How to Draw a Lobster: Easy 10-Step Guide for Kids
Ready to dive into the ocean? This lobster drawing tutorial is perfect for young artists ages 5 and up. All you need is a pencil, an eraser, and a piece of paper to bring this crustacean to life. Follow along to practice your shapes and build confidence in your artistic skills.
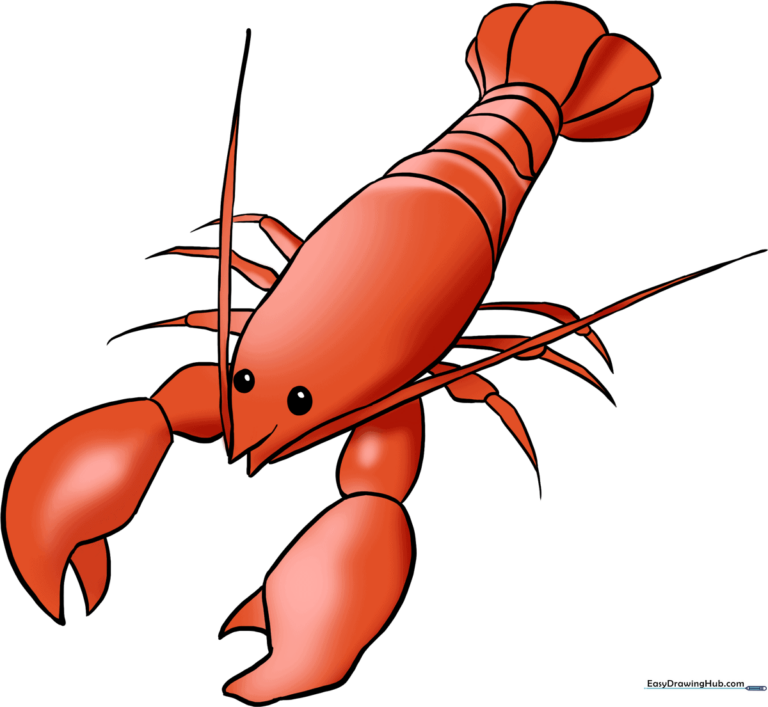
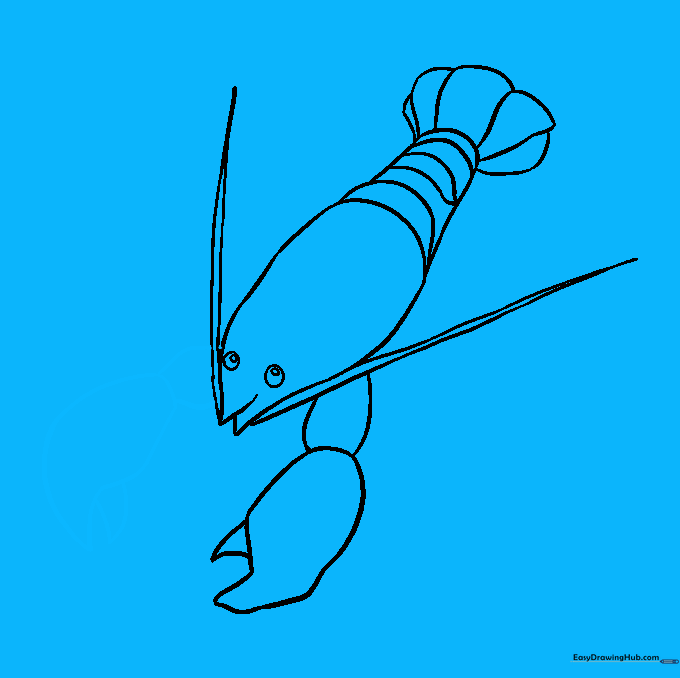
🎯 Final Result
Step-by-Step Instructions
Step 1: Sketching the Main Body
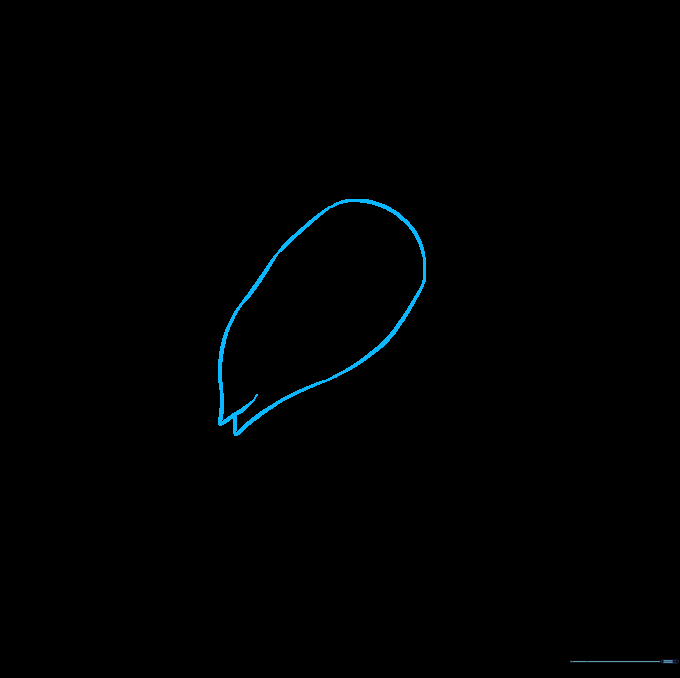
Use light, curved lines to enclose an irregular, rounded shape with two points at one end. Teacher's Tip: Think of this as the lobster's 'torso'—keep it centered on your paper so you have room for the claws later.
Step 2: Adding the Abdomen

Extend a long, curved shape from the back of the body to create the abdomen. Add a few horizontal curved lines across it to show the lobster's segments. Tip: These segments help the lobster bend its tail, so make them look like a stack of rounded bricks.
Step 3: Drawing the Tail Fan

Draw a series of irregular, fan-like shapes at the end of the abdomen. These are the uropods! Tip: Imagine you are drawing a flower petal or a hand fan to get that perfect spread.
Step 4: Eyes and Antennae
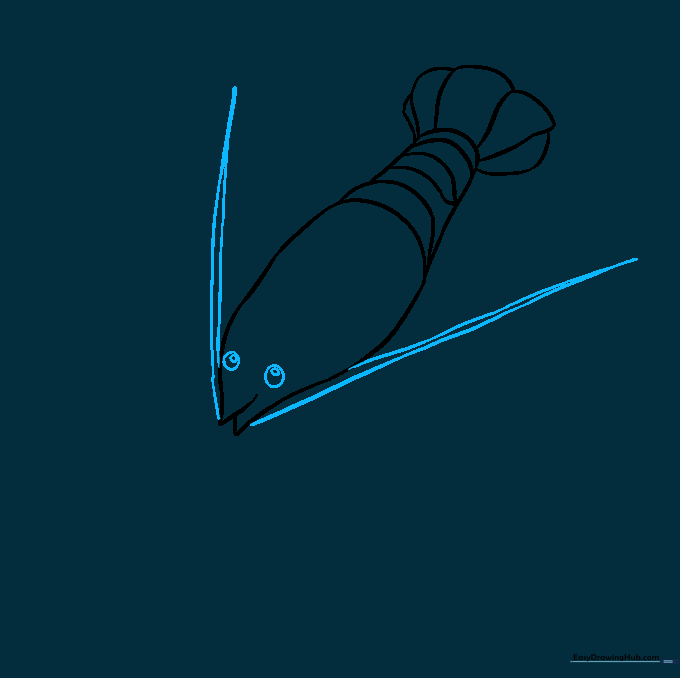
Draw two small circles for eyes near the front, then add long, diagonal lines extending from the head to create the antennae. Tip: Make the antennae slightly wavy to give your lobster a sense of movement.
Step 5: The First Claw
Below the antennae, draw a rounded shape connected to a larger, irregular shape with a small triangle at the end. This is the cheliped, or claw! Tip: Think of the claw as a mitten shape.
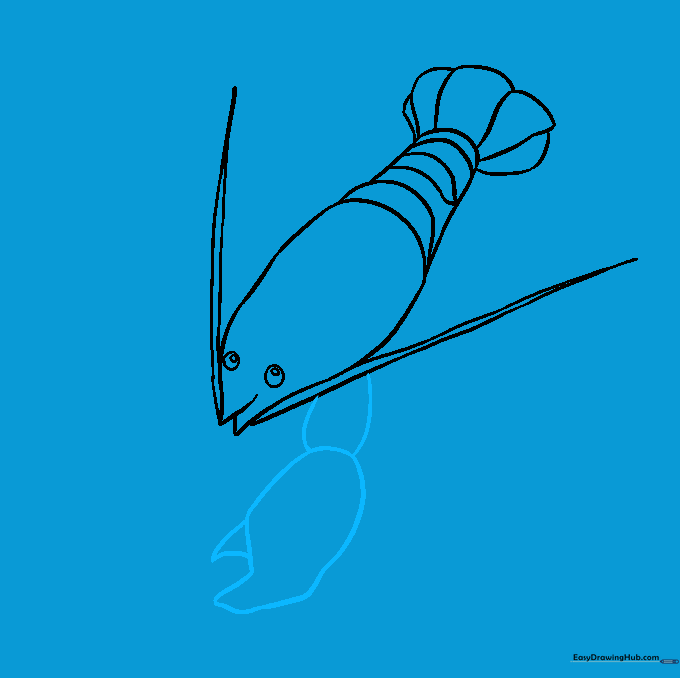
Step 6: The Second Claw
Repeat the claw process on the other side. Try to make it match the first one in size. Tip: It's okay if they aren't identical—lobsters in nature have unique claws too!
Step 7: Starting the Walking Legs

Draw the first set of walking legs by extending irregular shapes from the body, ending in sharp points. Tip: Keep these legs slightly tucked under the body to make the lobster look like it's crawling.
Step 8: Adding More Legs

Continue adding legs along the body. Lobsters have four walking legs on each side. Tip: Vary the angles of the legs to show the lobster moving across the ocean floor.
Step 9: Finalizing the Legs
Draw the legs on the opposite side of the body to complete the outline. Tip: Since these are on the 'far' side, you can draw them slightly smaller to create a sense of depth.
Step 10: Color Your Lobster
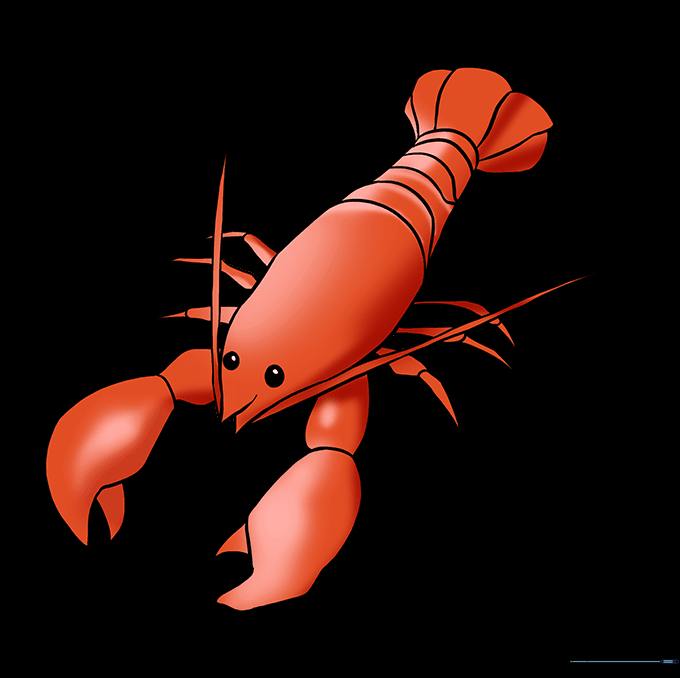
Time to color! Use bright reds for a cooked look, or try blues, greens, and browns for a natural look. Tip: Use a darker shade of your chosen color to add shadows under the body for a 3D effect.
More Tutorials


