How to Draw a Lamb: Easy 10-Step Guide for Kids
Bring a sweet, wooly lamb to life with this beginner-friendly drawing tutorial. Designed for children ages 5 and up, this activity requires only a pencil, paper, and an eraser. Follow these simple steps to master basic shapes and build confidence in your artistic skills.
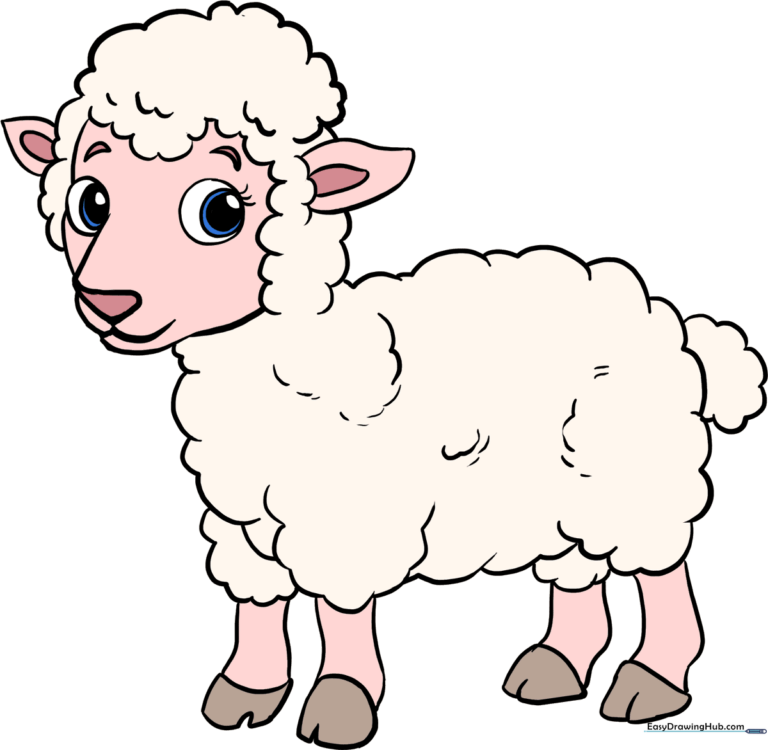
🎯 Final Result
Step-by-Step Instructions
Step 1: Sketching the Muzzle

Start by drawing a small inverted triangle with rounded corners for the nose. Add a soft 'W' shape underneath for the mouth. Teacher's Tip: Keep this small—it helps the lamb look like a baby animal!
Step 2: Creating the Fluffy Face
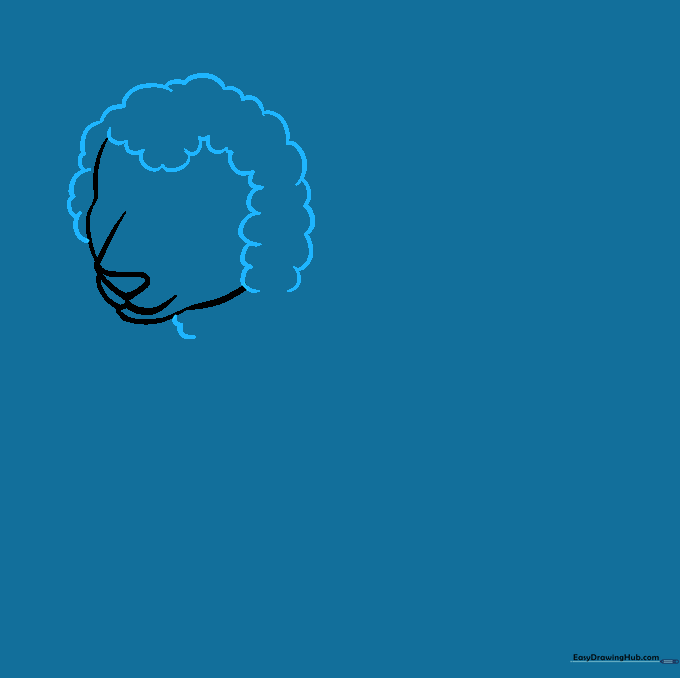
Use short, connected 'U' shaped lines to create the wooly outline around the face. Teacher's Tip: Don't worry about making these perfectly even; real wool is messy and clumped, so variety makes it look more realistic.
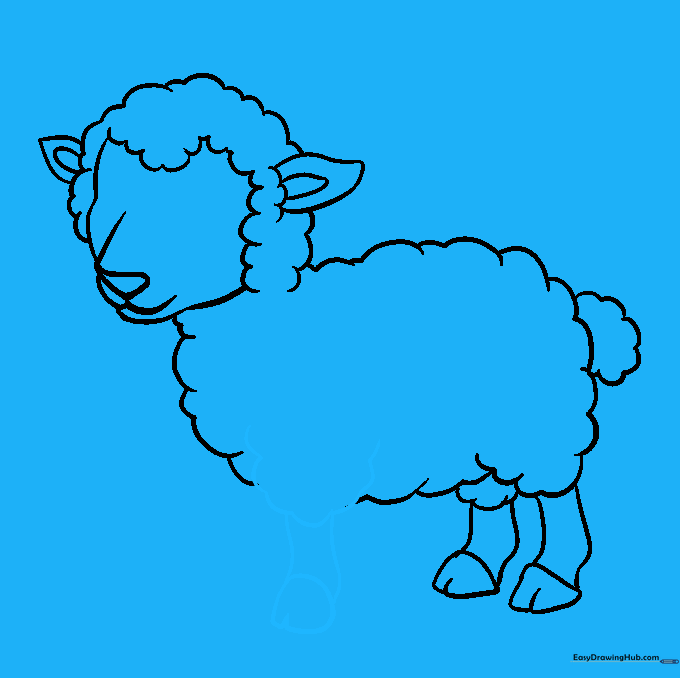
Step 3: Shaping the Body

Outline the body using a series of connected 'U' shapes. Make sure to leave a slight overlap near the back to suggest the rear hip. Teacher's Tip: Imagine you are drawing a cloud shape to get the right feel for the wool.
Step 4: Adding the Ears
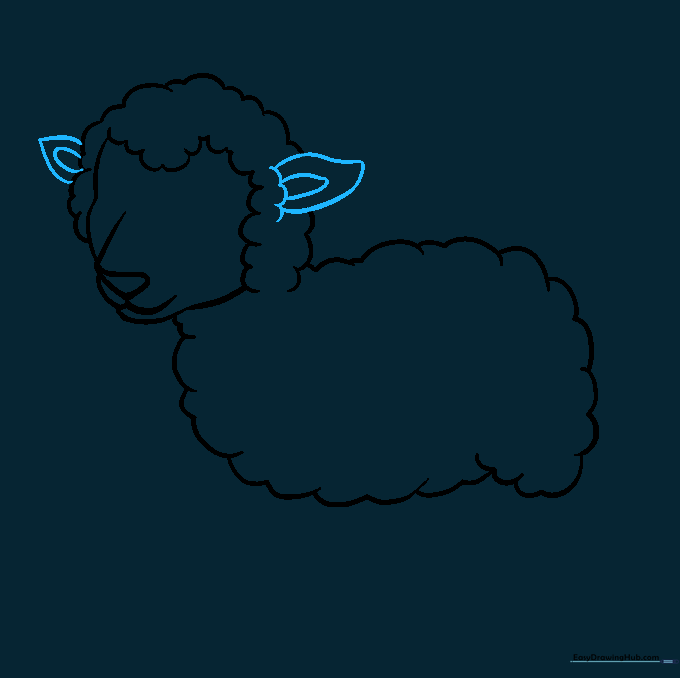
Draw two rounded triangles on the sides of the head. Add a smaller triangle inside each for depth. Teacher's Tip: Erase any lines from the head that are hidden behind the ears to make the drawing look clean.
Step 5: Sketching the Tail

Add a small, fluffy tail at the back using more 'U' shaped lines. Teacher's Tip: Keep the tail small so it doesn't distract from the main body shape.
Step 6: Drawing the Back Legs
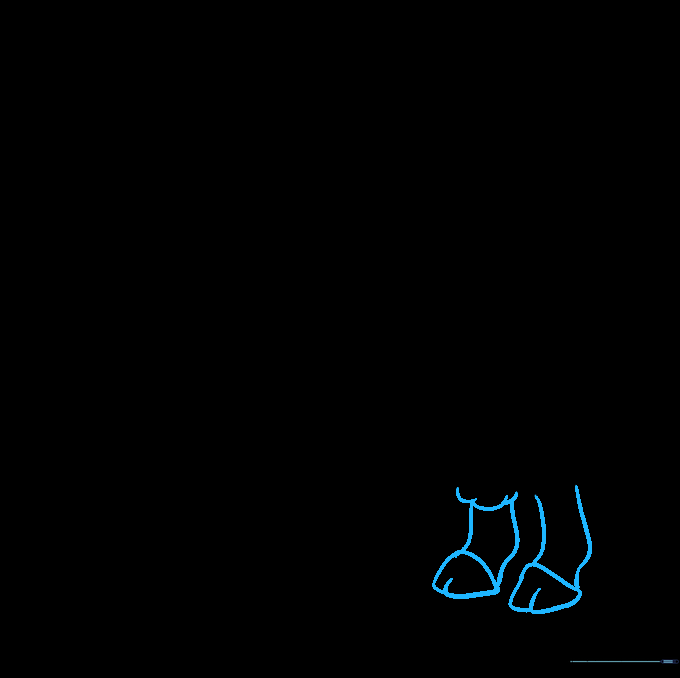
Draw the back legs using two parallel curved lines. Add a small triangle at the bottom for the hoof and split it with a tiny line. Teacher's Tip: Ensure the legs look sturdy but thin, as lambs have delicate limbs.
Step 7: Adding the Front Leg
Repeat the leg-drawing process for the front shoulder and leg. Teacher's Tip: Make the front leg slightly more visible than the back ones to create a sense of depth.
Step 8: Finalizing the Legs and Texture
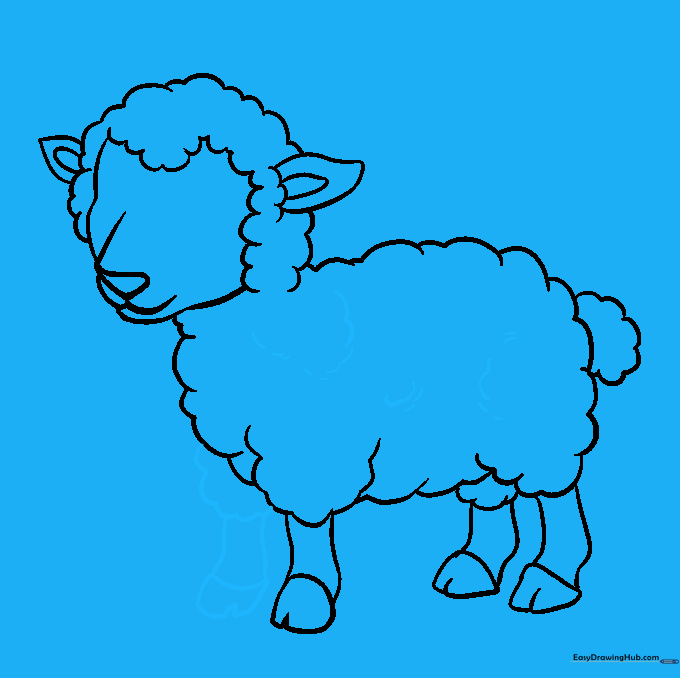
Add the final leg and use short, curved marks on the body to add texture. Teacher's Tip: These little 'flicks' of the pencil represent the woolly coat.
Step 9: Drawing the Eyes
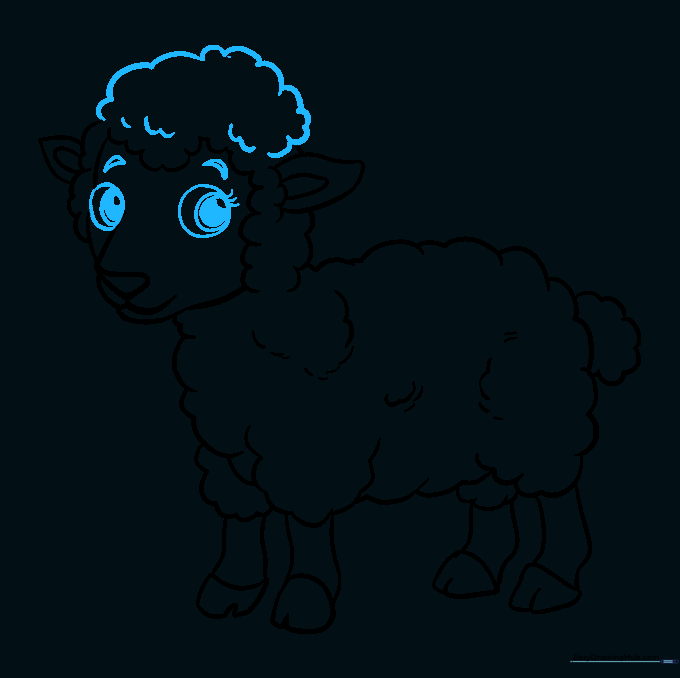
Draw three concentric circles for the eyes, shading the center to create a pupil. Add small curved lines for eyelashes. Teacher's Tip: Take your time here; the eyes are what give your lamb its personality!
Step 10: Adding Color
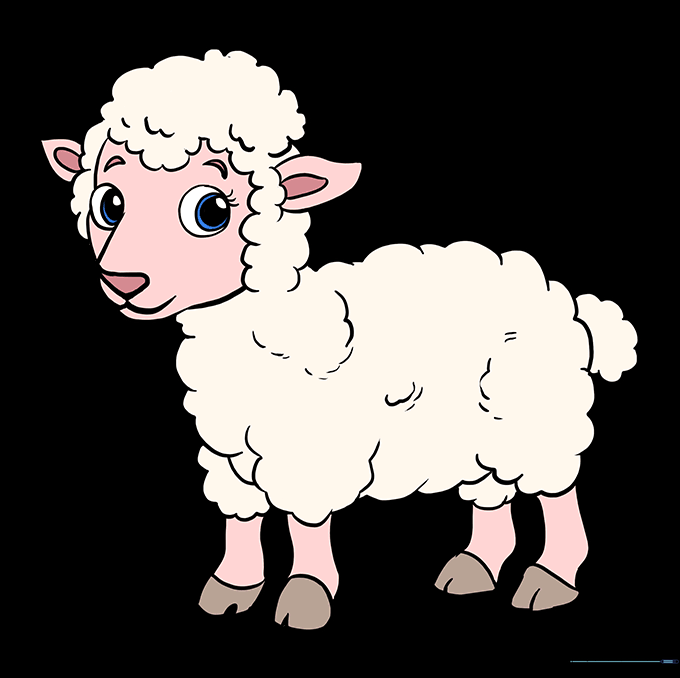
Bring your lamb to life with color! While white is traditional, try using light greys, browns, or even soft pinks for the ears. Teacher's Tip: Use light pressure with your colored pencils to keep the wool looking soft.
More Tutorials


