How to Draw a Kitten: Easy 10-Step Guide for Beginners
Ready to bring a fluffy friend to life? This tutorial is perfect for young artists ages 5 and up. All you need is a pencil, an eraser, and a piece of paper to start building your kitten’s character one simple shape at a time.
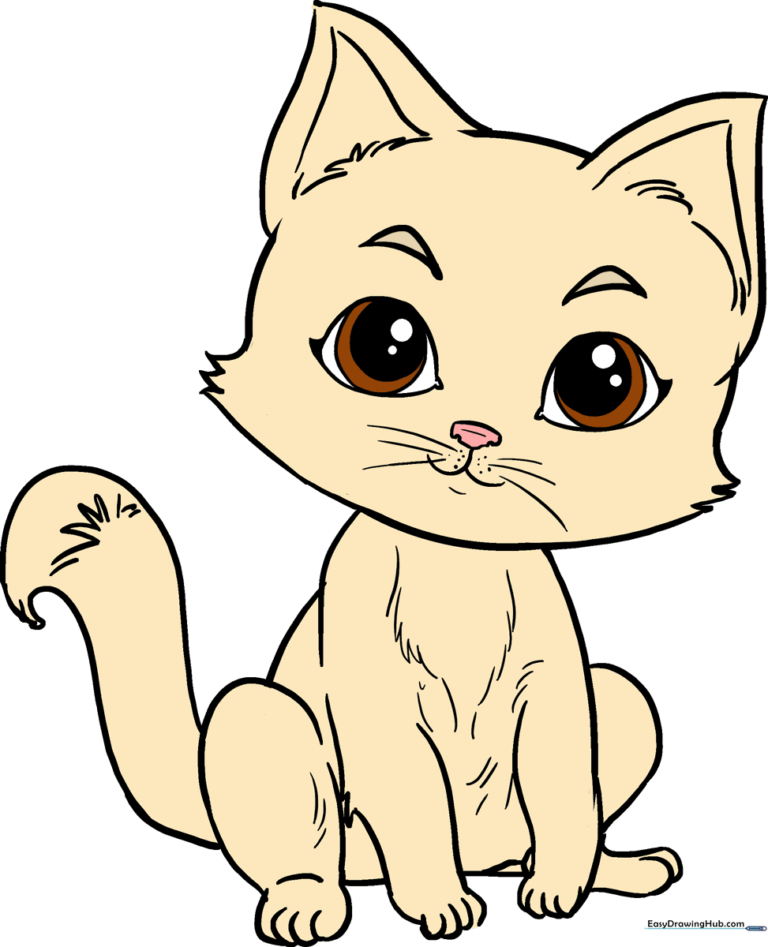
🎯 Final Result
Step-by-Step Instructions
Step 1: Sketching the Head

Draw a light circle to serve as the kitten's head. Teacher's Tip: Keep this circle about the size of a coin and press very gently with your pencil so it's easy to erase later.
Step 2: Forming the Body

Use smooth, curved lines to create an irregular shape beneath the head for the body. Tip: Think of this as a soft bean shape; it doesn't need to be perfectly symmetrical.
Step 3: Creating Furry Cheeks

Extend curved lines from the head and connect them with short, jagged strokes. Tip: Use quick, flicking motions with your pencil to make the fur look soft and realistic.
Step 4: Adding Ears
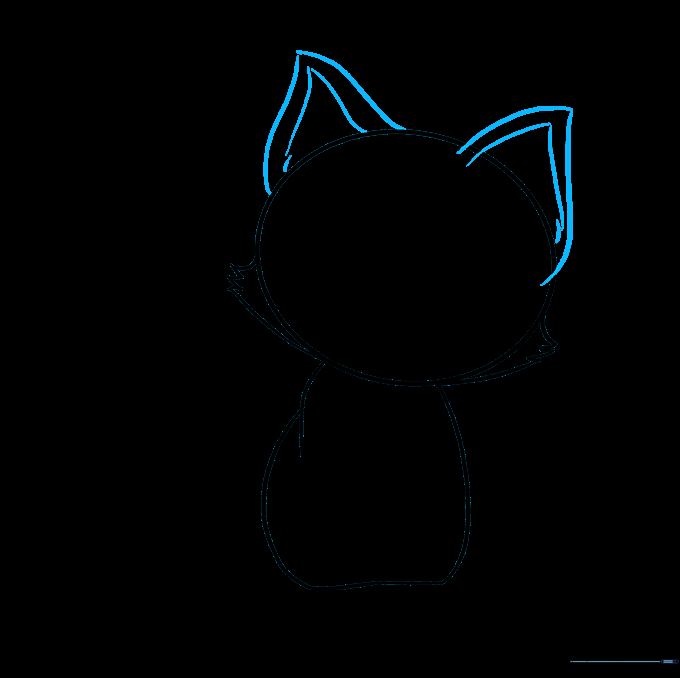
Draw two large triangles on top of the head, then add smaller triangles inside. Tip: Make the ears slightly rounded at the tips to keep the kitten looking friendly and cute.
Step 5: Refining the Ears

Erase the original circle guide lines inside the head. Add jagged lines inside the ears to show texture. Tip: Use your eraser carefully so you don't smudge your work!
Step 6: Drawing Front Paws
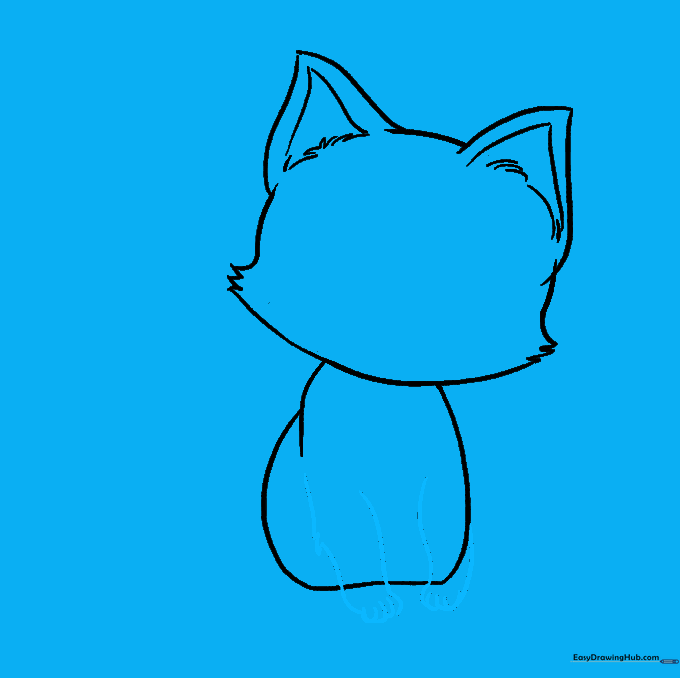
Outline the front legs using curved lines and add 'U' shapes for the toes. Tip: Overlapping the 'U' shapes makes the paws look like they are resting flat on the ground.
Step 7: Back Legs and Tail
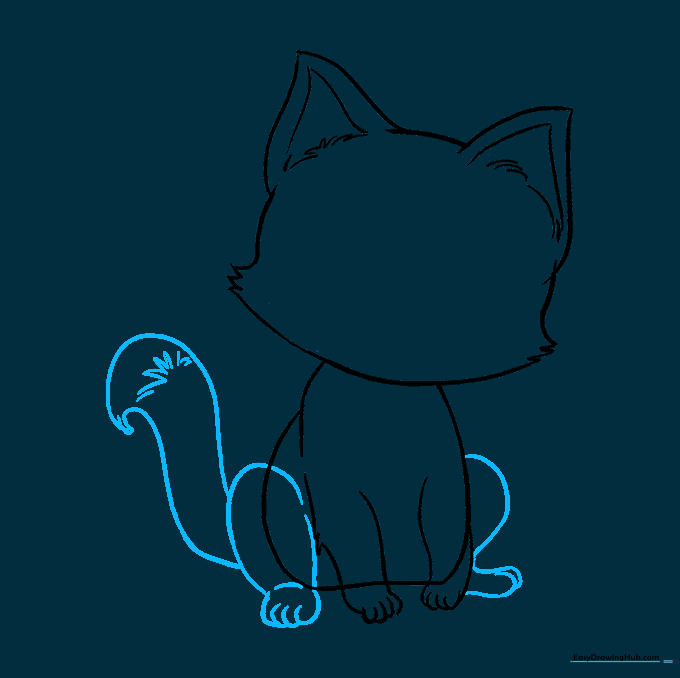
Add the rounded back legs and a long, curved tail. Tip: Use a series of short, connected lines at the tip of the tail to show a fluffy tuft of fur.
Step 8: Cleaning Up
Erase any remaining construction lines to reveal your clean kitten outline. Tip: A clean drawing makes it much easier to add your final details and color later.
Step 9: Adding Facial Features
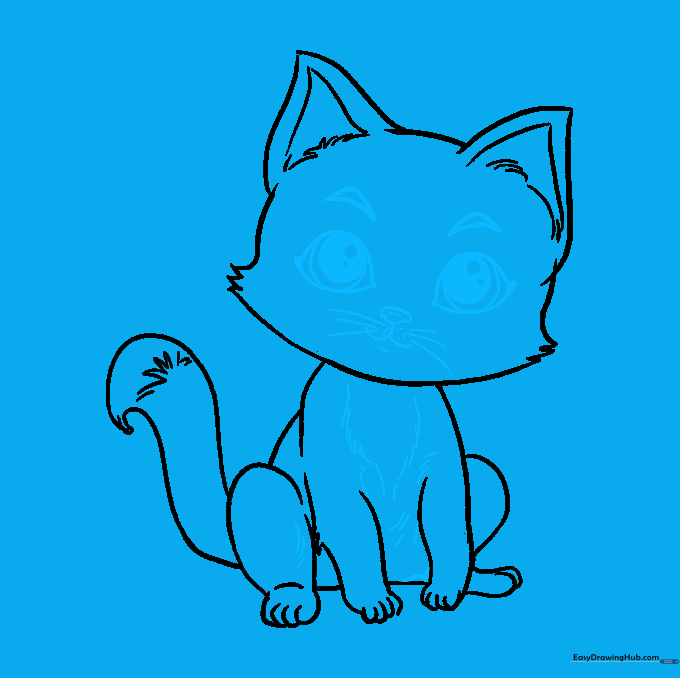
Draw the eyes, nose, mouth, and whiskers. Tip: For the eyes, draw three circles inside each other and shade the smallest one to create a realistic, sparkling pupil.
Step 10: Bringing it to Life with Color
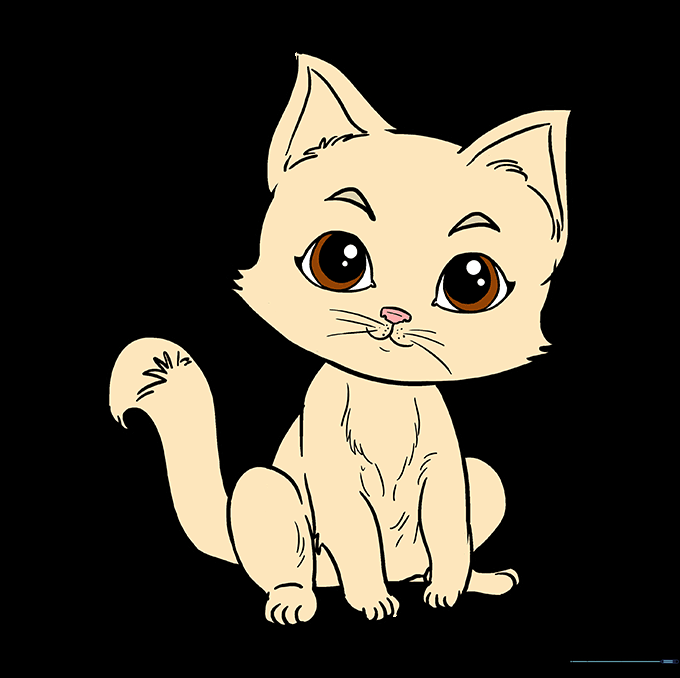
Color your kitten! Whether you choose stripes, spots, or a solid color, use light strokes to build up the fur texture. Tip: Use a lighter shade for the chest to make it look extra fluffy.
More Tutorials


