How to Draw a Katana: Easy 10-Step Guide for Beginners
Ready to design your own samurai blade? This tutorial is perfect for young artists ages 7+ looking to practice steady line work and geometric shapes. Grab a pencil, an eraser, and a piece of paper to begin building your own legendary sword from scratch.
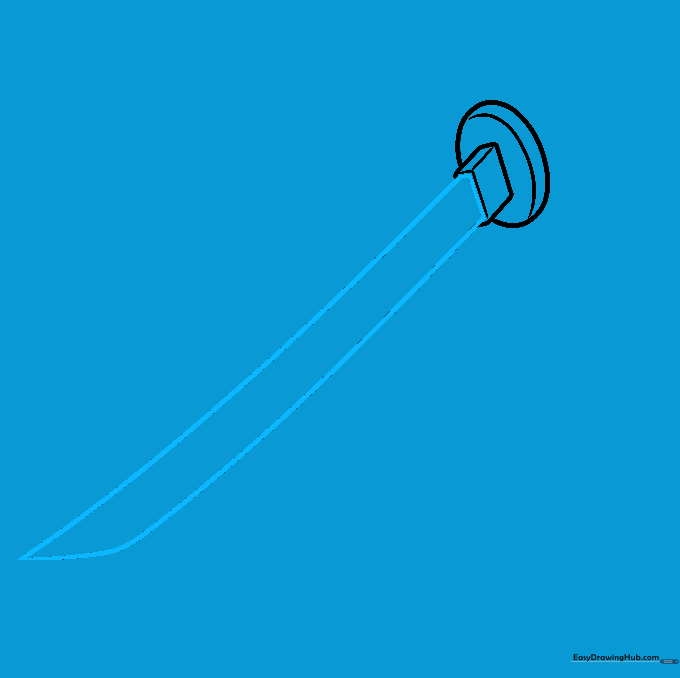
🎯 Final Result

Step-by-Step Instructions
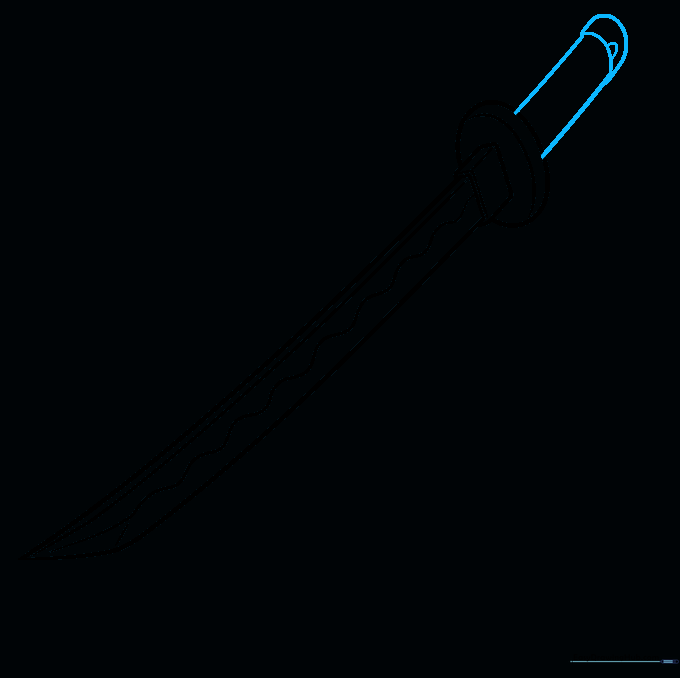
Step 1: Sketching the Tsuba

Start by drawing the tsuba, or handguard. Sketch an oval but leave a small gap at the top for the blade. Teacher's Tip: Keep your pencil pressure light so you can easily adjust the shape if it looks a bit lopsided.
Step 2: Adding the Habaki

Draw the habaki, the small metal collar that connects the blade to the handle. Use two short, parallel lines to create a narrow rectangular shape. Tip: Imagine you are drawing a small box sitting right on top of your oval guard.
Step 3: Shaping the Blade
Extend two long, graceful curves upward from the collar to form the blade. Let them meet at a sharp point called the kissaki. Tip: Try to keep the curve consistent so the blade looks balanced and sharp.
Step 4: Defining the Blade Details

Add a subtle curved line parallel to the back of the blade to show the ridge, then draw a wavy line down the edge to represent the hamon pattern. Tip: Use a steady hand for the wavy line to make it look like authentic tempered steel.
Step 5: Drawing the Handle
Sketch the handle (tsuka) extending downward from the guard. Add a small half-circle at the very bottom for the pommel. Tip: Make sure the handle is wide enough to look comfortable for a samurai to hold!
Step 6: Adding the Handle Wrap
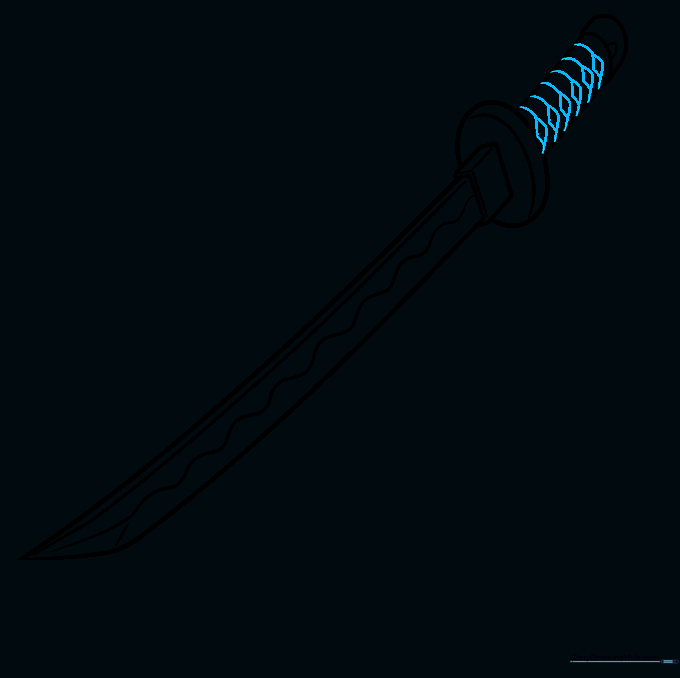
Draw a series of small diamonds down the handle to represent the cord wrap. Connect them with short, angled lines. Tip: Don't worry if they aren't perfectly uniform; the texture will look great once you add color.
Step 7: Sketching the Scabbard

Draw the scabbard (saya) as a long, slightly curved tube. Ensure the width matches the guard so it looks like the sword can slide right inside. Tip: Use long, sweeping motions with your pencil for a smoother curve.
Step 8: Adding the Hanging Cord
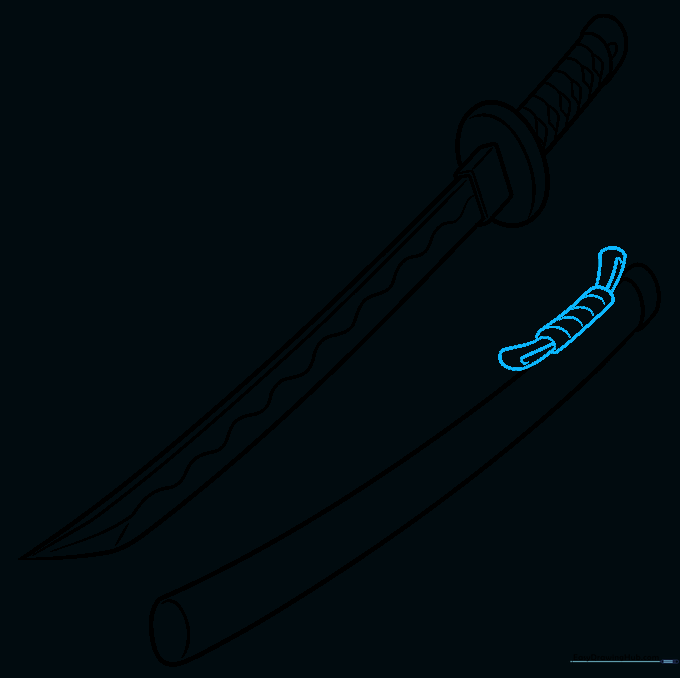
Draw the sageo (hanging cord) by sketching a rounded rectangle on the scabbard. Add small bands to show where the cord is tied. Tip: Erase any overlapping lines inside the rectangle to make the cord look like it's resting on top of the scabbard.
Step 9: Finalizing the Knot
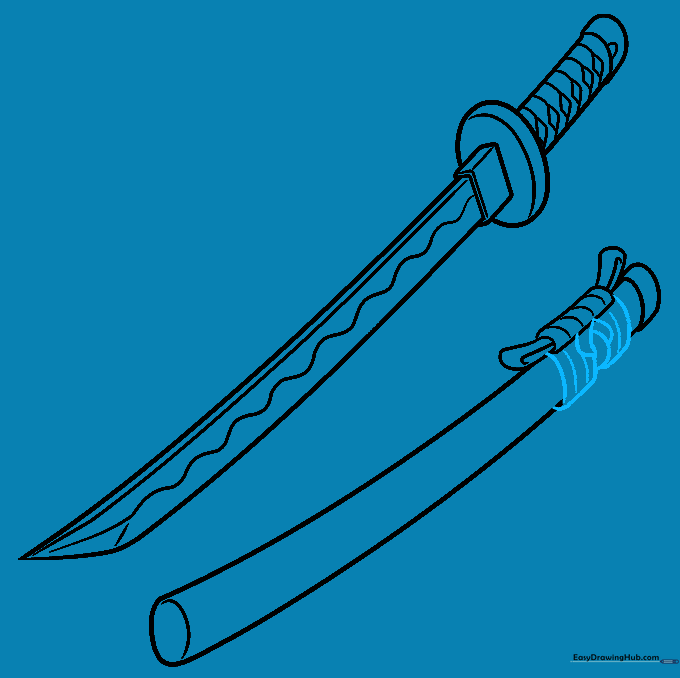
Complete the cord by adding small, knotted loops below the main section. Use curved lines to give the knot a sense of depth. Tip: Take your time here; small details like this make your drawing look professional.
Step 10: Bring Your Katana to Life
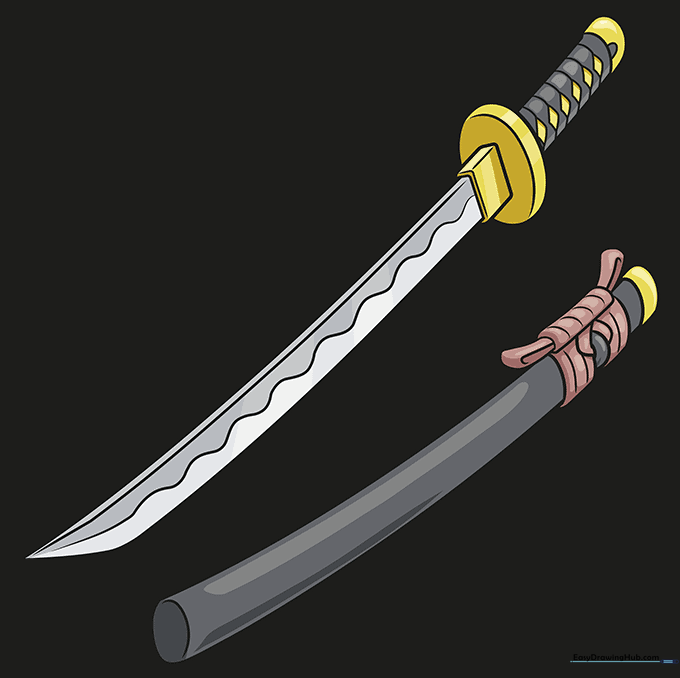
Time to color! Use metallic silvers for the blade and rich, bold colors for the handle and scabbard. Tip: Use a darker shade on one side of the blade to create a simple shadow effect, making the metal look shiny and sharp.
More Tutorials


