How to Draw a Jester Hat: Easy 10-Step Guide
Ready to add some whimsy to your sketchbook? This jester hat tutorial is perfect for artists ages 5 and up. All you need is a pencil, an eraser, and some markers to bring this colorful, jingling accessory to life.
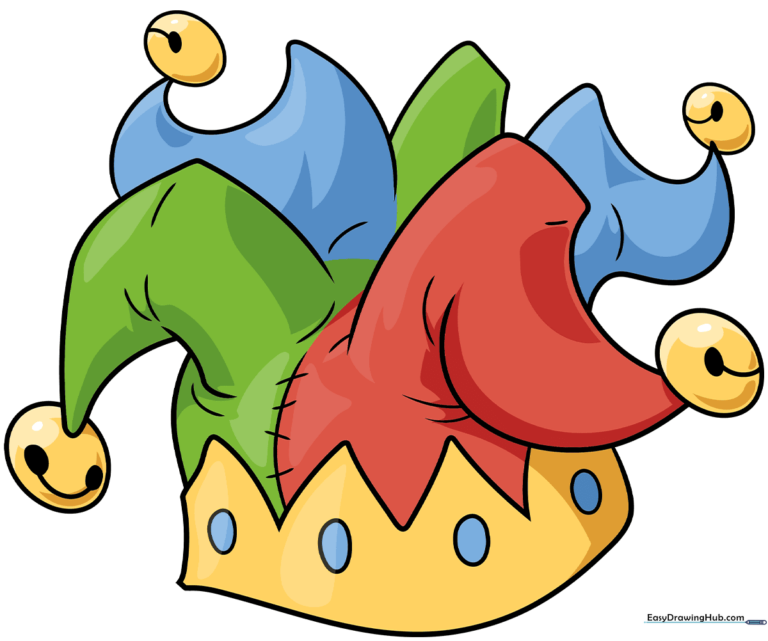
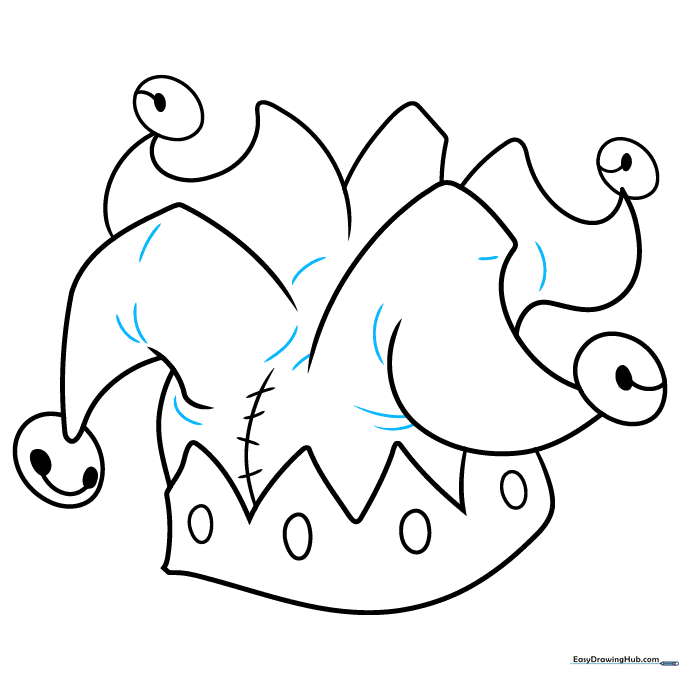
🎯 Final Result
Step-by-Step Instructions
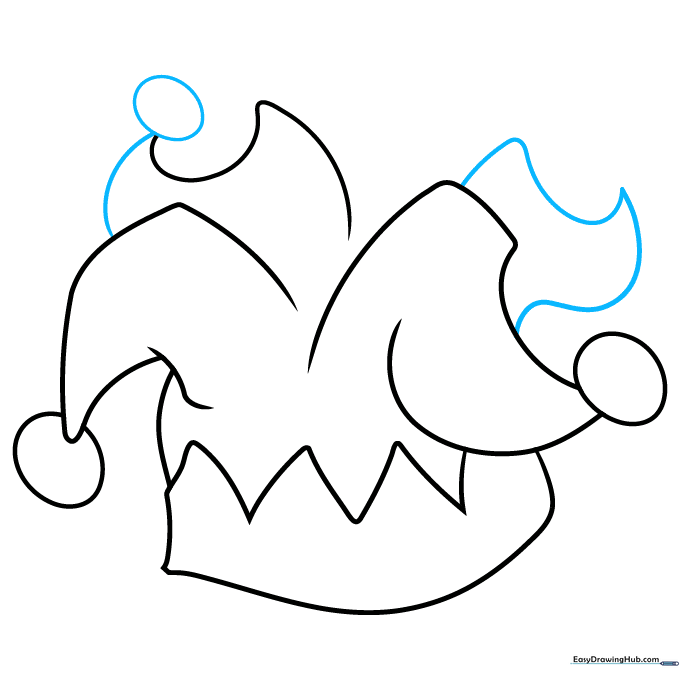
Step 1: Sketching the Crown Base

Start by drawing a crown-like shape. Use a long horizontal line for the base and connect shorter, angled lines to form the triangular points. Teacher's Tip: Keep the points rounded rather than sharp to give the hat a soft, fabric-like appearance.
Step 2: Adding the First Floppy Point
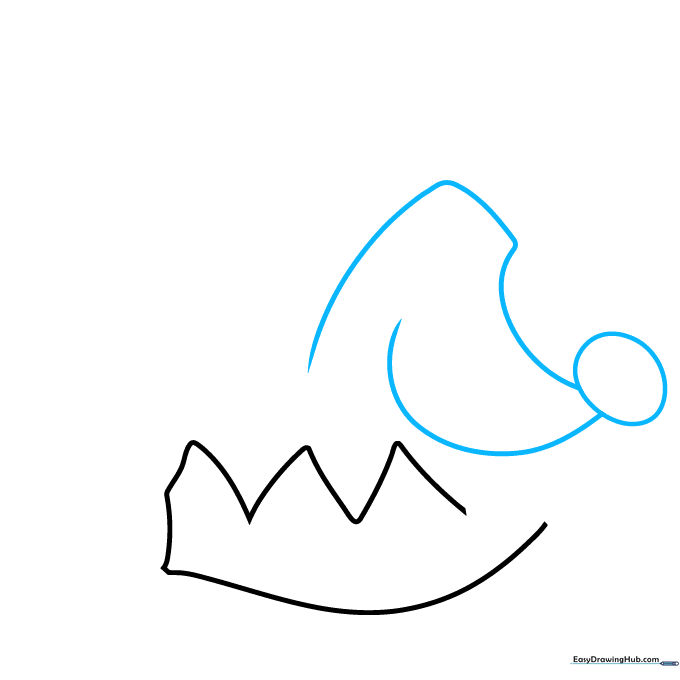
Draw a small oval at the end of your first section, then extend two long, curved lines downward to create a floppy, open triangle. Tip: Think of this like a long, drooping sock—gravity is pulling the fabric down!
Step 3: Connecting the Brim
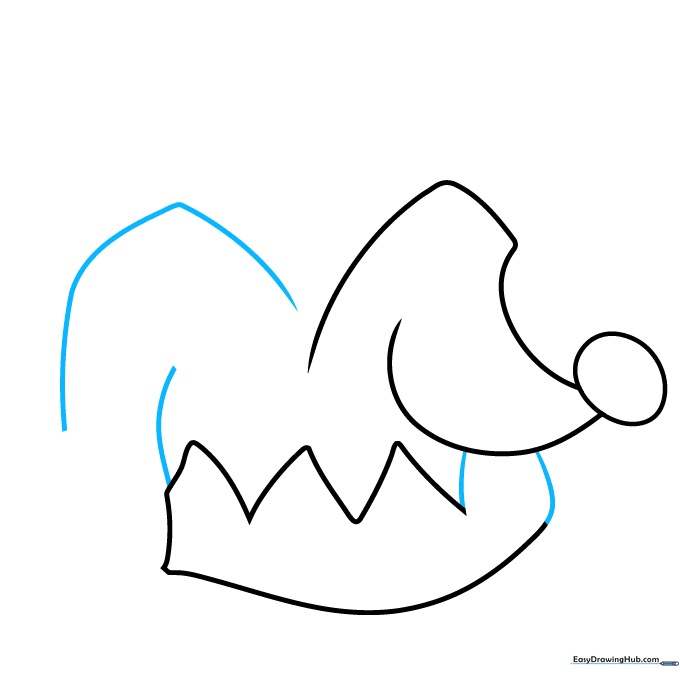
Connect the crown brim to your first floppy section using two smooth, curved lines. Then, begin sketching a second floppy section next to the first. Tip: Ensure your curves overlap slightly to show the fabric folding.
Step 4: Building the Third Section
Add an oval to the tip of the second section. Then, draw a long, sweeping curved line above the hat to start the third triangular section. Tip: Keep your lines loose and fluid to make the hat look soft.
Step 5: Adding the Fourth Point
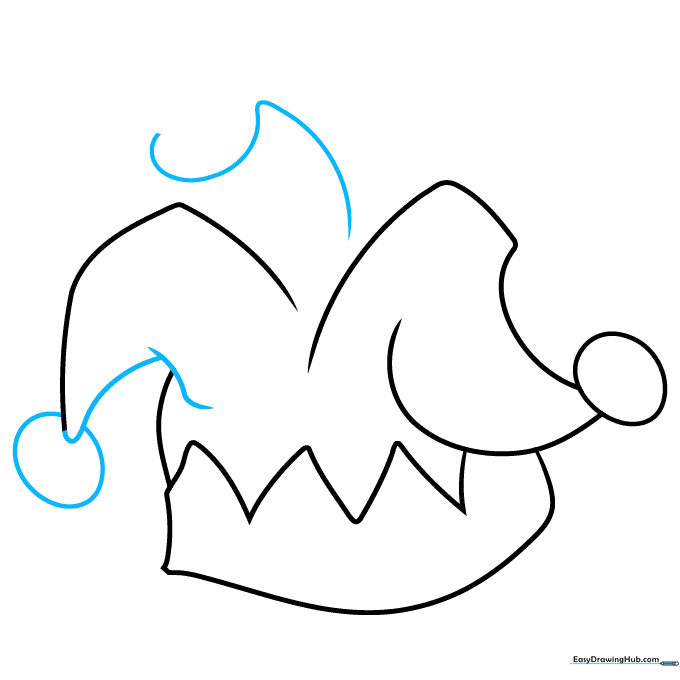
Place an oval at the tip of the third section. Now, extend two more curved lines that meet at a point to create the fourth section of the hat. Tip: Vary the heights of the points to make the hat look more dynamic.
Step 6: Finalizing the Shape
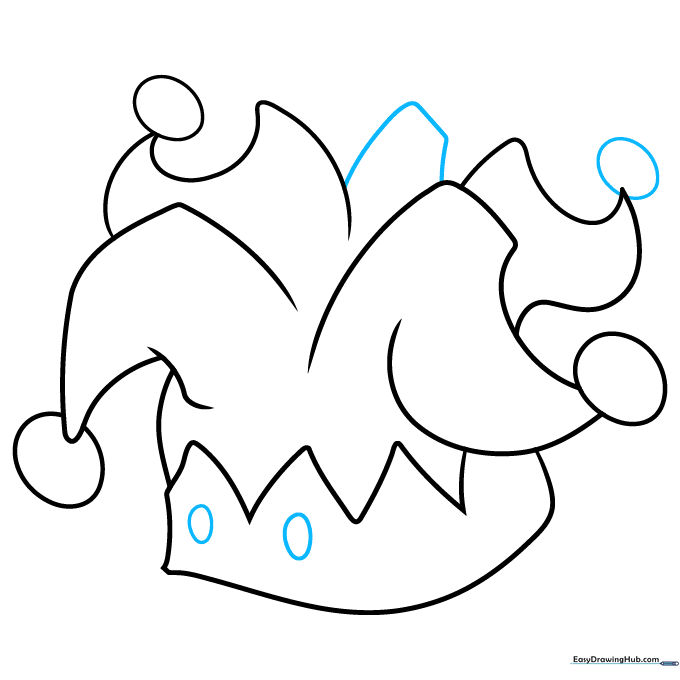
Add an oval to the fourth tip. Draw a long, curved line that doubles back to form the final fifth section. Add small ovals along the brim where the bells will sit. Tip: Don't worry if the ovals aren't perfect; they look more natural when they are slightly irregular.
Step 7: Adding Jingle Bells
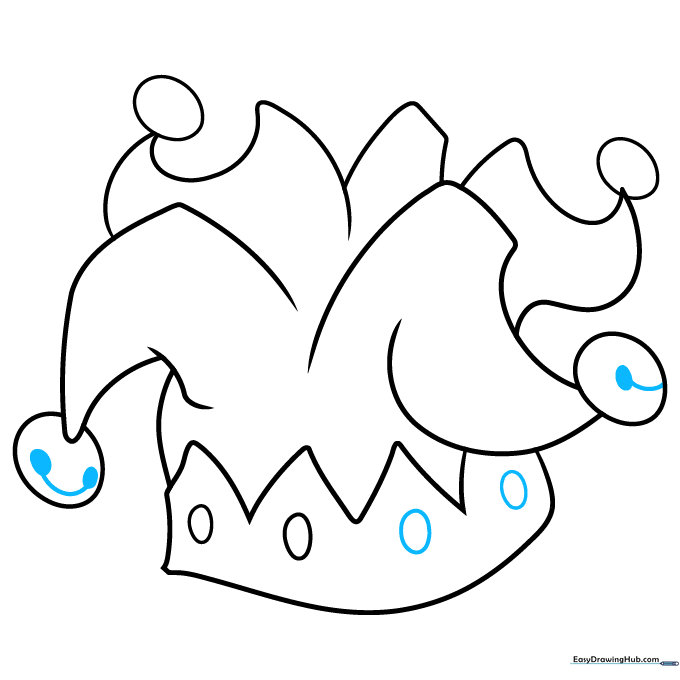
Turn your ovals into bells! Shade two small ovals and connect them with a curved line for some, and for others, draw a single line leading to the bell. Tip: This creates the illusion of the bell hanging from a small loop.
Step 8: Adding Texture and Stitches
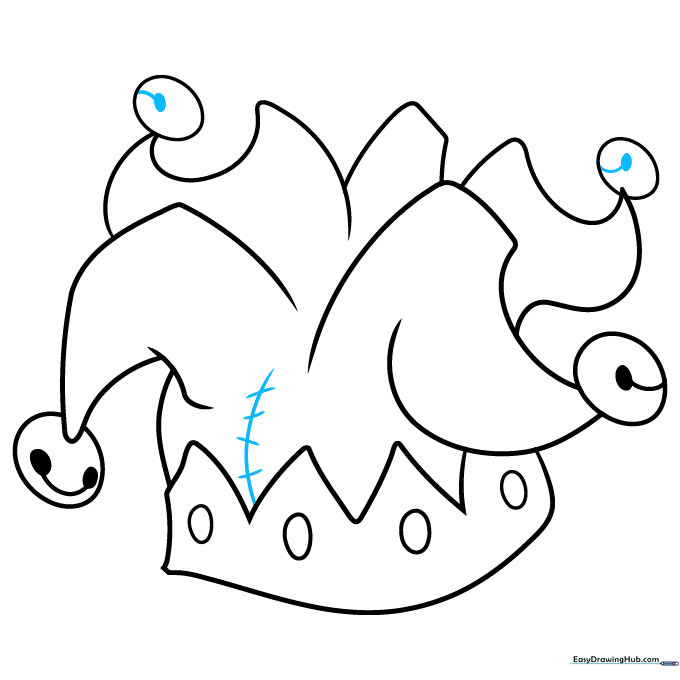
Detail the remaining bells. Then, draw a curved line across the front of the hat brim and add small, short perpendicular lines to represent stitching. Tip: Stitches add a professional, finished look to your drawing.
Step 9: Refining the Contours
Go over your drawing with final, confident lines. Add a few extra curved lines along the body of the hat to suggest the fabric folding and bending. Tip: Use a darker pencil or a fine-liner pen for this step.
Step 10: Adding Color

Time to bring your hat to life! Use vibrant, alternating colors for each triangular section to capture that classic jester look. Tip: Use gold or yellow for the bells to make them stand out against the fabric.
More Tutorials


