How to Draw a Jeep: Easy 9-Step Guide for Kids
Ready to hit the trail? This Jeep drawing tutorial is perfect for young artists ages 6 and up. Grab a pencil, an eraser, and some paper to build your own off-road vehicle from scratch while practicing basic geometric shapes.
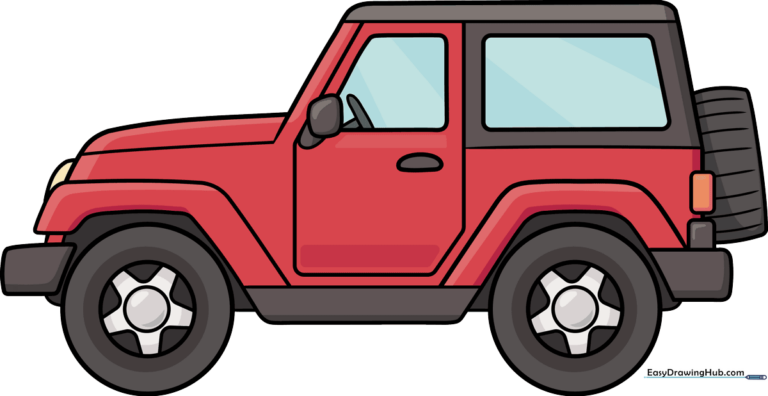
🎯 Final Result
Step-by-Step Instructions
Step 1: Sketching the Wheels and Bumper
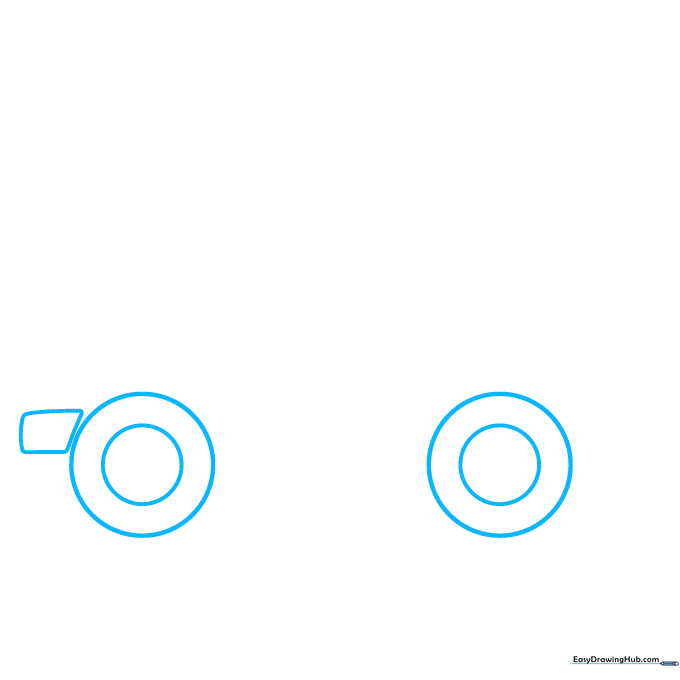
Start by drawing two circles for the wheels. Inside each, draw a smaller circle for the hubcap. Next to the front wheel, sketch an irregular rectangle to form the front bumper. Teacher's Tip: Keep your pencil lines light so you can easily adjust the size if the wheels look uneven.
Step 2: Adding the Front Fender
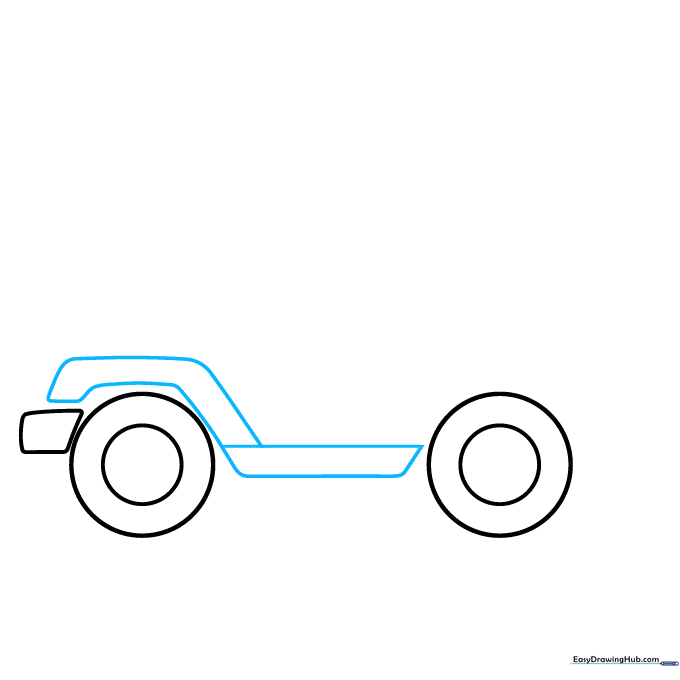
Draw a trapezoid between the wheels to act as the chassis base. Extend two long, curved lines over the front wheel, connecting them at the end to create the fender. Tip: Think of this shape like a rainbow arching over the tire.
Step 3: Creating the Rear Fender
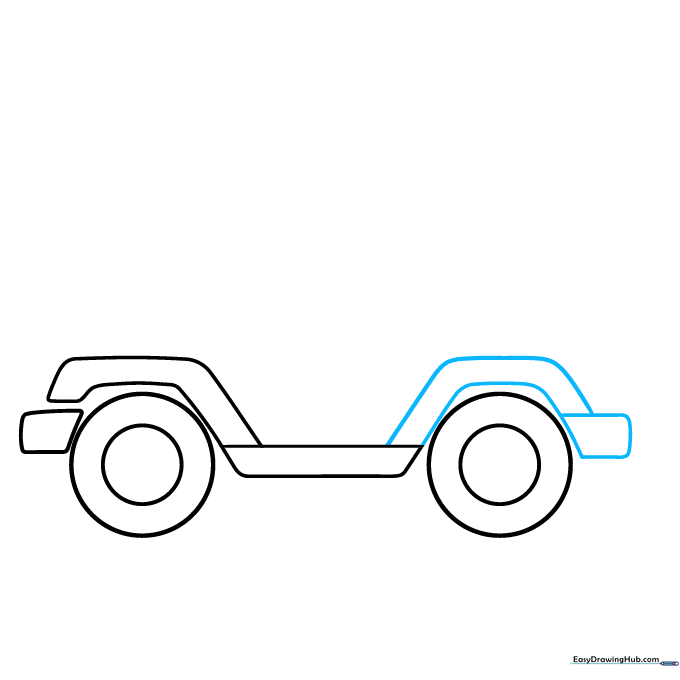
Draw an irregular rectangle behind the rear wheel for the back bumper. Then, draw another set of curved lines extending from the chassis to this bumper to form the rear fender. Tip: Ensure the fenders are roughly the same height for a balanced look.
Step 4: Sketching the Hood and Cab
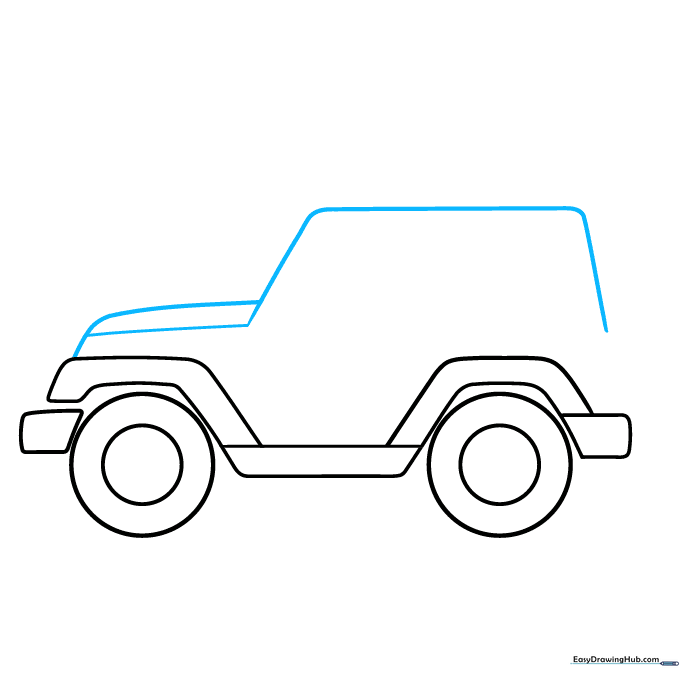
Use long, overlapping curved lines to outline the hood and the Jeep's cab. Connect the front of the hood down to the bottom of the cab. Tip: Use smooth, fluid motions to make the vehicle look aerodynamic.
Step 5: Defining the Door and Frame
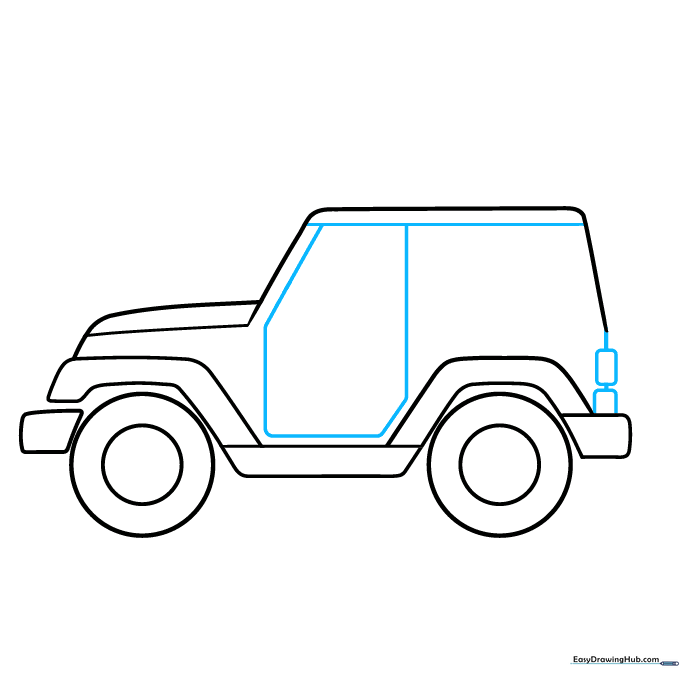
Draw a straight line across the top of the cab. Use straight lines to enclose an irregular hexagon shape for the door. Add two rounded rectangles at the back to connect the cab. Tip: Use a ruler if you struggle with straight lines, but freehand is great for practice!
Step 6: Adding Windows and Mirrors
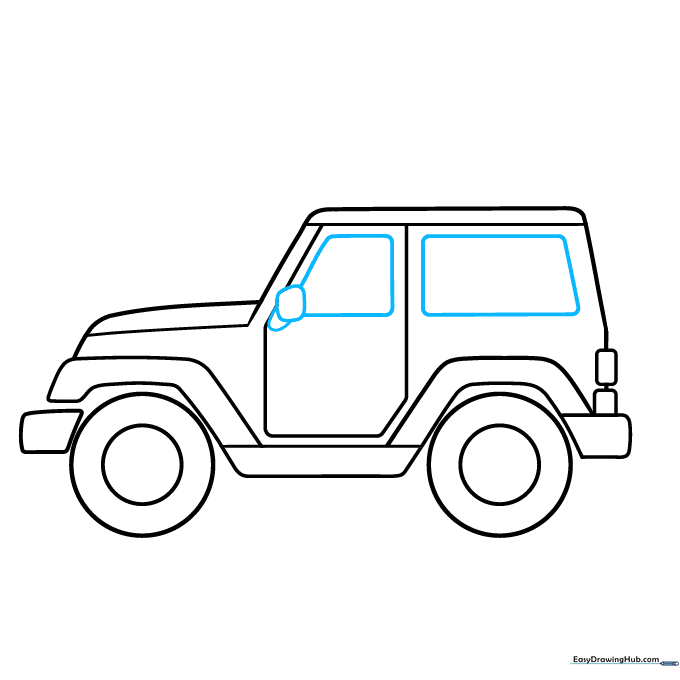
Draw two slanted, round-cornered rectangles for the windows. Add two small irregular shapes at the base of the front window for the rearview mirror. Tip: Keep the windows slightly tilted to give the Jeep a sense of motion.
Step 7: Adding Spare Tire and Headlights
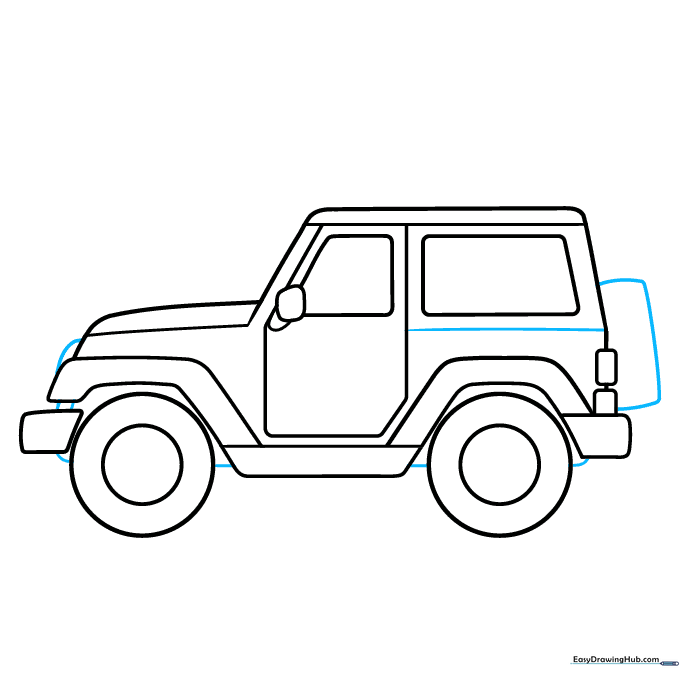
Draw a rectangle on the back for the spare tire. Add a horizontal line across the back of the cab. Use small lines to define the headlights and front frame. Tip: Adding these small details makes your drawing look much more realistic.
Step 8: Detailing the Wheels
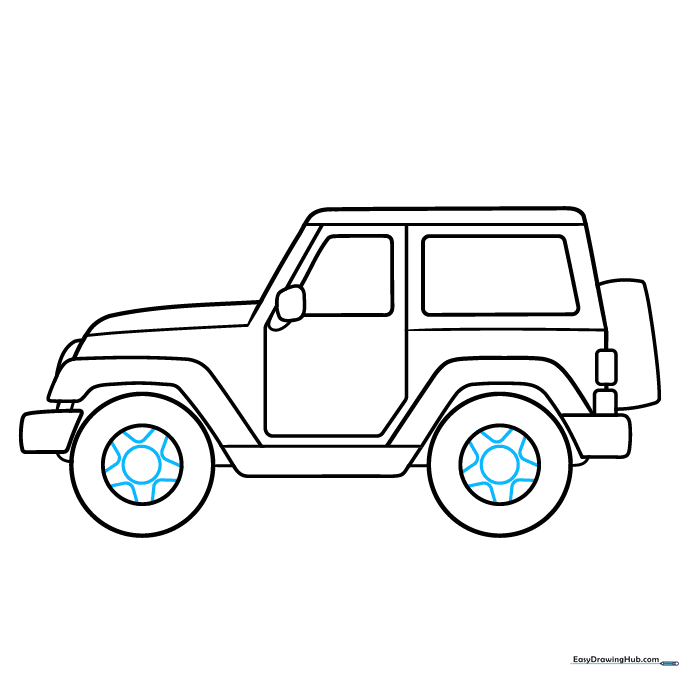
Draw a small circle in the center of each wheel. Around that, draw five curved lines to create a star-shaped hubcap. Tip: Take your time here; symmetry makes the wheels look like they are actually spinning.
Step 9: Final Touches
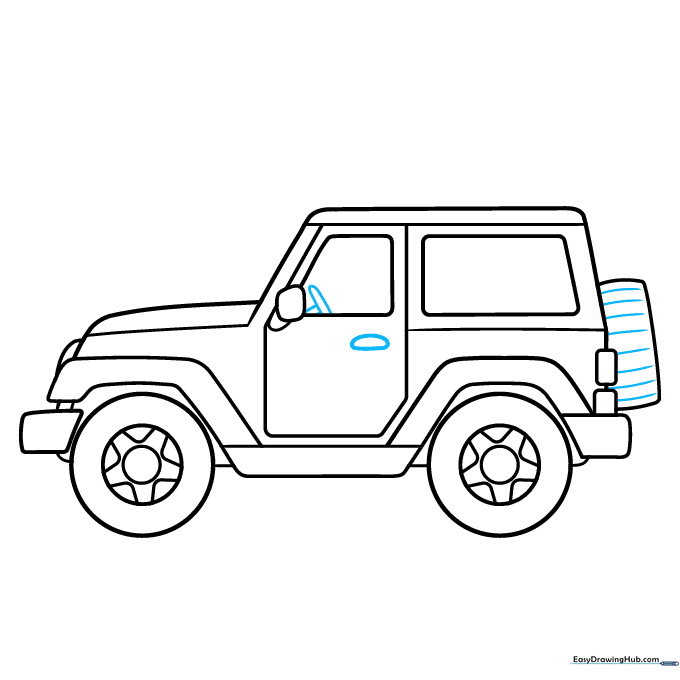
Add texture to the spare tire with curved lines. Draw the door handle and the steering wheel inside the window. Tip: Use a darker pencil or a fine-liner pen to trace your final outline before erasing your guide marks.
Color Your Jeep
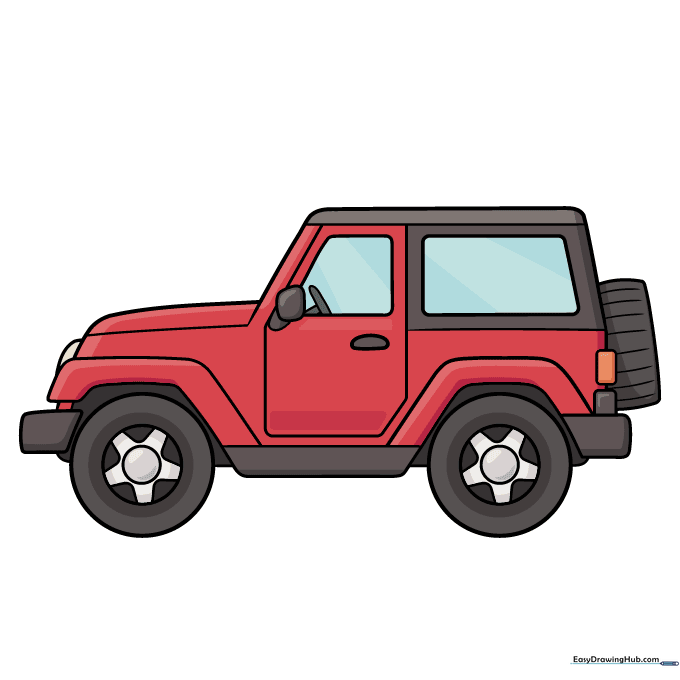
Your Jeep is ready for an adventure! Try classic red, or go for a military green or a movie-inspired look. Tip: Use colored pencils to add shading under the fenders to give your Jeep a 3D effect.
More Tutorials


