How to Draw a Jade Plant: Easy 10-Step Guide for Kids
Bring a touch of nature to your sketchbook with this fun jade plant tutorial, perfect for artists ages 5 and up. You will only need a pencil, an eraser, and your favorite coloring markers to get started. Follow along to master drawing organic, fleshy leaves and a sturdy, realistic-looking trunk.
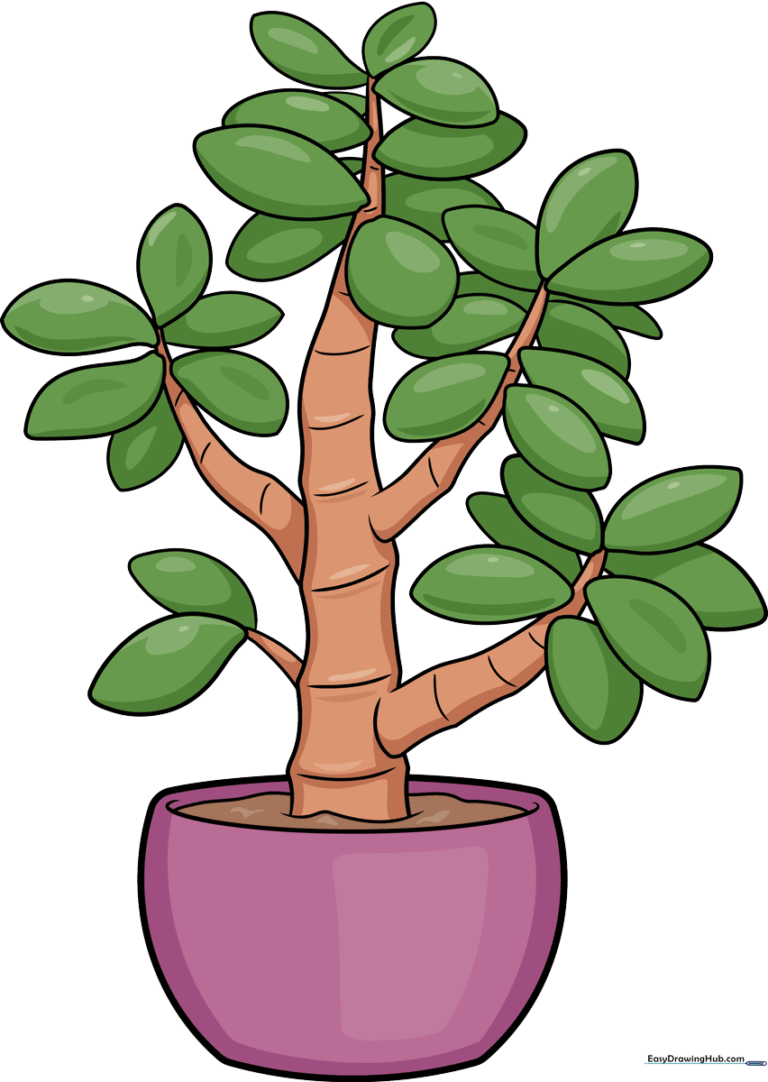
🎯 Final Result
Step-by-Step Instructions
Step 1: Sketching the Pot and Trunk Base
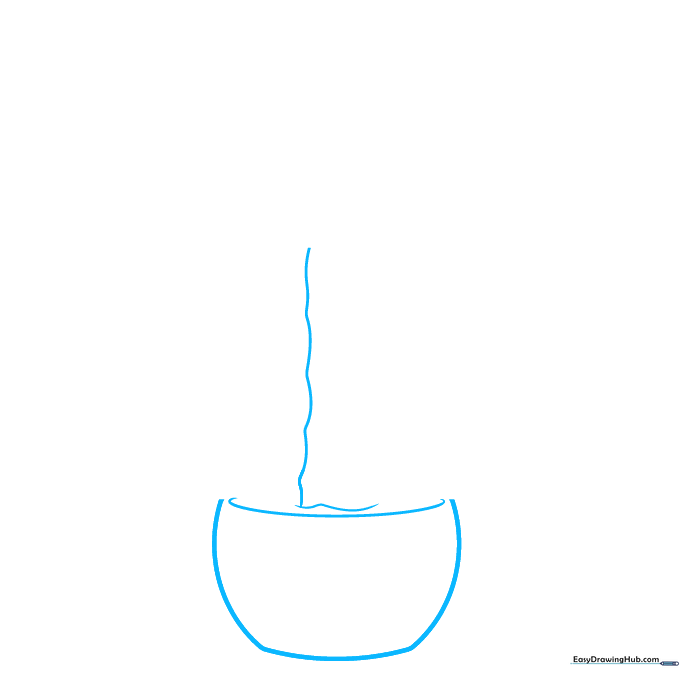
Start by drawing the pot using two separate curved lines for the sides and the top rim. Above the pot, draw a gentle, wavy line for the soil, then extend a long, slightly curved line upward to begin the woody trunk. Teacher's Tip: Keep your pencil pressure light so you can easily adjust the trunk's curve later.
Step 2: Defining the Pot and First Leaf
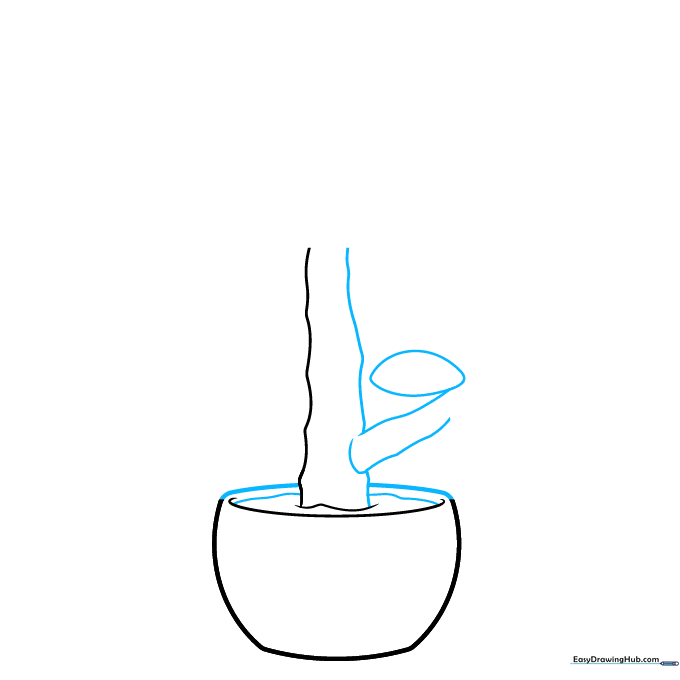
Close the pot shape with curved lines. Add a second wavy line to thicken the trunk and branch, then draw an irregular oval shape near the top to represent your first fleshy leaf. Teacher's Tip: Jade leaves are naturally plump, so don't worry about making them perfectly symmetrical!
Step 3: Adding Leaf Clusters
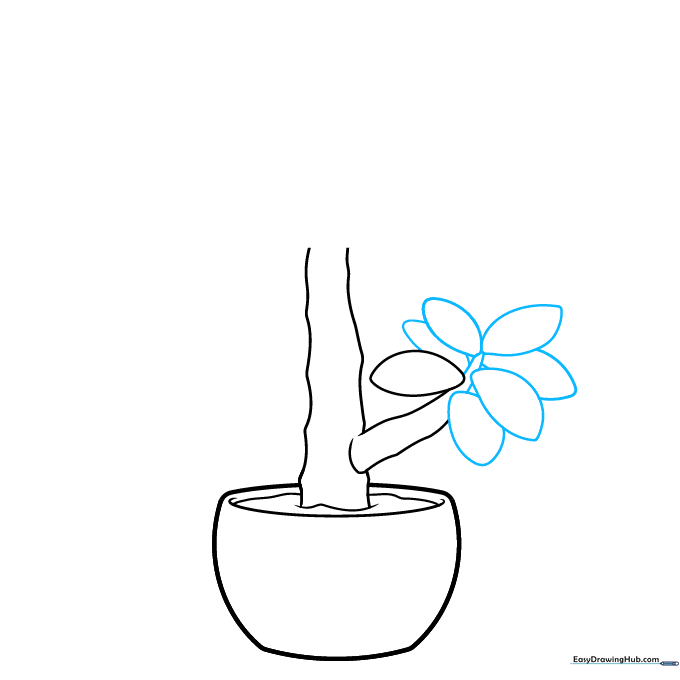
Continue adding leaves as pointed ovals or rounded teardrops along the branch. Allow some leaves to overlap others to create depth. Teacher's Tip: Overlapping is a great way to make your drawing look 3D rather than flat.
Step 4: Branching Out
Draw two additional branches extending from the main trunk. Add two oval leaves to each new branch. Teacher's Tip: If you make a mistake, use your eraser to lift the graphite gently before redrawing.
Step 5: Filling the Branches
Extend one of your branches further and fill it with a cluster of overlapping oval leaves. Teacher's Tip: Vary the sizes of the leaves to make the plant look more natural and alive.
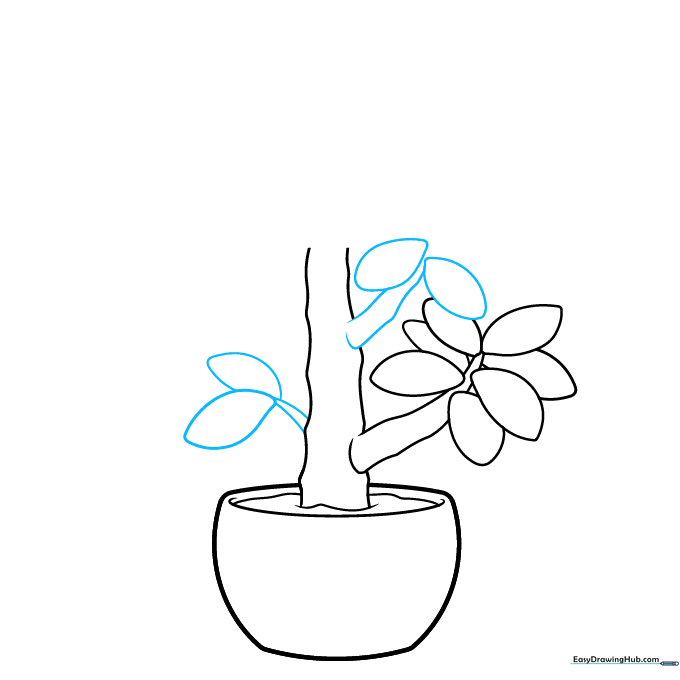
Step 6: Adding Side Branches
Use curved lines to add another branch from the side of the trunk, and add more leaves to this section. Teacher's Tip: Keep your lines smooth and fluid to mimic the organic growth of a real plant.
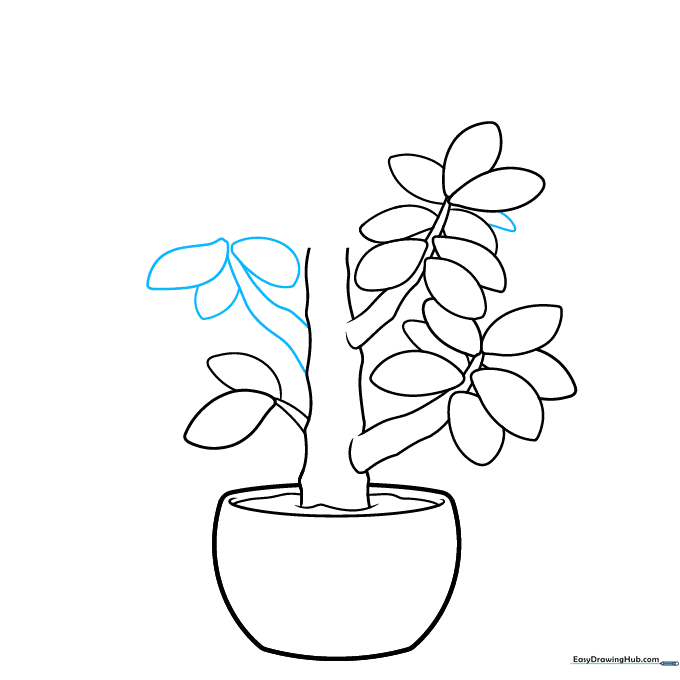
Step 7: Extending the Trunk
Continue the trunk lines upward and add a leaf directly onto the main stem. Teacher's Tip: Adding leaves directly to the trunk adds character and makes the plant look fuller.
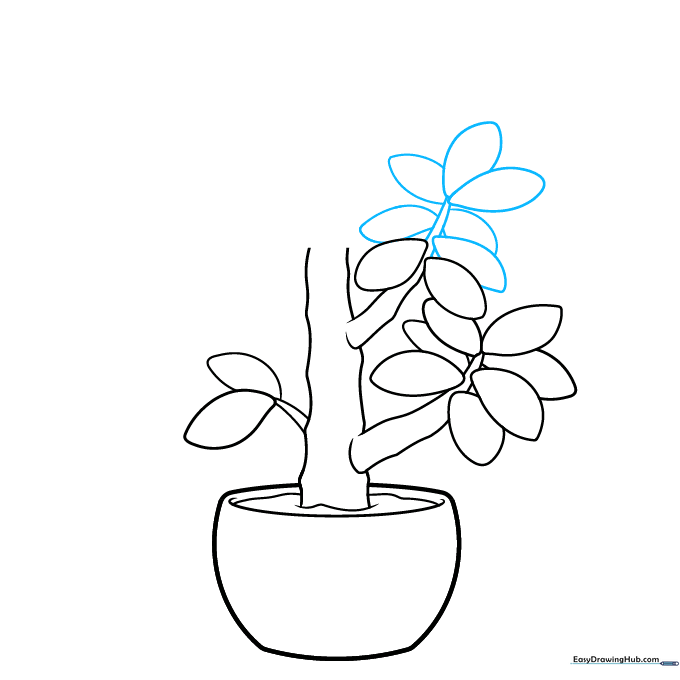
Step 8: Tapering the Branches
Extend the trunk further, tapering it so it becomes thinner like a branch. Add more pointed, oval leaves along this new length. Teacher's Tip: Tapering your lines helps show the plant is growing toward the light.
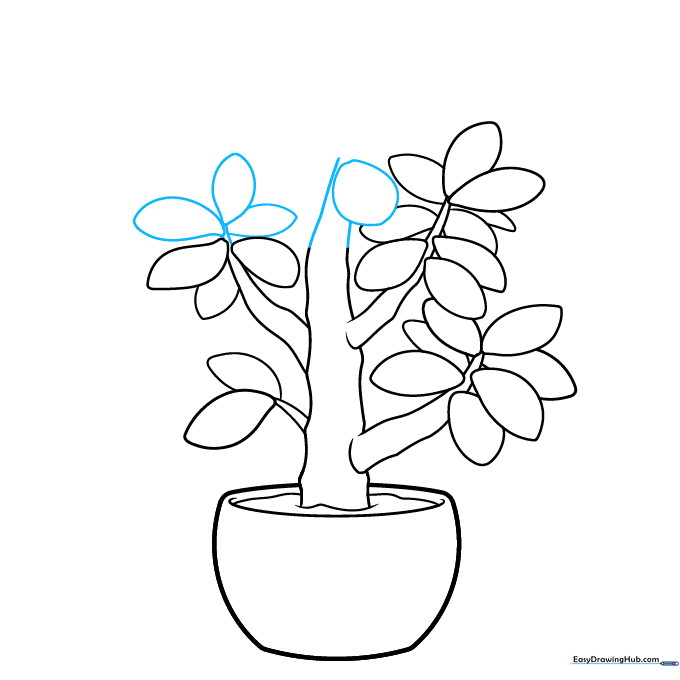
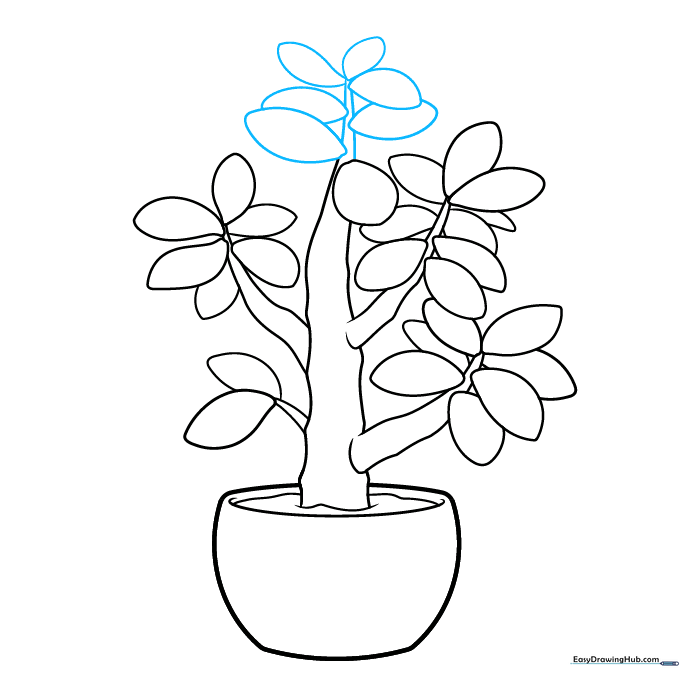
Step 9: Final Touches

Add a few background leaves to create depth, and draw small curved lines around the trunk to suggest texture. Teacher's Tip: These little details make your drawing look professional and finished.
Step 10: Color Your Jade Plant
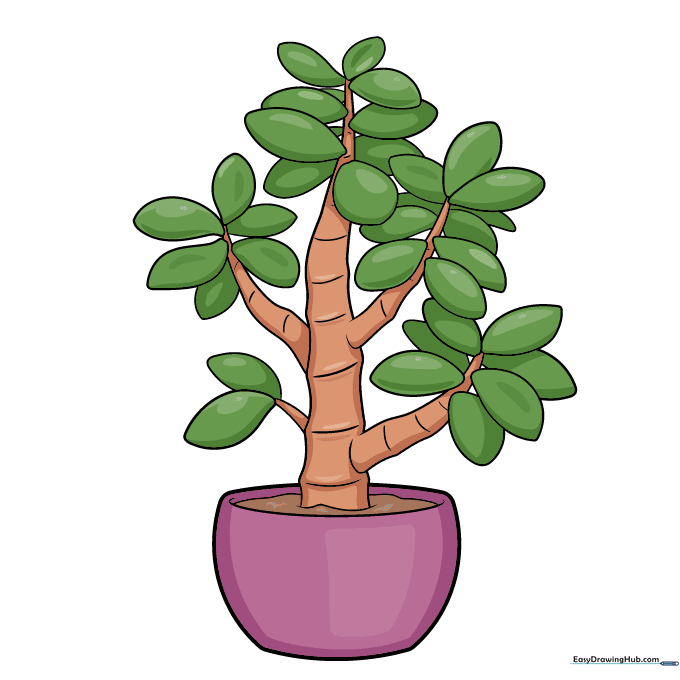
Your outline is complete! Use deep greens for the leaves. You can even add light green, white, or pinkish highlights to make it look like a variegated jade plant. Teacher's Tip: Use a darker green for the shadows under the leaves to make them pop!
More Tutorials


