How to Draw a Heart on Fire: Easy 10-Step Guide
Looking for a fun, expressive drawing project? This heart-on-fire tutorial is perfect for artists ages 6 and up. You only need a pencil, eraser, and some markers to bring this fiery design to life while practicing your symmetrical line work.
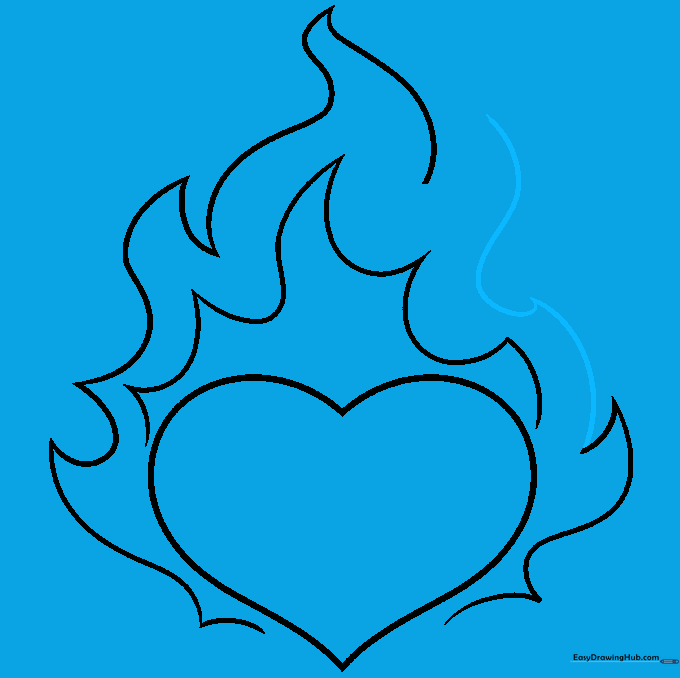
🎯 Final Result

Step-by-Step Instructions
Step 1: Sketching the Heart Base

Draw a classic heart shape in the center of your paper. Teacher's Tip: Keep your pencil lines light so you can easily erase any overlapping flame lines later.
Step 2: Starting the Inner Flames

Draw short, curved lines extending from the top sides of the heart, ending in sharp points. Teacher's Tip: Think of these as 'flickering' shapes rather than perfect curves to give them a natural, energetic look.
Step 3: Defining the Main Flame

Connect the tips of your lines with another curved line to form a larger flame shape. Teacher's Tip: Vary the height of these points to make the fire look like it's dancing.
Step 4: Adding Side Flames

Add a series of smaller curved lines along the side of the heart. Teacher's Tip: Keep your wrist loose—flames are organic, so they don't need to be perfectly straight.
Step 5: Building the Second Layer
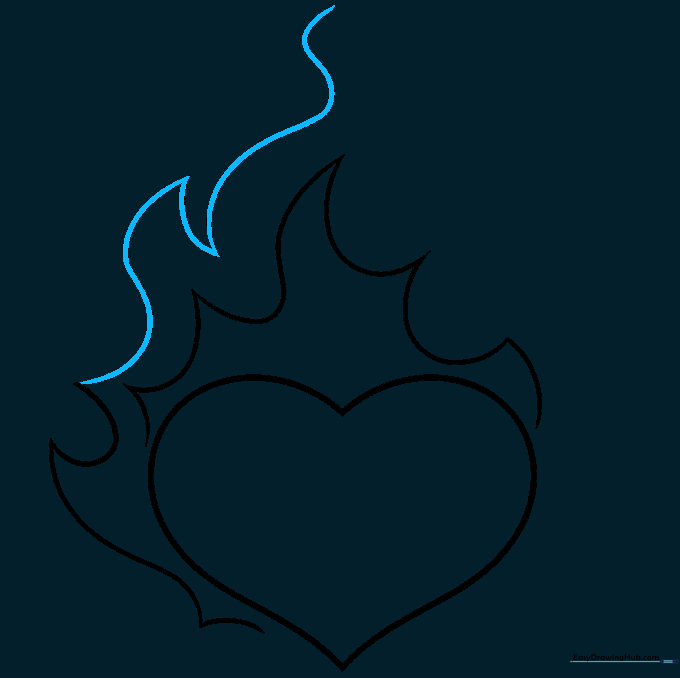
Continue adding curved lines to create a second layer of flames. Teacher's Tip: Overlapping your lines slightly creates a sense of depth and movement.
Step 6: Closing the Flame Top
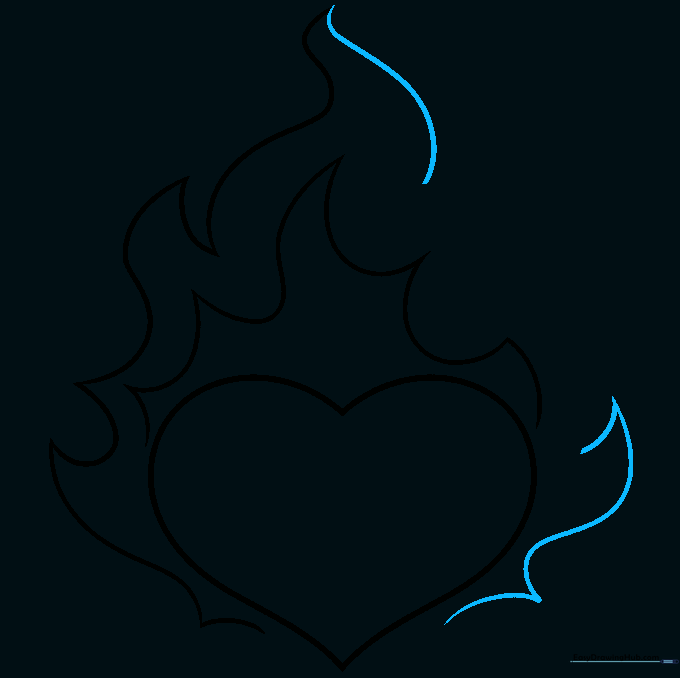
Draw curved lines on the remaining side and connect them at the top to enclose the flame. Teacher's Tip: Make sure your final point is sharp to give the flame a realistic 'flicker' effect.
Step 7: Refining the Edges
Add more curved lines to fill out the flame's silhouette. Teacher's Tip: If you make a mistake, don't worry! Fire is irregular, so extra lines just add to the texture.
Step 8: Adding Detail Flames
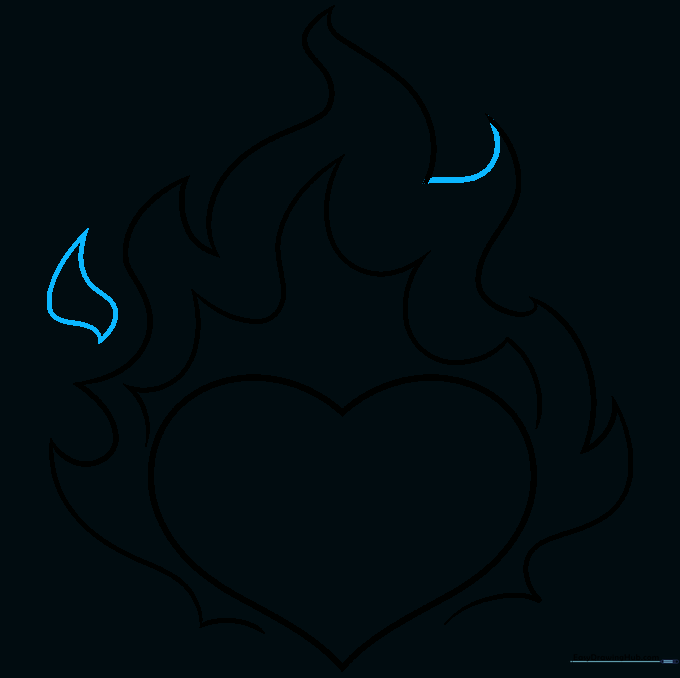
Draw small, detached teardrop shapes near the main fire to represent sparks or smaller flames. Teacher's Tip: Use two curved lines for each teardrop to keep them looking sharp.
Step 9: Finalizing the Outline

Add a few more small flame tongues to balance the drawing. Teacher's Tip: Step back and look at your drawing from a distance to see if the flames look balanced on both sides.
Step 10: Bringing it to Life with Color

Color your heart red and your flames with bright yellows and oranges. Teacher's Tip: Try blending your colors—use yellow at the base of the flame and orange at the tips for a realistic 'hot' effect!
More Tutorials


