How to Draw a Heart Anatomy Diagram: Simple Science Guide
Bring biology to life with this simple, step-by-step heart anatomy diagram. Designed for students and young artists, this lesson requires only paper, a pencil, and an eraser to map out the circulatory system. Follow along to turn complex science into a clear, visual masterpiece.
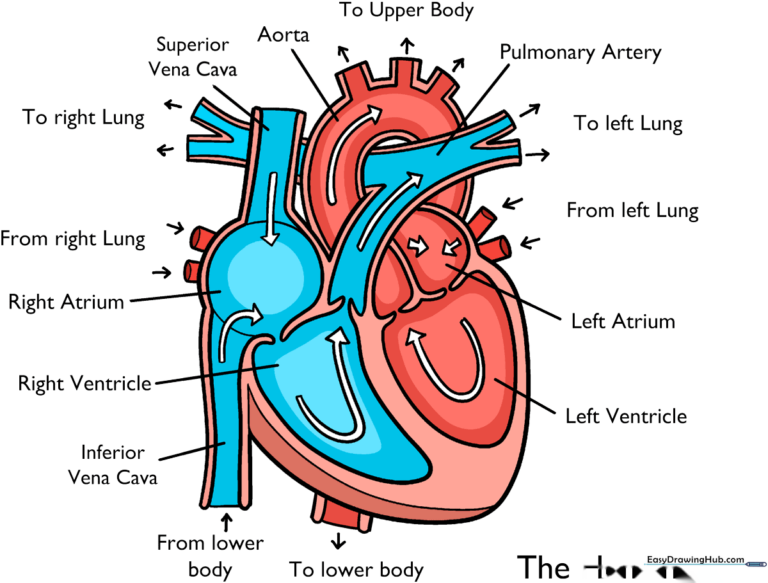
🎯 Final Result
Step-by-Step Instructions
Step 1: Sketching the Heart Base
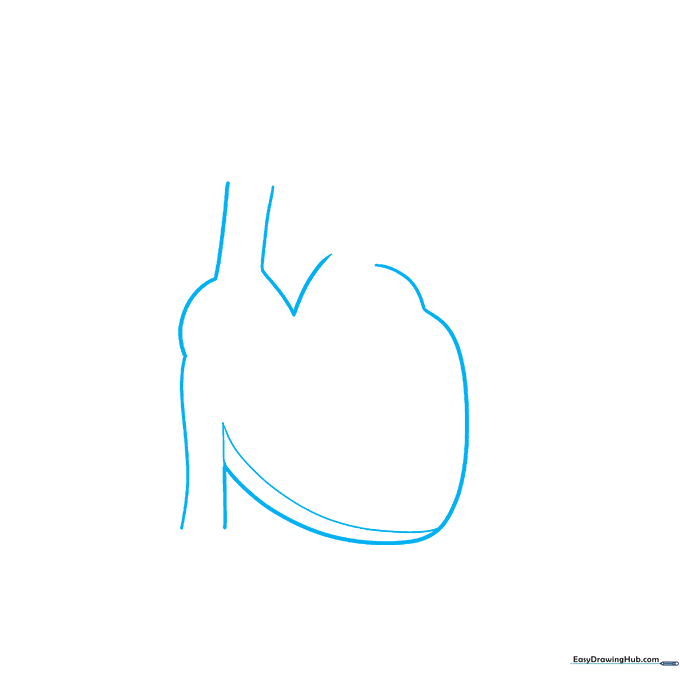
Start by drawing the main heart shape using smooth, curved lines. Leave the top open to make room for the arteries. Teacher's Tip: Keep your pencil pressure light so you can easily adjust the shape if it looks a bit lopsided.
Step 2: Adding the Major Vessels
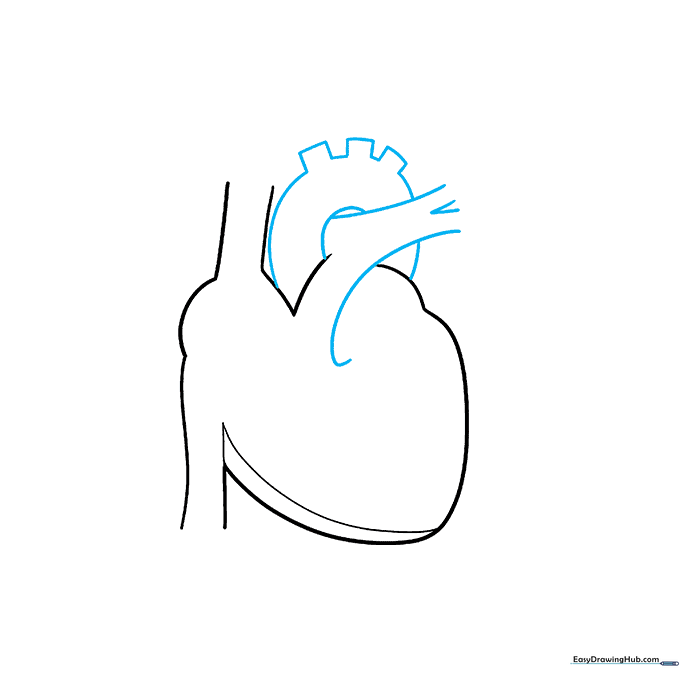
Draw the aorta and pulmonary artery by sketching a series of overlapping curved lines that form a ring with three small rectangular extensions. Teacher's Tip: Think of these as 'tubes'—keep the lines rounded to show they are hollow structures.
Step 3: Defining the Chambers
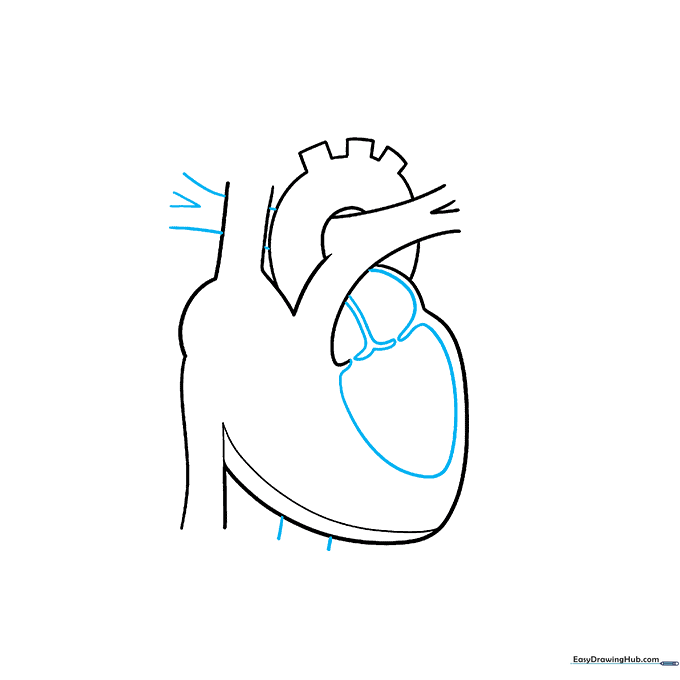
Use curved lines to section off the atriums and ventricles. Add pairs of lines behind the heart to represent the arteries passing through. Teacher's Tip: Use short, quick strokes to define the valves; this adds a sense of depth to your diagram.
Step 4: Outlining the Vena Cava
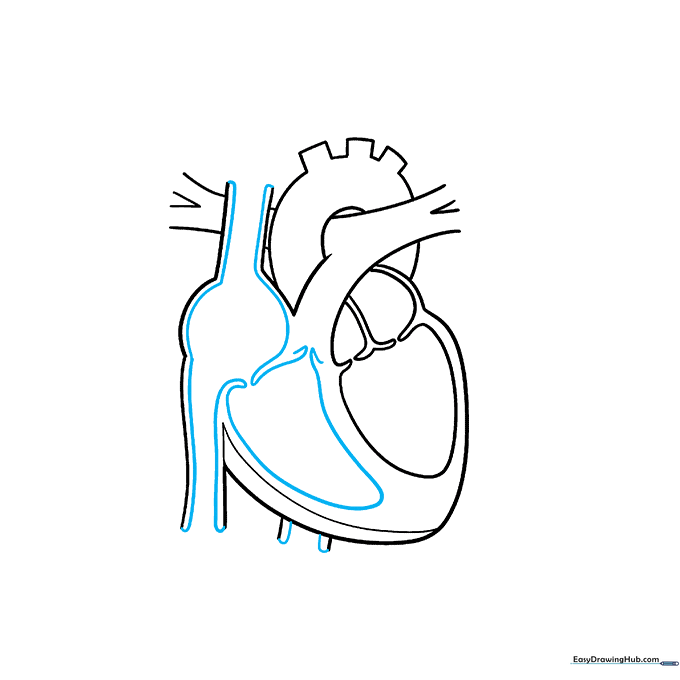
Carefully outline the right atrium and the interior of the vena cava using smooth, flowing lines. Teacher's Tip: Ensure your lines connect cleanly to the main heart body to keep the anatomy looking realistic.
Step 5: Refining the Vessels
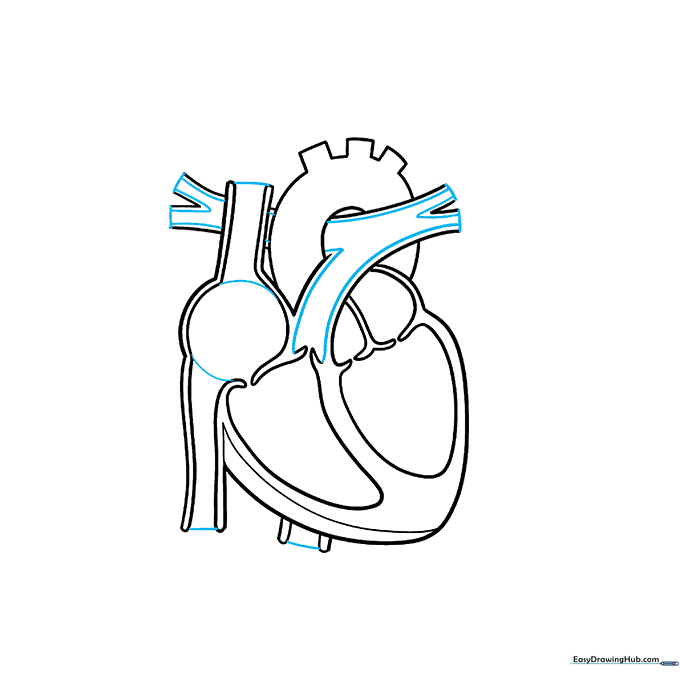
Draw lines parallel to the pulmonary artery and close off the ends of the veins. Give the atrium a rounded, circular shape. Teacher's Tip: Focus on keeping the lines parallel to create the illusion of cylindrical blood vessels.
Step 6: Adding Side Veins
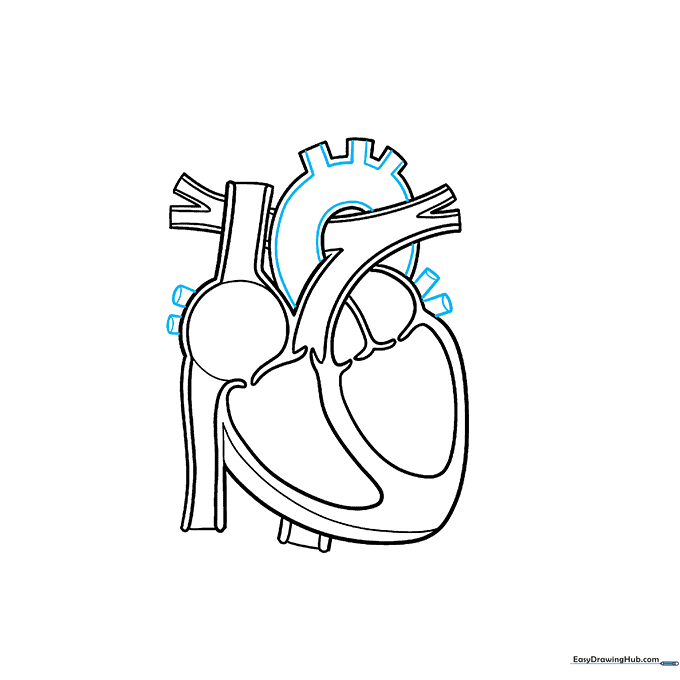
Draw the aorta's parallel lines and add cylinder-shaped veins on either side of the heart. Teacher's Tip: Use a ruler if you struggle with straight lines, but freehand is great for practice!
Step 7: Indicating Blood Flow
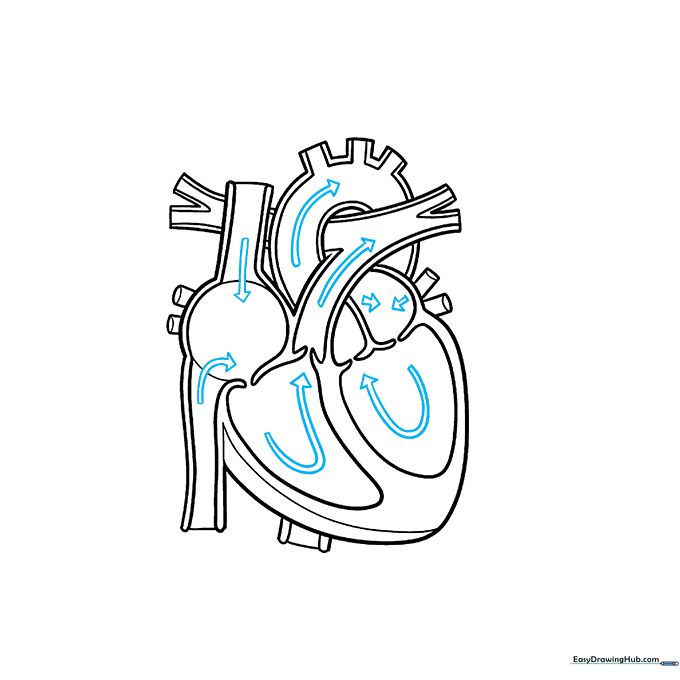
Draw small arrows inside the arteries, aorta, and veins to show the direction of blood flow. Teacher's Tip: Make sure your arrows are clear and point in the correct direction to make the science accurate.
Step 8: Adding the Title

Write 'The Human Heart' at the top of your page. Teacher's Tip: Use a clear, block-letter font so your diagram looks like a professional textbook illustration.
Step 9: Labeling the Parts
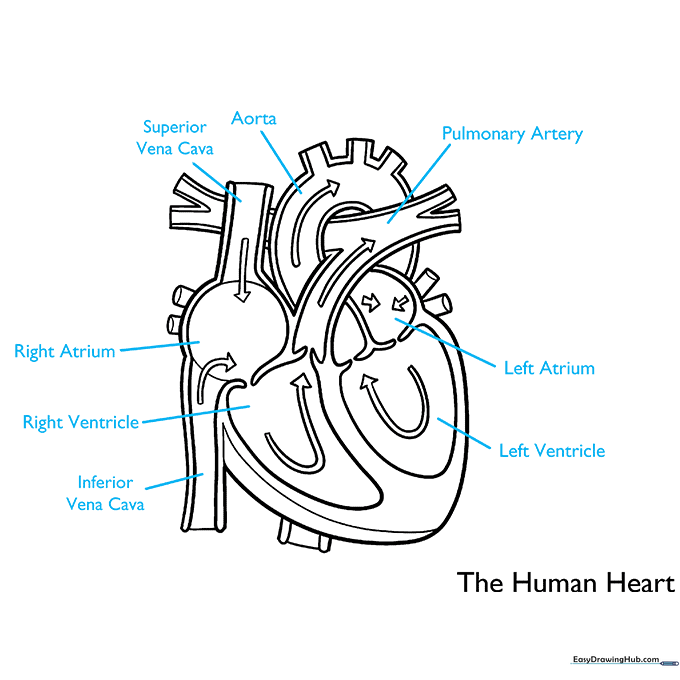
Add labels for the vena cava, ventricles, atriums, and arteries. Teacher's Tip: Use a fine-liner pen for the labels so they stand out against your pencil drawing.
Step 10: Coloring for Clarity
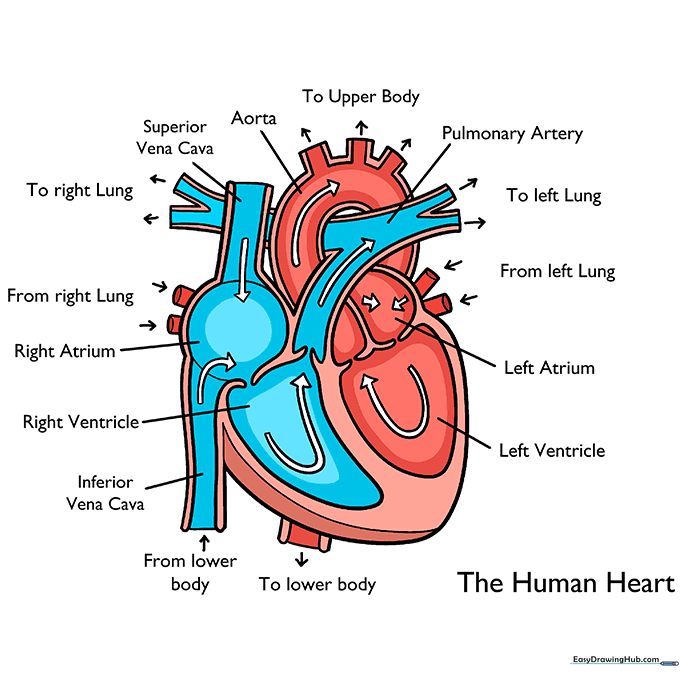
Color your diagram! Use red for oxygenated blood and blue for oxygen-depleted blood. Teacher's Tip: This color-coding is a standard scientific method that makes your diagram much easier to read and understand.
More Tutorials


