How to Draw a Happy Face: Easy 10-Step Guide for Kids
Bring joy to your sketchbook with this simple character drawing tutorial, perfect for artists ages 5 and up. All you need is a pencil, an eraser, and a piece of paper to get started. Follow along to master the art of drawing expressive facial features and a cheerful smile.
🎯 Final Result

Step-by-Step Instructions
Step 1: Sketching the Expressive Eyes

Start by drawing two curved lines to form the base of the eyes. Above these, add a partial oval to complete the eye shape. Add a dark, shaded circle inside for the pupil. Teacher's Tip: Keep the pupils centered to make your character look bright and alert!
Step 2: Adding Brows and Nose

Draw a curved line above each eye for the eyelid, then add a small, pointed shape above that for the eyebrow. Between the eyes, sketch the nose using light, separate curved lines for the bridge and nostrils. Teacher's Tip: Don't press too hard on the nose lines—subtle lines look more natural.
Step 3: Creating the Smile
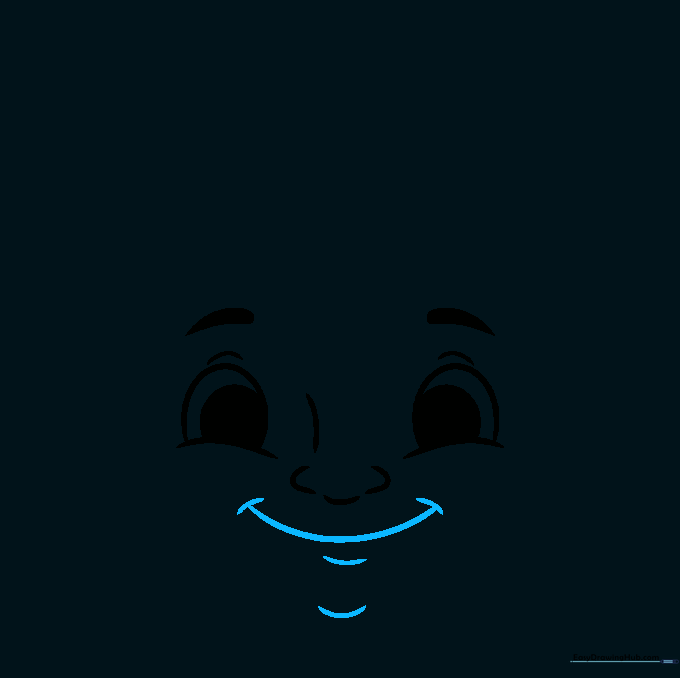
Draw a long, wide curved line to create a happy mouth. Add small curved lines at the corners for dimples and a tiny line under the chin for depth. Teacher's Tip: A wider, deeper curve makes the smile look even happier!
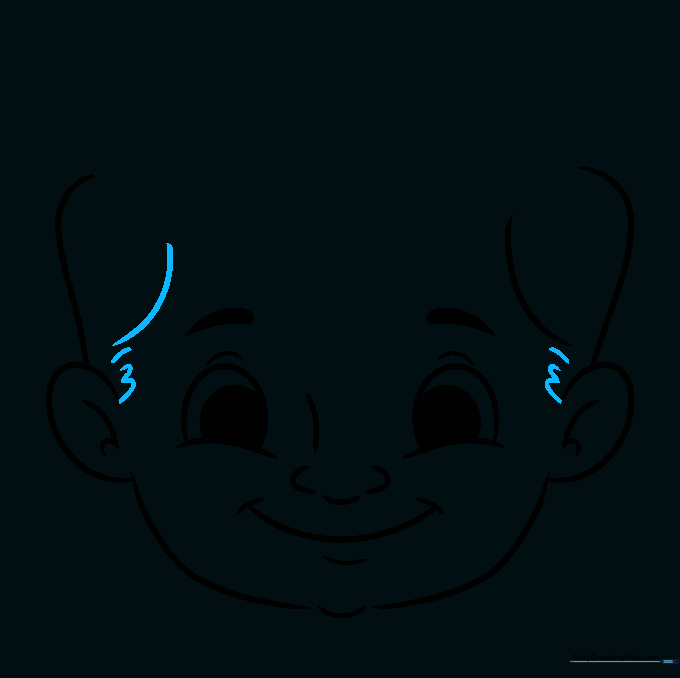
Step 4: Shaping the First Side
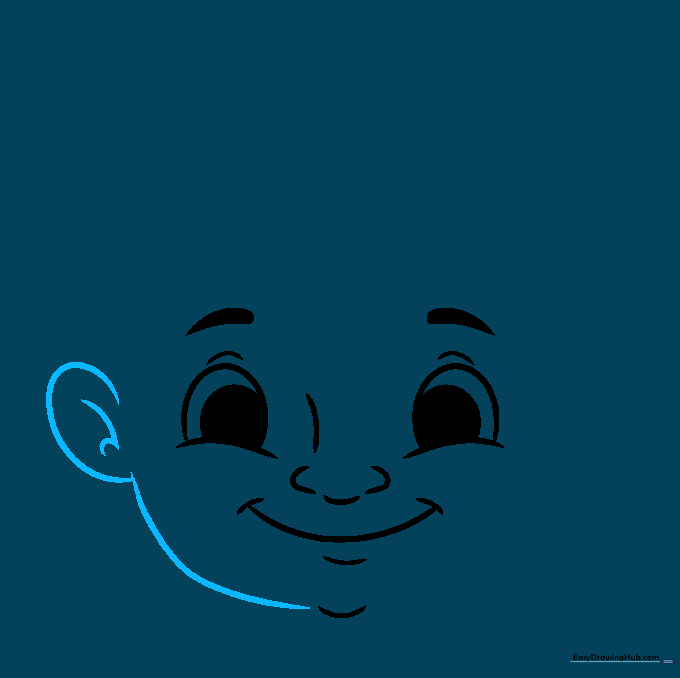
Outline the side of the face with a smooth, curved line and add an ear. Add small, inner lines to the ear to show its shape. Teacher's Tip: Keep your hand relaxed to get a smooth, continuous curve for the cheek.
Step 5: Balancing the Face
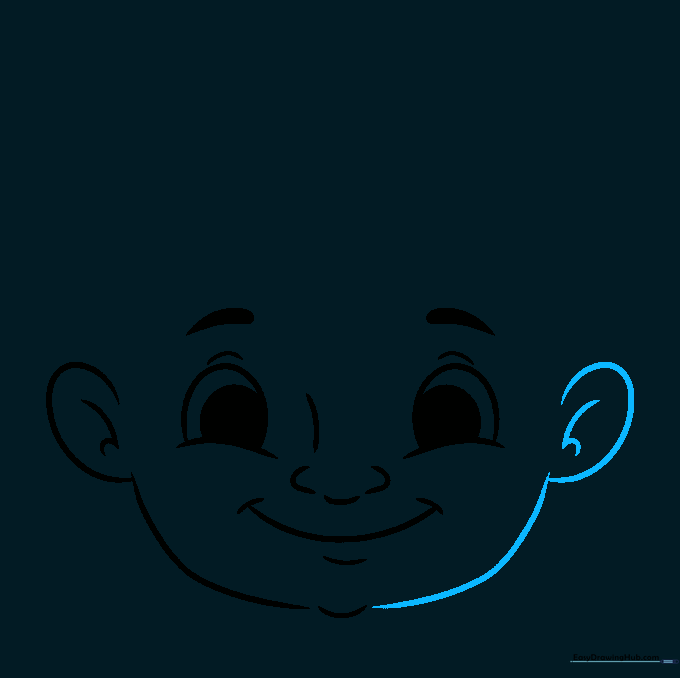
Repeat the process on the opposite side to create a mirror image. Ensure the ear is at the same height as the first one. Teacher's Tip: Use your pencil to measure the distance from the nose to each ear to keep it symmetrical.
Step 6: Starting the Hairline
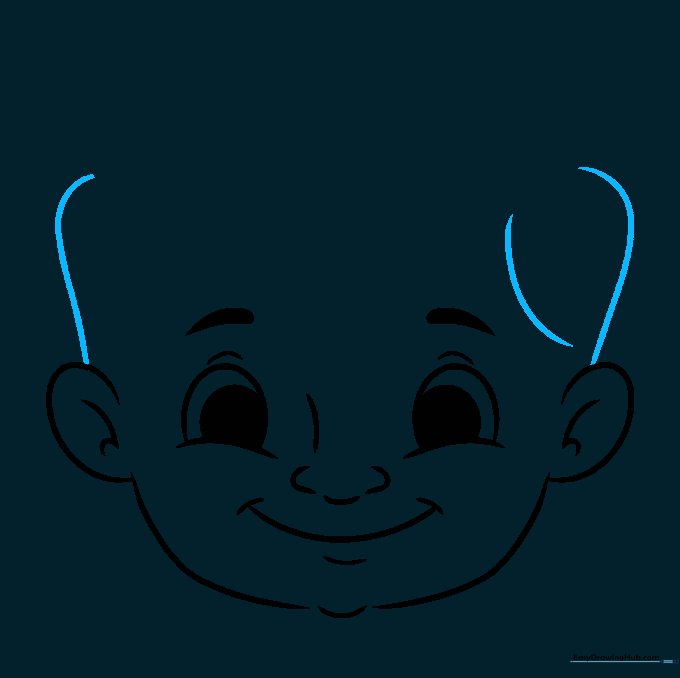
Draw curved lines upward from the ears to form the top of the head. Add a curved line above one ear to begin the hair texture. Teacher's Tip: Think of hair as large shapes rather than individual strands.
Step 7: Adding Sideburns
Continue the hair line over the other ear and add short, flicking lines near the ears for sideburns. Teacher's Tip: Use quick, light strokes to make the hair look soft and natural.
Step 8: Detailing the Forehead

Connect the hair across the forehead with a long, sweeping line. Add a jagged point to create a stylish lock of hair. Teacher's Tip: Varying the length of your lines makes the hair look more realistic.
Step 9: Finishing the Hair and Neck
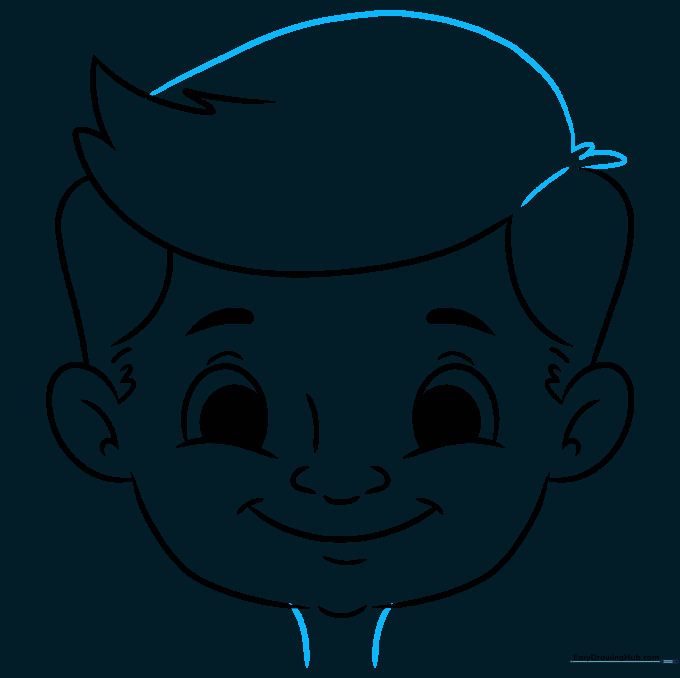
Complete the top of the hair with a large curve and add a few lines to show the part. Finally, draw two lines for the neck. Teacher's Tip: Make the neck lines slightly wider at the bottom to show the shoulders starting.
Step 10: Adding Color

Bring your drawing to life with your favorite colors! Use bright tones for the skin and hair to match the happy expression. Teacher's Tip: Try using a lighter color for the skin and a darker shade for the hair to create contrast.
More Tutorials


