How to Draw a Hand Covering Face: Easy 10-Step Guide
Capturing emotion in art is a key skill for young artists. This tutorial is perfect for ages 8+ and uses basic shapes to help you master the tricky anatomy of a hand resting against a face. Grab your pencil, eraser, and paper to get started on this expressive character study.
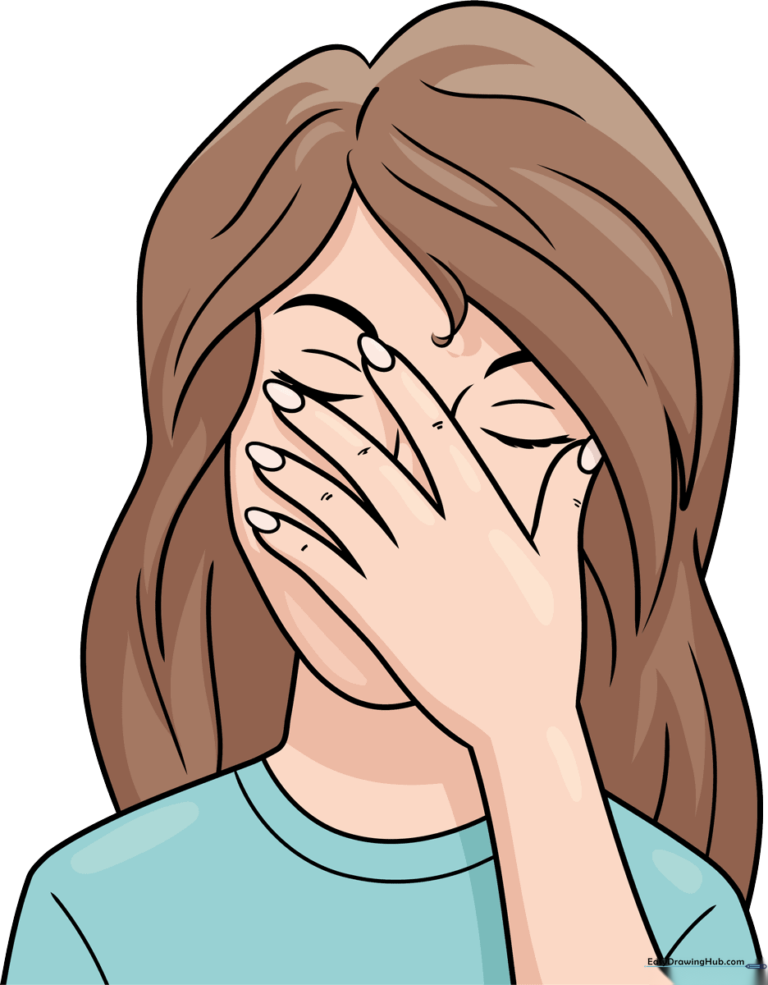
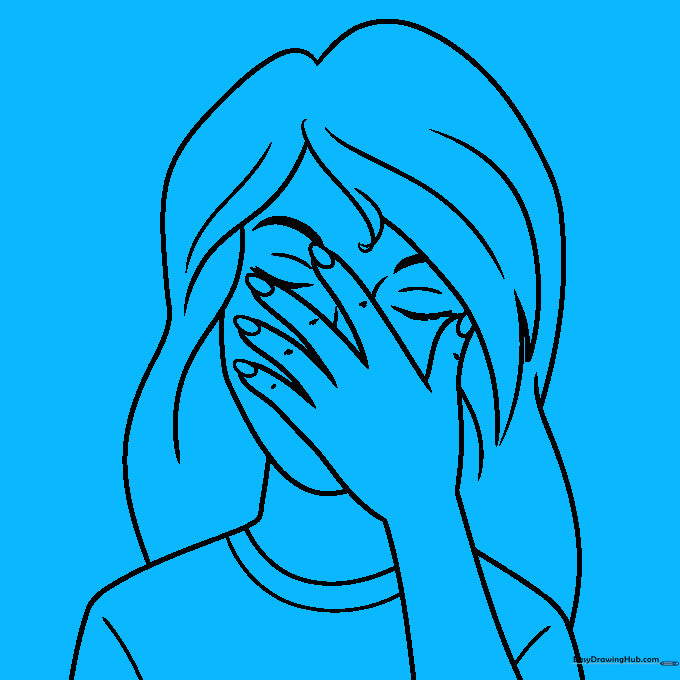
🎯 Final Result
Step-by-Step Instructions
Step 1: Sketching the Eyes

Draw two curved 'lemon' shapes for the eyes, then add thick lines underneath for lashes. Add a bold arch above each for the eyebrows. Teacher's Tip: Keep your pencil pressure light here so you can easily adjust the symmetry later.
Step 2: Forming the First Fingers

Sketch two narrow, rounded cylinders to represent the fingers resting on the face. Add a small oval at the tip of each for the fingernail. Tip: Think of these as soft tubes rather than straight lines to give them a natural, organic look.
Step 3: Adding More Fingers
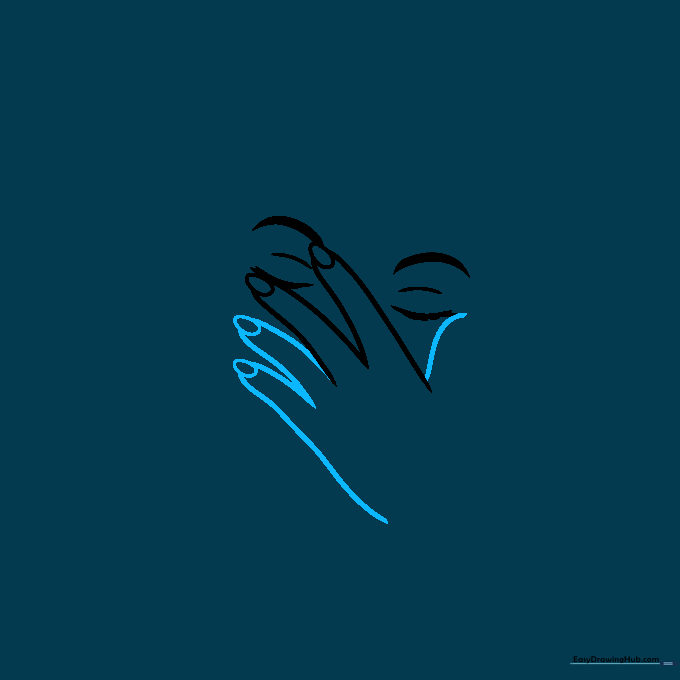
Add two more fingers, giving them a slight bend to show they are resting against the cheek. Tip: Varying the length of the fingers makes the hand look much more realistic and less like a robotic claw.
Step 4: The Thumb and Arm
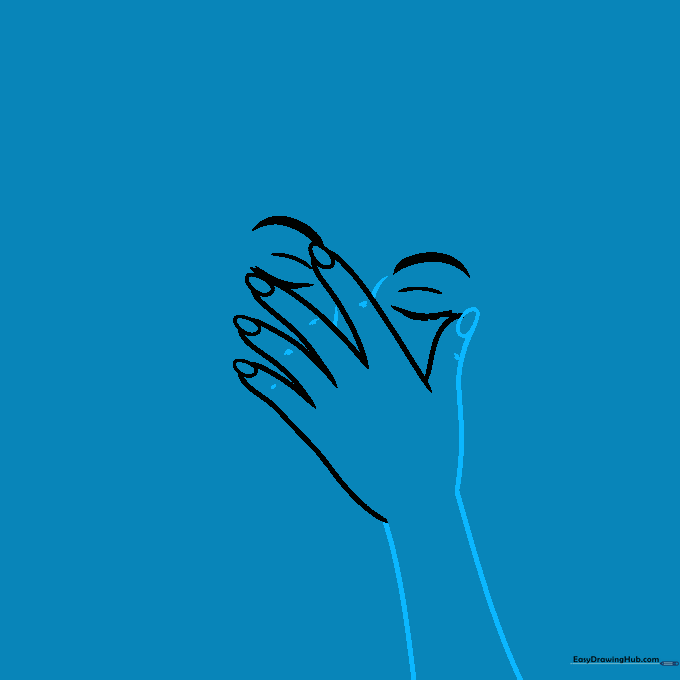
Draw the thumb as a final cylinder and connect the hand to the arm using two vertical lines. Add small dashes near the nose and knuckles to suggest skin texture. Tip: Use short, light dashes to keep the drawing looking soft rather than harsh.
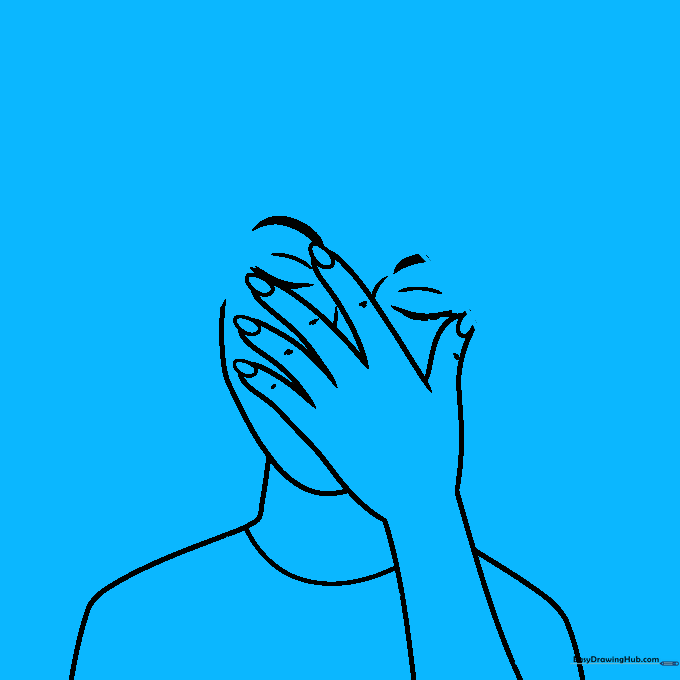
Step 5: Outlining the Face

Draw a soft, egg-shaped curve for the chin and jawline. Add simple lines for the neck and shoulders, finishing with a curve for the collar. Tip: Ensure the jawline flows naturally behind the hand to create depth.
Step 6: Starting the Hair
Sketch diagonal curves for the hair, adding a lock of hair falling across the forehead. Add details to the shirt collar. Tip: Use long, sweeping strokes to make the hair look smooth and flowing.
Step 7: Adding Hair Volume
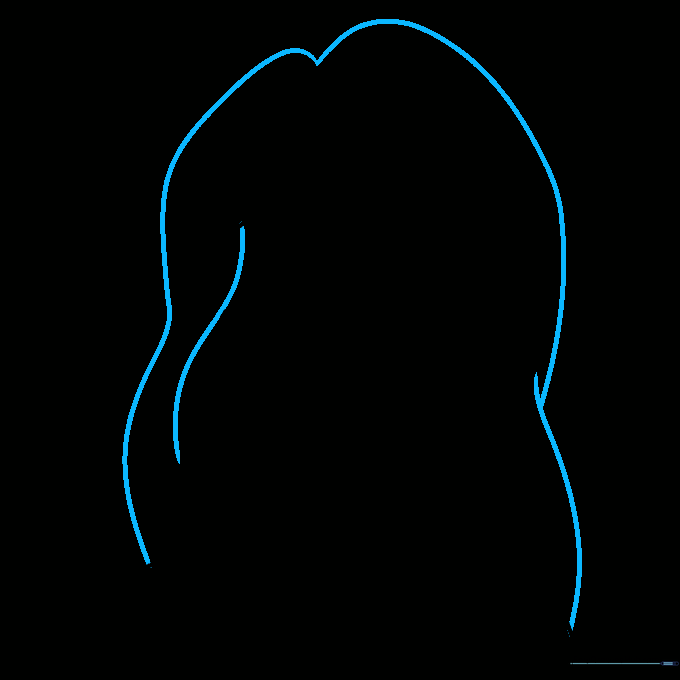
Draw two hill-like curves on top of the head and connect them to the body with wavy lines. Tip: Wavy lines help create the illusion of loose, natural hair movement.
Step 8: Adding Hair Texture

Add more curved lines throughout the hair to create depth and texture. Tip: Vary the length of your lines to make the hair look layered and realistic.
Step 9: Finalizing the Hair
Complete the hair with additional curved lines to fill in the shape. Tip: Don't worry about making every line perfect; hair is naturally messy and organic!
Step 10: Coloring Your Masterpiece

Outline your drawing with a black pen, then erase your pencil marks. Color the skin and hair, and add shadows to give the hand a 3D look. Tip: Use a darker shade of your skin color near the fingers to create a realistic shadow on the face.
More Tutorials


