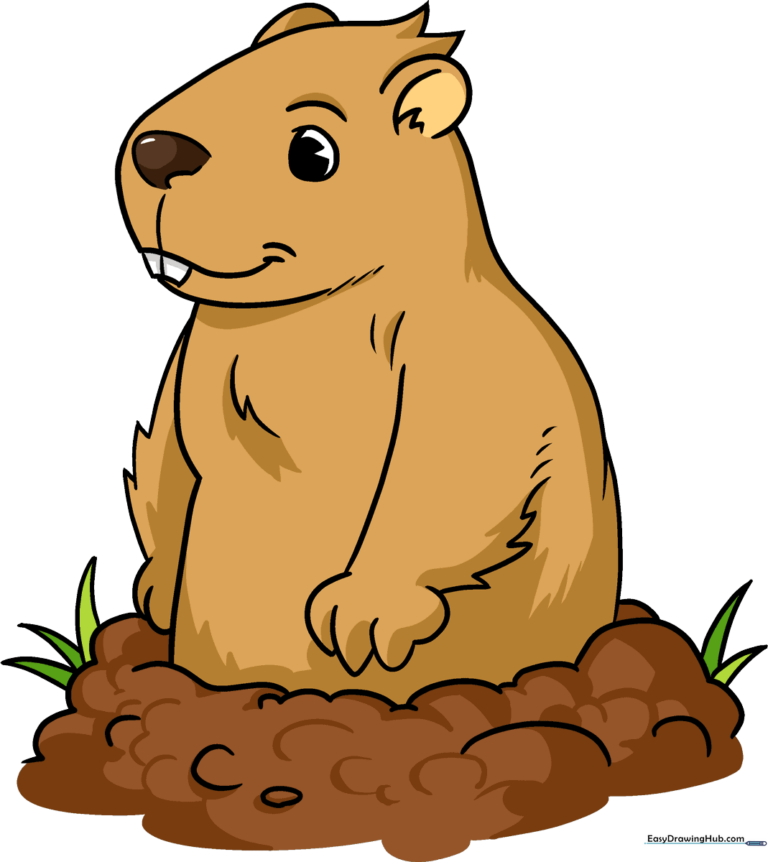
How to Draw a Groundhog: Easy 10-Step Guide for Kids
Ready to draw a friendly groundhog? This tutorial is perfect for young artists ages 5 and up. You will only need a pencil, an eraser, and some paper to bring this burrowing buddy to life while practicing your curved line control.
🎯 Final Result
Step-by-Step Instructions
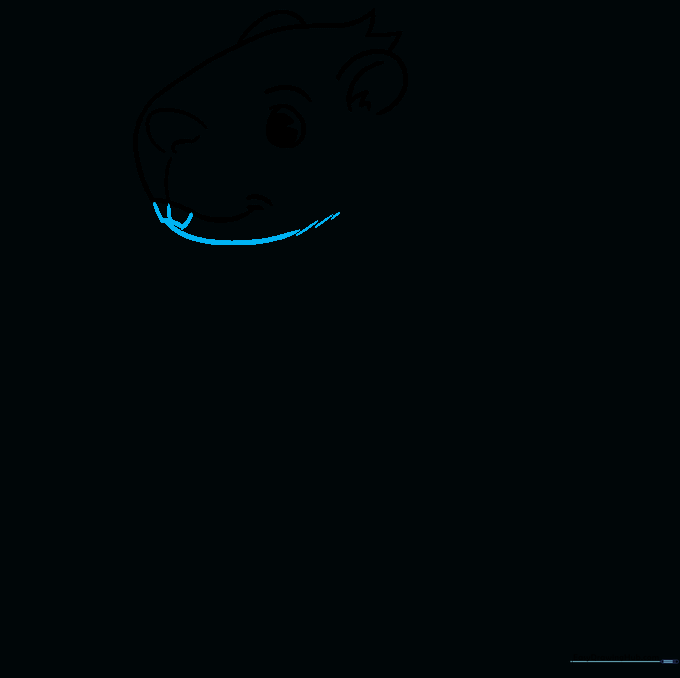
Step 1: Sketching the Face

Start by drawing the front of the face using a long, smooth curved line. Add two small 'V' shapes on top for tufts of fur. At the bottom, sketch a rounded, inverted triangle for the nose and a small curve for the mouth. Teacher's Tip: Keep your pencil pressure light here so you can easily adjust the shape if needed.
Step 2: Adding Eyes and Ears

Outline the ears with soft curves and add detail lines inside. Draw an oval for the eye, shading a smaller partial oval inside for the pupil. Add a gentle arch above the eye for the eyebrow. Teacher's Tip: Placing the eye slightly higher makes the groundhog look more curious and friendly.
Step 3: Drawing the Teeth and Jaw
Draw a curved rectangle below the mouth for the front teeth, adding a vertical line in the center to separate them. Use short, jagged curved lines to sketch the furry lower jaw. Teacher's Tip: Use quick, short strokes to mimic the texture of fur.
Step 4: Outlining the Body
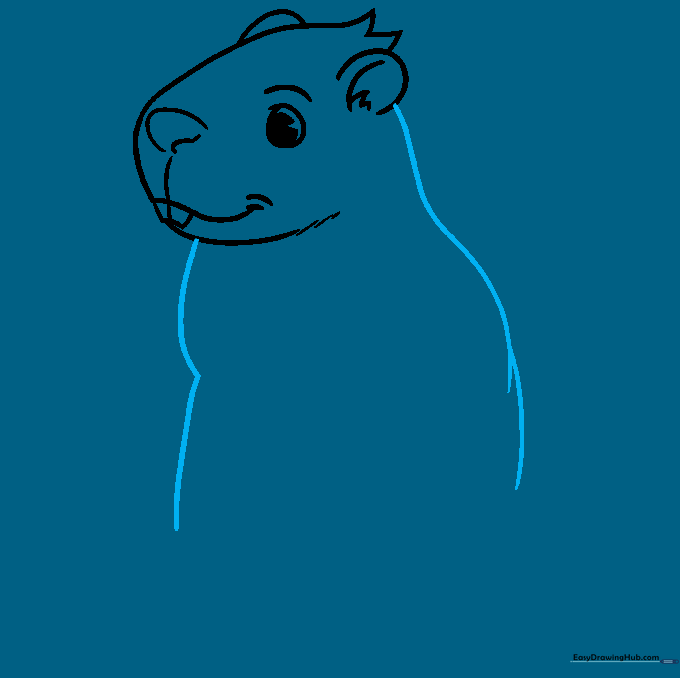
Use long, sweeping curved lines to define the back and front of the groundhog's body. Teacher's Tip: Try to draw these lines in one continuous motion to keep them looking smooth and natural.
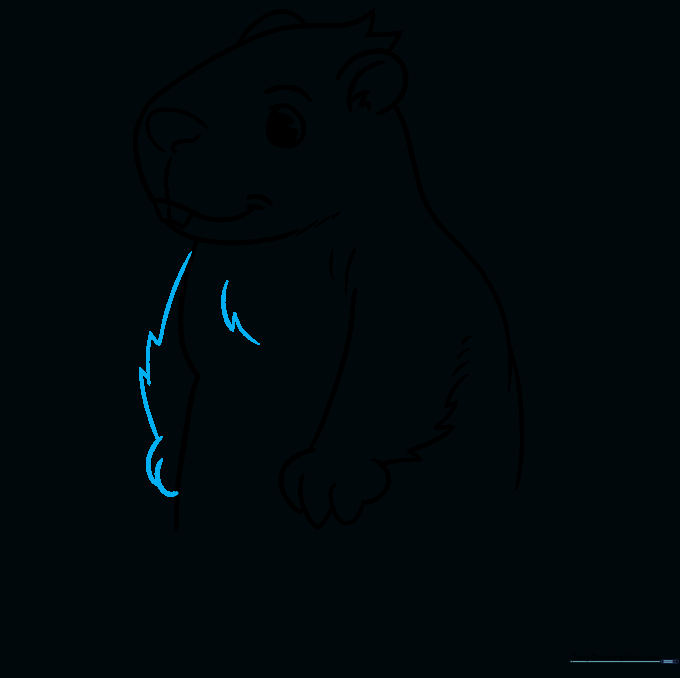
Step 5: Sketching the First Arm

Draw the foreleg using a long curve for the top and smaller overlapping curves for the toes. Add jagged lines at the back of the arm to represent fur. Teacher's Tip: Groundhogs have strong claws for digging, so make your toe lines look firm and rounded.
Step 6: Adding the Second Arm and Chest Fur
Sketch the second arm using similar overlapping lines. Add a tuft of fur on the chest using jagged, connected curves. Teacher's Tip: Varying the size of your 'fur' spikes makes the drawing look more realistic and less uniform.
Step 7: Drawing the Burrow Entrance
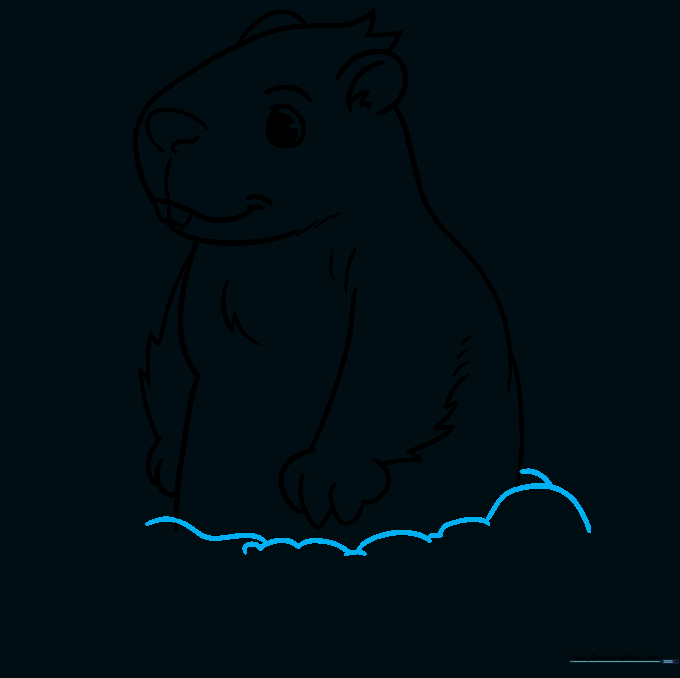
Add overlapping curved lines at the base of the torso to create the mound of dirt around the burrow entrance. Teacher's Tip: Use different lengths for these lines to create a natural, uneven look for the dirt pile.
Step 8: Adding Grass and Texture
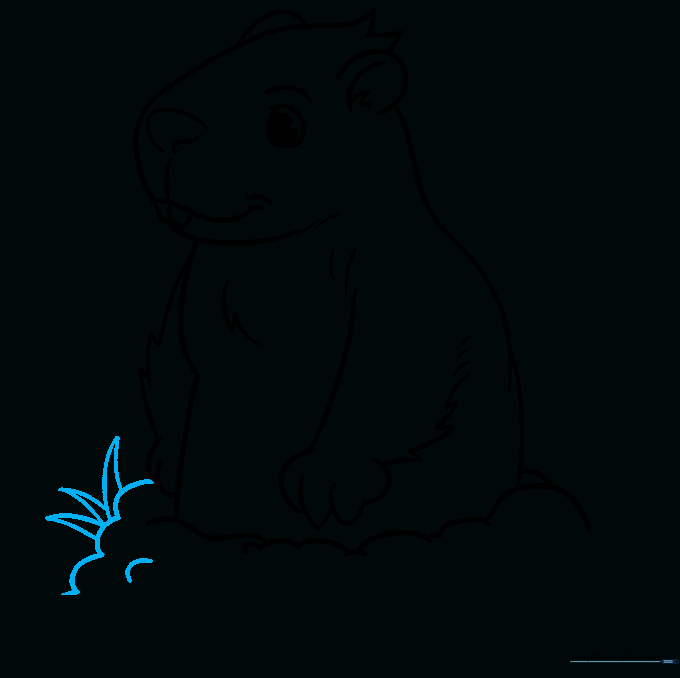
Add more curved lines to the dirt mound for texture. Draw pairs of lines that meet at sharp points to create blades of grass. Teacher's Tip: Grass blades look best when they lean in different directions.
Step 9: Final Details

Contour the dirt with small 'C' shaped lines to look like pebbles. Add a few more blades of grass on the opposite side to balance the composition. Teacher's Tip: Don't overthink the pebbles—small, random shapes look the most natural.
Step 10: Coloring Your Groundhog

Bring your drawing to life with color! Use light brown for the fur, and perhaps some darker browns for shading. Groundhogs can also be black or white, so feel free to get creative. Teacher's Tip: Use a light touch with your colored pencils to layer colors for a more realistic fur effect.
More Tutorials


