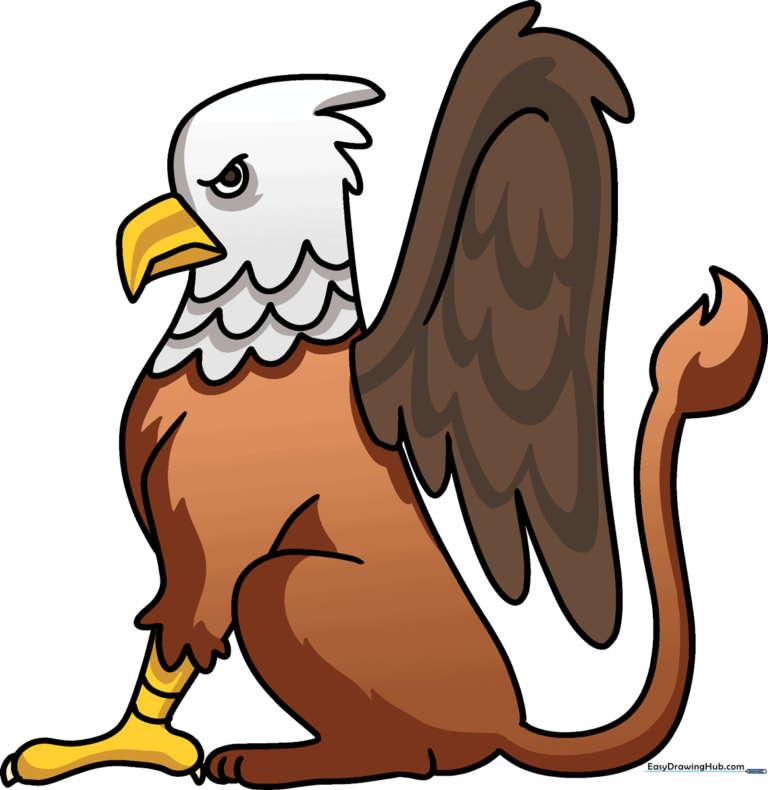
How to Draw a Griffin: Easy 10-Step Guide for Kids
Bring this legendary creature to life with a simple, guided lesson perfect for young artists ages 6 and up. All you need is a pencil, an eraser, and a sheet of paper to begin. Follow these steps to build your griffin’s anatomy, from its eagle-like head to its powerful lion body, and watch your mythical masterpiece take shape.
🎯 Final Result
Step-by-Step Instructions
Step 1: Sketching the Head and Chest

Start by sketching the head and chest using light, fluid lines. Use a long curve for the front of the chest and face, and another for the back. Tip: Keep your pencil pressure very light here so you can easily erase and refine your shapes later.
Step 2: Defining the Eye
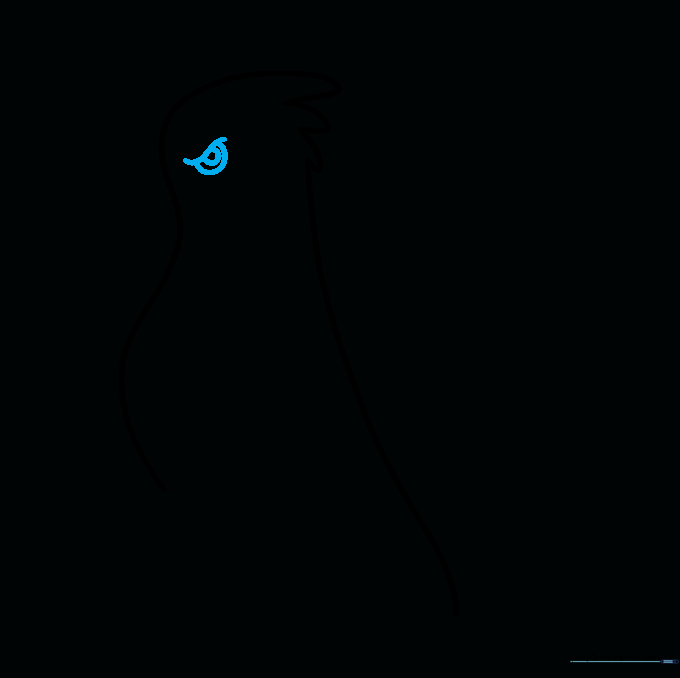
Draw the griffin's eye by creating a gentle curve for the eyelid, then adding a half-circle beneath it. Place a small, dark pupil inside. Tip: A slightly larger pupil gives your creature a friendly, curious expression.
Step 3: Adding the Beak
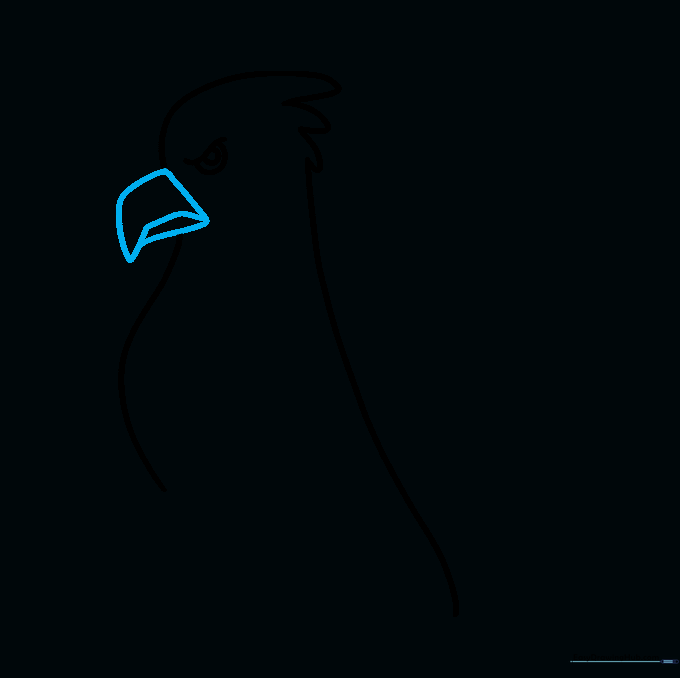
Gently erase the front of the face to make room for the beak. Draw a bent, irregular pentagon shape to form the sharp beak, then add a horizontal line to show where it opens. Tip: Make the beak slightly hooked at the end for that classic eagle look.
Step 4: Sketching the Foreleg
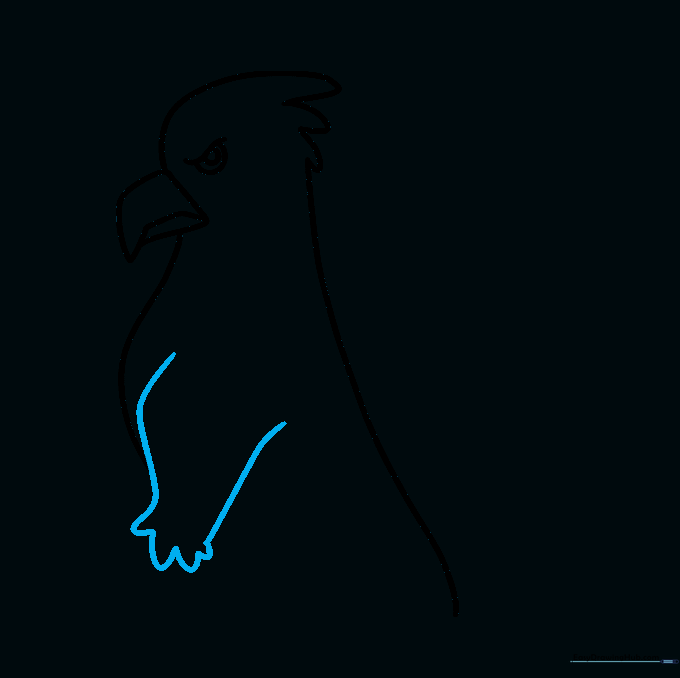
Draw the front leg using two long, parallel curved lines. Connect them at the bottom with small 'U' shapes to suggest the texture of the leg. Tip: Keep the lines smooth to make the leg look strong and sturdy.
Step 5: Drawing the Talons
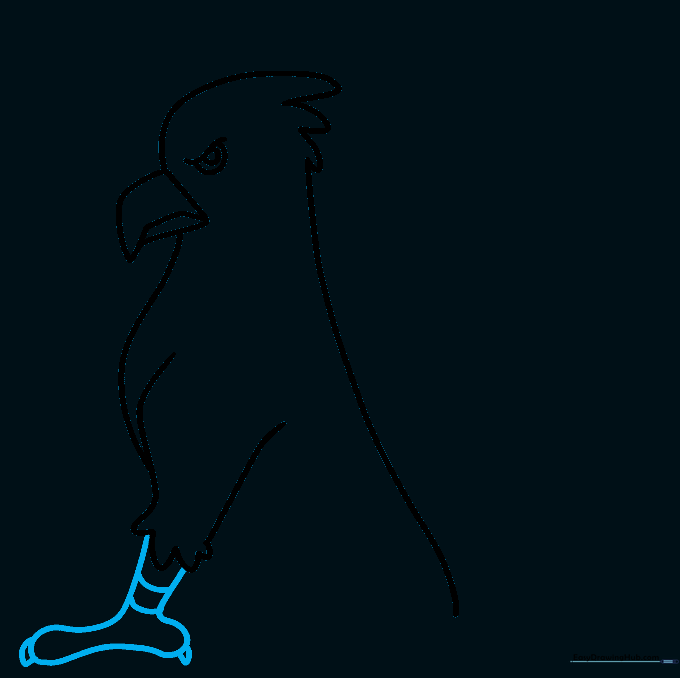
Create the bird-like foot by drawing curved lines that double back to form two distinct toes. Add small, sharp triangles at the tips for claws. Tip: Add a few horizontal bands on the leg to represent the scales of a bird's foot.
Step 6: Adding the Rear Leg
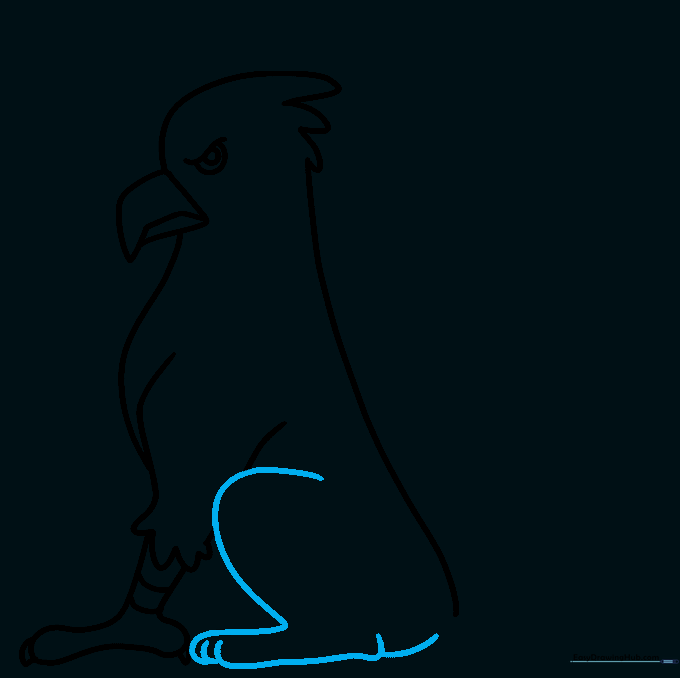
Draw the back leg using overlapping curved lines to show the muscle. Ensure the foot connects naturally to the haunches. Tip: Overlapping lines are a great way to show depth and make your drawing look 3D.
Step 7: Sketching the Tail
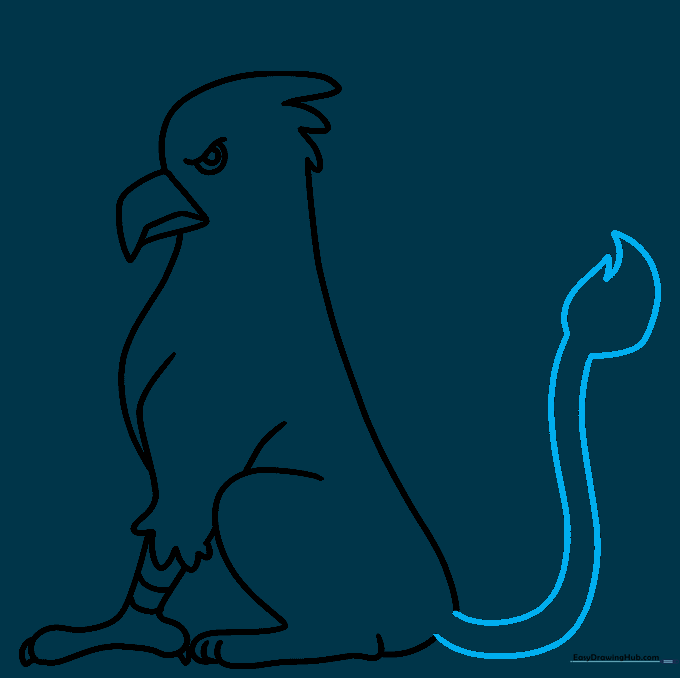
Extend two long, parallel lines from the rump to form the tail. At the end, draw a cluster of points to create a tuft of fur. Tip: Make the tail curve slightly to give your griffin a sense of movement.
Step 8: Adding the Wing
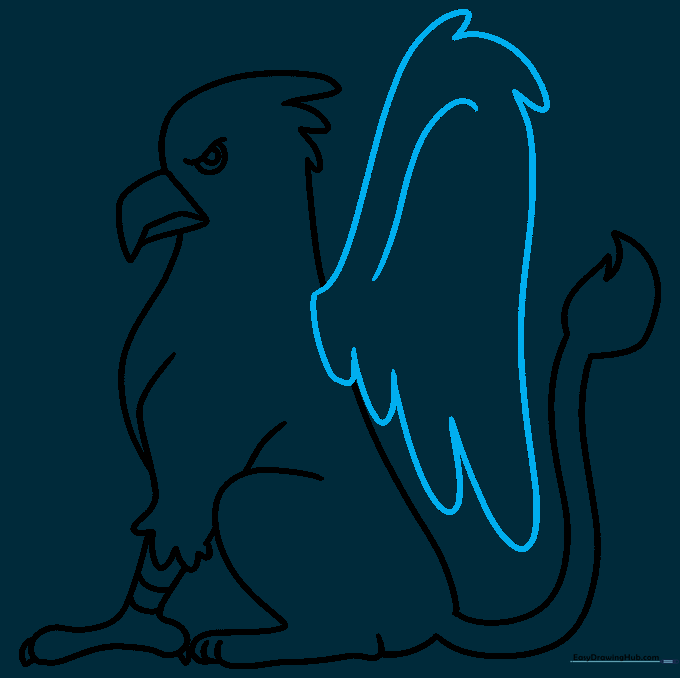
Draw a large wing using long, sweeping curved lines. Use 'U' shapes along the edges to represent individual feathers. Tip: Don't worry if the lines overlap the body; just erase the extra lines inside the wing shape once you're finished.
Step 9: Adding Neck Feathers
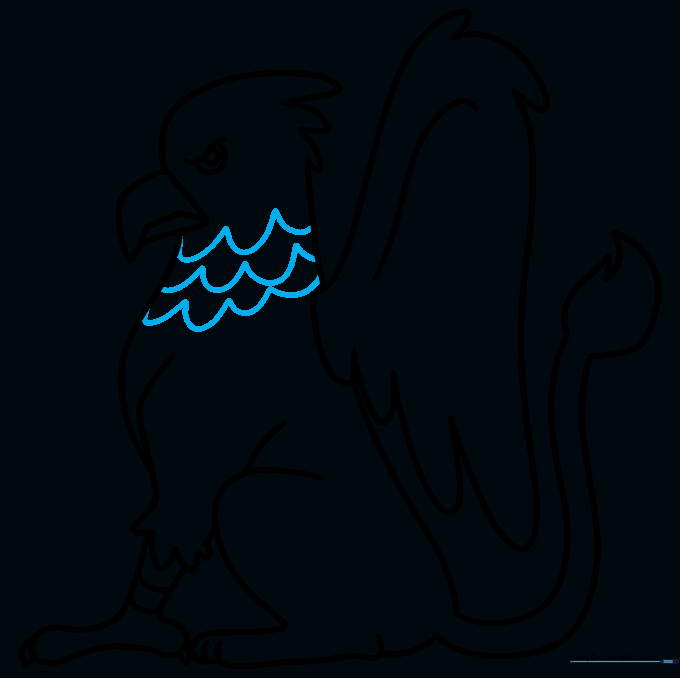
Detail the neck by adding a series of connected 'U' shapes. This creates a scalloped, feathery texture. Tip: Vary the size of your 'U' shapes to make the feathers look more natural and organic.
Step 10: Coloring Your Griffin

Bring your griffin to life with color! You can use traditional gold and brown tones for a classic look, or experiment with bright, magical colors. Tip: Use darker shades under the wing and belly to add shadows and make your drawing pop.
More Tutorials


