How to Draw a Gorilla Face: Easy 9-Step Guide for Kids
Bring the king of the jungle to life with this simple, guided drawing lesson perfect for ages 5 and up. You will only need a pencil, an eraser, and a piece of paper to master these expressive primate features. Follow along to develop your shading skills and learn how to capture the powerful, gentle look of a gorilla.
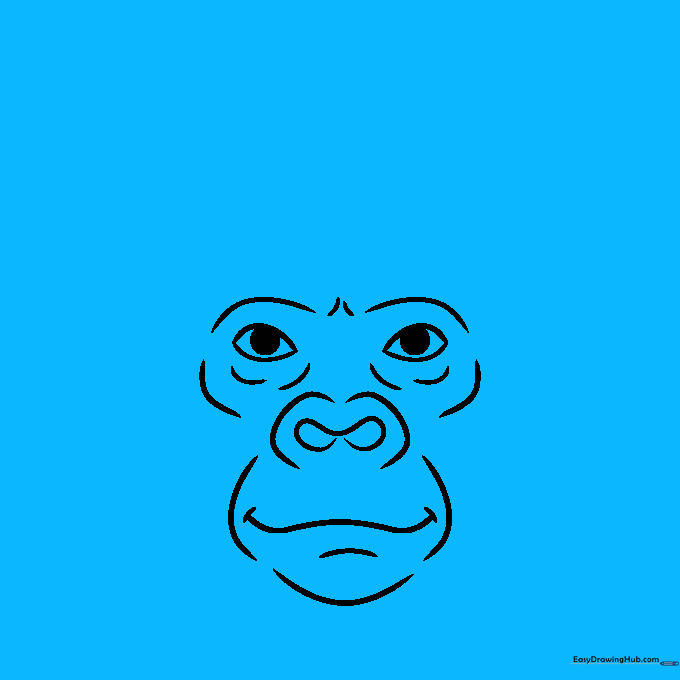
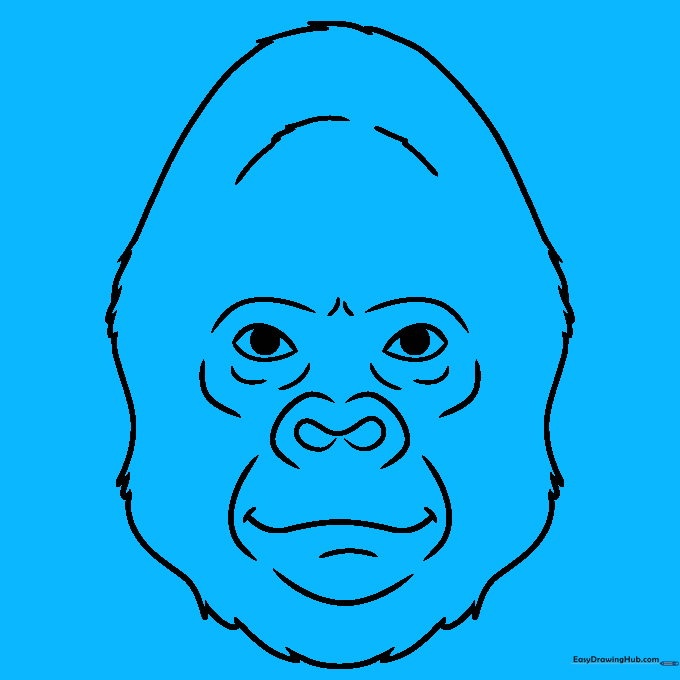
🎯 Final Result

Step-by-Step Instructions
Step 1: Sketching the Eyes

Draw two almond-shaped outlines for the eyes. Add a dark, circular pupil inside each. Teacher's Tip: Keep the eyes level with each other to give your gorilla a calm, focused expression.
Step 2: Defining the Eye Sockets
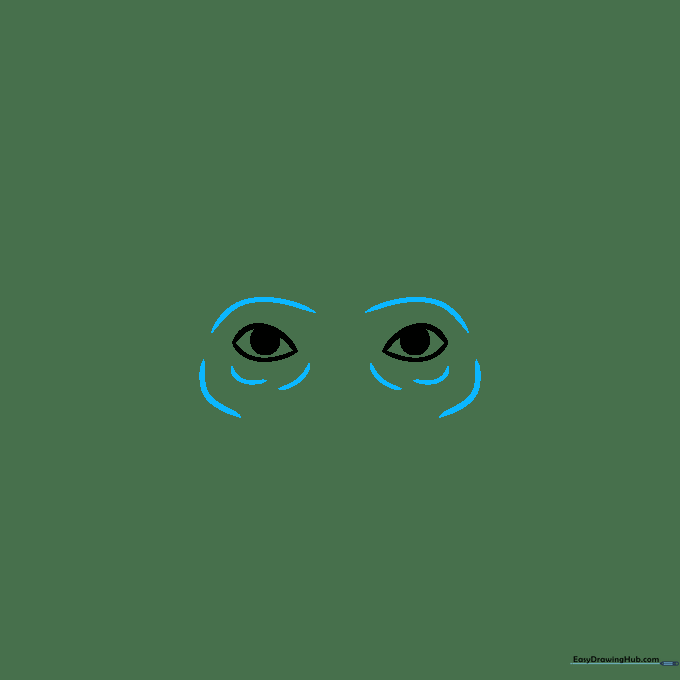
Add curved lines around the eyes to create the heavy brow and eye sockets. Teacher's Tip: Gorillas have deep-set eyes; using layered, curved lines helps create that sense of depth.
Step 3: Drawing the Nose

Sketch the nostrils using a peanut-shaped outline, then add curved lines around it. Teacher's Tip: A gorilla's nose is wide and flat; keep your lines soft and rounded rather than sharp.
Step 4: Creating the Mouth and Chin

Draw a wide, gentle curve for the mouth and a small line for the chin. Teacher's Tip: Adding tiny lines at the corners of the mouth gives your gorilla a friendly, approachable look.
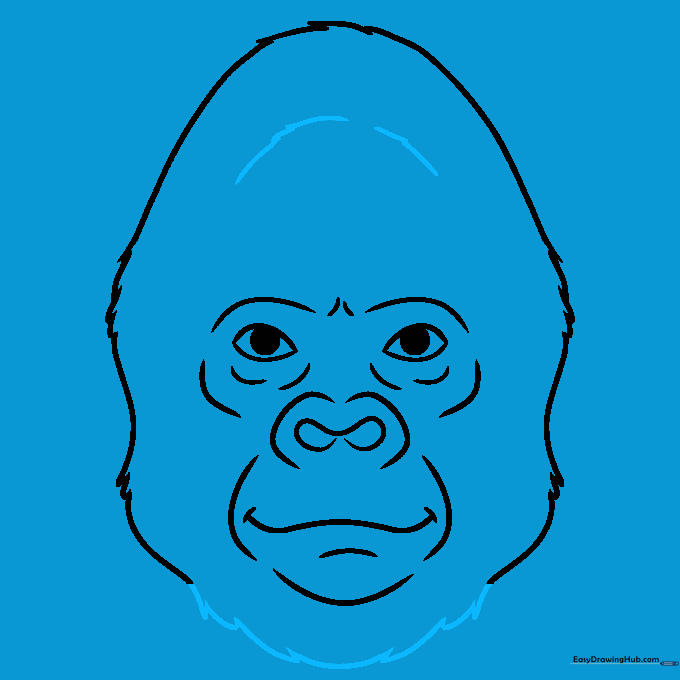
Step 5: Shaping the Head
Use long, jagged curved lines to form the dome of the head. Teacher's Tip: Don't make the lines perfectly smooth; the jagged edges represent the gorilla's thick, coarse fur.
Step 6: Outlining the Face Sides
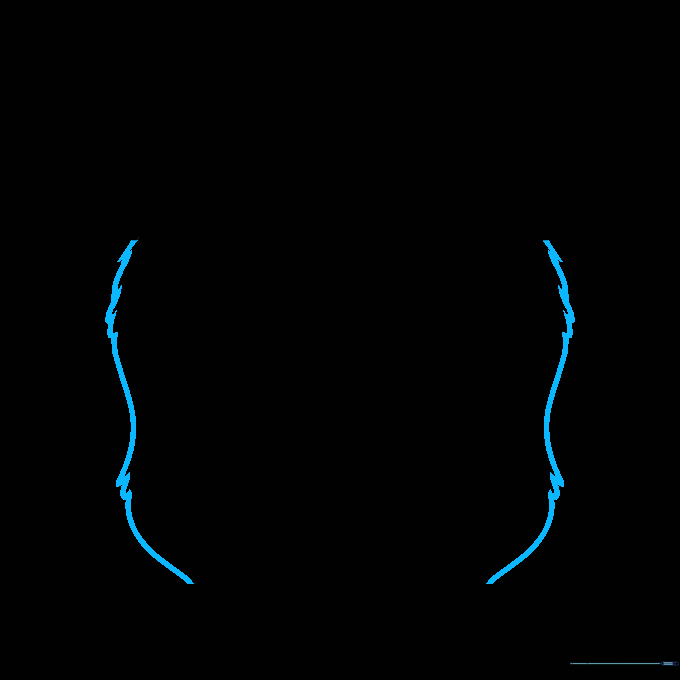
Connect the head to the chin using curved lines that meet at points. Teacher's Tip: These lines define the cheek area, so keep them slightly wider than the chin.
Step 7: Adding Fur Detail
Add more furry, jagged lines around the chin and forehead. Teacher's Tip: Vary the length of your lines to make the fur look natural and layered.
Step 8: Refining the Features
Add subtle curved lines along the forehead and cheeks to show muscle structure. Teacher's Tip: Use light pressure here; you want these to be subtle shadows, not heavy outlines.
Step 9: Final Touches
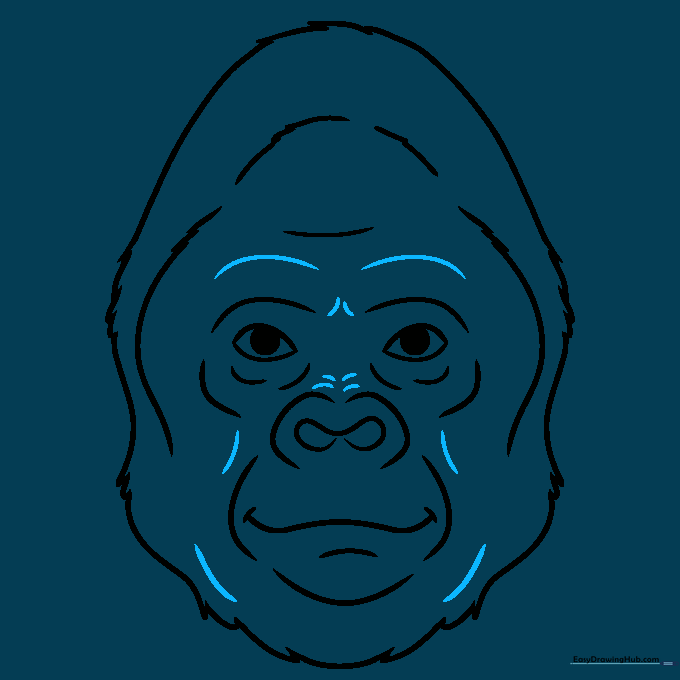
Add final contour lines around the eyes, nose, and mouth to complete the face. Teacher's Tip: Step back and look at your drawing from a distance to see if you want to darken any areas for more contrast.
Step 10: Bring Your Gorilla to Life with Color
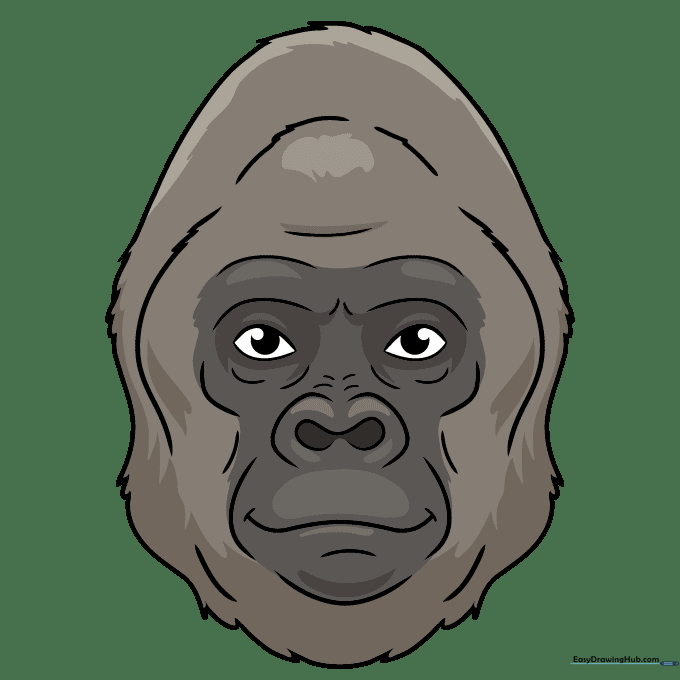
Fill in your drawing using shades of black, dark brown, or grey. Teacher's Tip: Use a lighter grey for the face and a darker black for the fur to create a realistic, three-dimensional effect.
More Tutorials


