How to Draw a Golf Ball: Easy 5-Minute Step-by-Step Guide
Ready to hit the green? This tutorial is perfect for young artists ages 5+ looking to master simple shapes. All you need is a pencil, an eraser, and a piece of paper to bring this golf ball to life. Follow along to practice your circular sketching and detail work.
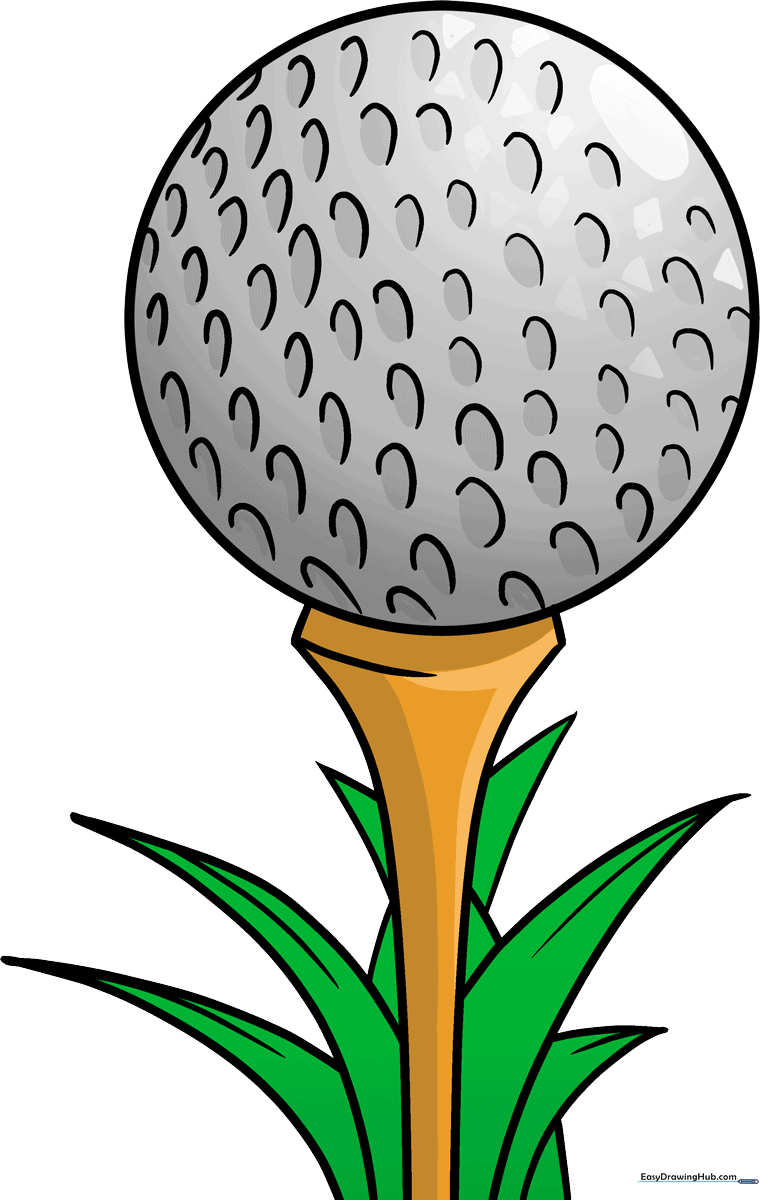
🎯 Final Result
Step-by-Step Instructions
Step 1: Sketching the Base Circle

Draw a clean circle to serve as the main body of the ball. Teacher's Tip: Keep your pencil pressure light so you can easily erase any stray marks later; try tracing a coin if you need a perfect guide!
Step 2: Constructing the Tee
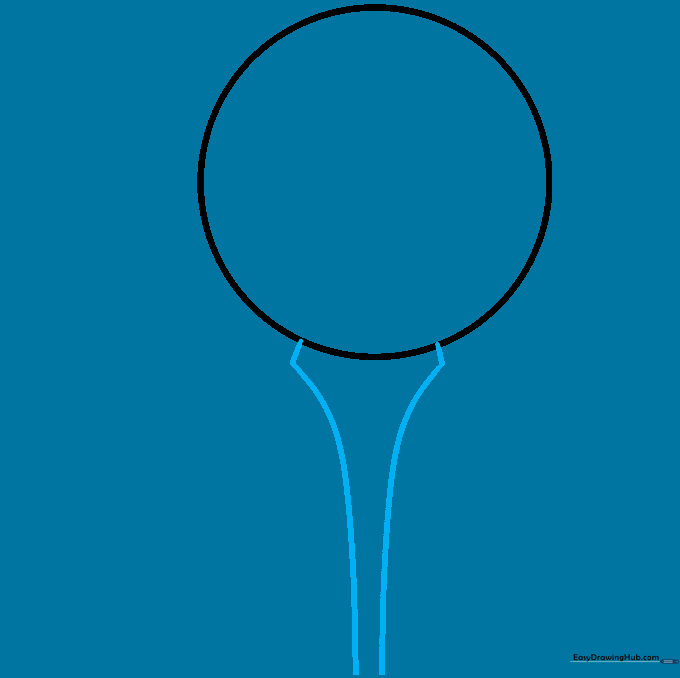
Extend two short, parallel lines downward from the bottom of your circle, then connect them with a curved base. This creates the tee. Tip: Ensure the tee is centered so your ball looks perfectly balanced.
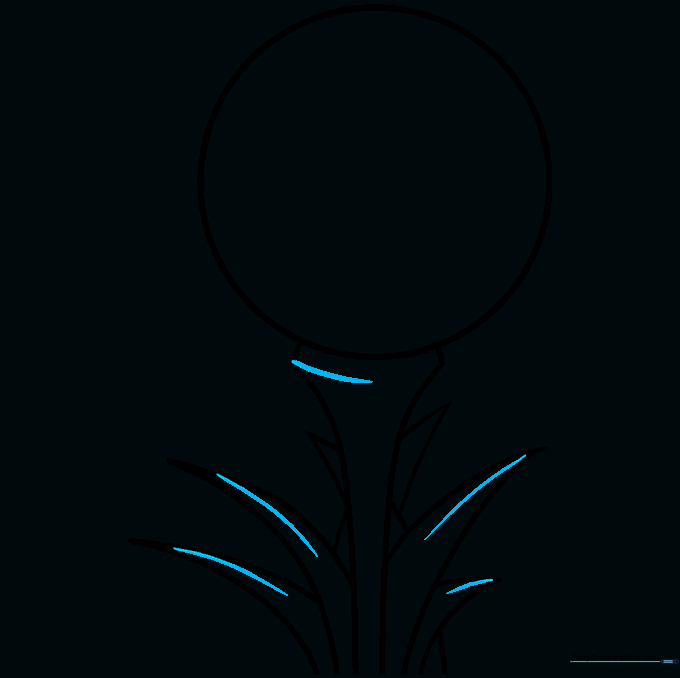
Step 3: Adding Grass Blades

Draw a few blades of grass around the base of the tee using two curved lines that meet at a sharp point. Tip: Vary the height of your grass blades to make the scene look more natural and less uniform.
Step 4: Filling the Foreground
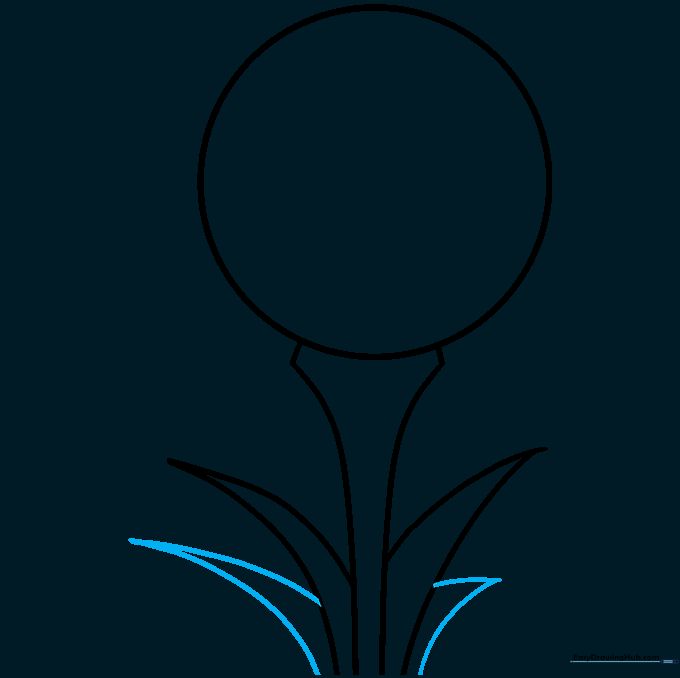
Add more grass blades in the foreground. Tip: Overlap some of the blades to create depth, making it look like the ball is nestled deep in the lawn.
Step 5: Adding Background Grass
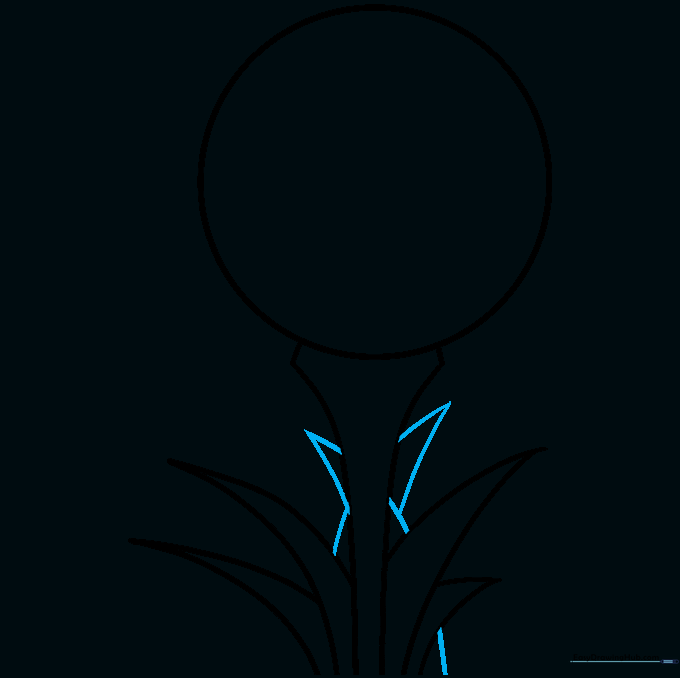
Draw a few more blades behind the tee. Tip: Keep these slightly smaller than the foreground blades to give your drawing a sense of perspective.
Step 6: Refining Details
Add a central vein line to each blade of grass and a curved line across the top of the tee. Tip: Use a steady hand for the tee line to make it look like a solid wooden surface.
Step 7: Drawing the Dimples

Start adding 'C' shaped curves across the ball to represent dimples. Fun Fact: These dimples help the ball fly further by reducing air drag! Tip: Space them out evenly to keep the ball looking spherical.
Step 8: Filling the Surface
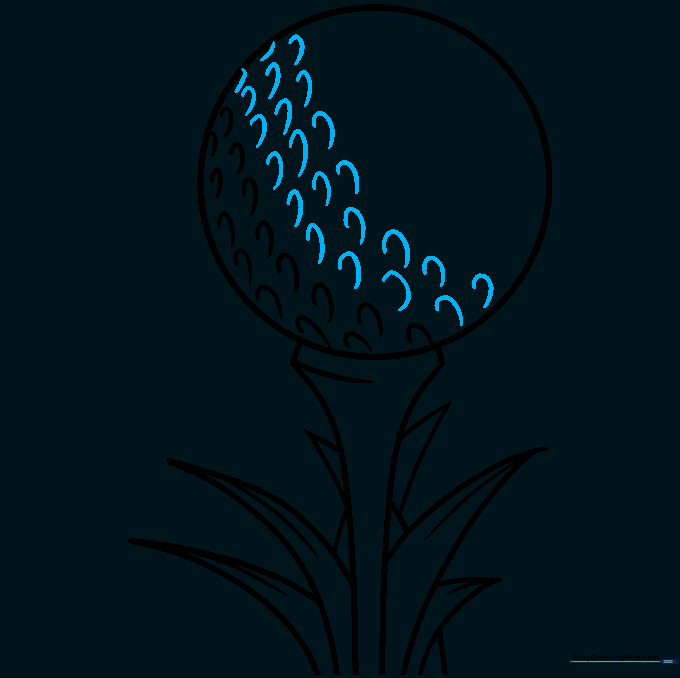
Continue adding rows of dimples. Tip: Try to stagger your rows—like a brick pattern—so the dimples don't look like they are in a straight, boring grid.
Step 9: Finalizing the Texture

Fill in the remaining space with dimples until the entire ball is covered. Tip: Don't worry if they aren't perfect; real golf balls have hundreds of dimples, so a little variation adds character!
Step 10: Adding Color

Time to color! Use white for a classic look, or get creative with neon colors if you're drawing a miniature golf ball. Tip: Use a light grey or blue pencil to lightly shade the edges of the dimples to give the ball a 3D, rounded appearance.
More Tutorials


