How to Draw a Goat Face: Easy 10-Step Guide for Kids
Ready to bring a farmyard friend to life? This tutorial is perfect for young artists ages 5+ to practice symmetry and character design. All you need is a pencil, an eraser, and a piece of paper to start building your goat's expressive face.
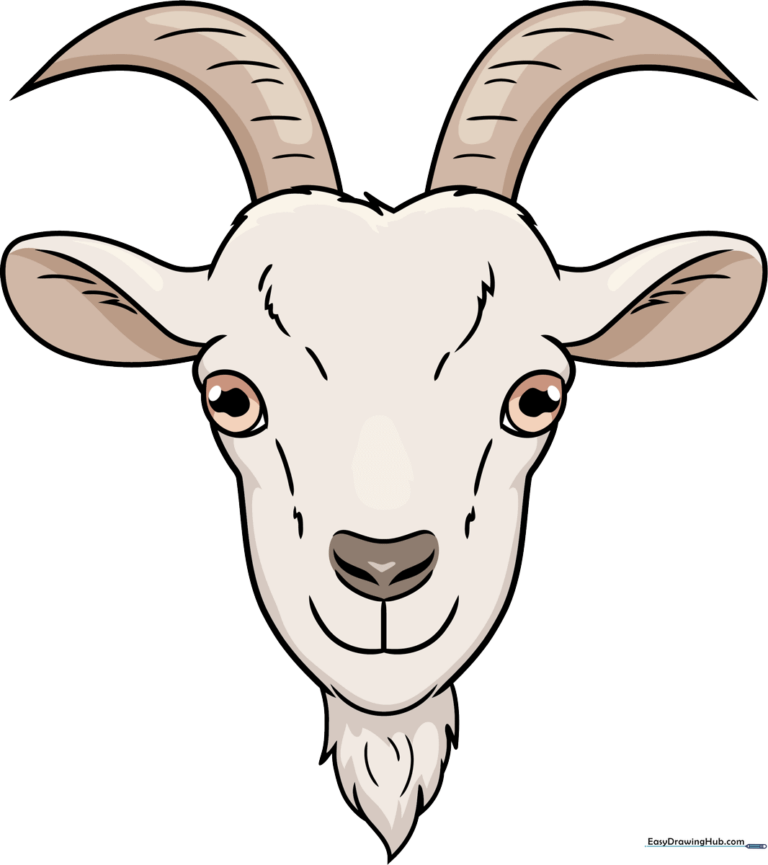
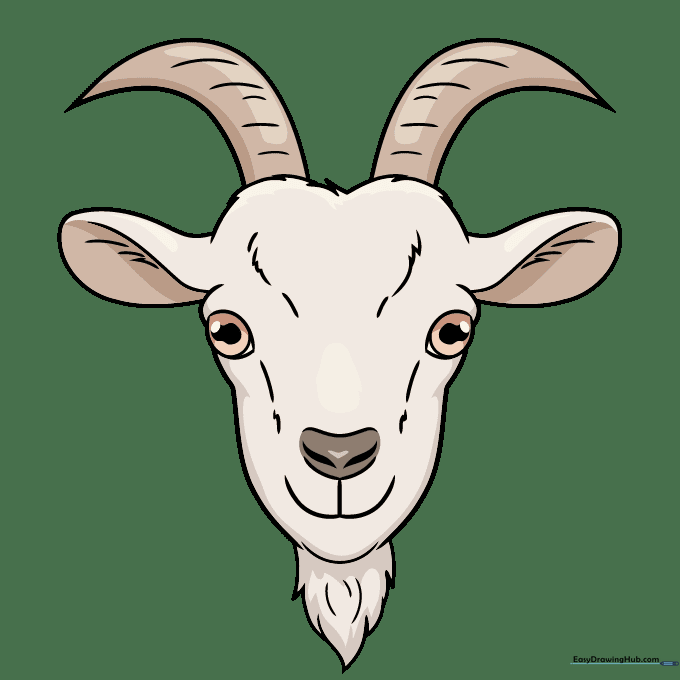
🎯 Final Result
Step-by-Step Instructions
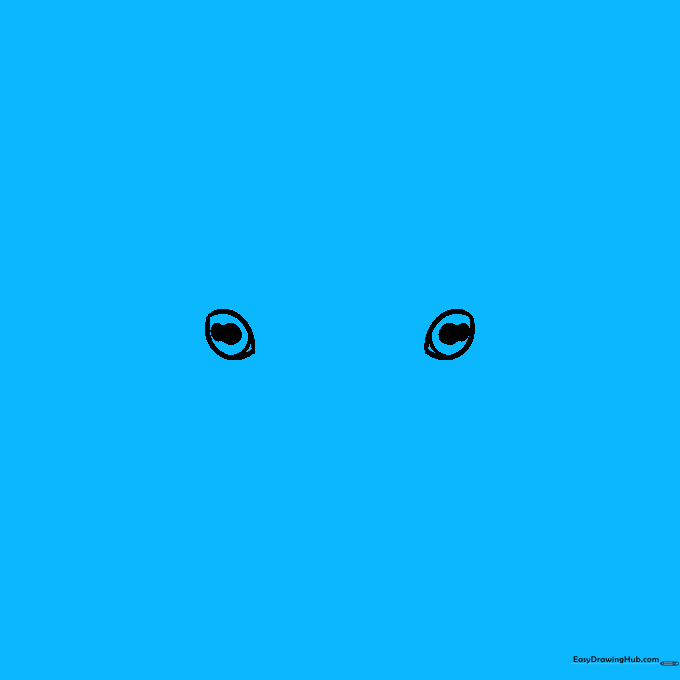
Step 1: Sketching the Goat's Eyes

Draw two curved, double-pointed shapes for the eyes, then add a small curve in the inner corner. Shade two horizontal, overlapping ovals inside each eye to create the goat's unique rectangular pupils. Teacher's Tip: Keep your pencil lines light here so you can easily adjust the shape if needed!
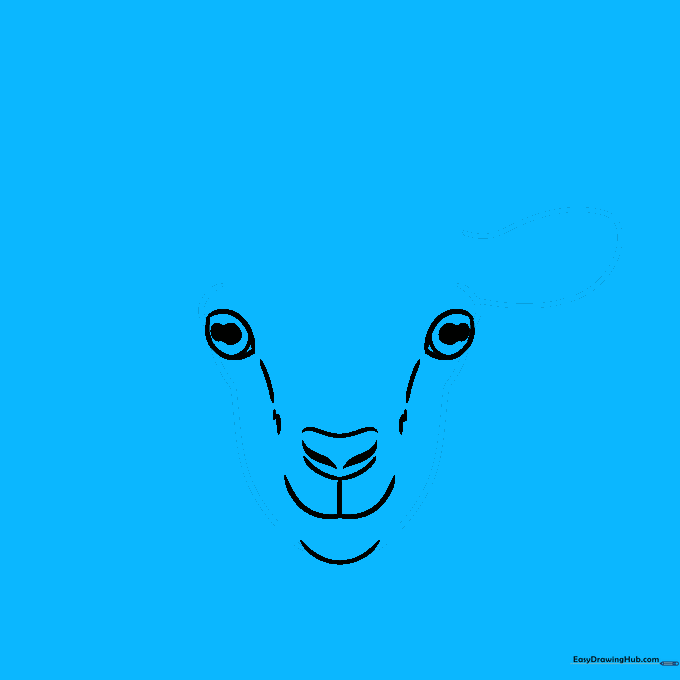
Step 2: Defining the Nose
Add a short line near the inner corner of each eye to frame the snout. Use two gentle curves to outline the top and bottom of the nose, then shade two thick, curved lines for the nostrils. Tip: Goats have very expressive noses; make the nostrils look slightly flared to give your goat personality.
Step 3: Adding the Mouth and Chin

Draw short, jagged lines on either side of the nose to suggest soft fur. Below the nose, sketch a rounded 'W' shape for the upper lip, followed by a soft curve underneath for the chin. Tip: Use quick, flicking motions with your pencil to make the fur look natural and fluffy.
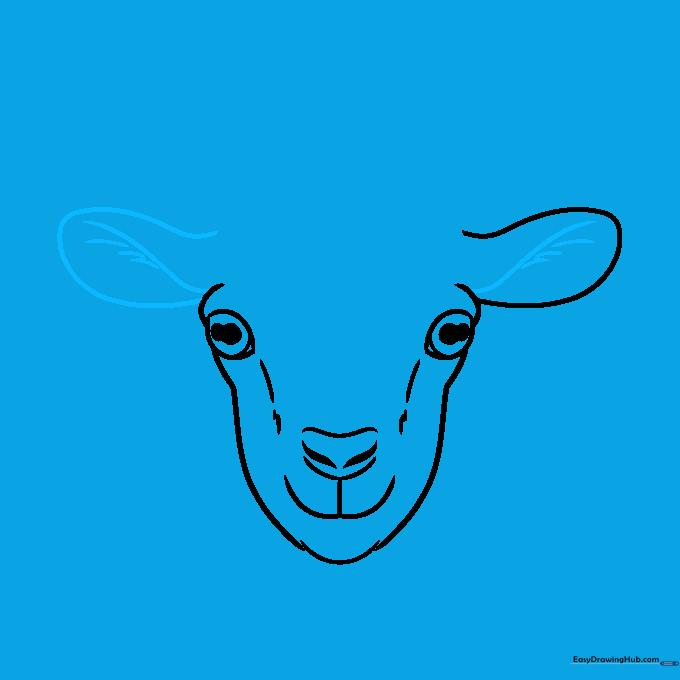
Step 4: Shaping the Head and First Ear
Connect the eyes and chin with smooth, curved lines to form the face shape. Add a brow line above each eye, then draw a long, curved ear that doubles back on itself. Tip: Goats have long, floppy ears—don't be afraid to make them nice and large!
Step 5: Adding the Second Ear
Mirror the first ear on the other side of the head. Add a long, curved line inside each ear to show depth. Tip: Adding these inner lines helps the ears look three-dimensional rather than flat.
Step 6: Creating the Furry Top
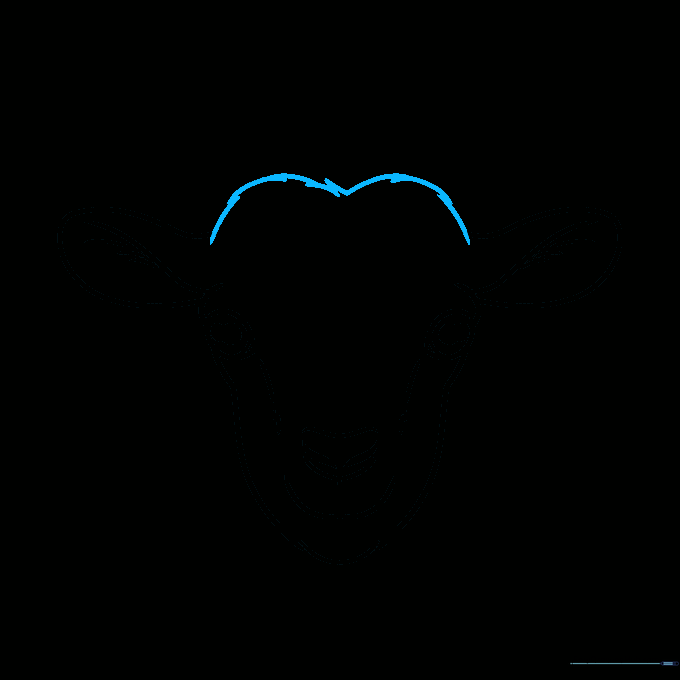
Use a series of overlapping, curved lines to close the top of the head. This creates a tuft of hair between the ears. Tip: Vary the size of your curves to make the fur look realistic and messy.
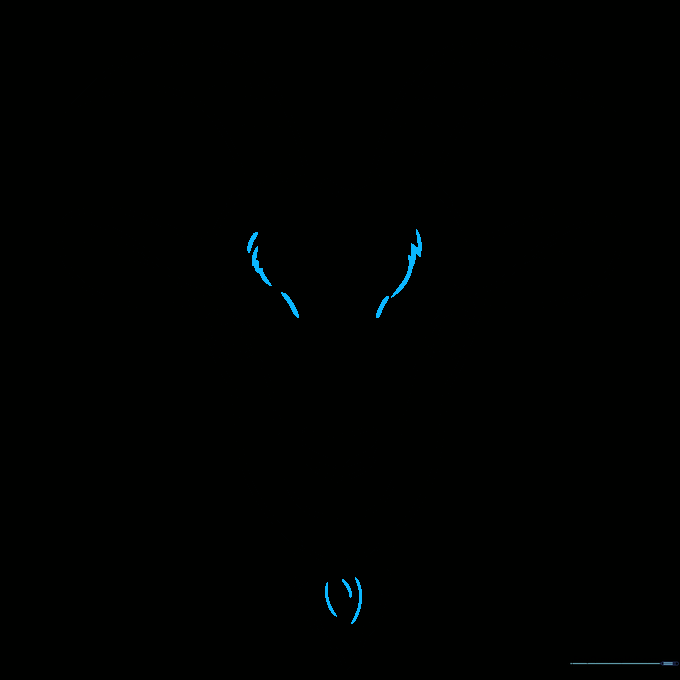
Step 7: Drawing the Horns

Sketch two curved, pointed horns on top of the head. Add small horizontal lines along the horns for texture. Tip: Did you know that goats use these horns to establish their place in the herd? They are a key feature of a happy goat!
Step 8: Adding the Beard

Every goat needs a beard! Use short, jagged lines under the chin to create a scruffy, textured look. Tip: Keep the lines pointing downward to mimic the way hair grows on a goat's chin.
Step 9: Final Details
Add a few extra short lines around the forehead and beard to emphasize the fur texture. This is your chance to clean up any stray lines and make your goat look extra fluffy. Tip: Don't overdo it—a few well-placed lines are better than too many!
Step 10: Bring Your Goat to Life with Color
Time to color! We chose a creamy white, but goats come in many beautiful shades like brown, gray, and black. Try adding spots or patches to make your goat unique. Tip: Use light pressure with your crayons to create a soft, natural fur look.
More Tutorials


