How to Draw a Gazelle: Easy 10-Step Guide for Kids
Bring the African savanna to life with this fun, beginner-friendly gazelle drawing guide. Designed for ages 5 and up, this project requires only a pencil, paper, and an eraser. Follow these simple steps to build confidence in your sketching skills while creating a charming cartoon animal.
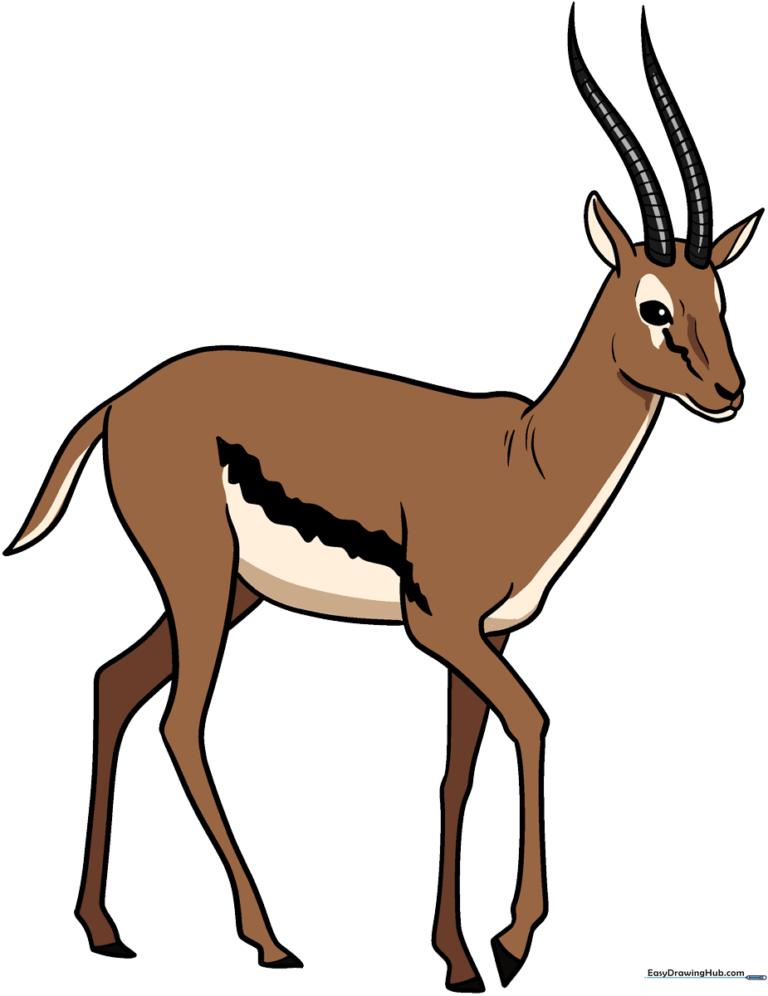
🎯 Final Result
Step-by-Step Instructions
Step 1: Sketching the Gazelle's Face
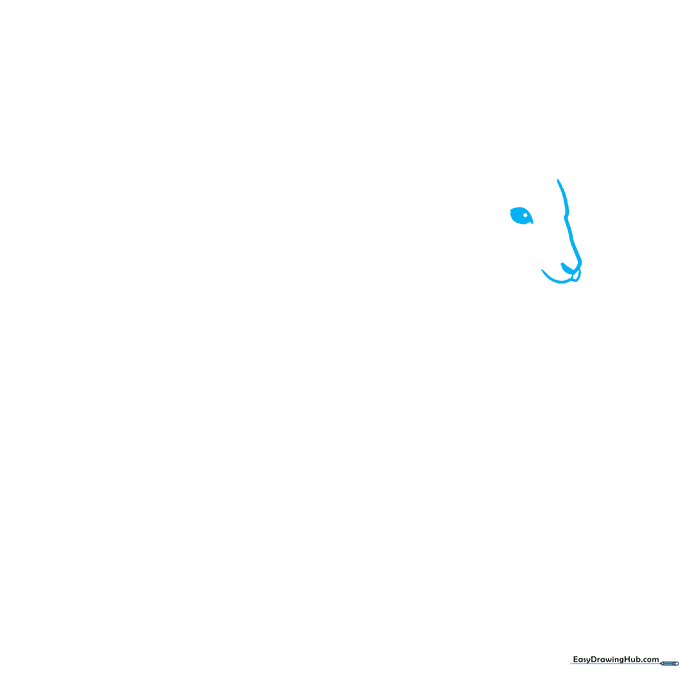
Start by drawing the gazelle's profile using soft, curved lines for the nose and muzzle. For the eye, draw an almond shape with a small circle inside. Tip: Keep your pencil pressure light so you can easily refine the shape of the nose later.
Step 2: Defining the Jaw and Ear
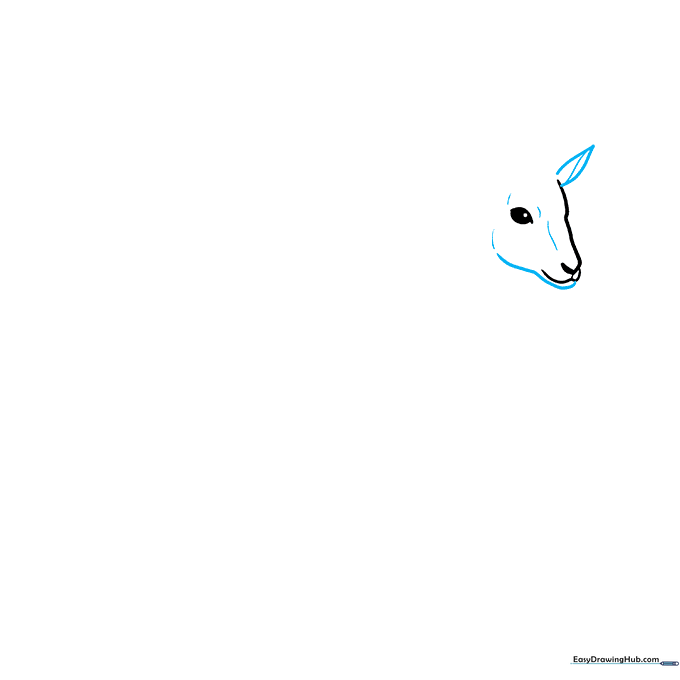
Draw the bottom of the jaw with a smooth curve and add the ear using two lines that meet at a point. Tip: Think of the ear as a leaf shape; keep it slightly pointed to give your gazelle an alert look.
Step 3: Adding Horns and Second Ear
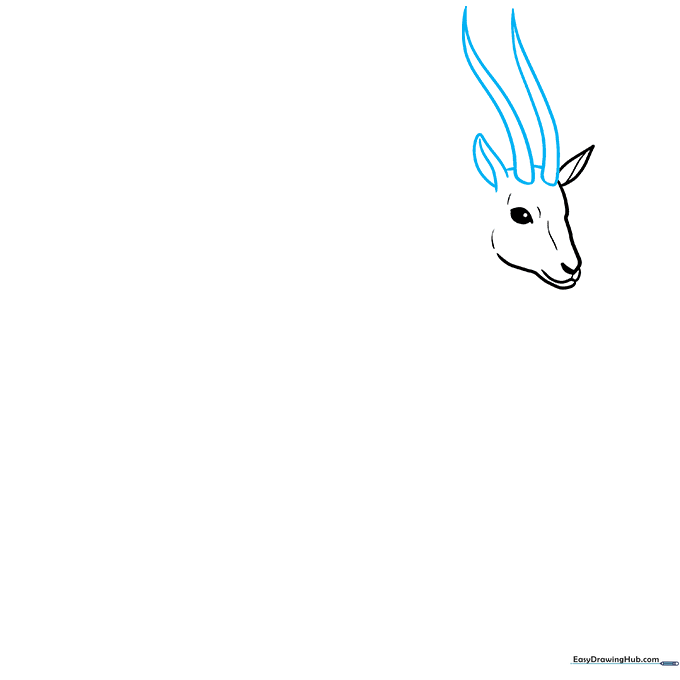
Add the second ear and two long, slender horns on top of the head. Tip: Gazelle horns have a slight curve, so try to draw them with a gentle 'S' shape rather than perfectly straight lines.
Step 4: Detailing Horns and Neck
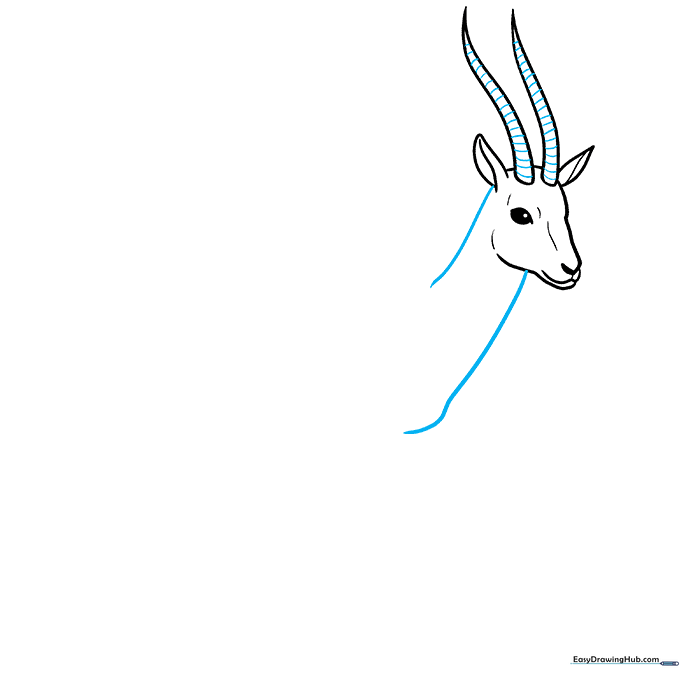
Add small horizontal lines along the horns to create texture. Then, draw two long, graceful lines extending down from the head to form the neck. Tip: Use long, sweeping strokes for the neck to make the gazelle look elegant.
Step 5: Sketching the Front Leg
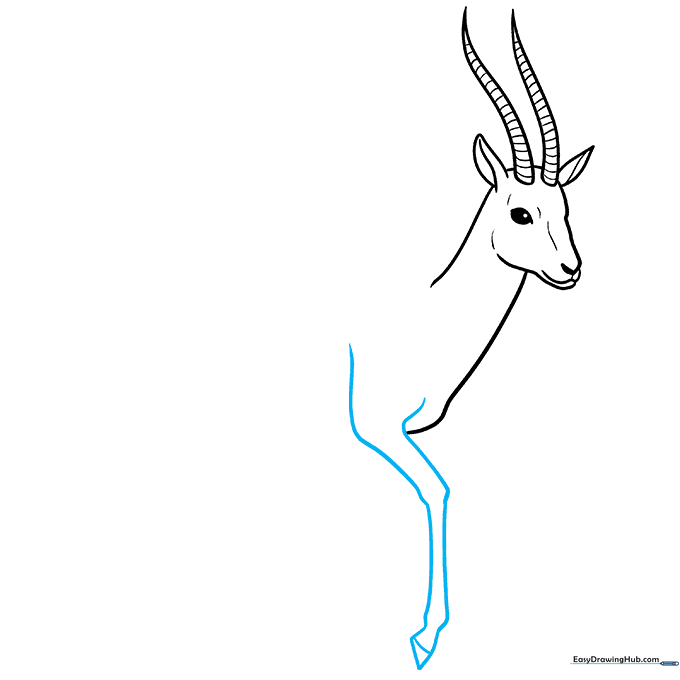
Draw the front leg with a slight bulge at the knee joint. Connect the bottom with a small horizontal line to create the hoof. Tip: Gazelle legs are very thin, so keep your lines close together.
Step 6: Adding the Second Leg and Belly
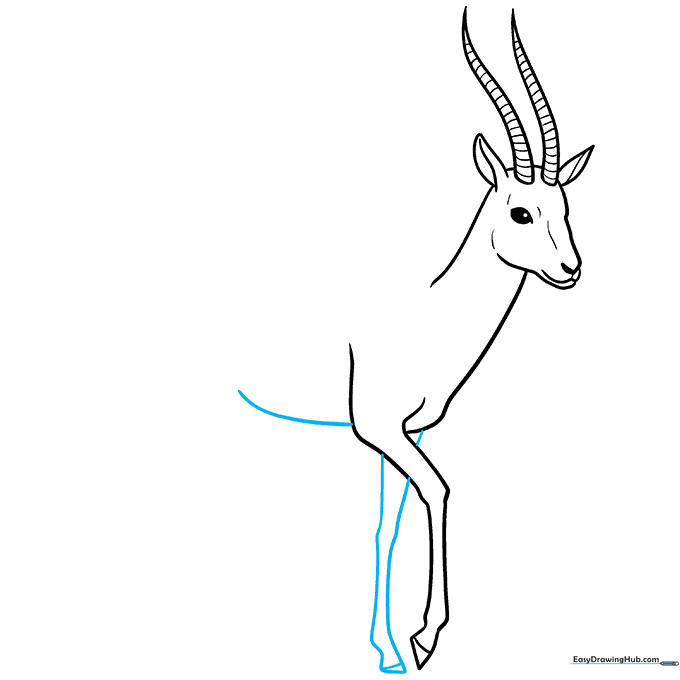
Draw the second front leg slightly behind the first one, then connect them with a curved line to form the belly. Tip: The belly line should be a gentle curve, not a flat line, to give the animal a realistic shape.
Step 7: Drawing the First Rear Leg
Sketch the first rear leg using two curved lines that taper toward the hoof. Tip: The rear leg is usually thicker at the top near the hip than at the bottom.
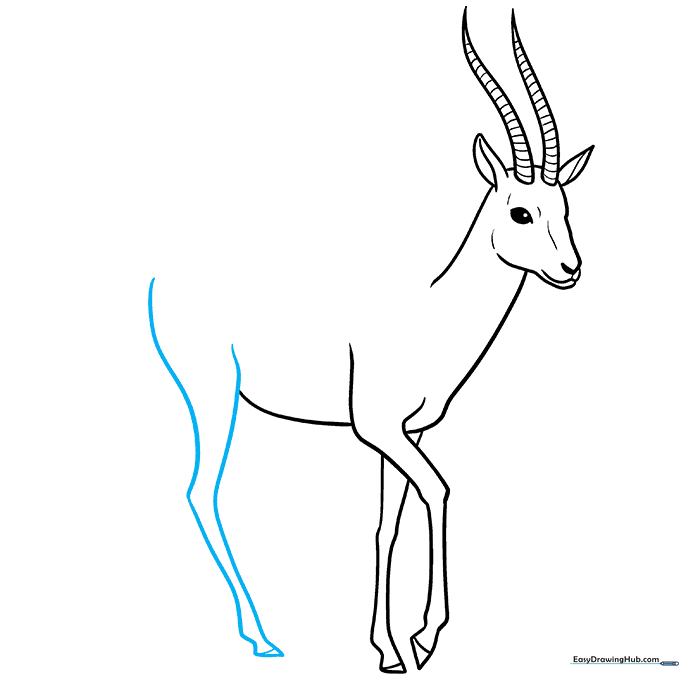
Step 8: Completing the Legs and Tail
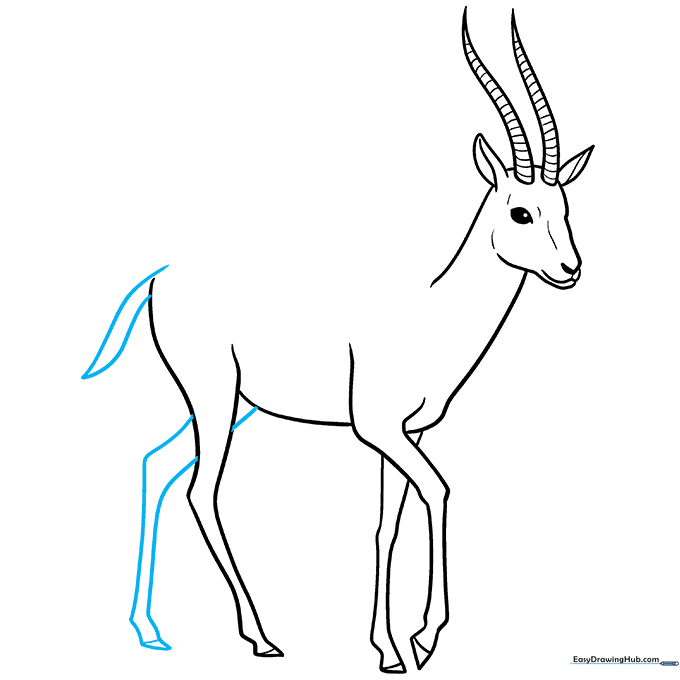
Add the final rear leg and a small, pointed tail. Tip: Keep the tail short and flicked upward to show that your gazelle is ready to run!
Step 9: Finalizing the Outline
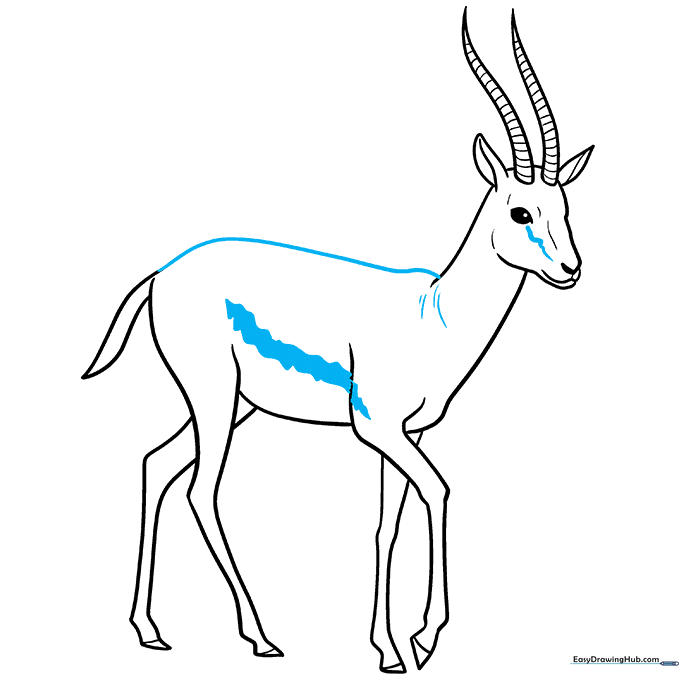
Connect the tail to the neck with a smooth back line. Add wavy stripes on the face and side for detail. Tip: Use a darker pencil or pen to trace your final lines, then erase the extra construction marks.
Step 10: Bringing Your Gazelle to Life with Color

Time to color! Use warm browns and creams to fill in your gazelle. Tip: Use a black marker for the side stripe to make it stand out against the lighter fur.
More Tutorials


