How to Draw a Furry: Easy Step-by-Step Guide for Beginners
Ready to bring your own character to life? This tutorial is perfect for artists ages 8+ looking to master anthropomorphic features. Grab a pencil, an eraser, and some paper to start building your unique character design through these simple, guided shapes.
🎯 Final Result

Step-by-Step Instructions
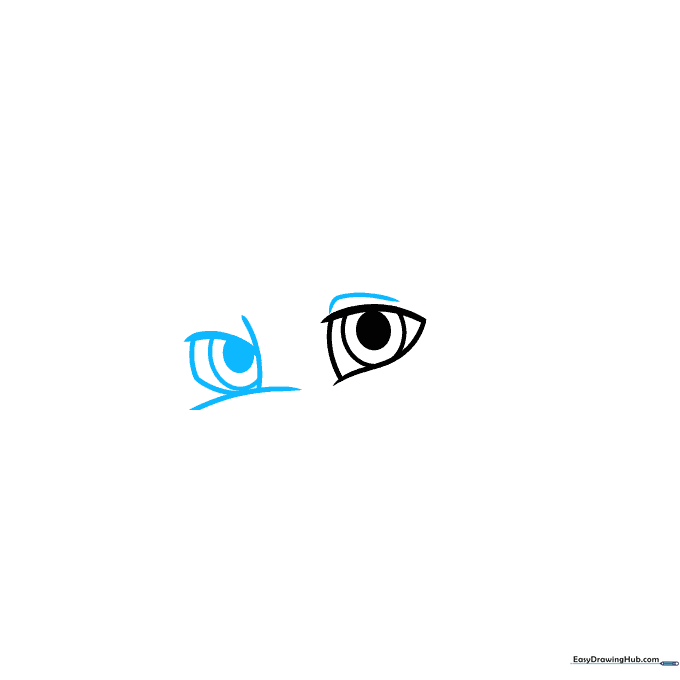
Step 1: Sketching the First Eye

Start by drawing a curved, triangular shape for the eye. Place two circles inside for the iris and pupil, then shade the pupil dark. Teacher's Tip: Keep your pencil lines light so you can easily adjust the eye placement later.
Step 2: Adding the Nose and Second Eye
Draw a small inverted 'T' shape for the nose, then mirror the eye shape on the other side. Tip: Use the nose as a center point to make sure your eyes are symmetrical.
Step 3: Defining the Snout and Smile
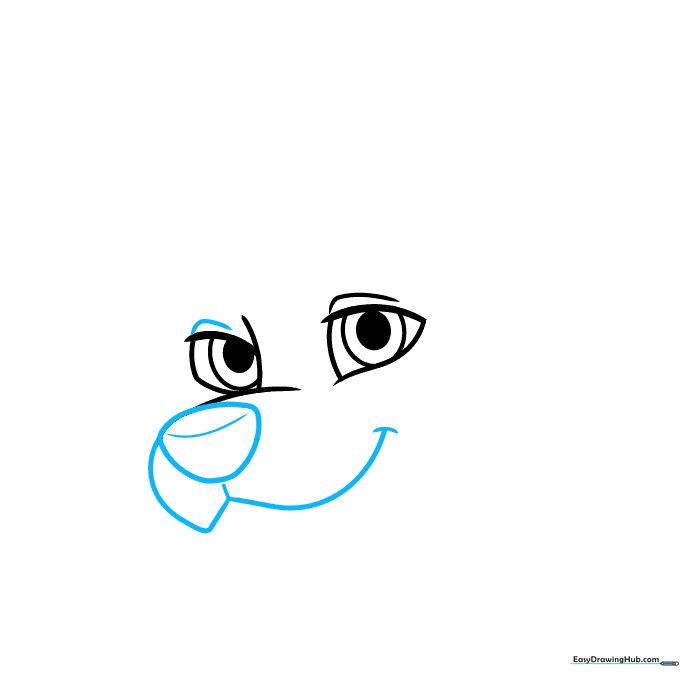
Use a 'W' shaped line to form the snout and a friendly smile. Add small, short strokes under the nose for texture. Tip: A gentle curve on the mouth makes the character look approachable.
Step 4: Jawline and Eyebrows
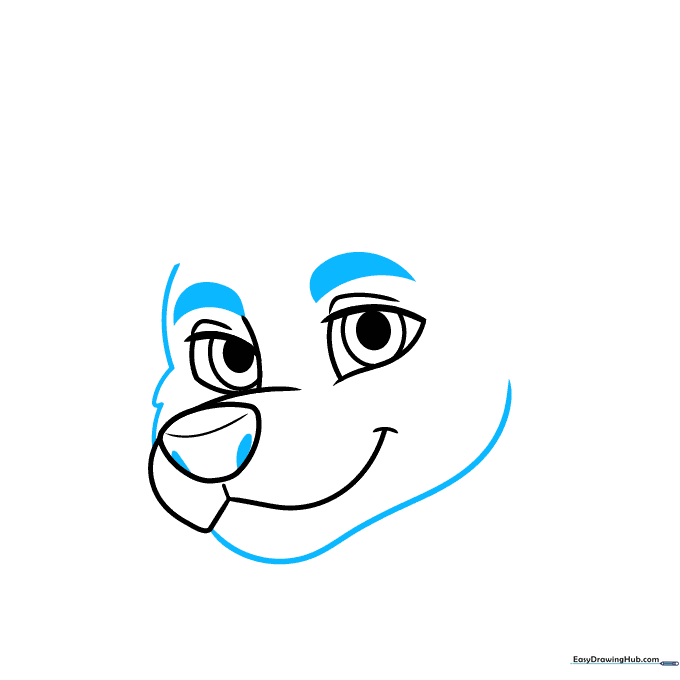
Draw a long, curved jawline and add pointed, shaded shapes above the eyes for expressive eyebrows. Tip: Vary the thickness of your lines to give the face more depth.
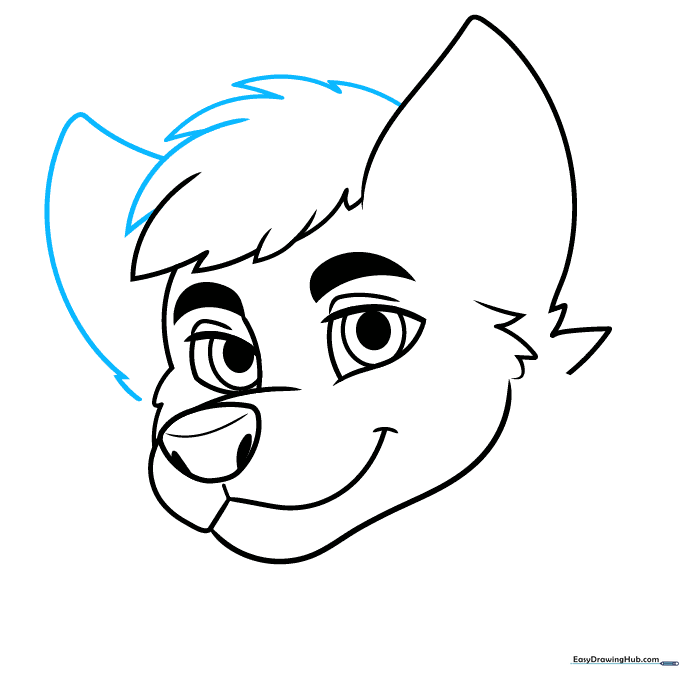
Step 5: Adding the First Ear
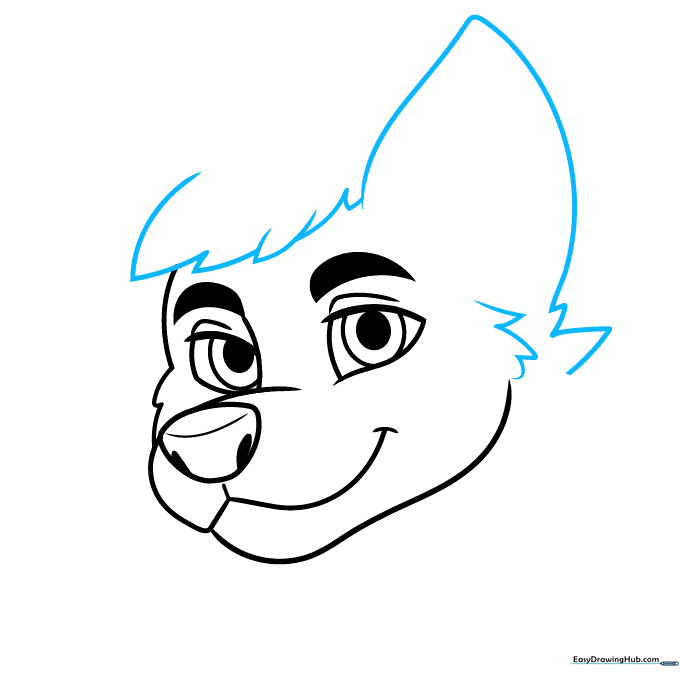
Use connected, curved lines to draw a large triangular ear with tufts of fur at the base. Tip: Don't worry about making the fur lines perfect; jagged lines look more natural.
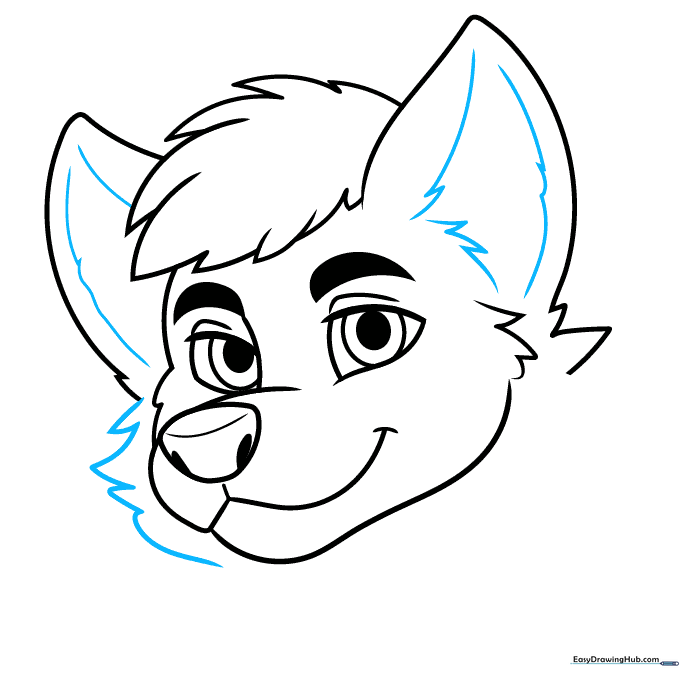
Step 6: Completing the Head Shape
Draw the second ear and connect the hair on top using jagged, overlapping lines. Tip: Use a 'zigzag' motion with your pencil to create the illusion of fluffy hair.
Step 7: Adding Inner Ear Detail
Add detail inside the ears with smaller, jagged lines to show depth. Tip: Keep these lines sparse to avoid cluttering the drawing.
Step 8: Adding Neck and Shoulder Fur
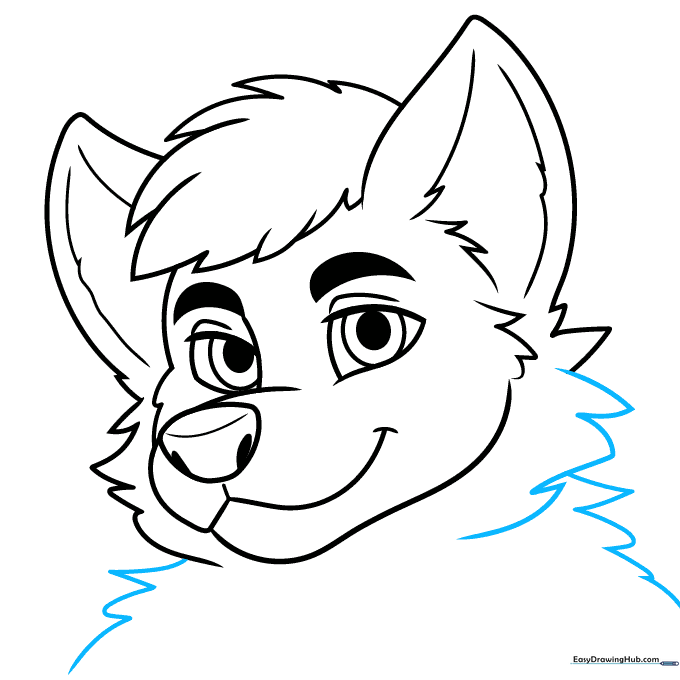
Extend the fur lines down to the neck and shoulders. Tip: Use longer, flowing strokes here to represent the transition from head to body.
Step 9: Finalizing the Outline
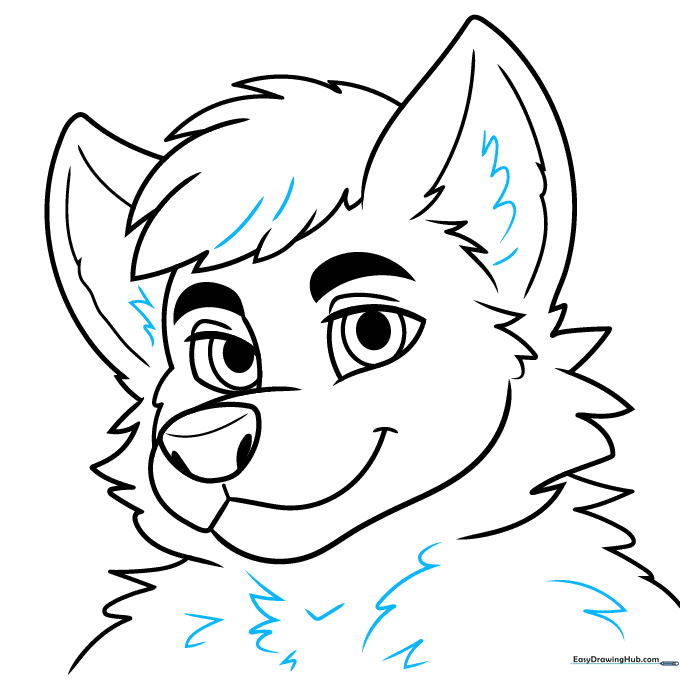
Go over your lines to ensure the fur texture looks consistent across the head and chest. Tip: Erase any stray guidelines now to clean up your character sketch.
Step 10: Bringing Your Character to Life with Color

Time to color! Use natural tones for a realistic look, or experiment with vibrant, creative colors to make your character stand out. Tip: Use lighter shades for the muzzle and darker shades for the fur tips to create a 3D effect.
More Tutorials


