How to Draw a Fried Egg: Easy 10-Step Guide for Kids
This breakfast-themed drawing lesson is perfect for young artists ages 5 and up. All you need is a pencil, an eraser, and your favorite coloring tools to bring this sunny-side-up egg to life. Follow along to practice drawing organic, wavy shapes and perfect circles.
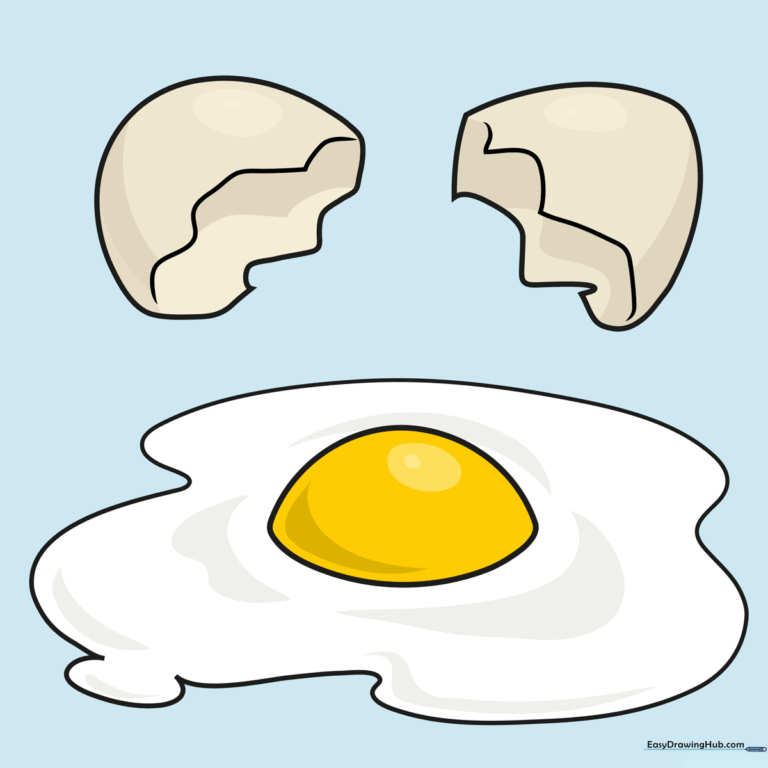
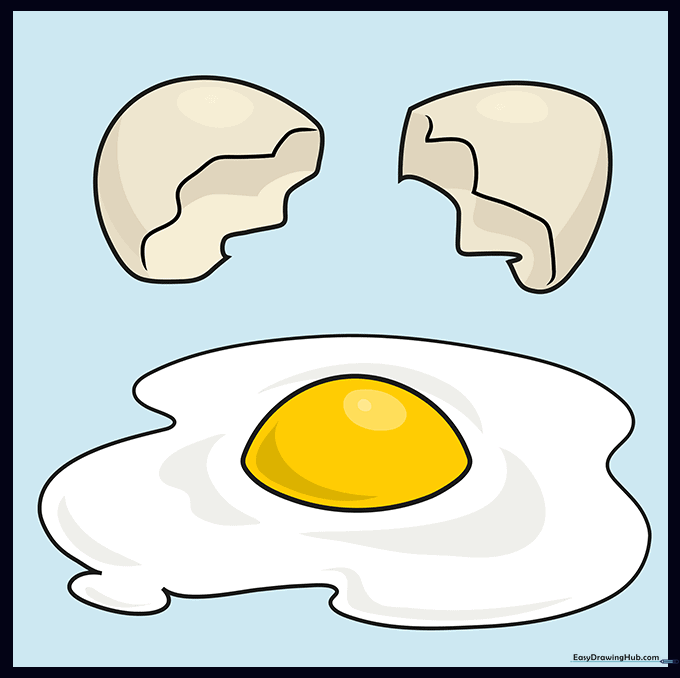
🎯 Final Result
Step-by-Step Instructions
Step 1: Sketching the Egg White Base

Start by drawing a long, gentle curved line to form the first edge of the egg white. Teacher's Tip: Keep your pencil pressure light so you can easily adjust the shape later if it looks too symmetrical!
Step 2: Adding Wavy Edges

Continue the outline by adding a series of curved lines of varying lengths. Teacher's Tip: Don't worry about making it perfect; real fried eggs have irregular, wiggly edges, so embrace the wiggles!
Step 3: Closing the Shape and Adding the Yolk

Connect the ends of your wavy lines to close the egg white. Then, draw a half-circle in the center for the yolk. Teacher's Tip: A yolk isn't a perfect circle, so make it slightly flattened to look more realistic.
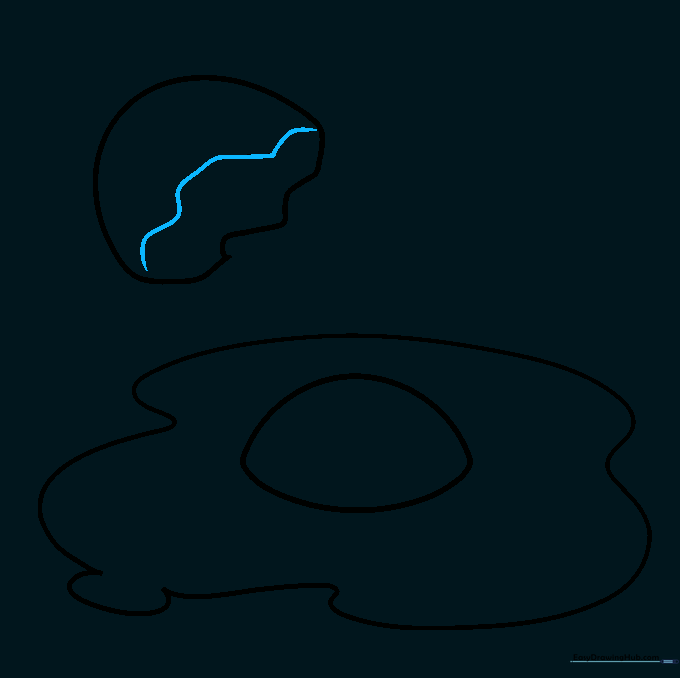
Step 4: Starting the Eggshell

Close the yolk with a curved line, then draw a large 'C' shape hovering above the egg. This is the start of your broken eggshell. Teacher's Tip: Think of this as a 'cap' for your egg.
Step 5: Defining the Shell Edge

Use a series of jagged, wavy lines to connect the ends of your eggshell. Teacher's Tip: Make the lines meet at sharp points to mimic the look of a cracked, brittle shell.
Step 6: Adding Depth to the Shell
Draw curved lines across the inside of the shell to show the thickness of the opening. Teacher's Tip: This small detail adds a 3D effect, making the shell look hollow.
Step 7: Sketching the Second Shell Half
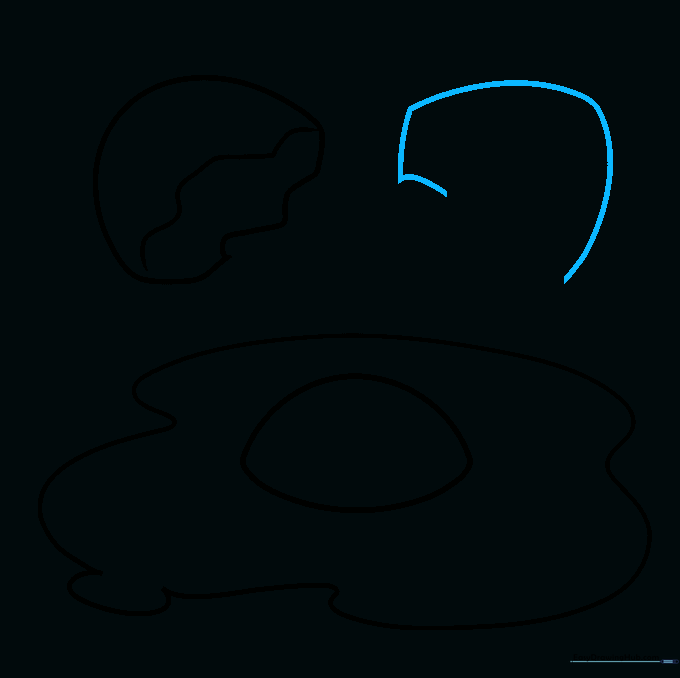
Draw another set of curved lines to outline the second piece of the broken shell. Teacher's Tip: Position this piece slightly offset to make it look like the egg was just cracked open.
Step 8: Completing the Shell Structure

Connect your lines to finish the shape of the second shell piece. Teacher's Tip: Keep your lines fluid to ensure the shell looks like a natural, curved object.
Step 9: Final Shell Details
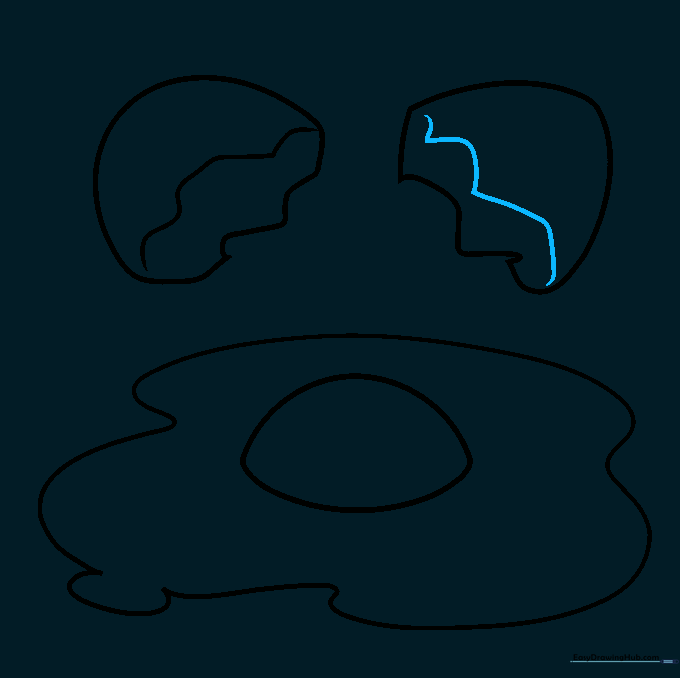
Add final curved lines across the second shell piece to indicate the hollow opening. Teacher's Tip: Ensure these lines match the style of the first shell piece for consistency.
Step 10: Bringing It to Life with Color
Color your egg! Use bright white for the egg white and a vibrant yellow or orange for the yolk. Teacher's Tip: Try using light brown or grey for the shell to give it a realistic texture, or get creative with blue or speckled patterns for a fantasy egg!
More Tutorials


