How to Draw a Freesia: Easy 10-Step Flower Tutorial
Bring the beauty of spring to your sketchbook with this beginner-friendly freesia tutorial. Designed for artists ages 5 and up, this lesson uses basic shapes to build a complex-looking flower. Grab your pencil, eraser, and paper to start creating your own botanical masterpiece.
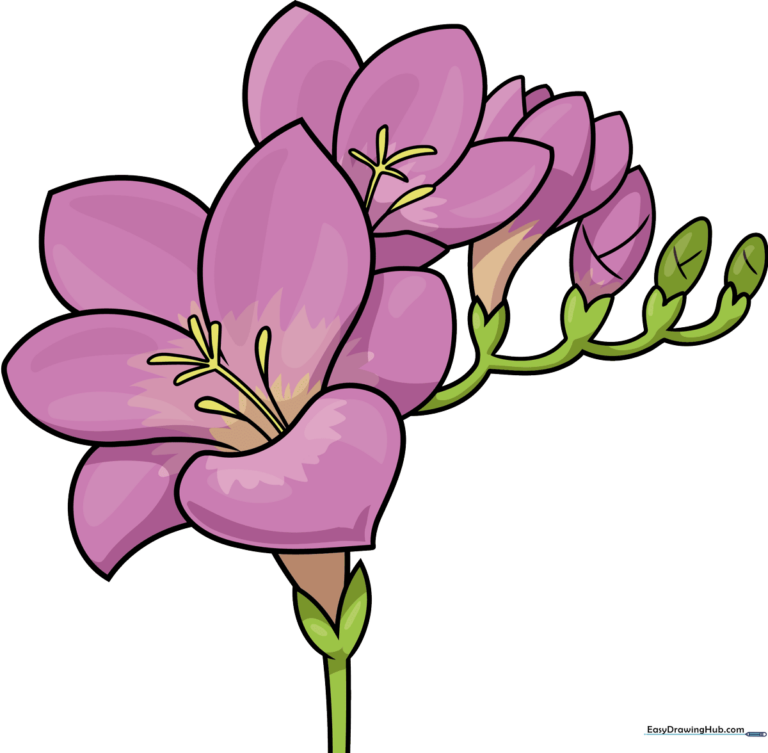
🎯 Final Result
Step-by-Step Instructions
Step 1: Sketching the Primary Petal
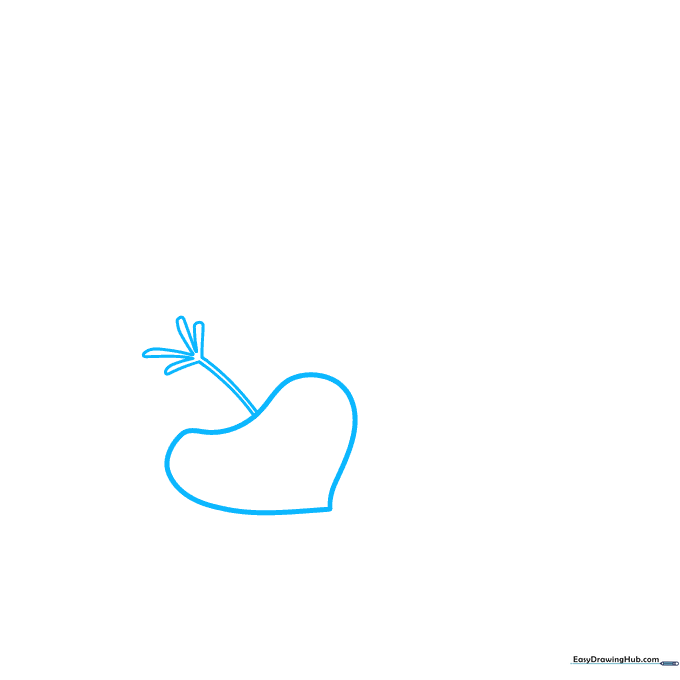
Start by drawing a heart-shaped petal near the top of your page. Extend two curved lines downward to form the pistil, and add four tiny 'U' shapes at the tip for the stigma. Teacher's Tip: Keep your pencil pressure light here so you can easily adjust the shape later.
Step 2: Adding Side Petals and Stamens
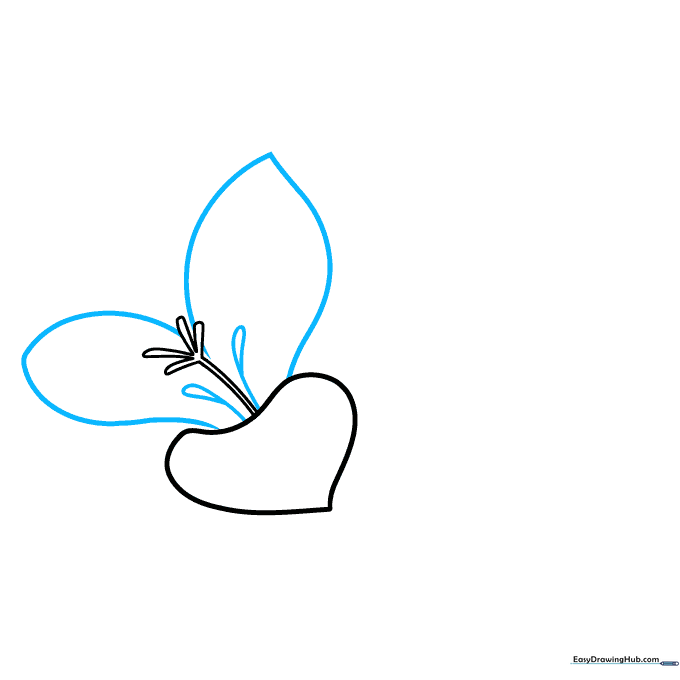
Enclose two additional petals on either side using curved lines that meet at soft points. Add the pollen-bearing stamens by drawing small, teardrop-shaped lines near the center. Teacher's Tip: Think of the stamens as little 'drops' of pollen hanging inside the bloom.
Step 3: Completing the First Bloom
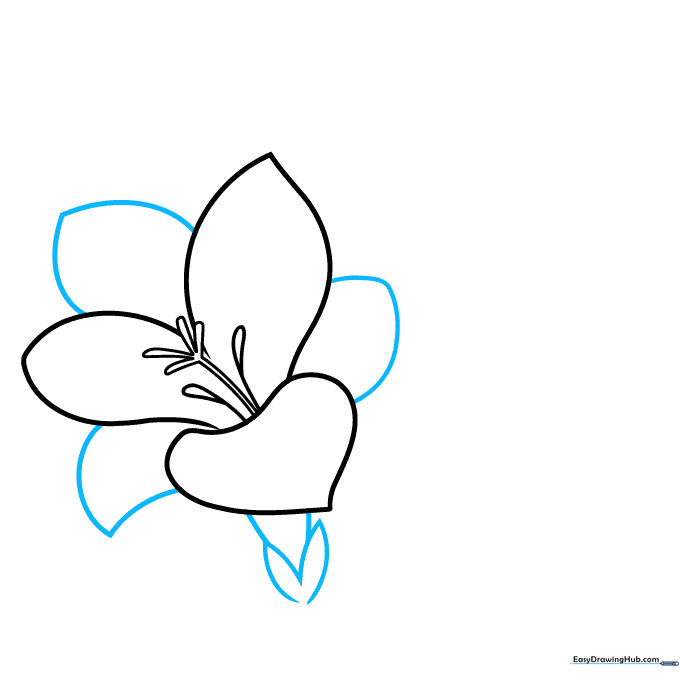
Fill in the gaps with three more petals, ensuring they meet at gentle points. Below the flower, draw a curved 'M' shape to represent the sepals. Connect the flower head to the sepals with two short, parallel lines. Teacher's Tip: The sepals act as the 'cup' that holds the flower steady on the stem.
Step 4: Starting the Second Flower
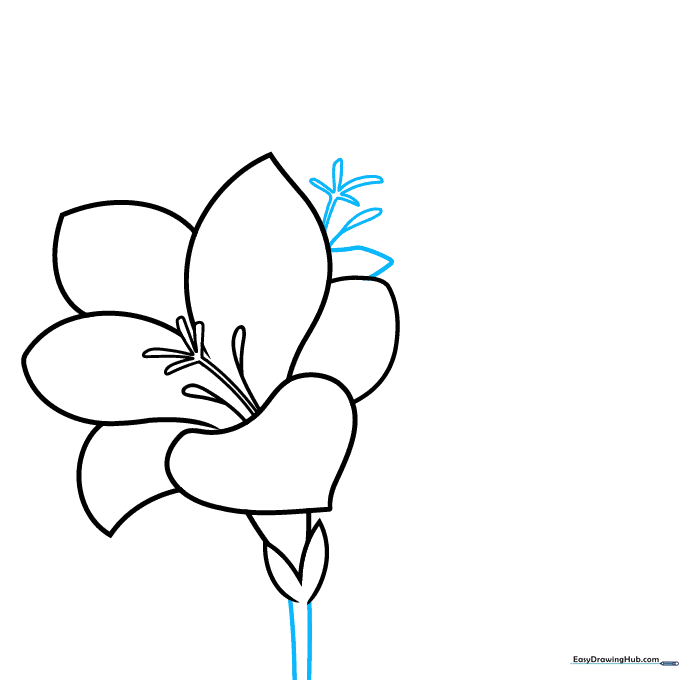
Extend two lines down from the sepals to start your stem. Now, sketch a second flower partially tucked behind the first. Include a pointed petal, a teardrop stamen, and a small star-shaped pistil. Teacher's Tip: Overlapping shapes creates a sense of depth in your drawing.
Step 5: Defining the Second Bloom
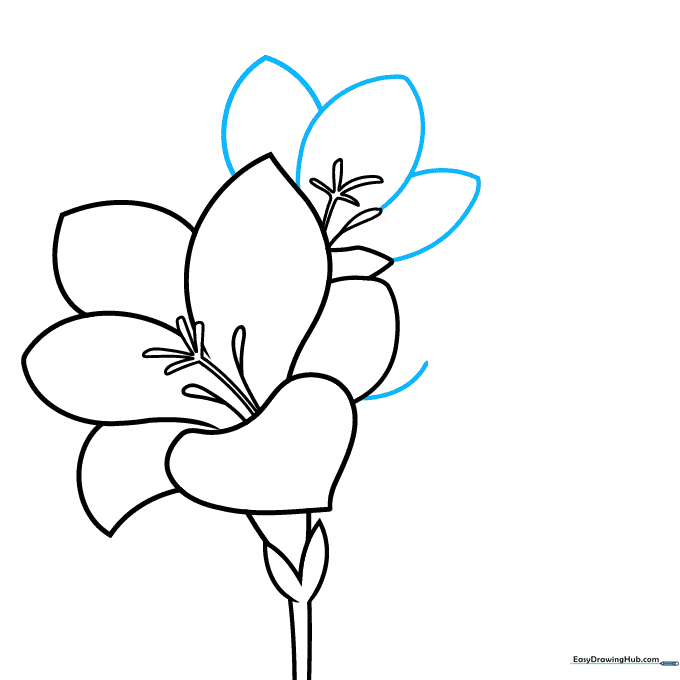
Finish the second flower by adding more petals around the center. Use pairs of curved lines that meet at soft points to keep the look organic. Teacher's Tip: Vary the size of your petals slightly to make the flower look more natural.
Step 6: Adding an Unopened Bud
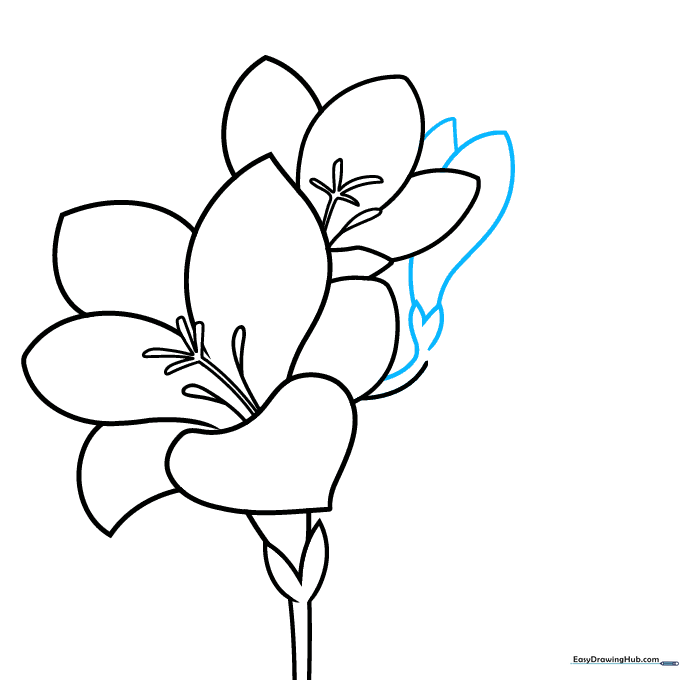
Draw a third, unopened blossom to the side. Extend two curved lines from the first flower and cap them with a heart-shaped sepal. Add two petals inside using gentle, curved strokes. Teacher's Tip: Buds are tighter and more compact than open flowers, so keep your lines closer together.
Step 7: Expanding the Stem
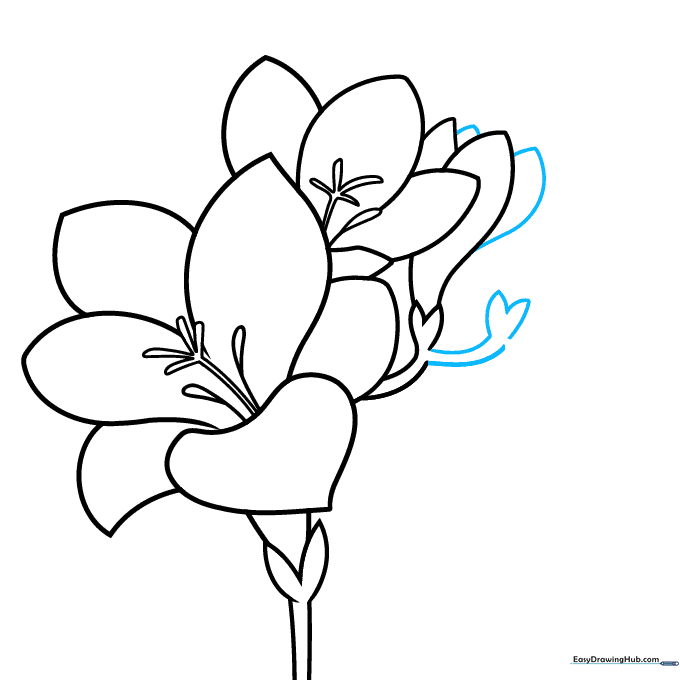
Add two more pointed petals behind the first bloom. Below the sepal, extend a new stem section with another heart-shaped sepal at the end. Teacher's Tip: Freesias grow in a cluster, so don't be afraid to let your stems overlap.
Step 8: Adding More Buds
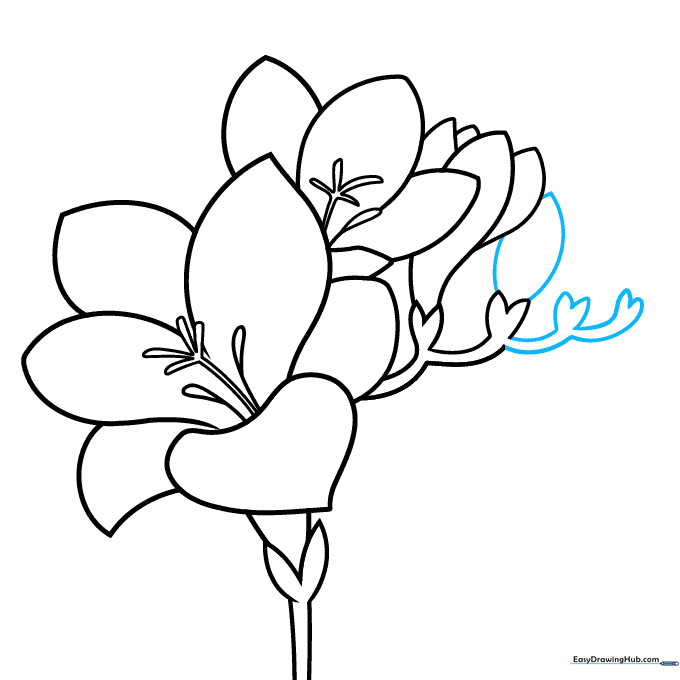
Draw another bud on top of the sepal using curved lines. Continue extending the stem with additional heart-shaped sepals to create a full, realistic look. Teacher's Tip: Keep your lines fluid to mimic the natural growth of a flower stem.
Step 9: Final Details
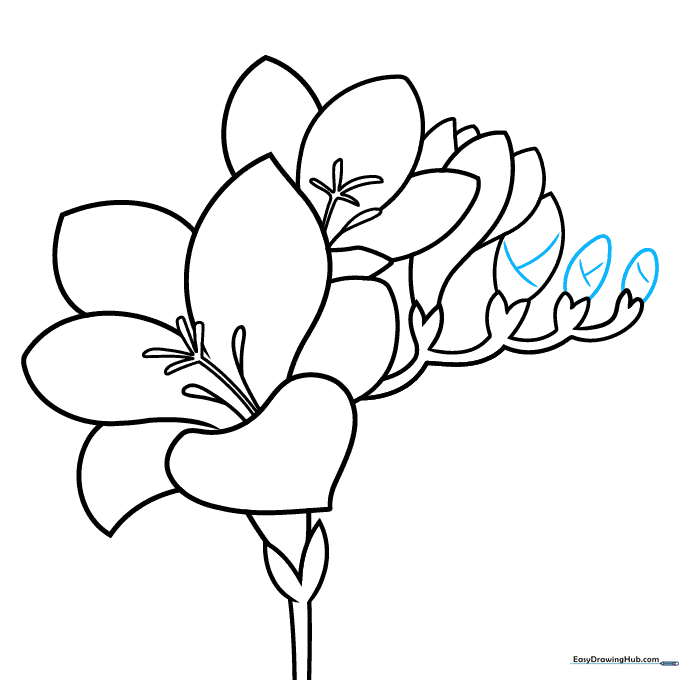
Add 'Y' shaped curved lines across your unopened buds to suggest the texture of petals waiting to unfurl. Teacher's Tip: These small details add a professional touch to your botanical drawing.
Step 10: Bring Your Freesia to Life with Color
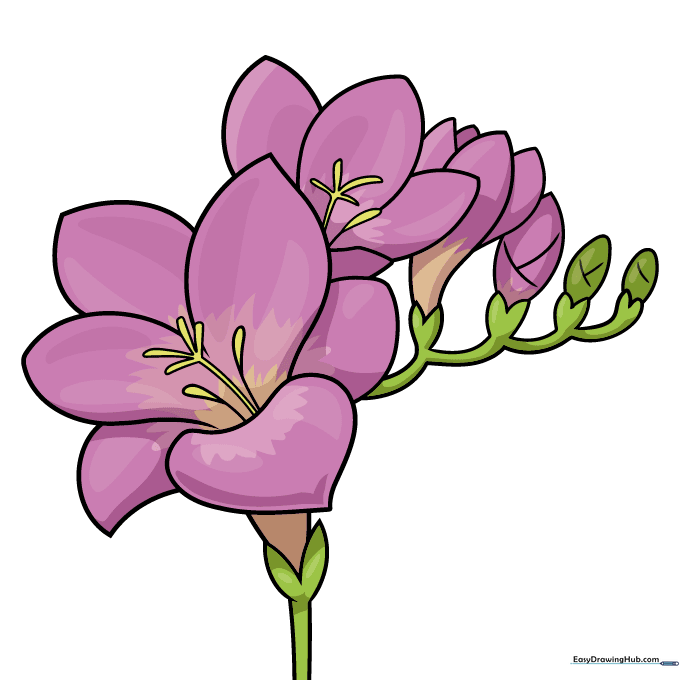
Your outline is complete! Now, add color. While we used purple, freesias bloom in vibrant shades of red, yellow, pink, and white. Teacher's Tip: Use a lighter shade for the base of the petals and a darker shade near the center to create a realistic 3D effect.
More Tutorials


