How to Draw a Fox Face: Easy 10-Step Guide for Kids
Ready to bring a clever woodland friend to life? This tutorial is perfect for young artists ages 5 and up. All you need is a pencil, an eraser, and your favorite markers to master this expressive fox face and build your confidence in drawing animal features.
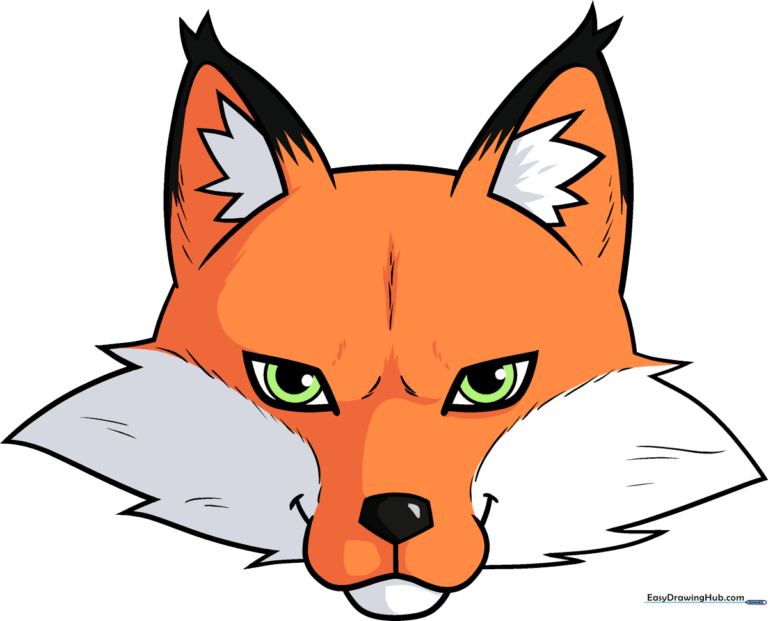
🎯 Final Result
Step-by-Step Instructions
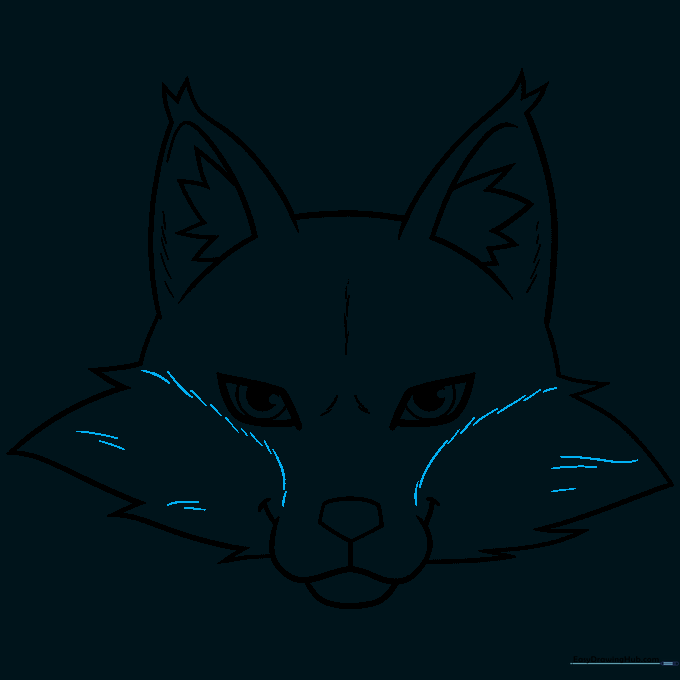
Step 1: Sketching the Expressive Eyes

Draw two diagonal lines for each eye, then connect them with a soft curve. Add two circles inside each eye, leaving a small white dot for the pupil's highlight. Teacher's Tip: Keep the eyes level to ensure your fox looks friendly and balanced.
Step 2: Defining the Muzzle

Underneath the eyes, draw a semi-hexagon with a gentle curve on top. Add a round W-shape below for the mouth, and place small dashes on either side for whiskers. Teacher's Tip: Use a light touch here; the muzzle is the center of the fox's expression.
Step 3: Adding Facial Structure
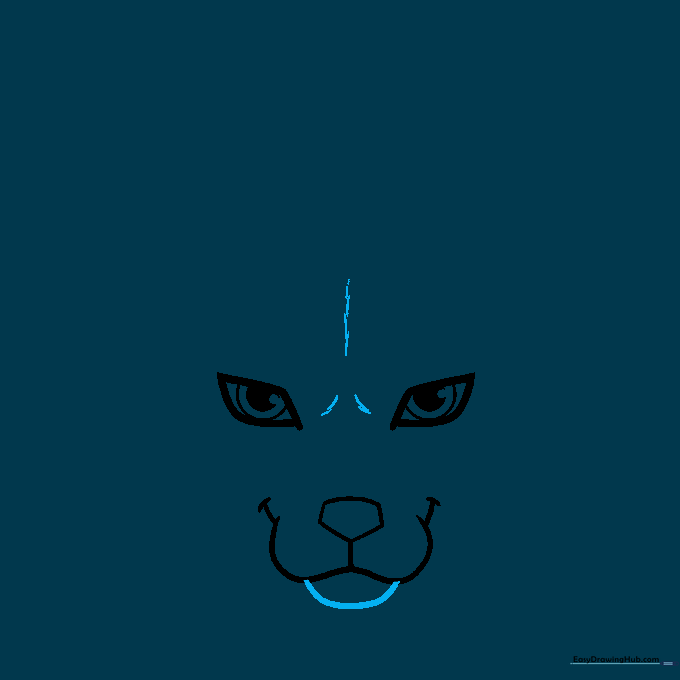
Draw a soft curve beneath the mouth to define the chin. Sketch small dashes above and between the eyes to map out the fur pattern. Teacher's Tip: These dashes act as a guide for where the fur color changes later.
Step 4: Outlining the Right Cheek
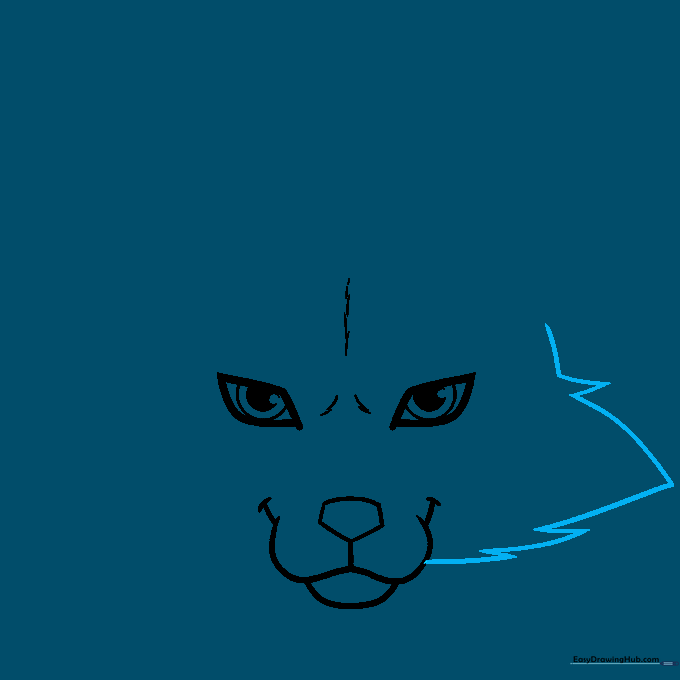
On the right side, outline the head using loose, sketchy triangles to represent fluffy fur. Teacher's Tip: Don't make the triangles too uniform—real fur is messy and organic!
Step 5: Balancing the Left Cheek

Repeat the previous step on the left side of the head. It doesn't need to be a mirror image; a little variation makes your fox look more natural. Teacher's Tip: Keep your hand loose to get those jagged, furry edges.
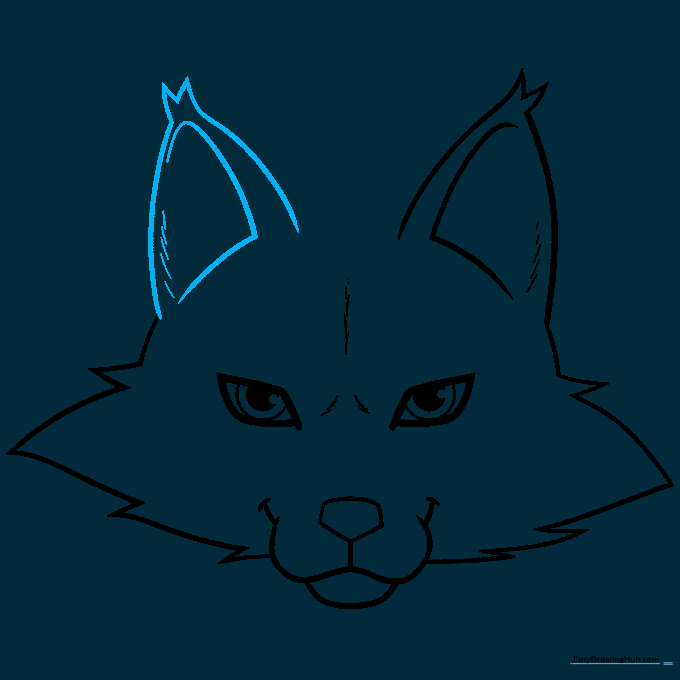
Step 6: Drawing the Right Ear

Draw a large, rounded triangle for the ear. Add a tuft of fur at the tip and an L-shaped curve inside to show depth. Teacher's Tip: Foxes have large ears to help them hear, so make them nice and tall!
Step 7: Drawing the Left Ear
Mirror the process for the left ear. Ensure it matches the height of the right ear so your fox looks symmetrical. Teacher's Tip: Imagine the ears are like two triangles sitting on top of a soft, round head.
Step 8: Finalizing the Head Shape
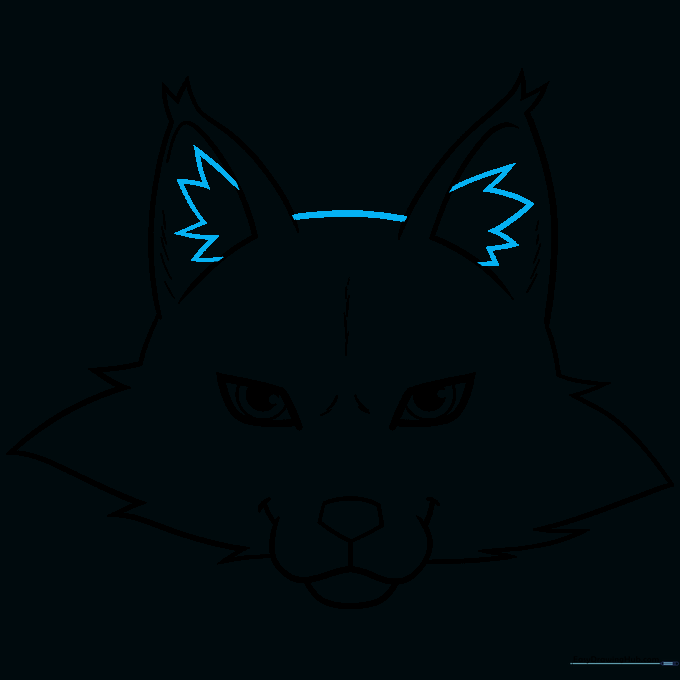
Connect the ears with a smooth curve to finish the top of the head. Add small, sharp triangles inside the ears to represent the inner ear fur. Teacher's Tip: Use short, quick strokes for the inner ear fur to make it look soft.
Step 9: Inking Your Masterpiece
Add a few extra dashes inside the face for texture. Now, go over your pencil lines with a black marker. Teacher's Tip: Vary your line thickness—use a thicker pen for the outer edges and a thinner one for the facial details to make it pop!
Step 10: Bringing Your Fox to Life with Color

Color the head a vibrant orange, using darker orange or light brown for shadows. Keep the inner ears and muzzle white. Use a bright green for the eyes. Teacher's Tip: Use a light gray for the shadows to give your fox a 3D look.
More Tutorials


