How to Draw a Flamingo: Easy 10-Step Guide for Kids
Bring the tropics to your sketchbook with this fun, step-by-step flamingo tutorial. Designed for young artists and beginners, this lesson uses basic shapes to build confidence and coordination. All you need is a pencil, an eraser, and your favorite pink markers to get started.
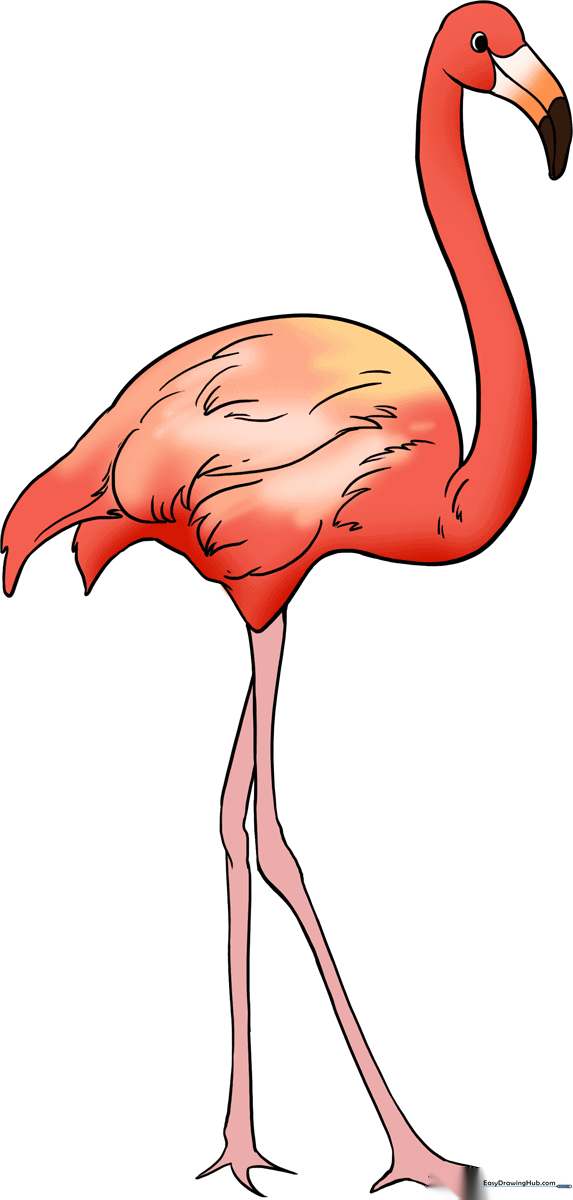
🎯 Final Result
Step-by-Step Instructions
Step 1: Sketching the Head and Neck
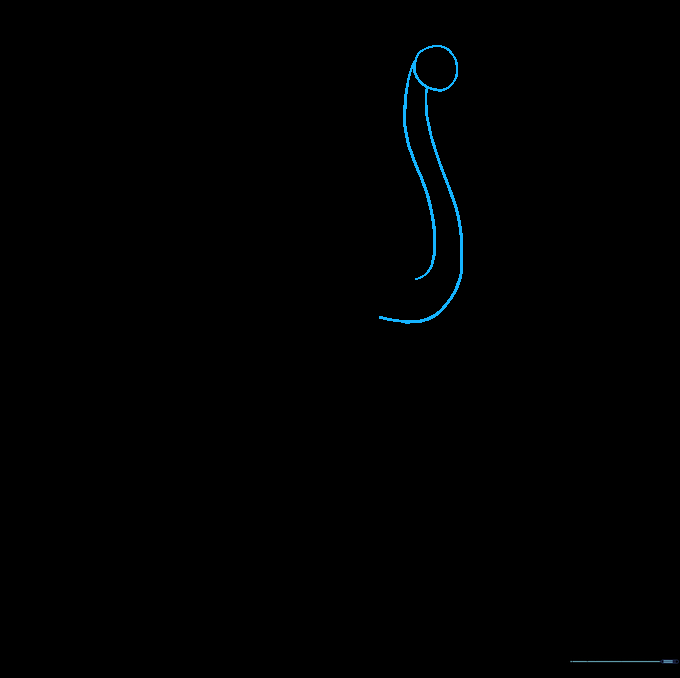
Draw a small circle for the head. Then, extend two parallel, curved 'S' lines downward to create the long, elegant neck. Teacher's Tip: Keep these lines light—they are just your roadmap for the flamingo's graceful posture.
Step 2: Shaping the Beak
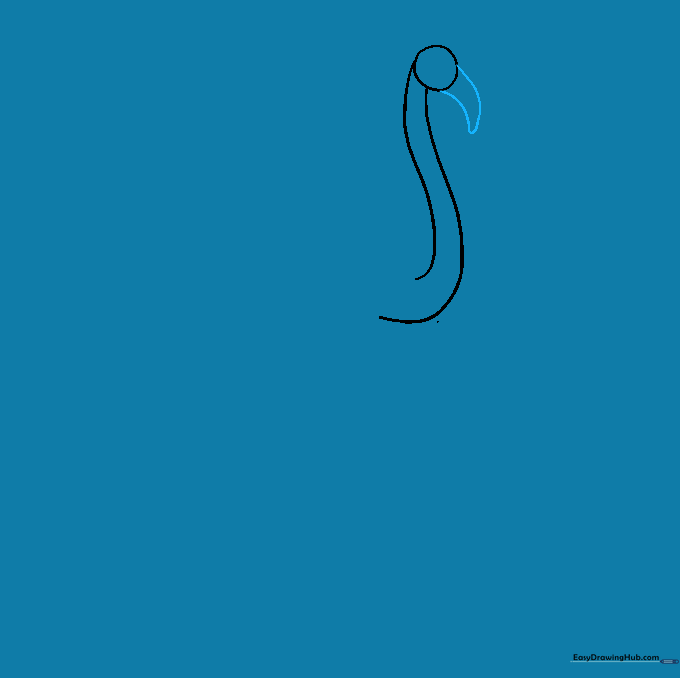
Draw two curved lines extending from the head that meet in a sharp, hooked point. Teacher's Tip: Flamingo beaks are unique because they curve downward; make sure your point is nice and sharp!
Step 3: Creating the Body
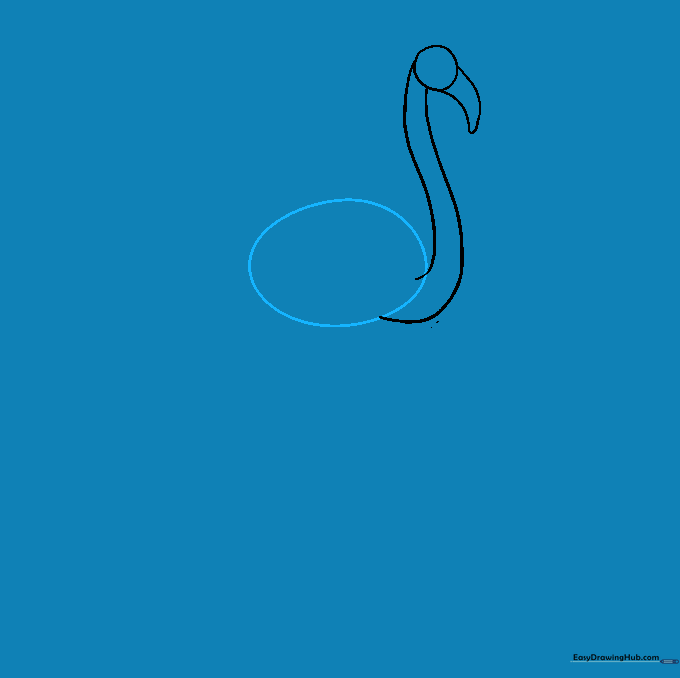
Sketch a large, rounded oval at the base of the neck to serve as the main body. Teacher's Tip: Don't worry about making it perfect; a slightly lopsided oval gives the bird a more natural, organic look.
Step 4: Defining the Tail

Connect the neck lines to the body and add drooping, triangular shapes at the back for tail feathers. Teacher's Tip: Use quick, short strokes to make the feathers look fluffy and soft.
Step 5: Cleaning Up

Gently erase the overlapping guide lines inside the body and neck. Leave the line where the head meets the neck to show the shape. Teacher's Tip: Use a soft eraser to avoid smudging your work.
Step 6: Drawing the First Leg

Draw two parallel lines for the leg, bending them at the knee and foot. Add small 'U' shapes at the bottom for toes. Teacher's Tip: Flamingos have very long, thin legs—don't be afraid to make them nice and tall!
Step 7: Adding the Second Leg
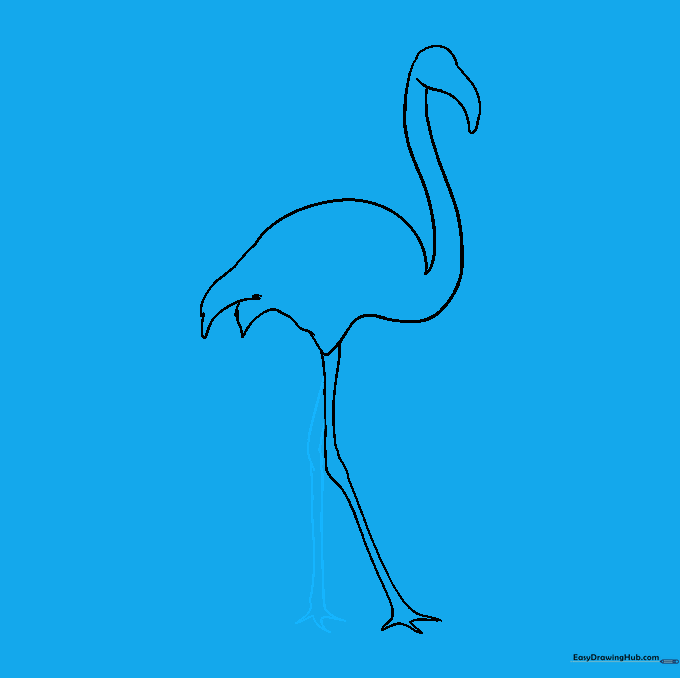
Draw the second leg slightly behind the first, showing the knee bent in a walking motion. Teacher's Tip: Adding a slight bend makes your flamingo look like it's actually moving through the water.
Step 8: Adding Feather Texture
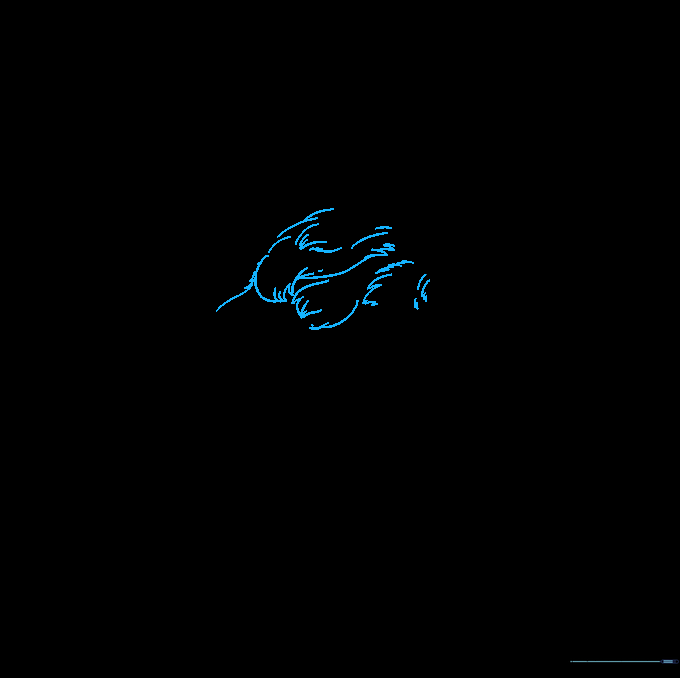
Add small, overlapping lines across the body to create the look of soft feathers. Teacher's Tip: Keep your lines short and rhythmic for a natural, textured appearance.
Step 9: Facial Details
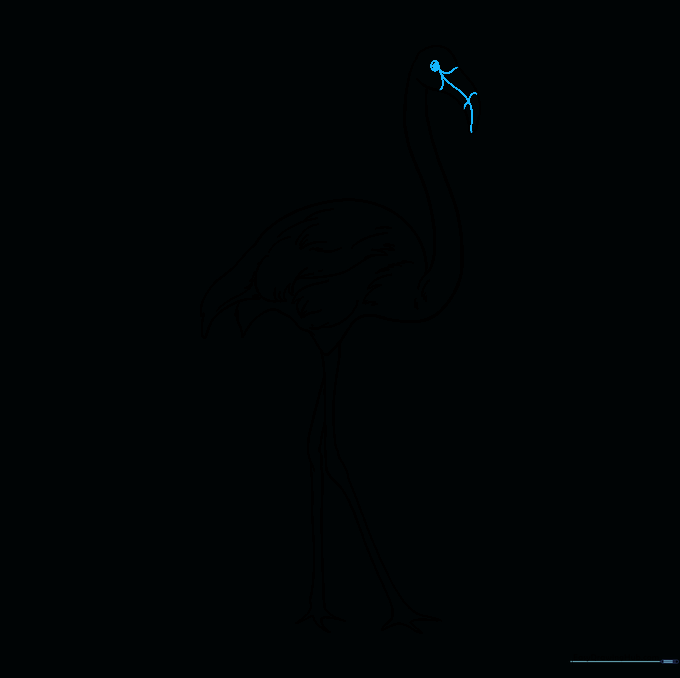
Draw a small, shaded circle for the eye and add a line across the beak to define the mouth. Teacher's Tip: A tiny white dot left inside the shaded eye makes the flamingo look bright and alert.
Step 10: Bringing it to Life with Color
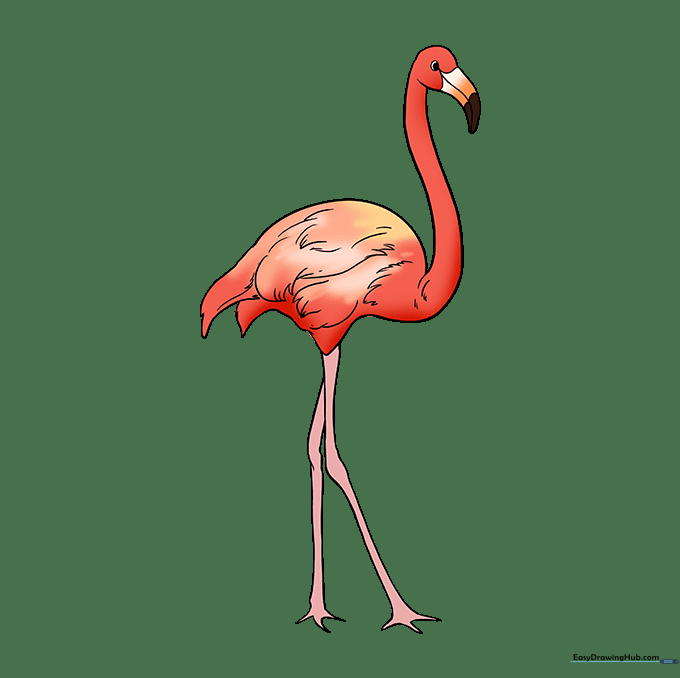
Color your flamingo in shades of vibrant pink! Teacher's Tip: Did you know flamingos are pink because of the food they eat? Use different shades of pink and coral to give your bird depth.
More Tutorials


