How to Draw a Fire Breathing Dragon: Easy 10-Step Guide
Ready to bring a mythical creature to life? This tutorial is perfect for young artists ages 6+ looking to master fantasy character design. Grab your pencil, eraser, and paper to follow along as we build this dragon from simple shapes to a roaring masterpiece.
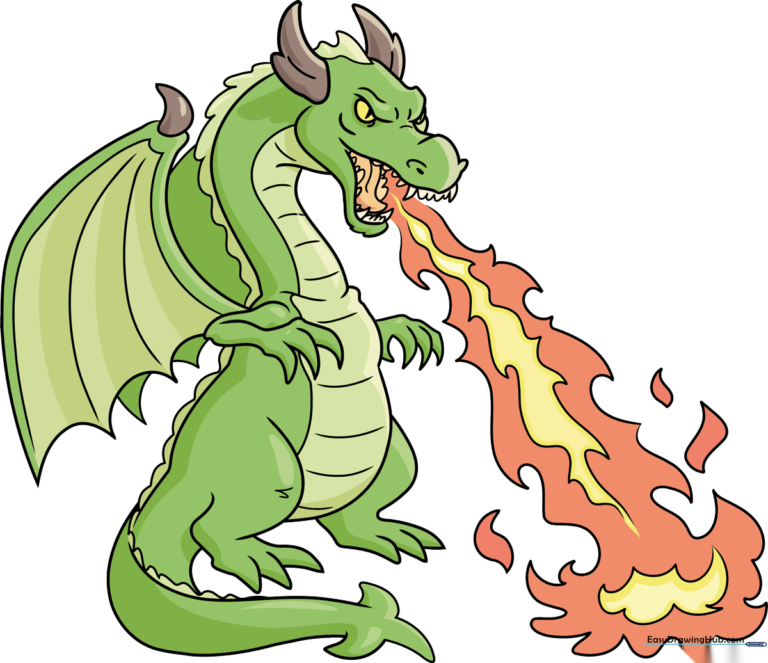
🎯 Final Result
Step-by-Step Instructions
Step 1: Sketching the Snout and Eyes

Draw an uneven V-shape for the open mouth and a curved snout. For the eyes, use an elongated S-shape for the left and a simple curve for the right. Teacher's Tip: Keep your pencil lines light so you can easily adjust the dragon's expression later.
Step 2: Defining the Jaw and Teeth

Add a curved line beneath the mouth to define the lower jaw. Sketch jagged, triangle-shaped teeth inside the mouth. Teacher's Tip: Make the teeth different sizes to give your dragon a more natural, fierce look.
Step 3: Adding Horns and Tongue
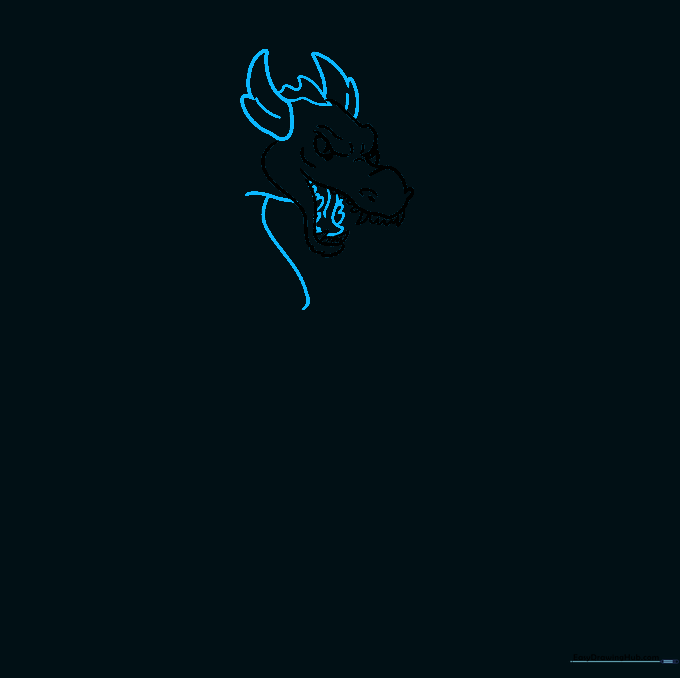
Draw swooping, flame-like horns on the head and a wavy tongue inside the mouth. Start the neck with a horizontal line. Teacher's Tip: Use fluid, sweeping motions for the horns to make them look like they are curving backward.
Step 4: Sketching the Neck and Arm

Extend the neck with a long, sweeping line and create a bulbous shape for the body. Add a wavy arm with triangular claws. Teacher's Tip: Don't worry about perfect lines; dragons are organic, so slight wobbles add character.
Step 5: Drawing the Legs and Feet
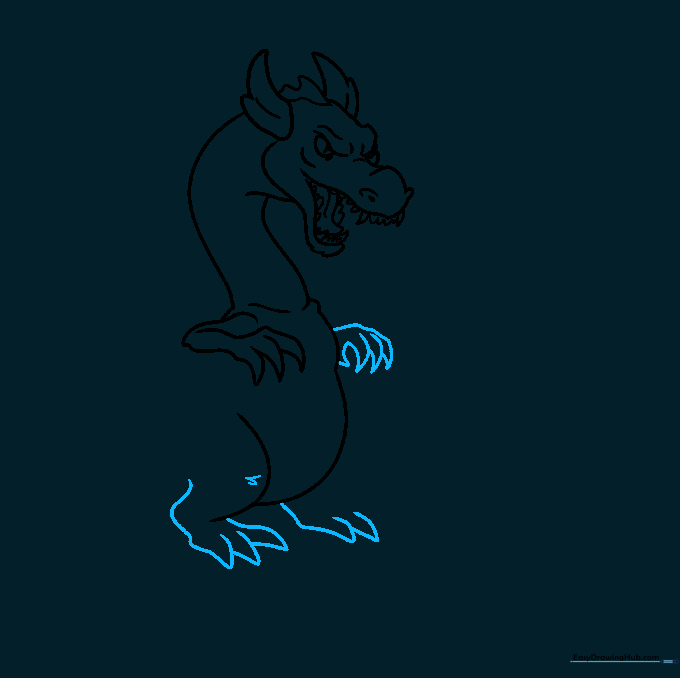
Draw the second arm and start the feet using L-shapes and large, curvy triangles for the claws. Teacher's Tip: Think of the feet as heavy, sturdy bases to support the dragon's weight.
Step 6: Creating Wings and Body Details
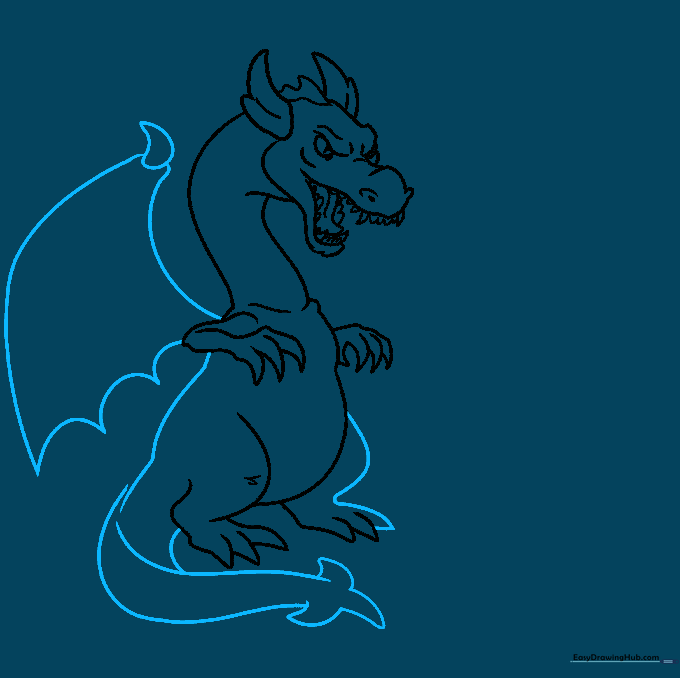
Complete the feet, sketch the body, and add scalloped wings. Teacher's Tip: Use a 'scallop' motion (like drawing a series of connected 'U' shapes) to give the wings a leathery, bat-like appearance.
Step 7: Adding Scales and Texture
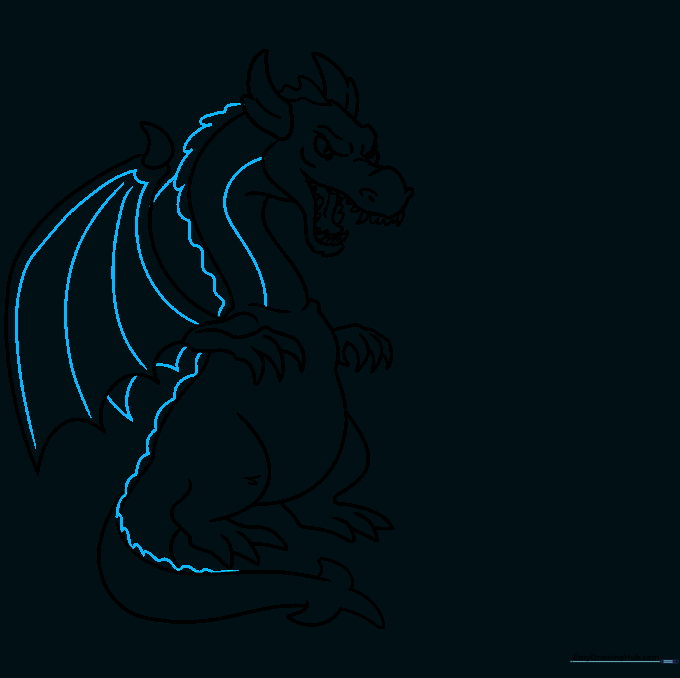
Add lines inside the wings and body for depth. Use small, repeating curves along the back and tail to represent scales. Teacher's Tip: Vary the size of your scales to make the dragon look more realistic.
Step 8: Drawing the Fire
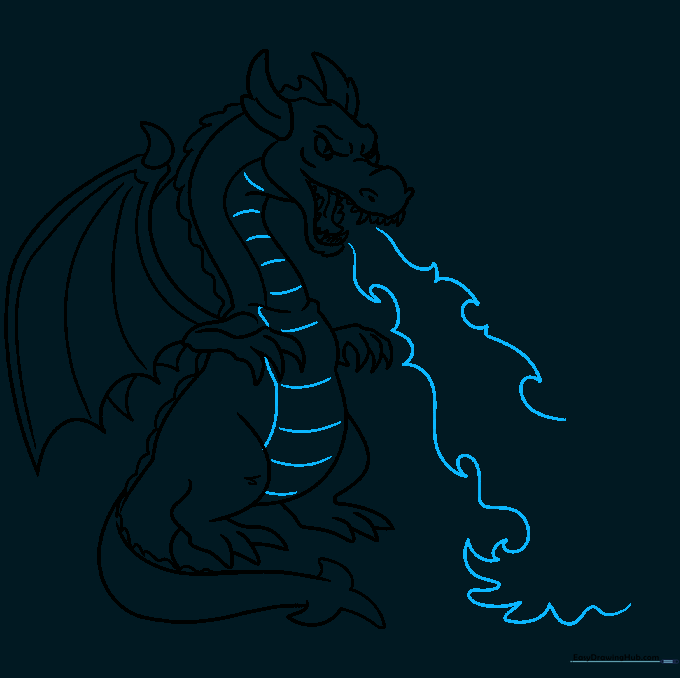
Add dashed lines to the stomach for texture. Sketch chaotic, flame-like shapes coming from the mouth. Teacher's Tip: Flames are unpredictable! Use loose, jagged strokes rather than perfect circles.
Step 9: Outlining Your Dragon
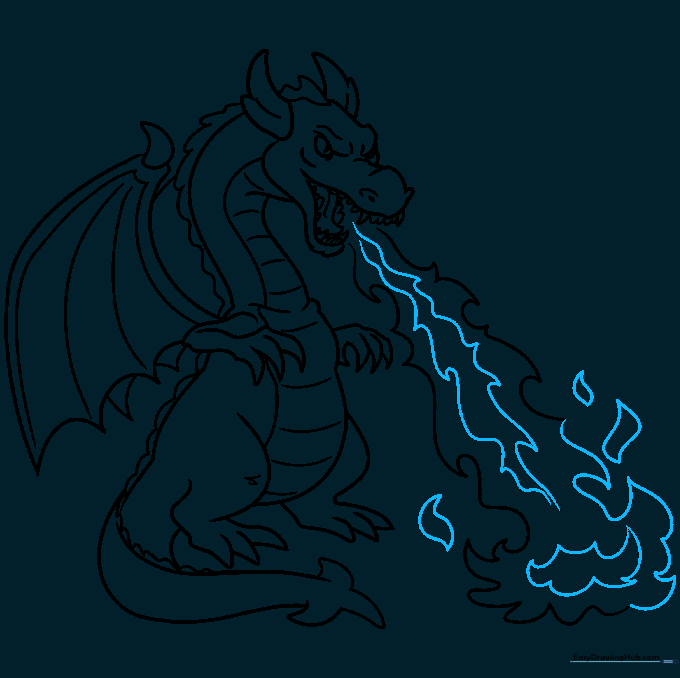
Refine the flames with extra sparks and outline the entire dragon with a black pen or marker. Teacher's Tip: Use a steady hand for the outline to make your cartoon character pop off the page.
Step 10: Adding Color
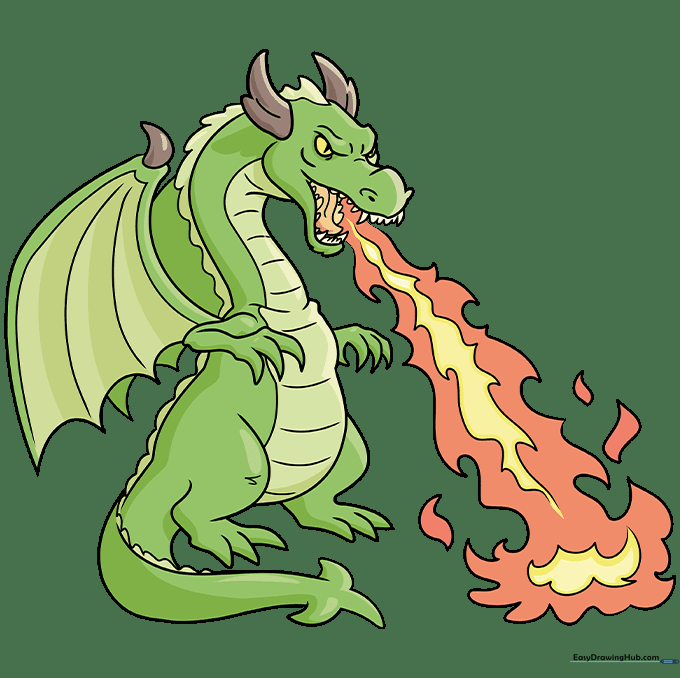
Bring your dragon to life! Use vibrant yellows and oranges for the fire, and shades of green for the body. Teacher's Tip: Use a darker green for shadows under the wings to add 3D depth to your art.
More Tutorials


