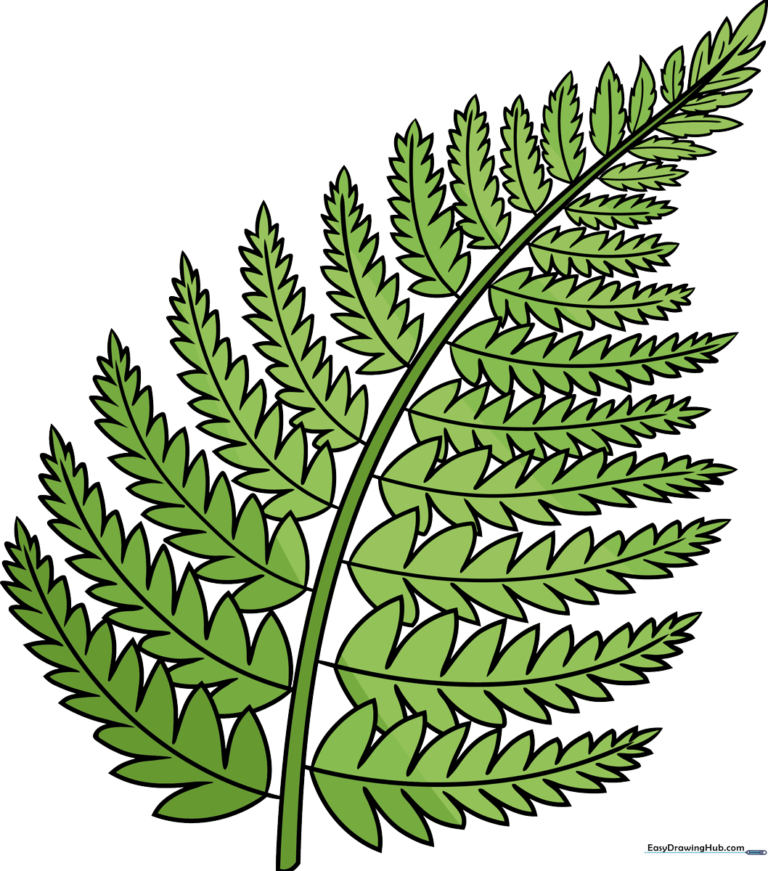
How to Draw a Fern: Easy 9-Step Botanical Guide
Bring the beauty of the forest to your sketchbook with this simple fern drawing guide, perfect for artists ages 5 and up. You will only need a pencil, an eraser, and your favorite green markers or colored pencils. Follow these steps to master the organic, flowing shapes of a classic fern frond.
🎯 Final Result
Step-by-Step Instructions
Step 1: Sketching the Central Stem
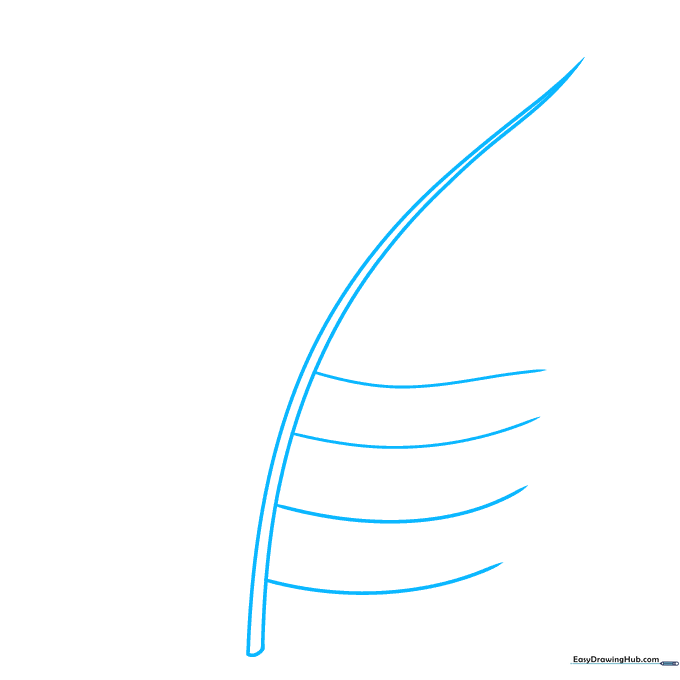
Draw the central vein of the fern using two long, gently curved lines that meet at a sharp point at the top. Tip: Keep your pencil pressure light so you can easily adjust the curve if it looks a bit stiff.
Step 2: Mapping the Leaflet Branches
Extend a series of horizontal curved lines from the sides of the central vein. Tip: Make these lines shorter as you move toward the top to give your fern a natural, tapering look.
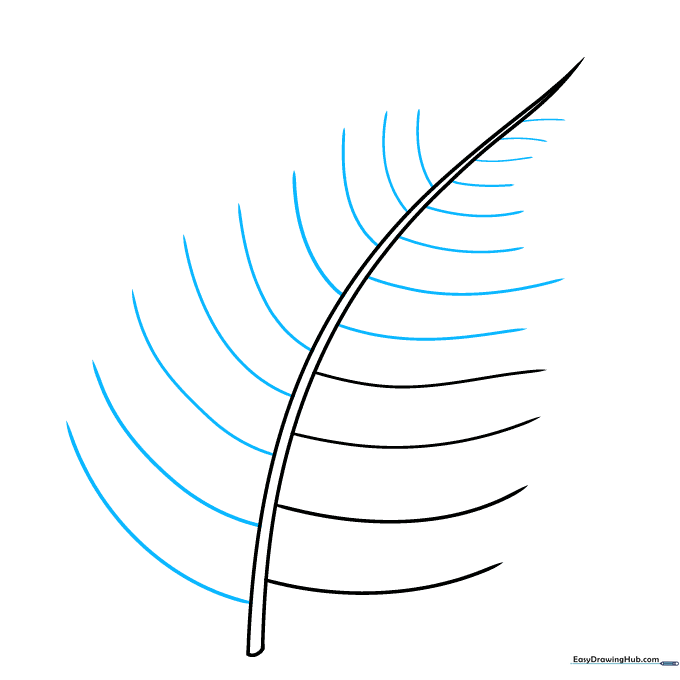
Step 3: Creating the Pinnules
Turn those branches into leaves by drawing small, curved triangles along the lines. Tip: Use a 'zigzag' motion with your pencil to create these pairs of leaflets quickly and fluidly.
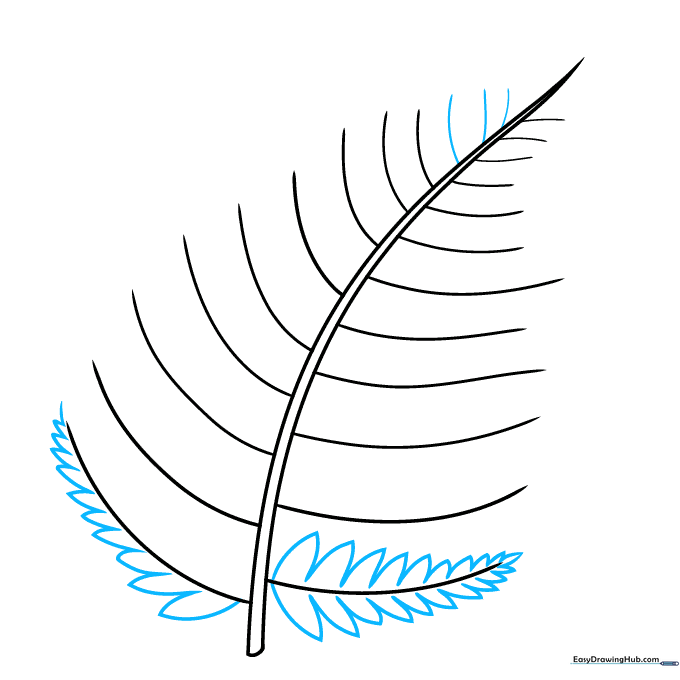
Step 4: Filling the Lower Fronds
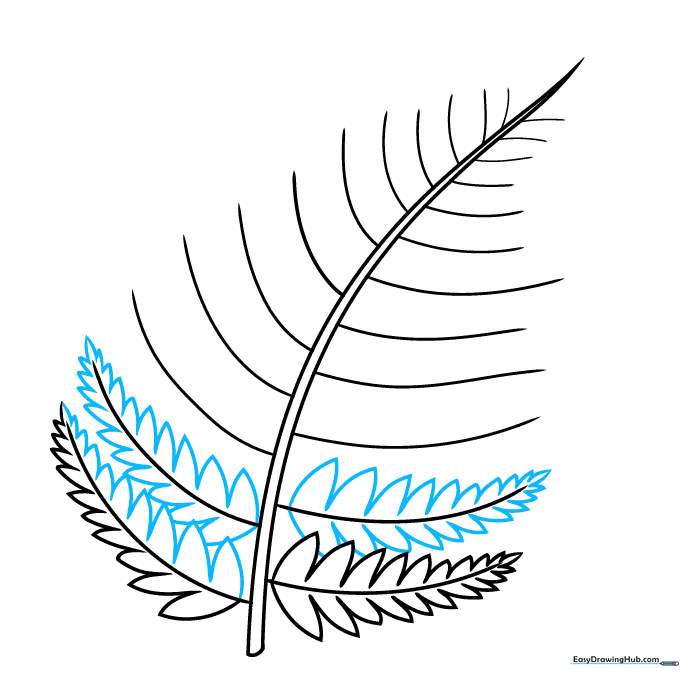
Continue adding these triangular pinnules to the lower sections of the fern. Tip: Don't worry about making them perfectly symmetrical; nature is beautifully imperfect!
Step 5: Working Upwards
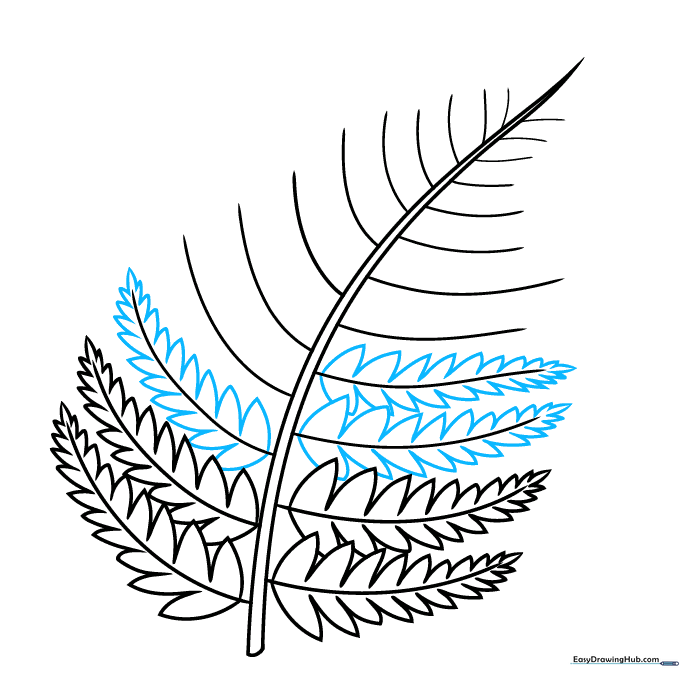
Repeat the process for the middle rows of the fern. Tip: Keep your strokes confident—if you make a mistake, just use your eraser to lift the graphite gently.
Step 6: Maintaining Proportion
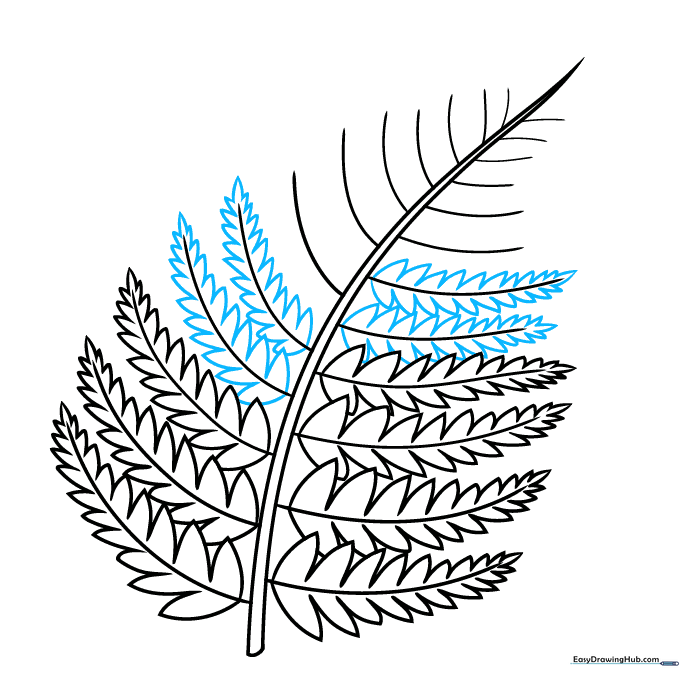
Ensure the pinnules remain larger near the center and taper off toward the edges. Tip: This variation in size is what makes the fern look realistic rather than like a cartoon comb.
Step 7: Defining the Edges

Continue enclosing the jagged, pointed shapes along the remaining branches. Tip: Try to connect the points of your triangles to create a continuous, flowing edge.
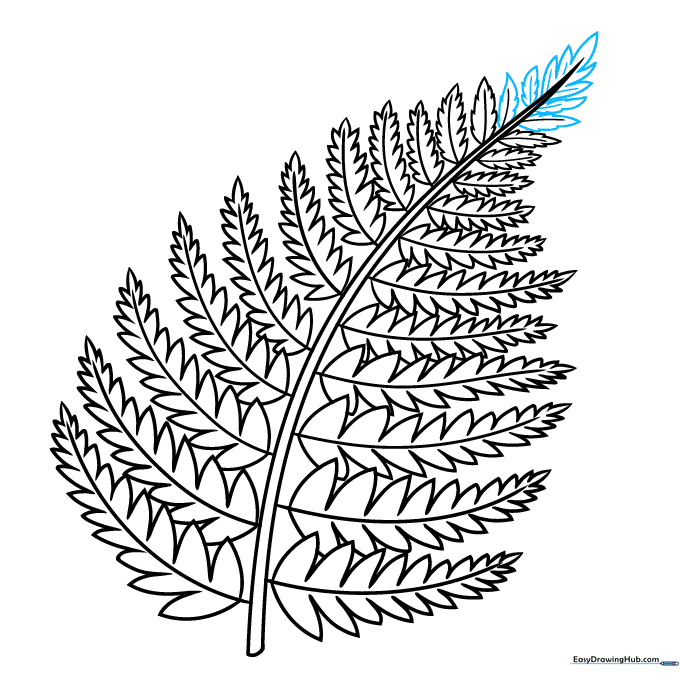
Step 8: Detailing the Apex
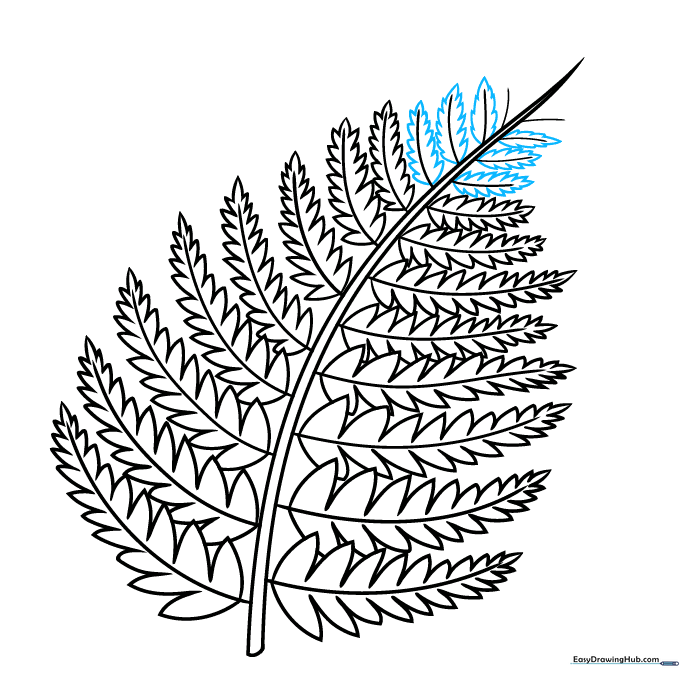
At the very tip of the fern, simplify your shapes into smaller, jagged points. Tip: You don't need to draw individual leaflets here; a simple wavy line works perfectly.
Step 9: Final Touches
Review your outline and add any missing vein details to the leaves. Tip: Use a darker pencil to go over your final lines before you start coloring.
Step 10: Bringing Your Fern to Life
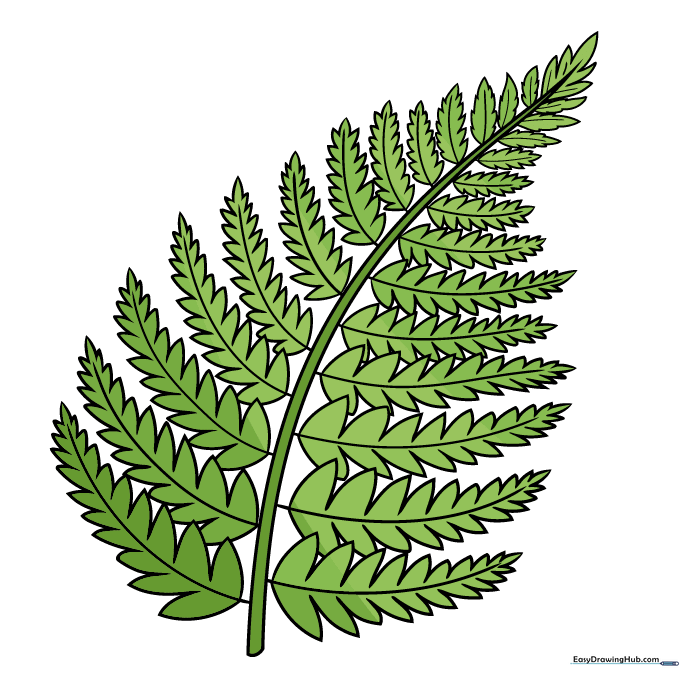
Time to color! Use various shades of green to add depth. Tip: Add a touch of brown or yellow near the base of the stem to make it look like a real, healthy plant.
More Tutorials


