How to Draw a Fennec Fox: Easy 10-Step Guide for Kids
Bring the world's smallest fox to life with this fun, beginner-friendly drawing guide! Perfect for ages 5 and up, all you need is a pencil, an eraser, and a piece of paper. Follow these simple steps to master the Fennec Fox's iconic oversized ears and fluffy features.
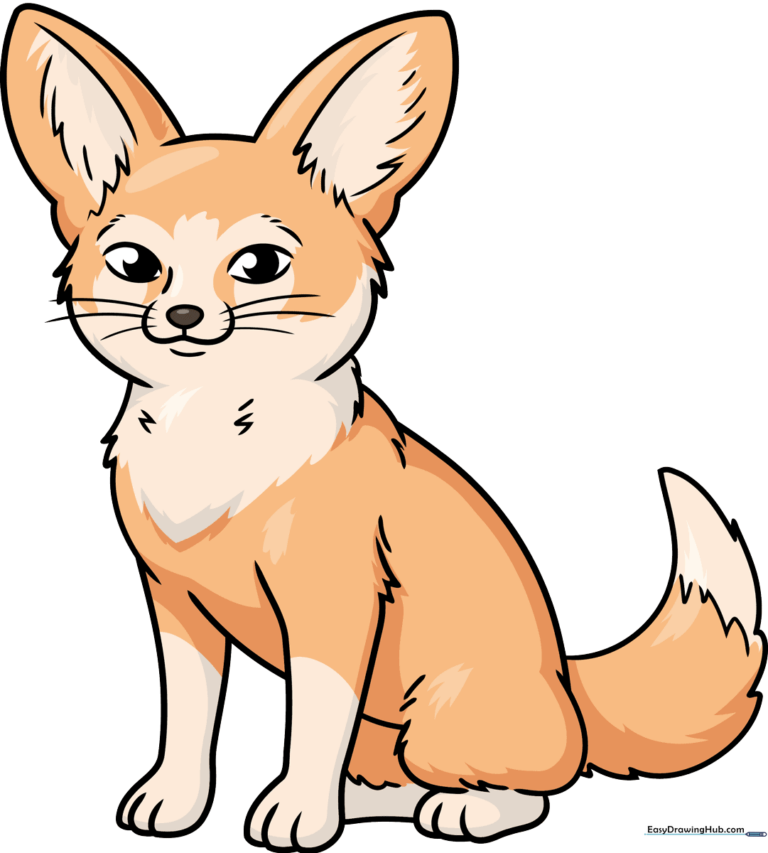
🎯 Final Result
Step-by-Step Instructions
Step 1: Sketching the Eyes and Snout

Draw two almond-shaped curves for the eyes, leaving the corners open. Shade in a small circle inside each for the pupils. Add a tiny oval for the nose and a soft 'W' shape around it for the snout. Teacher's Tip: Keep the eyes level so your fox looks balanced!
Step 2: Defining the Face Shape

Outline the top and sides of the head using short, curved strokes. Add little jagged points to suggest soft fur. Teacher's Tip: Use quick, flicking motions with your pencil to create that 'furry' texture.
Step 3: Drawing the Iconic Ears
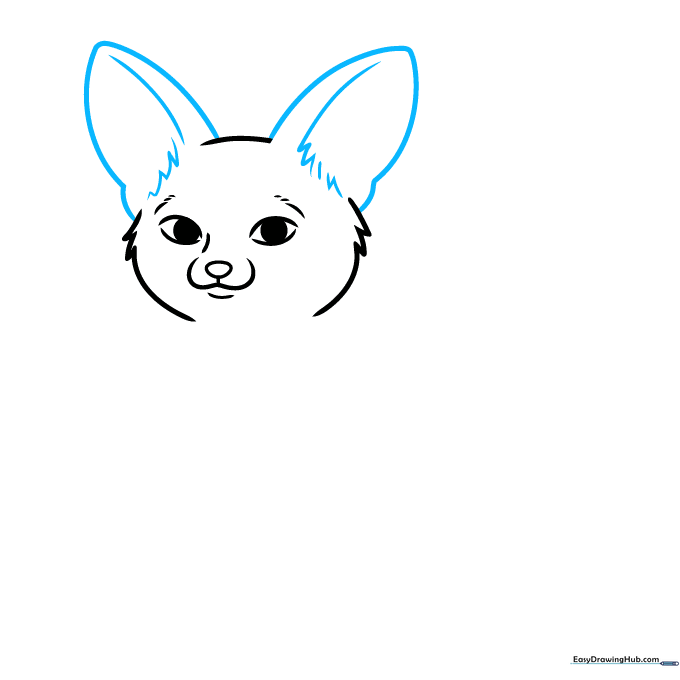
Fennec foxes are famous for their huge ears! Draw two large, rounded triangles on top of the head. Add a curved line inside each to give them depth. Teacher's Tip: Make them nice and big—they are the most important part of the fox's silhouette!
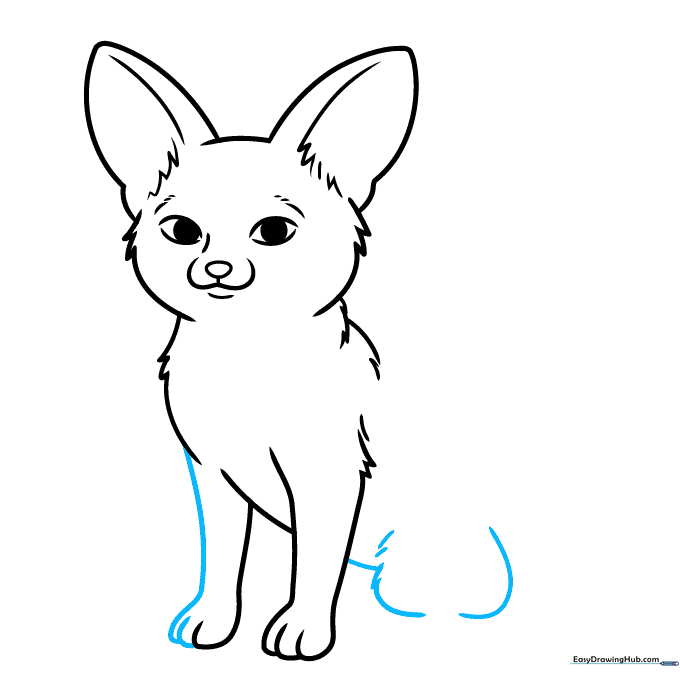
Step 4: Adding the Chest and Foreleg
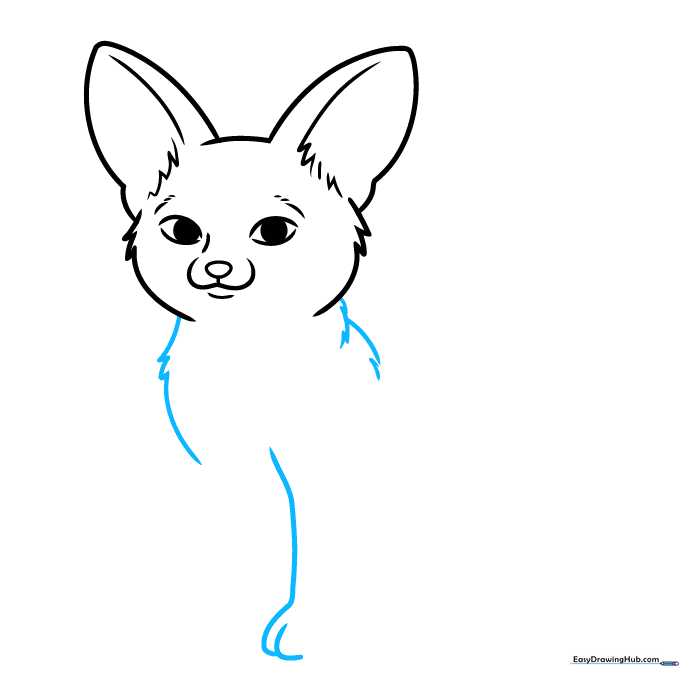
Use jagged lines to sketch the chest area. Draw a long, smooth curve for the front leg and finish it with small, overlapping 'U' shapes for the toes. Teacher's Tip: Overlapping lines create the look of soft, layered fur.
Step 5: Shaping the Body
Continue the leg line and add a soft curve for the belly. Start the second foreleg behind the first one. Teacher's Tip: Keep the belly line slightly rounded to make the fox look cute and plump.
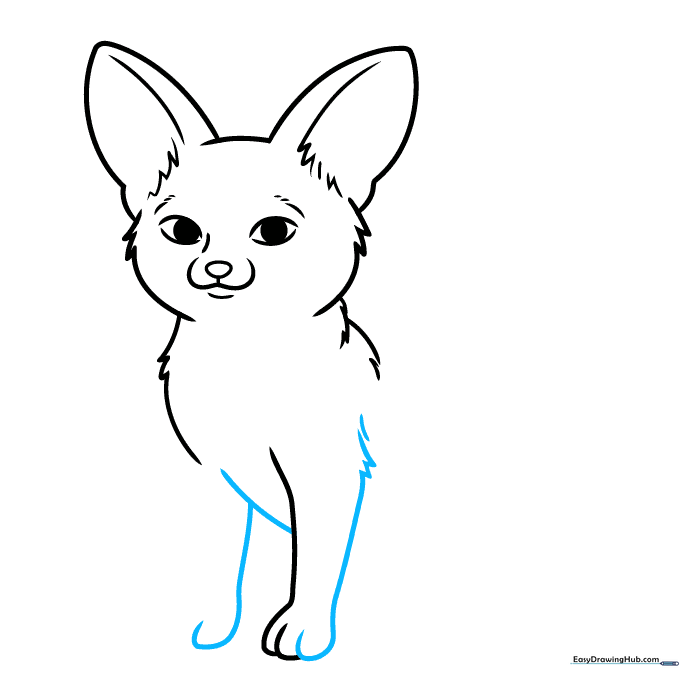
Step 6: Completing the Legs
Finish the second foreleg and draw the top of the rear leg. Use those same jagged lines to show where the fur meets the leg. Teacher's Tip: Notice how the rear leg is slightly thicker than the front one.
Step 7: Drawing the Back and Paws
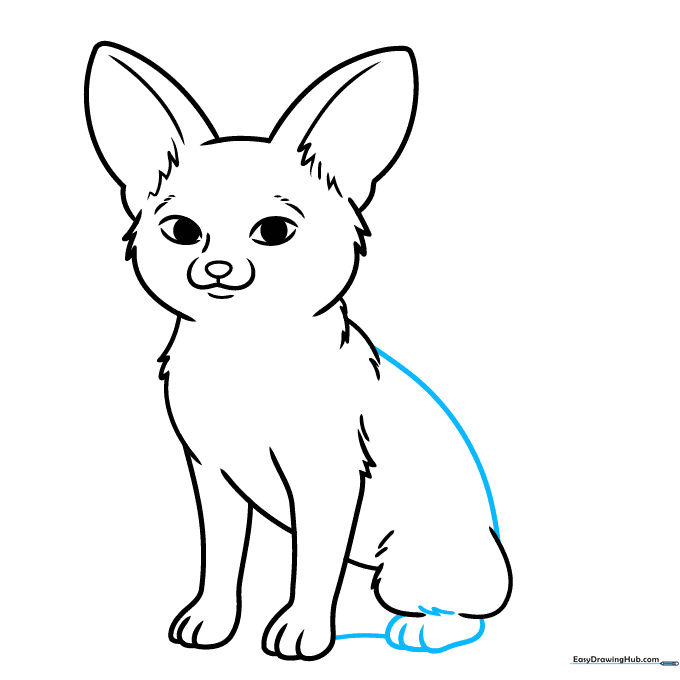
Draw a long, smooth curve for the fox's back. Add the rear paws using small, overlapping lines to show the toes. Teacher's Tip: A smooth back line helps the fox look like it's sitting comfortably.
Step 8: Adding the Tail
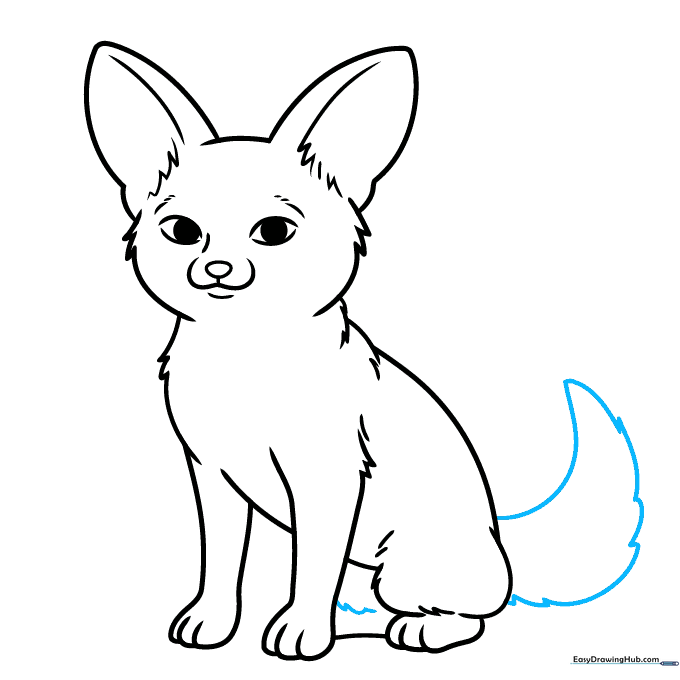
Draw a large, bushy tail curling around the side of the body. Use long, sweeping curves. Teacher's Tip: Make the tail look thick and fluffy—it's a signature feature of the Fennec Fox!
Step 9: Adding Final Details
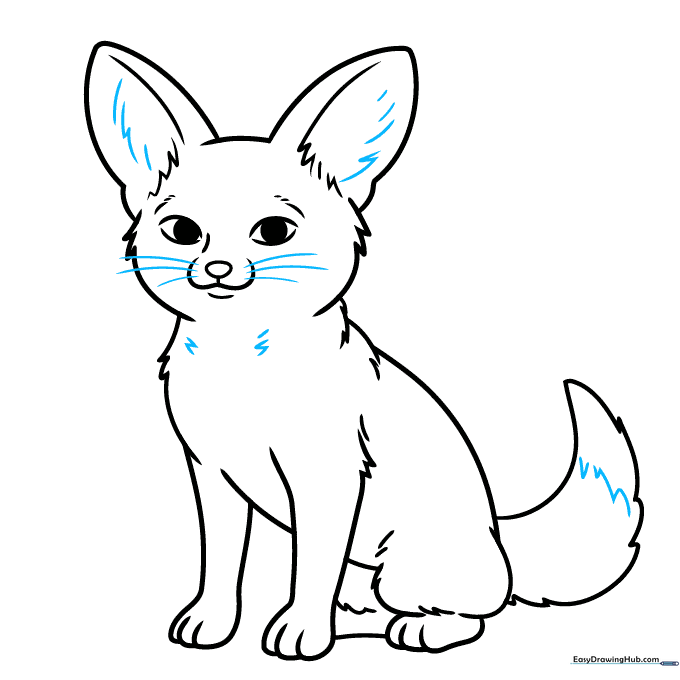
Add texture to the ears, chest, and tail tip with small, jagged lines. Finally, draw three long, thin lines on each side of the snout for whiskers. Teacher's Tip: Use a sharp pencil for the whiskers so they look delicate.
Step 10: Coloring Your Fox

Your outline is ready! Use sandy tan or light brown colors to fill in your fox. Fennec foxes live in the desert, so these colors help them blend in. Teacher's Tip: Leave the belly and the inside of the ears a lighter cream color for a realistic look.
More Tutorials


