How to Draw a Father’s Day Card: Easy 10-Step Guide
Looking for a meaningful, screen-free gift? This tutorial is perfect for children ages 5 and up to create a personalized Father's Day card from scratch. You only need a pencil, an eraser, and some markers or crayons to bring this cartoon dad to life. Follow along to build confidence in your drawing skills while making a keepsake Dad will cherish.
🎯 Final Result

Step-by-Step Instructions
Step 1: Sketching the Face

Start by drawing the cartoon dad’s head using two 'C' shaped lines for the ears, connected by a smooth curve. Add the eyes, eyebrows, and nose using short, gentle strokes. Tip: Keep your pencil pressure light so you can easily erase any stray lines later.
Step 2: Adding Hair and Shoulders

Use a series of jagged, curved lines to create the hair, making it look natural. Sketch the neck using two short vertical lines and add small triangles for the shirt collar. Tip: Think of the hair as a cloud shape to keep the lines flowing smoothly.
Step 3: Sketching the Arms

Extend two lines upward to form the forearms. Use overlapping curved lines to sketch the hands into fists. Tip: If the fists look tricky, draw a small oval first and then refine the finger shapes around it.
Step 4: Defining the Torso and Tie
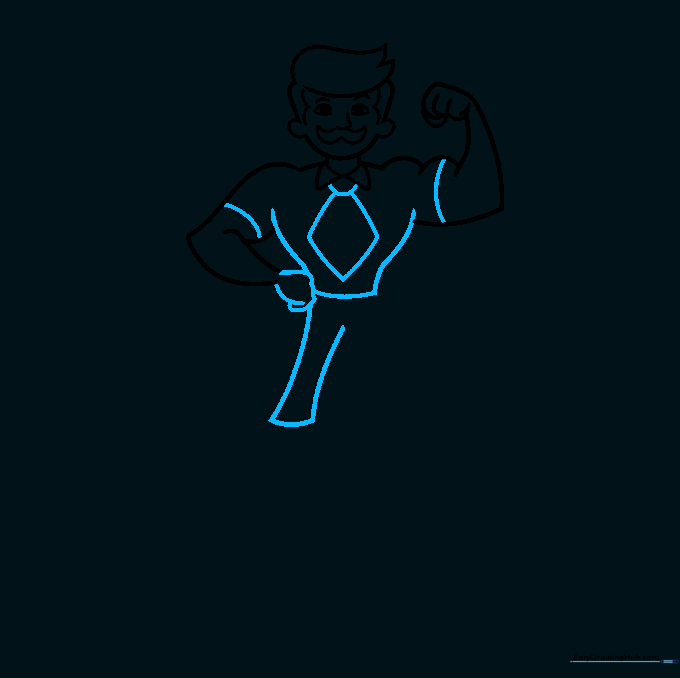
Enclose the torso with curved lines and add small curves on the biceps to suggest short sleeves. Draw a diamond shape beneath the collar to create a necktie. Tip: A diamond shape is just two triangles stacked on top of each other!
Step 5: Adding Character Details

Draw a bold 'F' on the necktie, similar to a superhero emblem. Outline the pants and the irregular shapes of the shoes at the bottom. Tip: Make the 'F' large so it stands out when you color it later.
Step 6: Creating the Banner

Draw a bent rectangle shape beneath the character to serve as your message banner. Connect it with 'V' shaped lines on the sides. Tip: Use a ruler if you want the banner edges to look perfectly crisp.
Step 7: Adding Decorative Hearts

Fill the space around your character with hearts of various sizes. This adds a festive, loving touch to your card. Tip: Varying the sizes of the hearts creates a more dynamic and professional-looking composition.
Step 8: Adding Text and Radiance

Write the word 'Happy' inside the largest heart. Then, draw straight lines radiating outward from the circle to make your drawing pop. Tip: Use a fine-tip black marker to make the lettering stand out clearly.
Step 9: Finalizing the Message

Complete your card by writing 'Father's' across the banner and 'DAY' just below it. Tip: Practice your lettering on a scrap piece of paper first to ensure it fits perfectly within the banner space.
Step 10: Adding Color

Bring your card to life with your favorite colors! Use bright markers or colored pencils to fill in the character and the hearts. Tip: Use a warm color palette like reds and oranges to make the card feel cheerful and inviting.
More Tutorials


