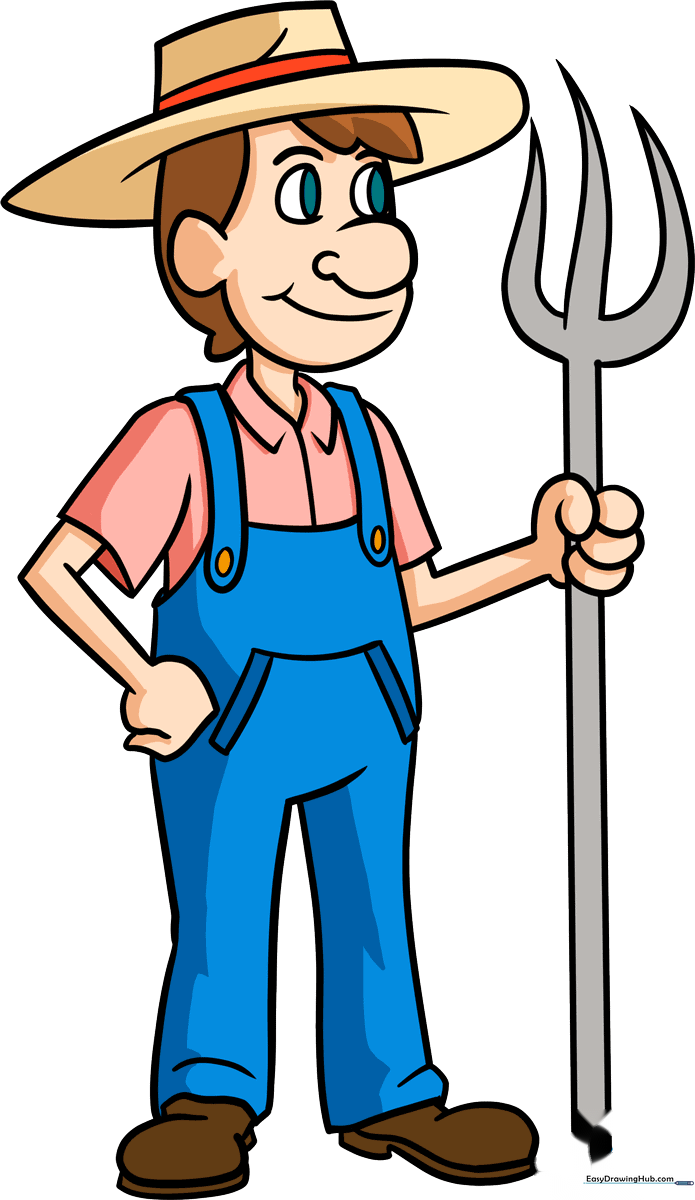
How to Draw a Farmer: Easy 10-Step Guide for Kids
Ready to bring a friendly farmer to life? This tutorial is perfect for young artists ages 5 and up. All you need is a pencil, an eraser, and a piece of paper to practice these foundational shapes and build your character drawing confidence.
🎯 Final Result
Step-by-Step Instructions
Step 1: Sketching the Straw Hat

Start by drawing a wide, curved brim for the hat, then add a rectangular crown on top. Tip: Keep the crown slightly narrower than the brim to give it that classic straw hat look.
Step 2: Defining the Face Shape

Draw the hairline, nose, and ear using soft, overlapping curves. Connect these to form the jawline. Tip: Don't worry about perfection; a slightly uneven jawline adds character to your drawing.
Step 3: Adding Facial Features

Add two ovals for eyes with vertical pupils, thick eyebrows, and a cheerful, curved mouth. Tip: Placing the eyebrows closer to the eyes makes the farmer look more focused and friendly.
Step 4: Drawing the Shirt and Overalls
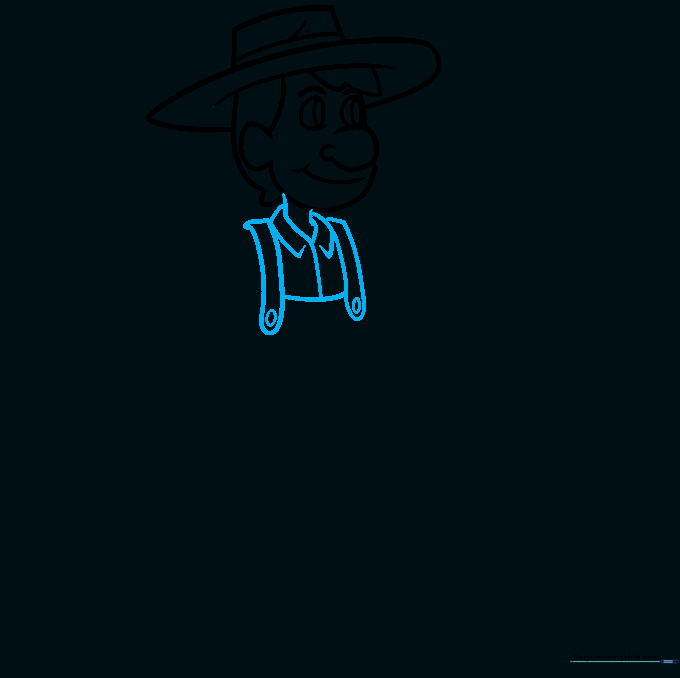
Sketch the collar, the shirt opening, and the overall straps with buttons. Tip: Use a 'V' shape for the neck to help the collar sit naturally on the shoulders.
Step 5: Sketching the First Arm
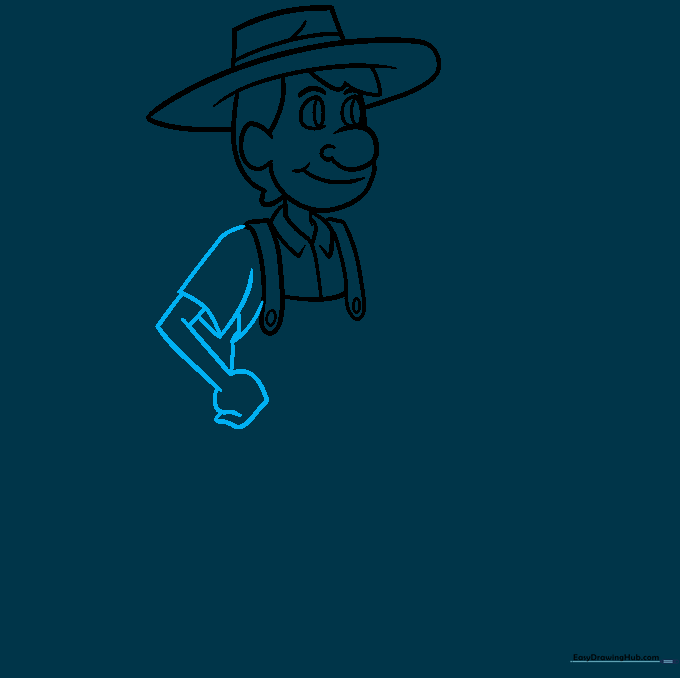
Draw the sleeve and the arm reaching down, ending in a simple rounded fist. Tip: Keep the arm slightly bent to make the pose look more relaxed and natural.
Step 6: Adding the Second Arm
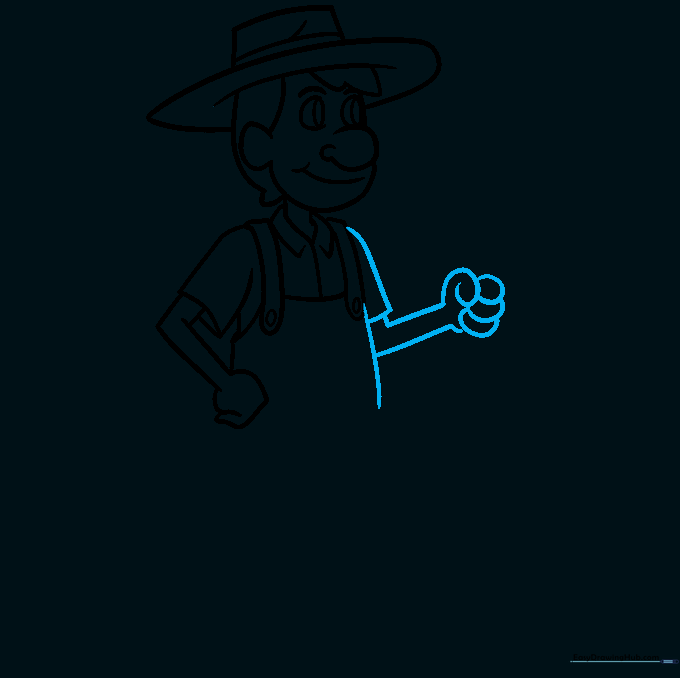
Draw the second arm and hand, using simple ovals for the fingers. Tip: Ensure the hand is positioned to hold a tool in the next step.
Step 7: Adding Pockets and Legs
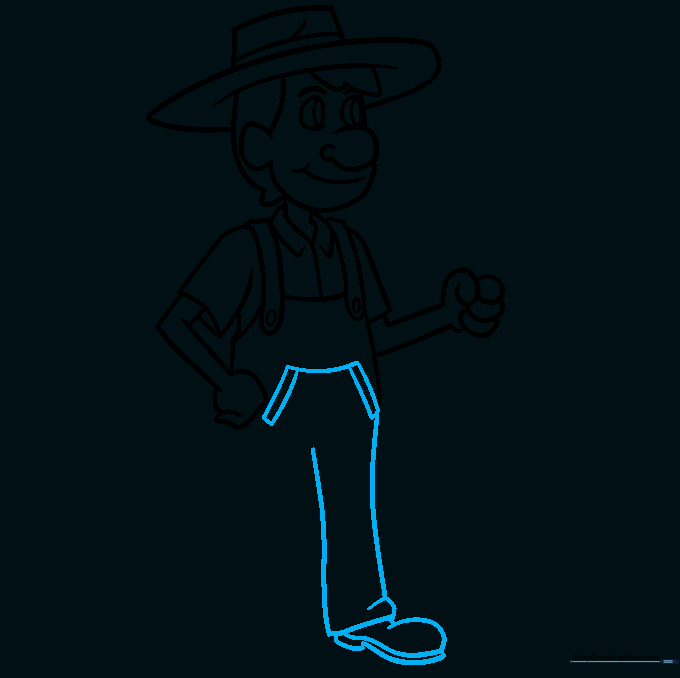
Draw the overall pocket on the chest, then outline the pant leg and the top of the boot. Tip: Use a few short lines to suggest the folds in the fabric near the knees.
Step 8: Completing the Legs
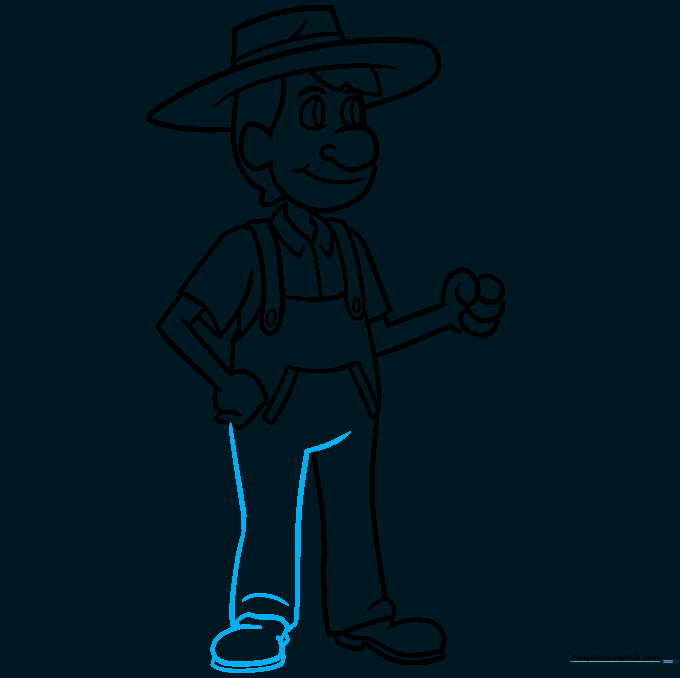
Finish the second leg and boot. Tip: Make sure both boots are roughly the same size to keep the character balanced.
Step 9: Drawing the Pitchfork
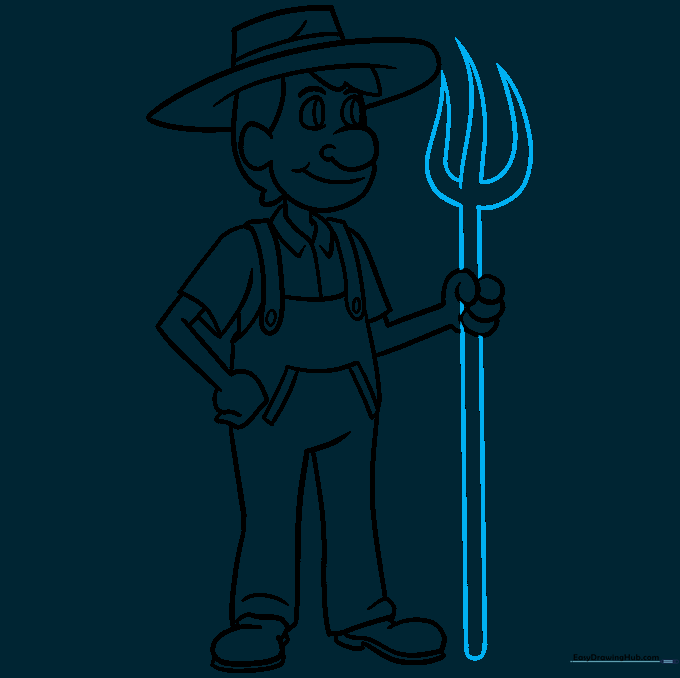
Draw a long handle and three sharp tines at the top. Tip: Use a ruler if you struggle with straight lines for the pitchfork handle.
Step 10: Adding Color
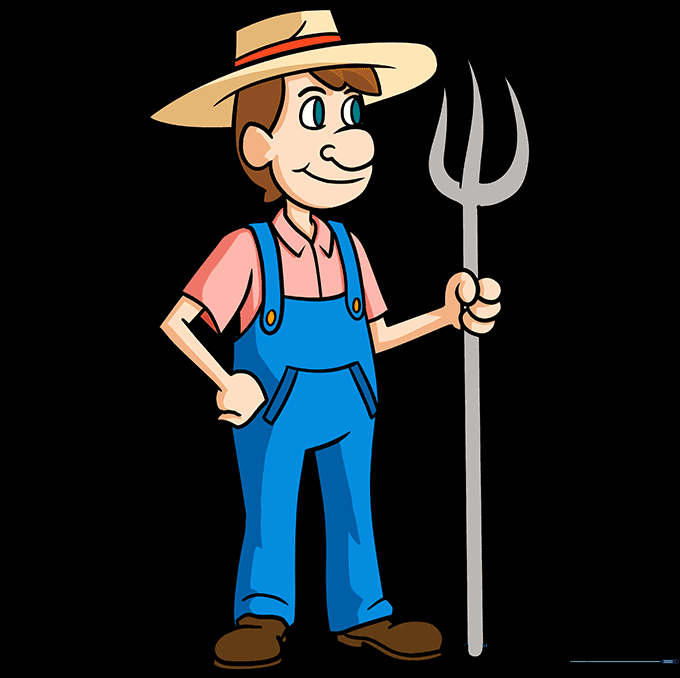
Bring your farmer to life with color! Use blue for the overalls and tan for the hat. Tip: Add a little shading under the hat brim to create depth.
More Tutorials


