How to Draw a Fancy Heart: Easy Step-by-Step Guide
Ready to add some flair to your artwork? This fancy heart tutorial is perfect for artists of all ages looking to create a stylized, decorative design for cards or journals. Grab a pencil, an eraser, and a piece of paper, and let's transform a simple shape into a work of art.
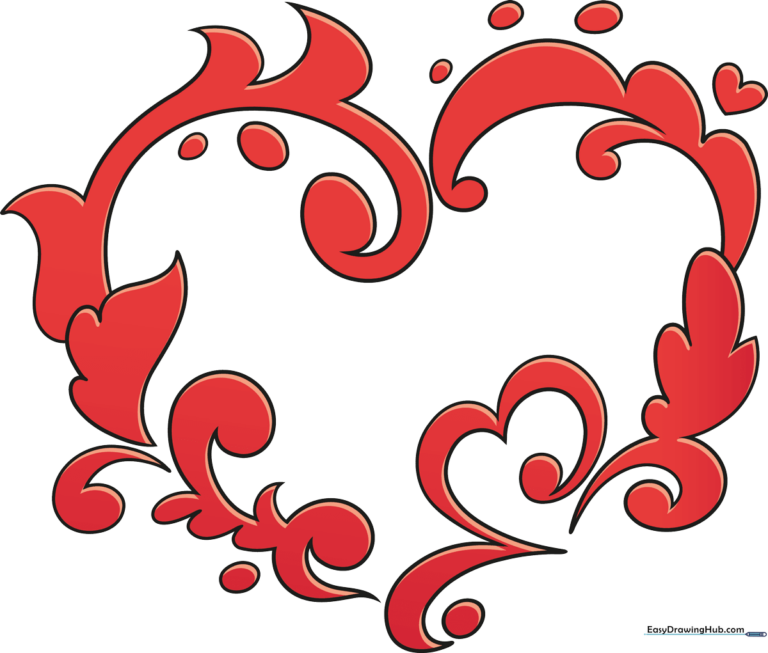
🎯 Final Result
Step-by-Step Instructions
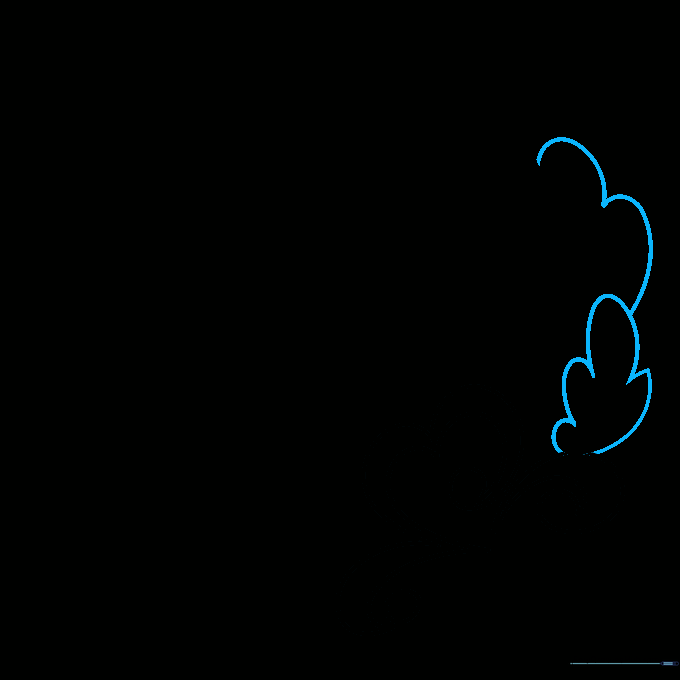
Step 1: Sketching the Initial Curve

Start by drawing two loops to form the right side of your heart. Sweep the curve downward and add a small circle at the tip. Teacher's Tip: Keep your hand loose; these curves don't need to be perfectly symmetrical yet.
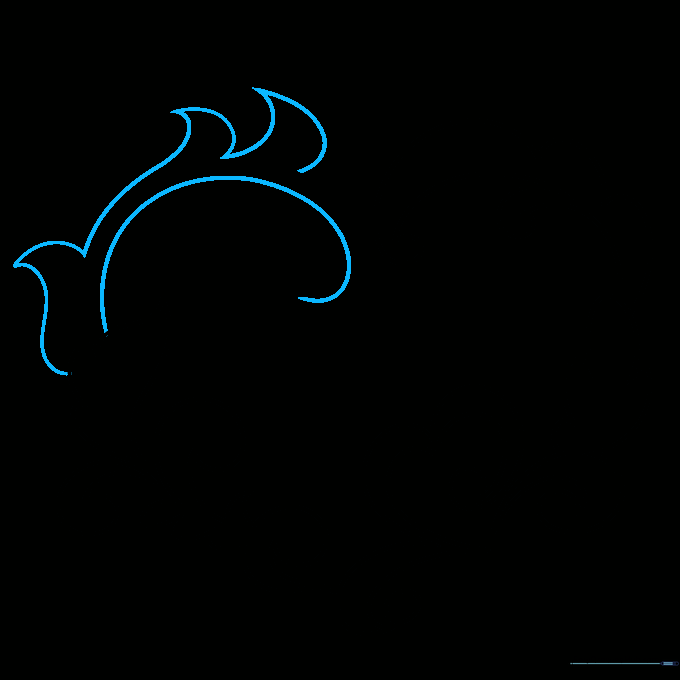
Step 2: Adding Parallel Depth

Draw parallel lines along the top curve and add another small circle at the end. Create a deep V-shape to the right, then loop the line back upward. This creates the 'fancy' layered look.
Step 3: Creating Organic Curves
Use soft, hill-like shapes to sketch decorative lines that resemble leaves. Teacher's Tip: Think of these as flowing ribbons rather than rigid lines.
Step 4: Sweeping the Top Edge
Sketch a high, sweeping curve from the top. Add a small loop, then bring the line up and over to create a side-turned V-shape. Connect the entire structure with a final smooth curve.
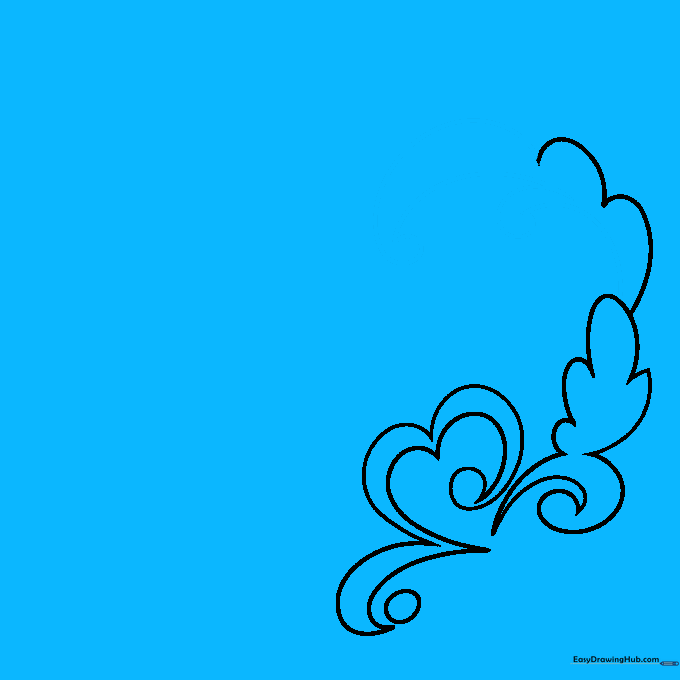
Step 5: Defining the Left Side

On the left, draw a loop with a curved triangle on top and a wavy triangle on the bottom. Make the bottom triangle slightly longer for balance.
Step 6: Adding Decorative Loops

Sketch three small loops to the left. Then, draw one large, sweeping loop that carries the line downward to anchor the shape.
Step 7: Creating Flame-Like Details

Draw a loop and triangle to create a 'tadpole' shape. Add a triangle on top, then sketch flame-like loops and points to give the heart an energetic feel.
Step 8: Refining the Right Side
Sketch a long, graceful curve on the right. Add more points and curves along the top to match the flame-like style of the left side.
Step 9: Final Touches

Complete the design with one final loop. Add a small heart and a few floating circles around the main drawing to add a playful, whimsical touch.
Step 10: Outlining and Coloring

Trace your pencil lines with a black pen. For coloring, use a bold red for the base and a lighter shade for highlights to give your heart a 3D, glossy appearance.
More Tutorials


