How to Draw a Drought: Easy Landscape Tutorial for Kids
Explore environmental themes through art with this simple drought landscape tutorial. Designed for ages 5 and up, this activity requires only a pencil, paper, and eraser. Follow these steps to build confidence in sketching natural textures and weather patterns.
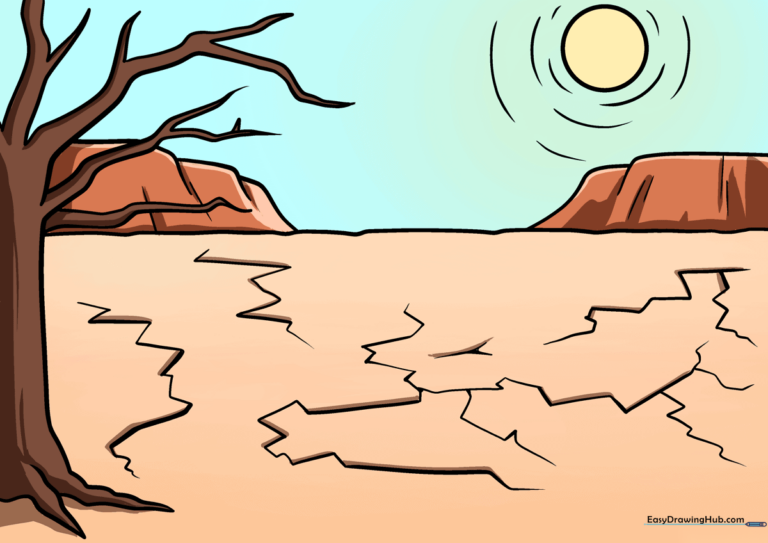
🎯 Final Result
Step-by-Step Instructions
Step 1: Sketching the Dried Roots
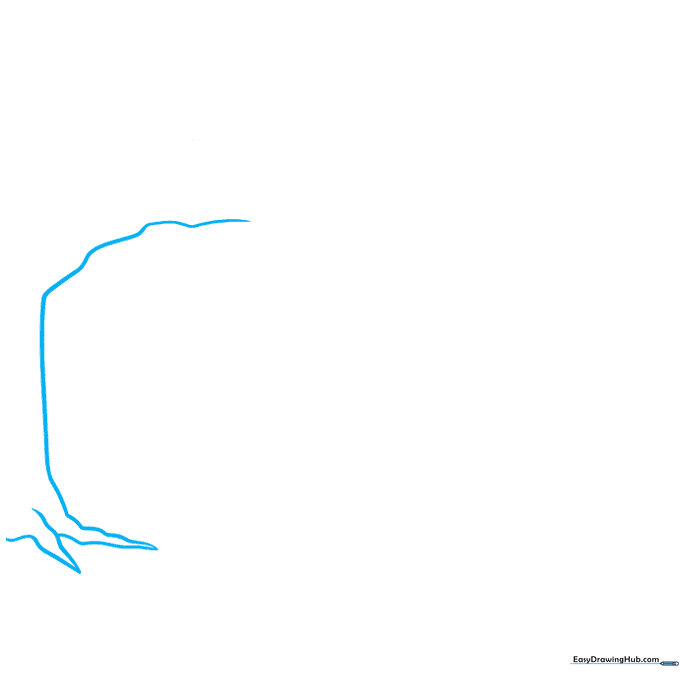
Start by drawing a squiggly vertical line on the left side of your paper to represent a withered root. Add a smaller, jagged line branching off it. Teacher's Tip: Keep your pencil pressure light here; these are just guidelines for the final shape.
Step 2: Adding Withered Branches
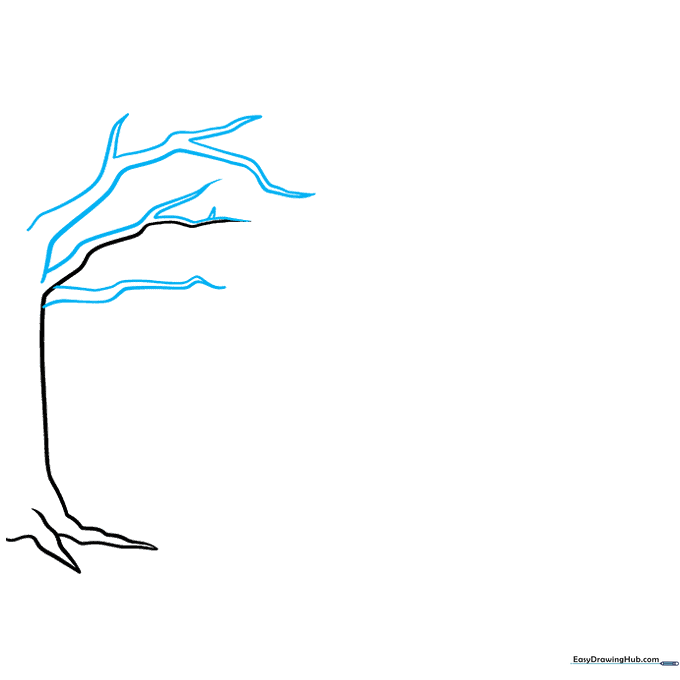
Draw two crooked, parallel lines that meet at a point to form a branch. Repeat this for a second branch, then sketch a loose, uneven dome shape above them. Teacher's Tip: Don't worry about making the lines perfectly straight—nature is full of irregular shapes!
Step 3: Defining the Horizon
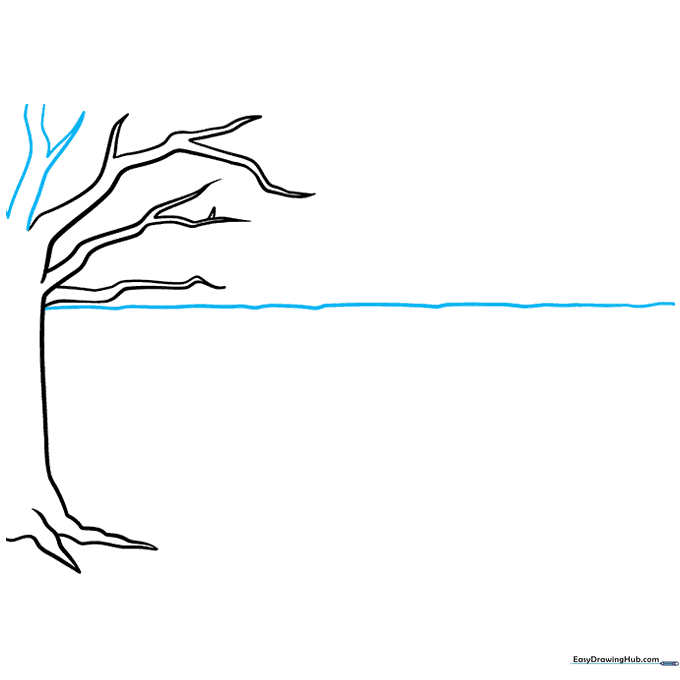
Add more vertical, crooked lines to complete the branch structure. Then, draw a long, uneven horizontal line across the page to create the horizon. Teacher's Tip: A slightly wavy line makes the ground look more natural than a ruler-straight one.
Step 4: Creating Soil Cracks
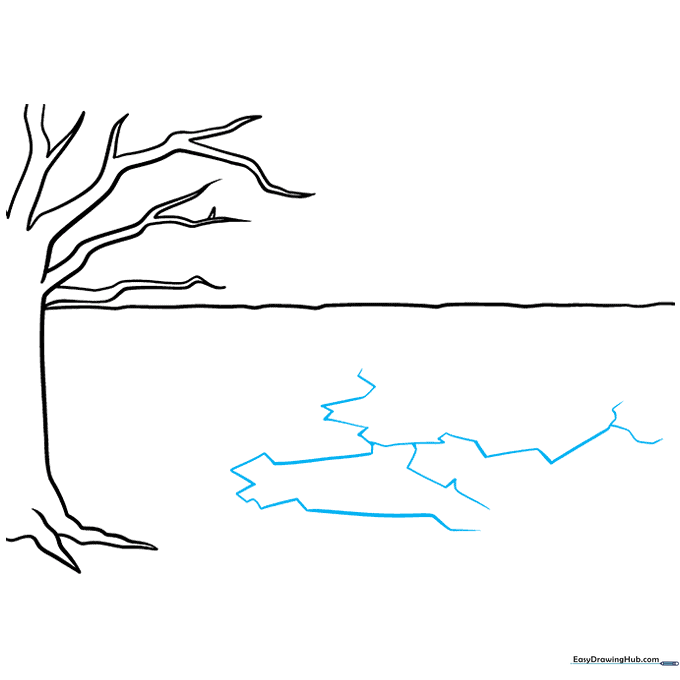
Use blocky, zigzag lines to draw cracks in the soil, similar to how you might draw lightning bolts. Teacher's Tip: Vary the length of your lines to make the ground look realistically parched.
Step 5: Expanding the Texture
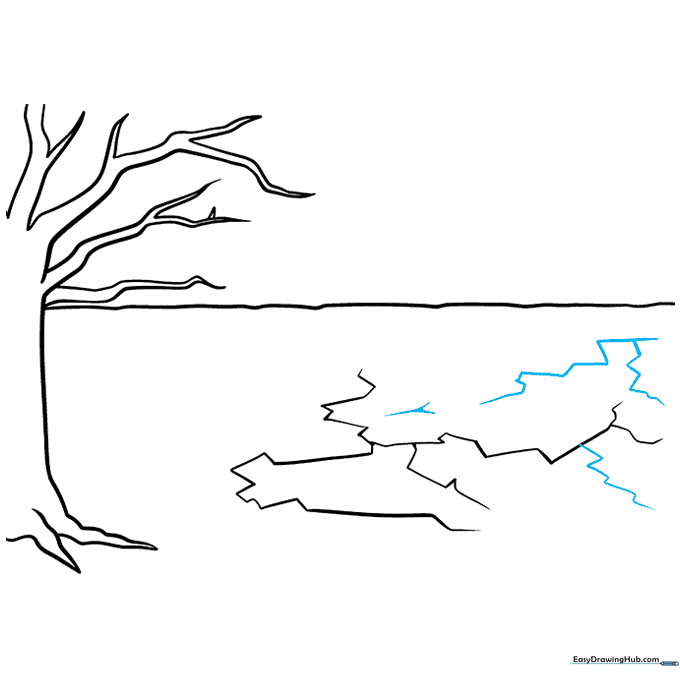
Continue adding more zigzag cracks across the foreground. Teacher's Tip: Try to connect some of the lines to create small, irregular polygons in the dirt.
Step 6: Finalizing the Dry Ground
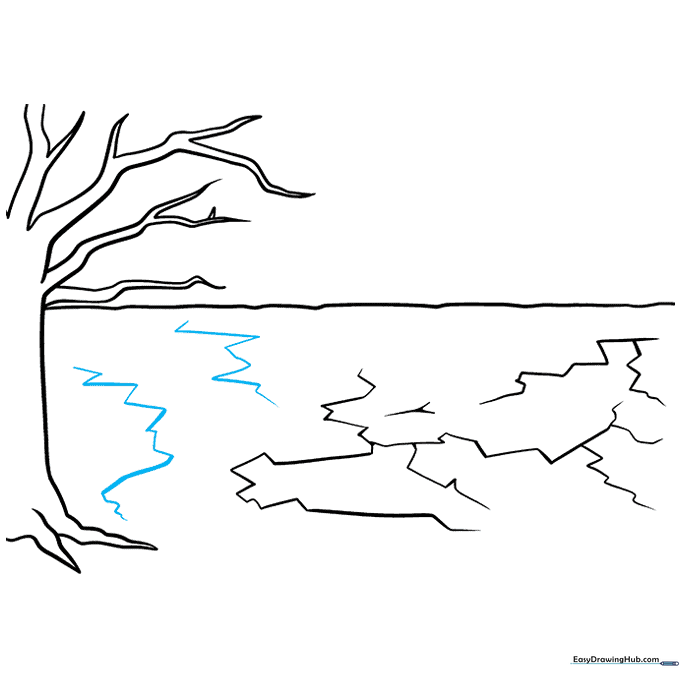
Add a few final, smaller cracks to fill in any empty spaces. This gives the drawing a weathered, dry appearance. Teacher's Tip: Focus on making the cracks look random rather than perfectly symmetrical.
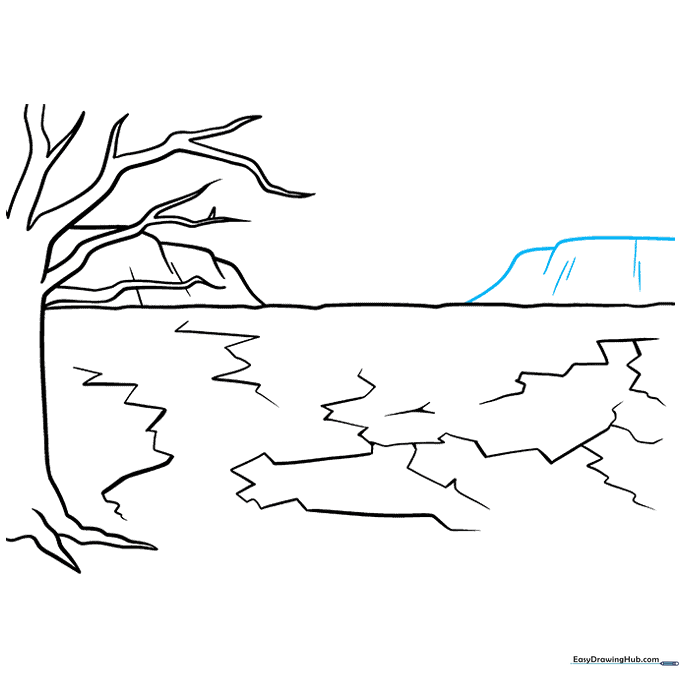
Step 7: Drawing Background Hills

Sketch three overlapping, blocky hook shapes in the distance to represent hills. Add two lines inside each to give them depth. Teacher's Tip: Keep these shapes lighter than the foreground to create a sense of distance.
Step 8: Completing the Landscape
Repeat the hill-drawing process on the right side of the page, pointing the shapes in the opposite direction for balance. Teacher's Tip: Overlapping shapes is a great way to show perspective in a simple drawing.
Step 9: Adding the Sun
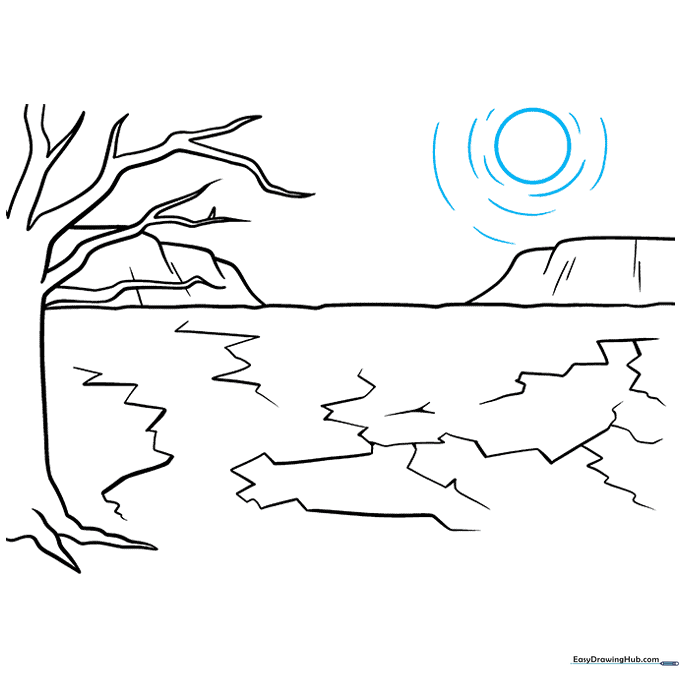
Draw a circle in the sky with short, curved lines radiating outward to represent the hot sun. Teacher's Tip: Place the sun slightly off-center to make your composition more dynamic.
Step 10: Coloring Your Scene
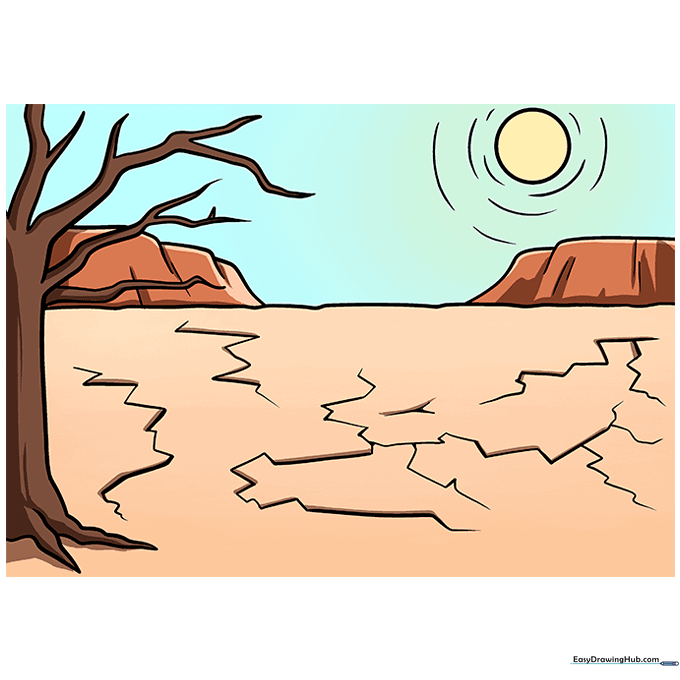
Outline your drawing with black ink, using thicker lines for the cracks to add emphasis. Color the ground light brown, the tree a darker brown, the hills reddish-brown, the sky blue, and the sun pale yellow. Teacher's Tip: Use a darker shade of brown inside the cracks to create a shadow effect, making the ground look truly parched.
More Tutorials


