How to Draw a Dragon with Flowers: Easy Step-by-Step Guide
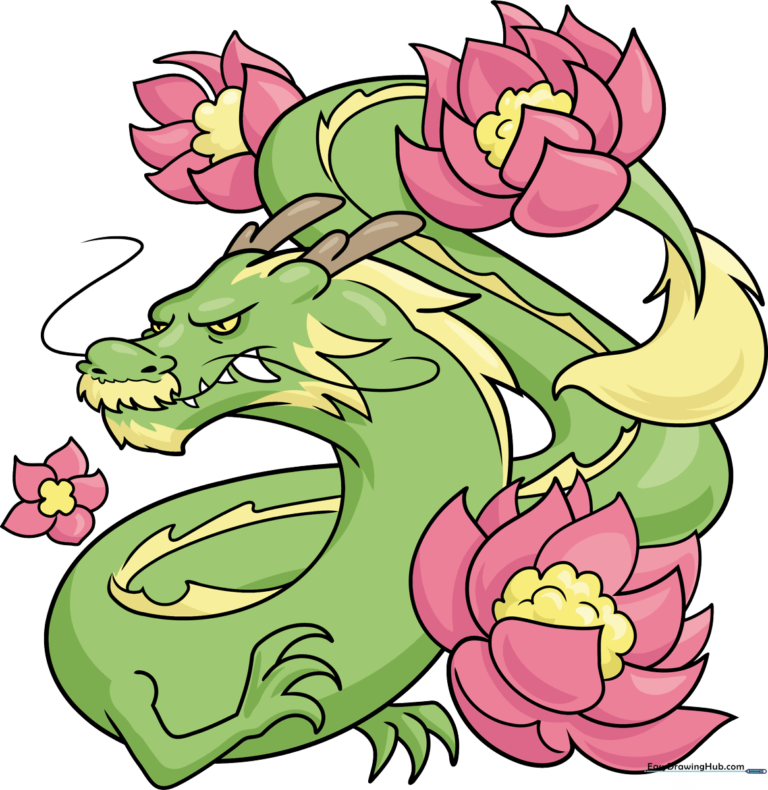
Bring a touch of fantasy to your sketchbook with this charming dragon and lotus flower design. Perfect for artists ages 6 and up, this project uses simple shapes to build confidence. Grab your favorite pencil, an eraser, and some colored pencils to get started on your magical masterpiece.
🎯 Final Result
Step-by-Step Instructions
Step 1: Sketching the Dragon's Face

Start by lightly sketching the face. Use curved lines for the brow, snout, and nostrils. Tip: Keep your pencil pressure light here—if you make a mistake, it will be much easier to clean up later!
Step 2: Defining the Jaw and Horns

Draw the lower jaw using a gentle curve, then add the antler-like horns on top of the head. Tip: Think of the horns as tree branches—they don't need to be perfectly symmetrical to look great.
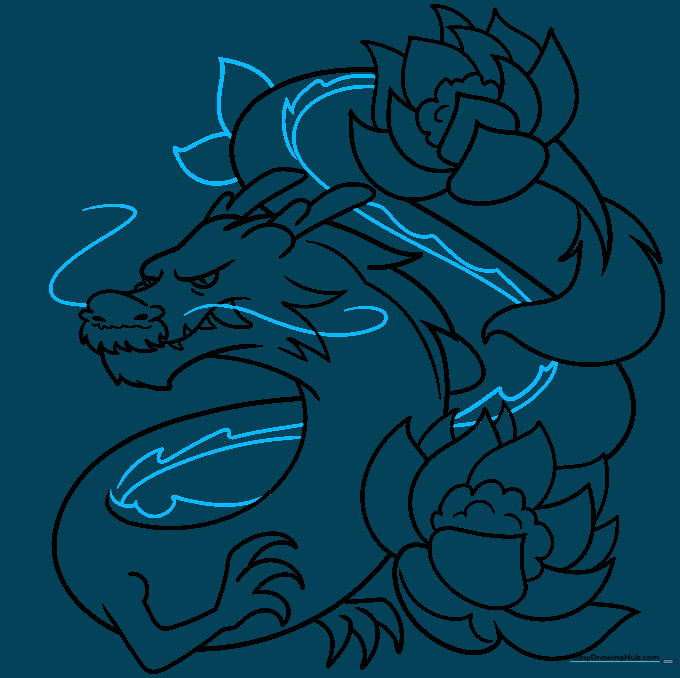
Step 3: Adding Teeth and Lotus Petals

Add small, triangular teeth and begin the long, serpentine neck. Now, start your first lotus flower near the neck using overlapping petal shapes. Tip: Vary the size of your petals to make the flower look more natural.
Step 4: Detailing the Lotus Center
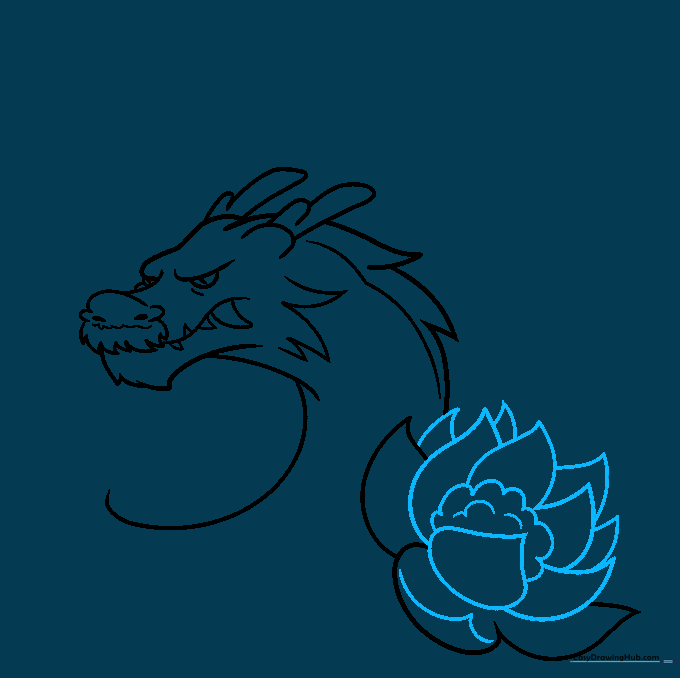
Continue the petals and add a center to your lotus using 'U' shaped lines. Tip: Use a rhythmic motion for the 'U' shapes to keep them consistent and neat.
Step 5: Drawing the Body and Claws
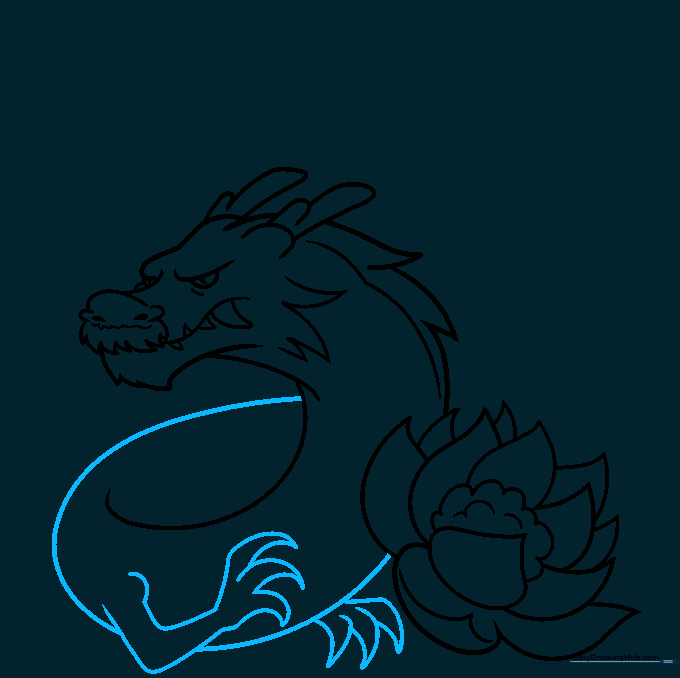
Extend the dragon's body with a long, flowing curve and sketch the forelimbs. Tip: Keep the claws sharp and pointed to give your dragon a bit of personality.
Step 6: Adding a Second Flower
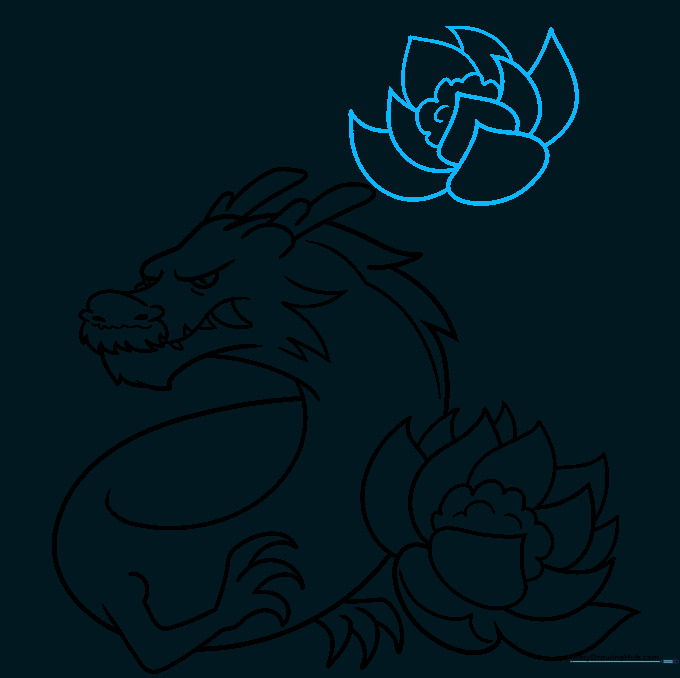
Draw another lotus blossom near the dragon's head. Tip: Try overlapping this flower slightly with the dragon's mane to create depth in your drawing.
Step 7: The Tail and Flame Tuft
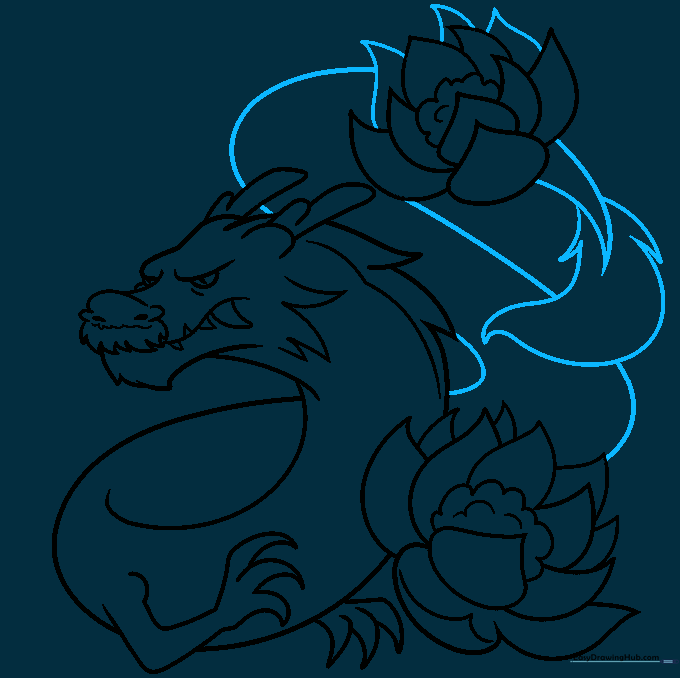
Continue the long body and finish the tail with a flamelike tuft. Tip: Use quick, flicking motions with your pencil to make the flame look energetic.
Step 8: Adding Whiskers and Texture
Add long, flowing whiskers from the snout and a jagged ridge down the back. Tip: The ridge adds a sense of movement—make sure the spikes follow the curve of the body.
Step 9: Final Touches
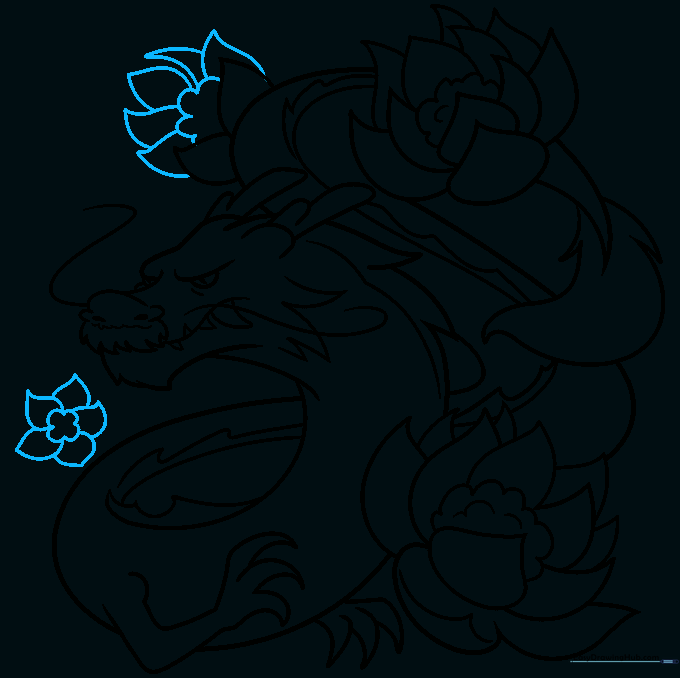
Add a few more lotus blossoms to fill the space. Tip: Placing flowers at different heights creates a balanced, professional-looking composition.
Step 10: Bringing it to Life with Color
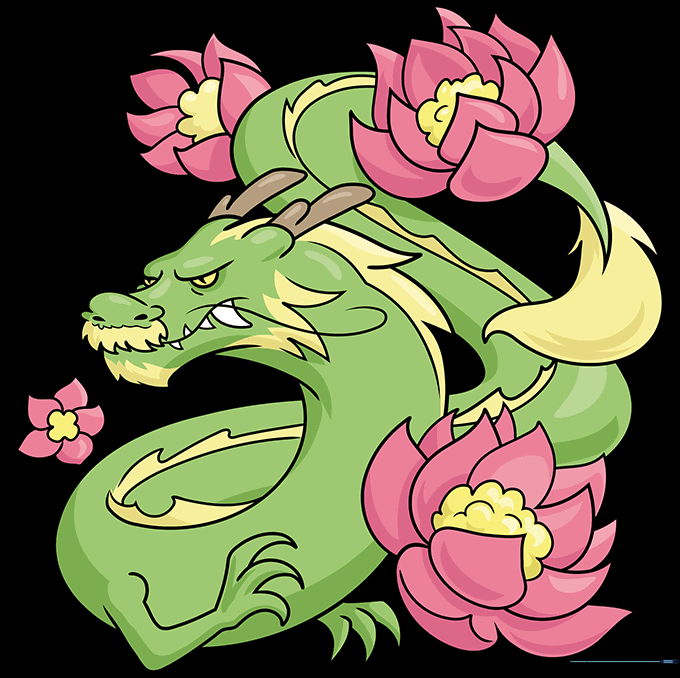
Time to color! We used green and gold for the dragon and soft pinks for the lotus. Tip: Use light pressure for the base color, then press harder in the shadows to add depth.
More Tutorials


