How to Draw a Barking Dog: Easy 10-Step Guide
Ready to bring some personality to your sketchbook? This tutorial is perfect for young artists ages 6+ who want to capture a dynamic, barking dog. You only need a pencil, an eraser, and a piece of paper to get started. Follow these simple steps to master expressive facial features and basic animal anatomy.
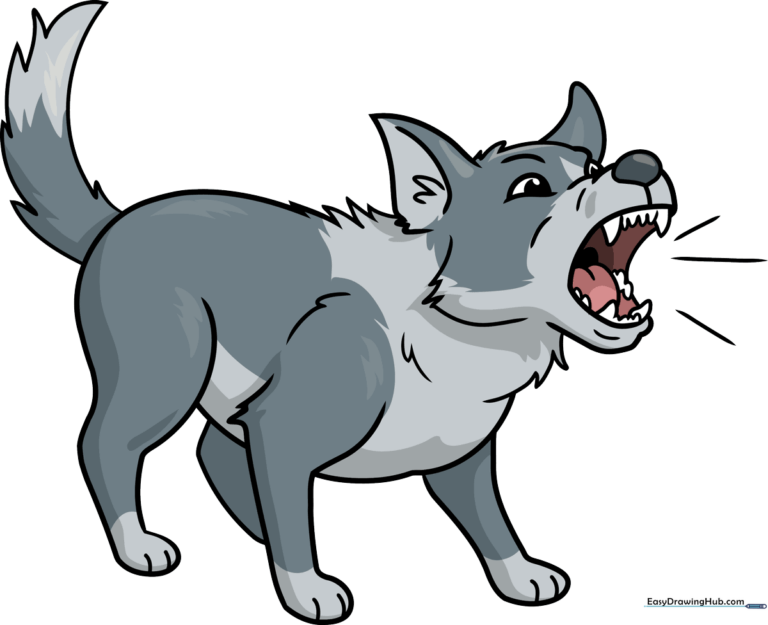
🎯 Final Result
Step-by-Step Instructions
Step 1: Sketching the Snout and Eyes

Start by drawing an irregular round shape for the nose. Use overlapping curved lines to form the wrinkled skin on top of the snout. Teacher's Tip: Keep your pencil pressure light here; these wrinkles define the dog's expression, so you'll want to refine them later.
Step 2: Forming the Open Mouth

Use a large 'C' shaped line to draw the open mouth. Connect it to the center and side of the nose with short, precise lines. Then, add the triangular teeth. Teacher's Tip: Make sure the mouth is wide enough to show the dog is really barking!
Step 3: Adding the Tongue and Jaw
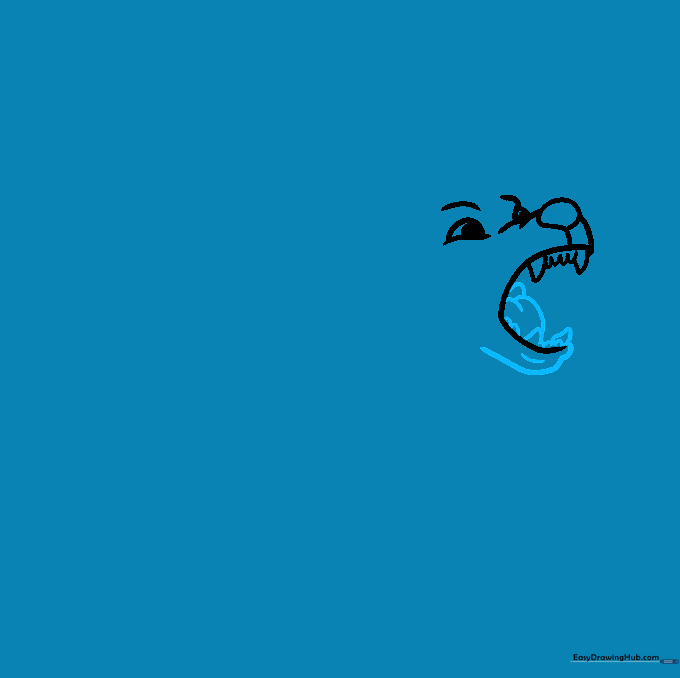
Draw the tongue and the lower teeth using curved lines. Sketch the lower jaw and contour the lip with a short, firm line. Teacher's Tip: A slightly curved tongue adds a sense of movement to your drawing.
Step 4: Ears and Head Shape

Complete the far side of the mouth and add the triangular ear. Use jagged lines to draw the top of the head and fur. Teacher's Tip: Use short, quick pencil strokes to create the look of fluffy fur.
Step 5: Defining the Neck and Fur

Outline the second ear and add tufts of fur along the neck and face. Teacher's Tip: Vary the size of your 'fur' lines to make the coat look natural rather than perfectly uniform.
Step 6: Drawing the Front Leg
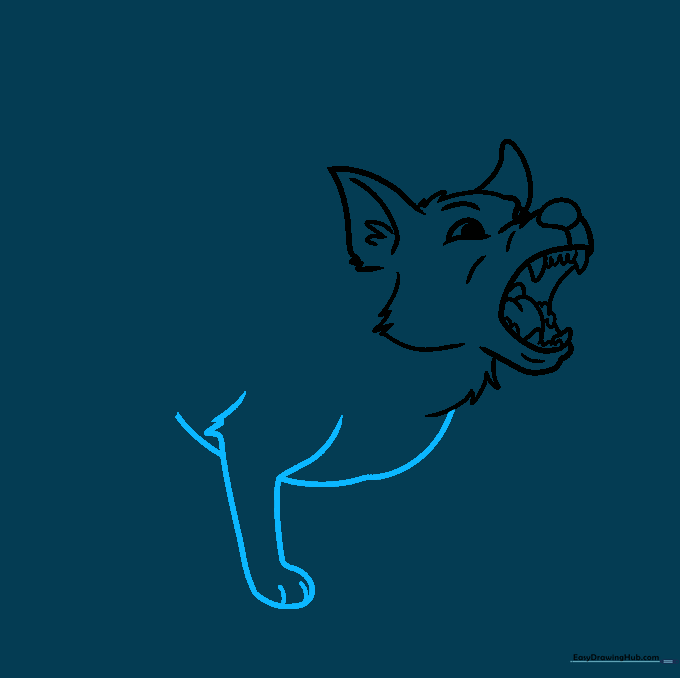
Draw the front leg using a long curved line. Add a small tuft of fur at the elbow. Teacher's Tip: The elbow is a great place to add a little extra detail to show the dog's posture.
Step 7: The Back and Hind Leg
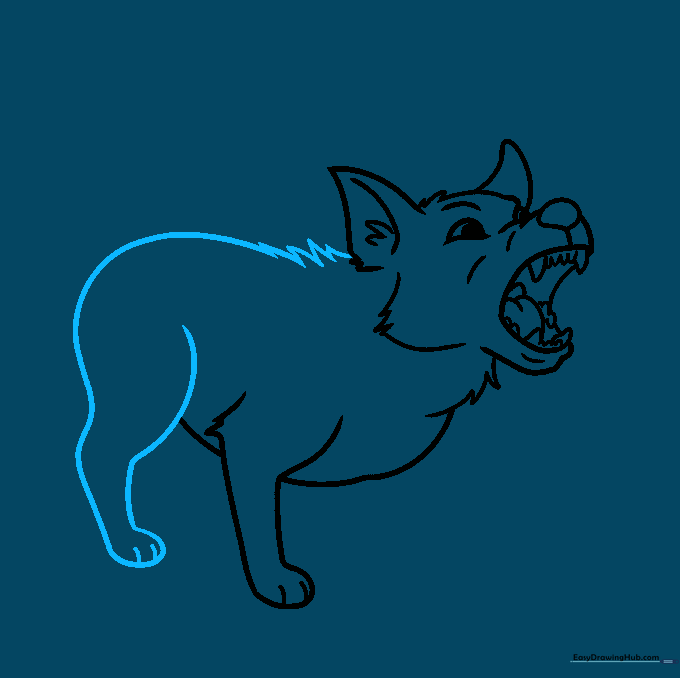
Extend a long curved line for the back and rump. Draw the hind leg, ensuring it intersects with the belly line. Teacher's Tip: Keep the back line smooth to show the dog's lean, active stance.
Step 8: Adding Remaining Legs and Texture
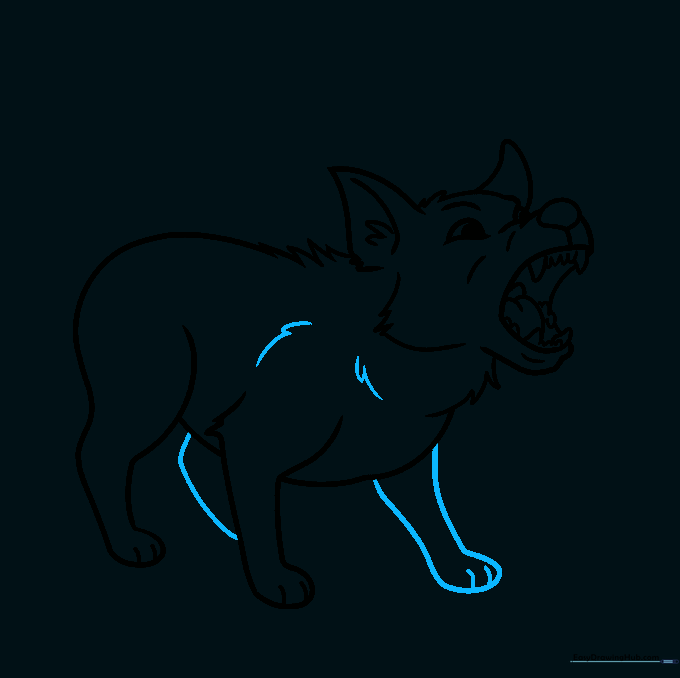
Trace the remaining legs and add more furry texture to the body using short, overlapping lines. Teacher's Tip: Don't overthink the fur; random, short strokes look more natural than perfectly symmetrical ones.
Step 9: Tail and Sound Lines
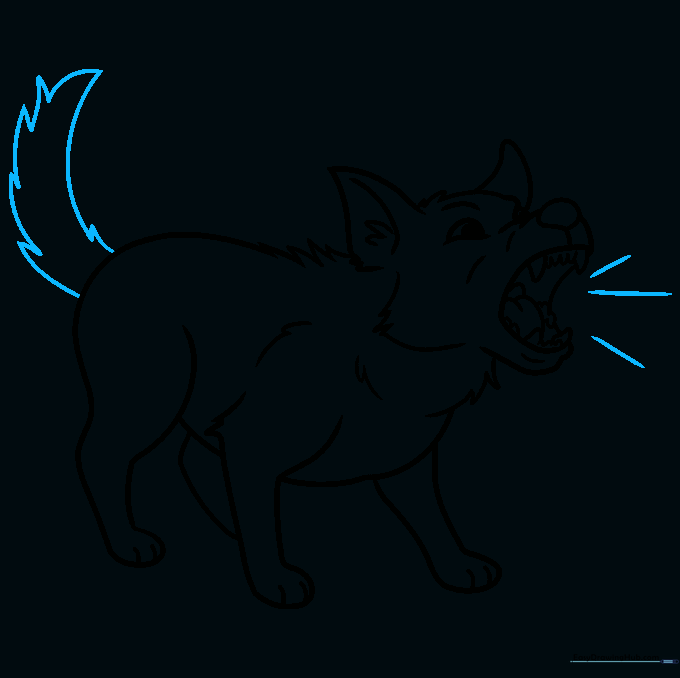
Draw the tail with jagged lines. Add three straight lines in front of the mouth to represent the barking sound. Teacher's Tip: The sound lines are a classic cartoon technique to show action!
Step 10: Bring Your Dog to Life with Color
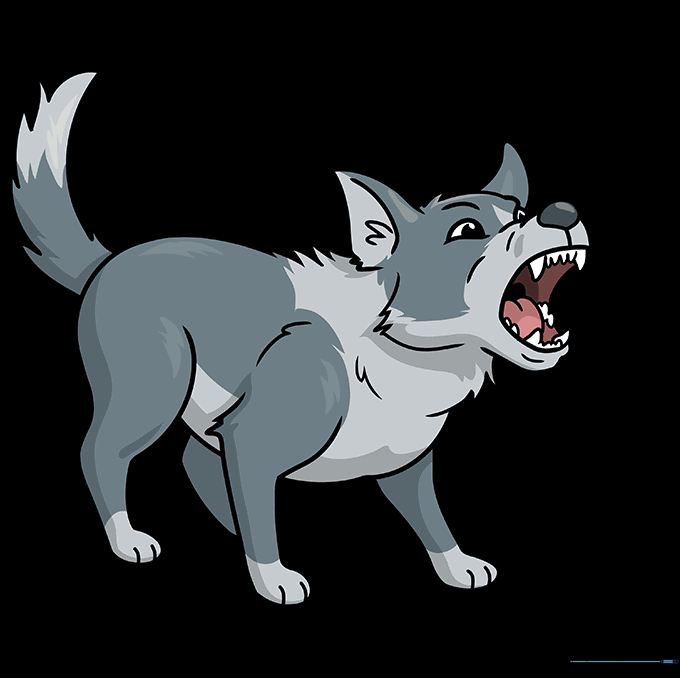
Time to color! We used shades of gray to give our dog a classic look. Teacher's Tip: Use a darker shade for the shadows under the belly and ears to give your drawing more depth.
More Tutorials


