How to Draw a Day of the Dead Skull: Easy 9-Step Guide
Celebrate culture and creativity with this festive Day of the Dead skull tutorial, perfect for artists ages 6 and up. You will need a pencil, an eraser, and your favorite markers or colored pencils to bring this design to life. Follow these steps to master symmetrical shapes and intricate patterns while building your confidence as an illustrator.
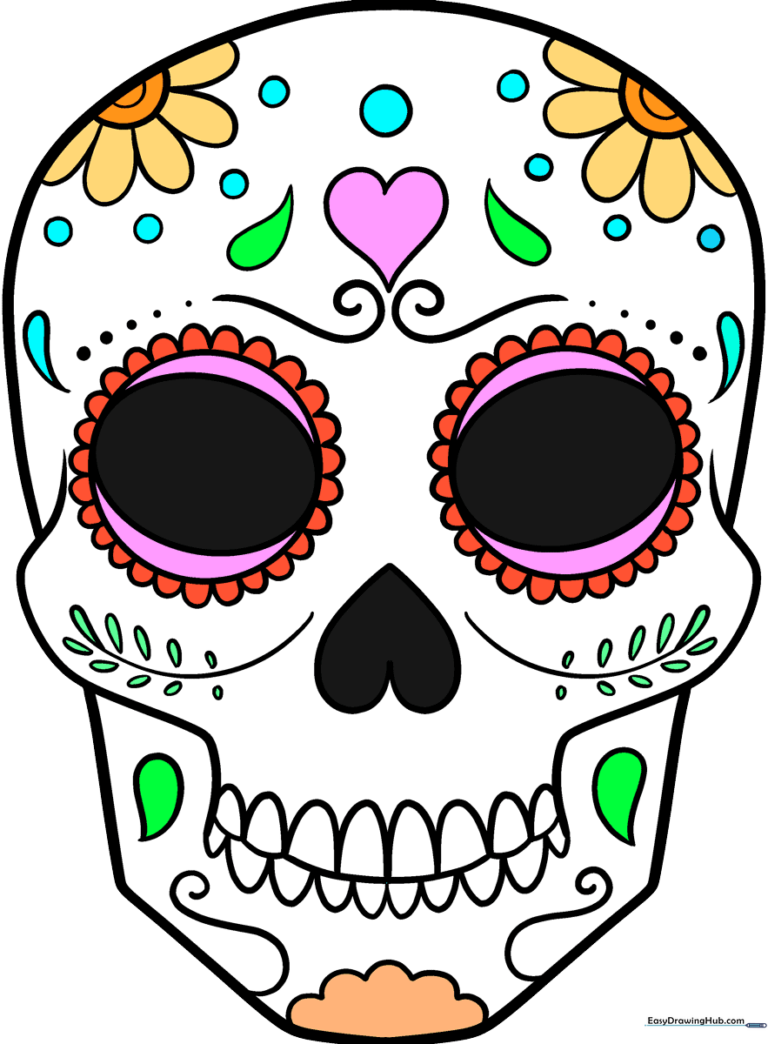
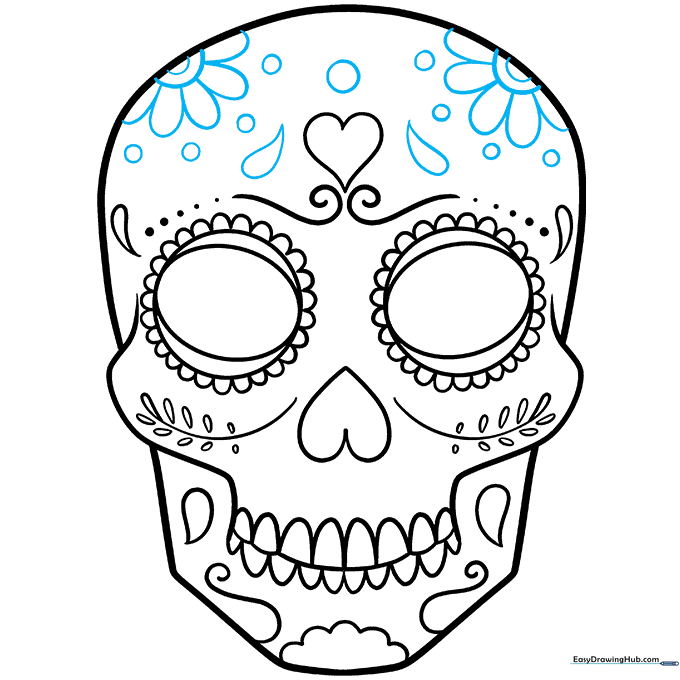
🎯 Final Result
Step-by-Step Instructions
Step 1: Sketching the Eye Sockets
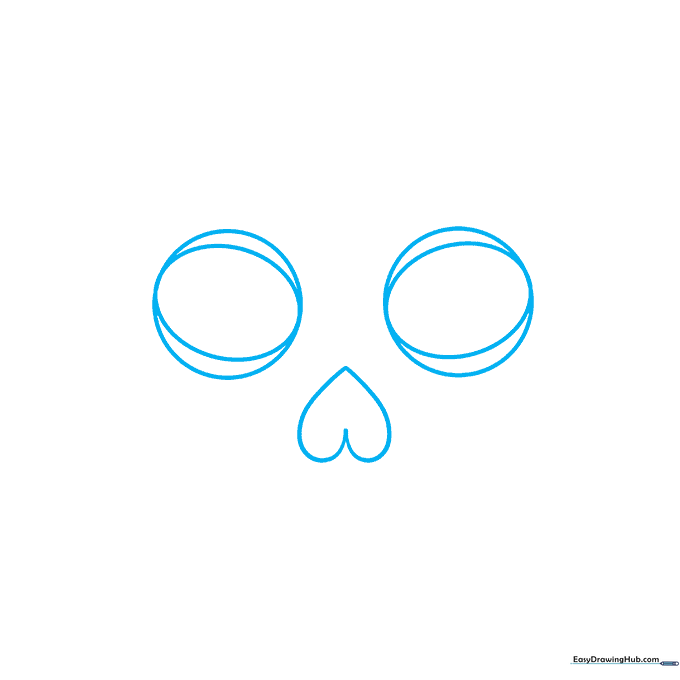
Draw two large, balanced circles for the eye sockets. Inside each, sketch a smaller oval. Place an upside-down heart between them for the nose. Teacher's Tip: Keep your pencil pressure light here so you can easily adjust the symmetry before committing to darker lines.
Step 2: Defining the Skull Shape
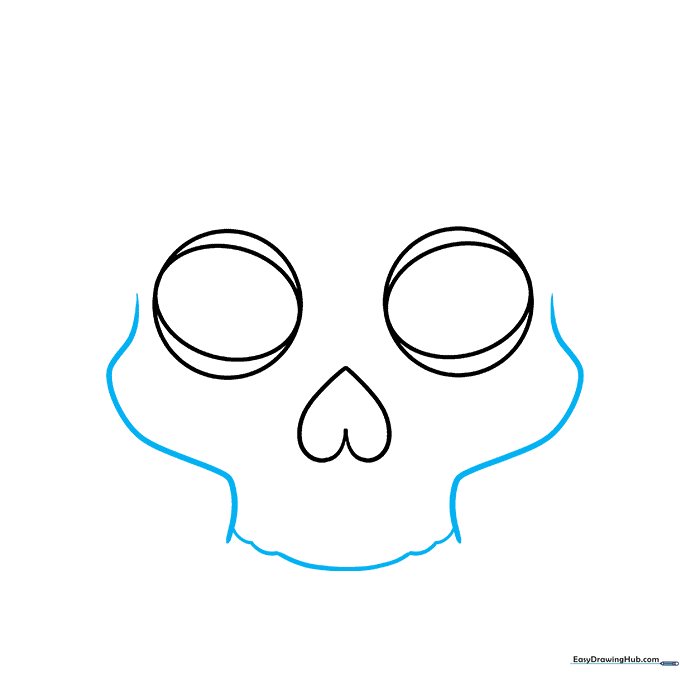
Outline the sides of the skull using smooth, curved lines. Connect them at the bottom with a gentle, wavy line. Teacher's Tip: Think of this as drawing a rounded rectangle; don't worry if it's not perfectly even—skulls have natural character!
Step 3: Adding the Teeth
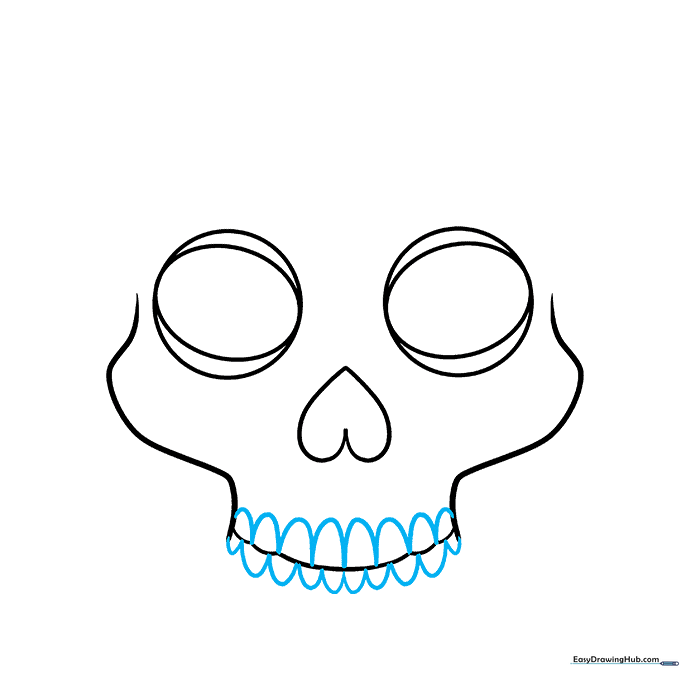
Create a series of 'U' shaped lines above and below the wavy mouth line to form the teeth. Teacher's Tip: Keep the 'U' shapes consistent in size to make the skull look organized and intentional.
Step 4: Drawing the Jawline
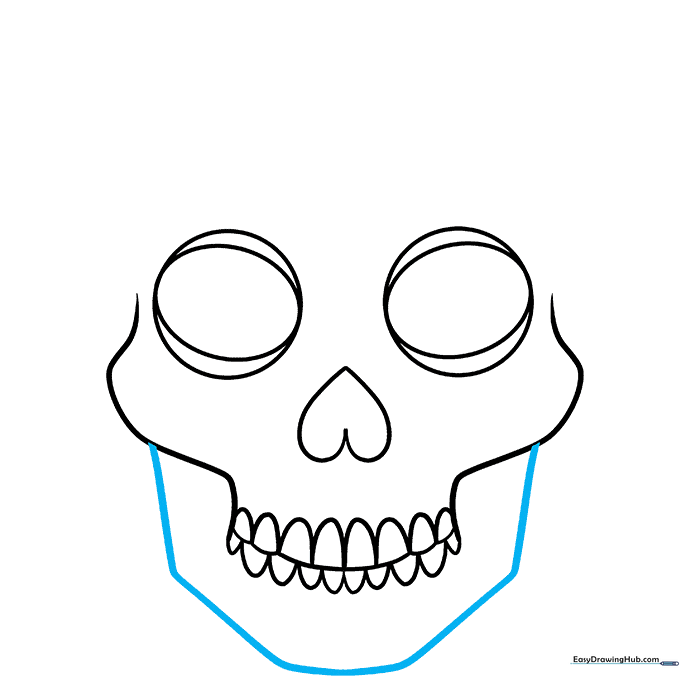
Draw a long, sweeping curved line from one cheek to the other to define the jawbone, ensuring you add sharp corners near the chin. Teacher's Tip: Use a confident, fluid motion to get a smooth curve.
Step 5: Completing the Cranium
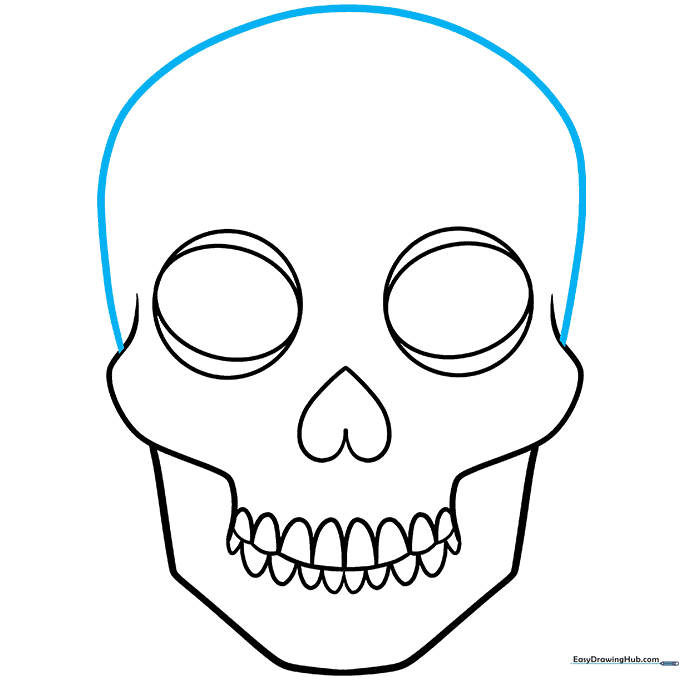
Draw a large, bold curved line over the top of the head to connect the cheeks. This closes the skull shape. Teacher's Tip: Imagine you are drawing a large dome or a bowl turned upside down.
Step 6: Adding Decorative Patterns
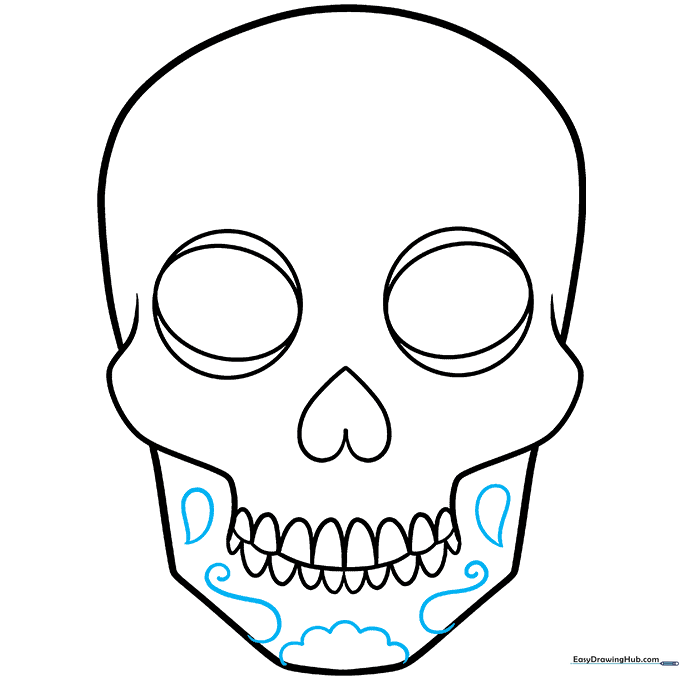
Add whimsical details like teardrops on the jaw, spiral cheek accents, and a scalloped border at the bottom. Teacher's Tip: Sugar skulls are all about folk art—don't be afraid to make your patterns colorful and unique!
Step 7: Intricate Facial Details

Draw fern-leaf patterns on the cheeks, a heart on the forehead, and spirals below it. Add small dots above the eyes for texture. Teacher's Tip: Use a fine-liner pen for these small details to keep them crisp.
Step 8: Embellishing the Eyes
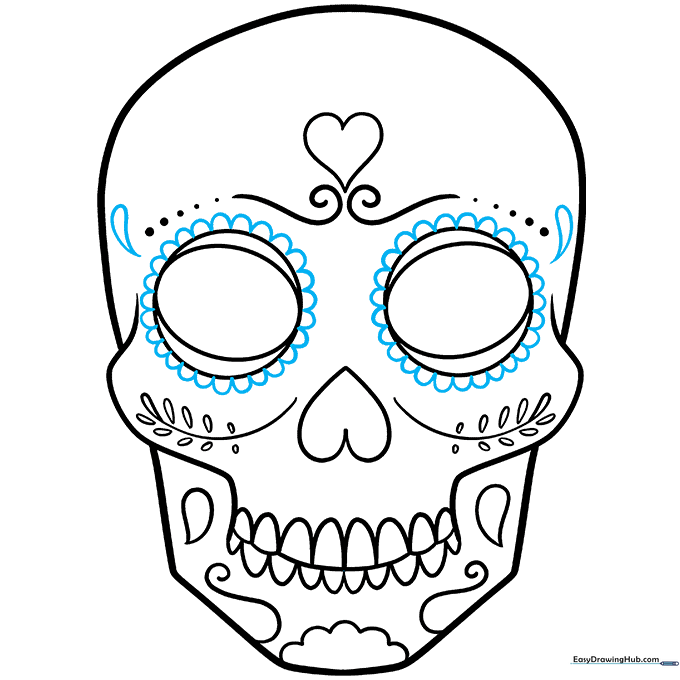
Frame the eyes with a scalloped 'U' pattern and add teardrop shapes above them. Teacher's Tip: This creates a 'flower petal' effect around the eyes, which is a classic sugar skull design element.
Step 9: Final Floral Touches
Finish by drawing daisy flowers on the forehead, filling gaps with small circles and teardrops. Teacher's Tip: Now is the time to color! Use bright, bold colors like marigold orange, hot pink, and turquoise to make your skull pop.
More Tutorials


