How to Draw a Dandelion: Easy 10-Step Guide for Kids
Bring the beauty of spring to your sketchbook with this simple dandelion tutorial, perfect for young artists ages 5 and up. You will only need a pencil, an eraser, and your favorite green and yellow markers or crayons. Follow along to master the art of drawing delicate petals and jagged leaves with ease.
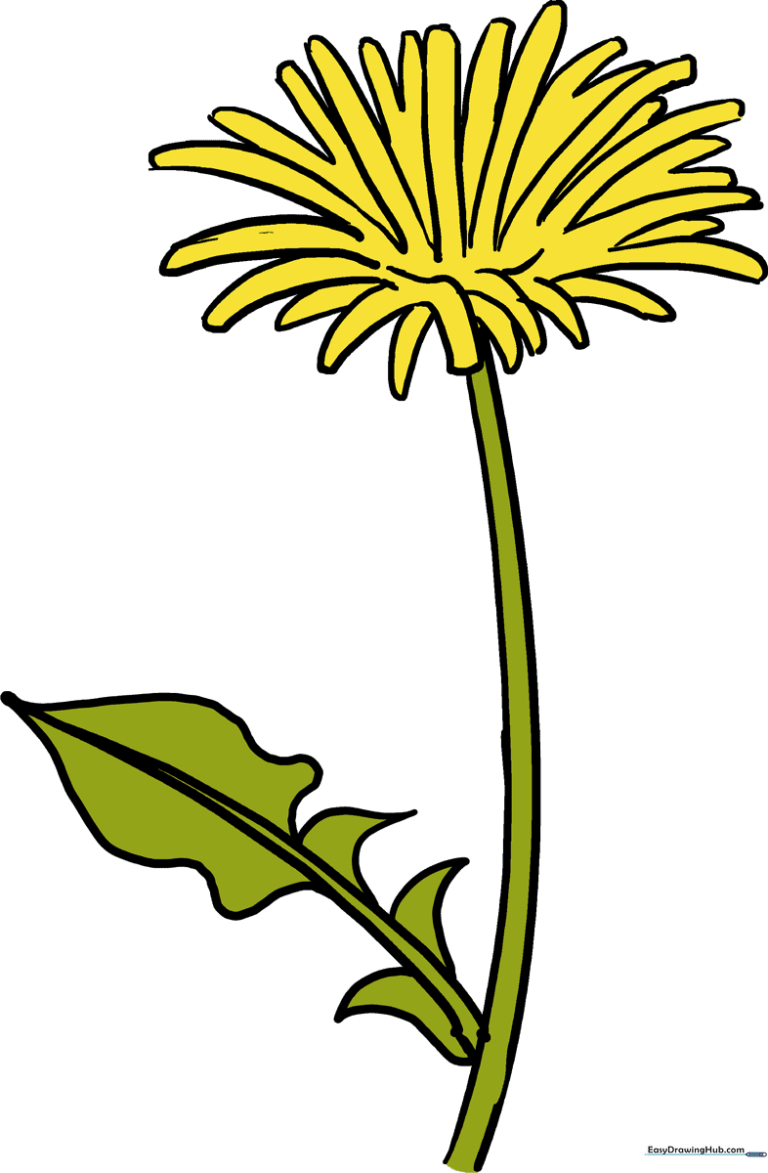
🎯 Final Result
Step-by-Step Instructions
Step 1: Sketching the First Petals

Start by drawing the flower's narrow petals. For each, draw two parallel curved lines and connect them at the top with a small curve. Teacher's Tip: Keep your pencil pressure light so you can easily adjust the shape if your petals look a bit wobbly!
Step 2: Mirroring the Petals

Move a short distance away and draw a second set of petals. These should look like a mirror image of your first set. Tip: Try to keep the spacing consistent to help the flower look balanced.
Step 3: Connecting the Petal Layers

Draw additional petals to bridge the gap between your first two sets. Ensure the tips of these petals meet in sharp points. Tip: Dandelions are naturally messy, so don't worry if your petals aren't perfectly uniform!
Step 4: Adding Depth with V-Shapes

Fill in the empty spaces between your petals using a mix of parallel lines and small 'V' shapes. This adds texture and makes the flower look more realistic. Tip: Use short, quick strokes for the V-shapes to mimic the natural jagged edge of a dandelion.
Step 5: Filling the Center
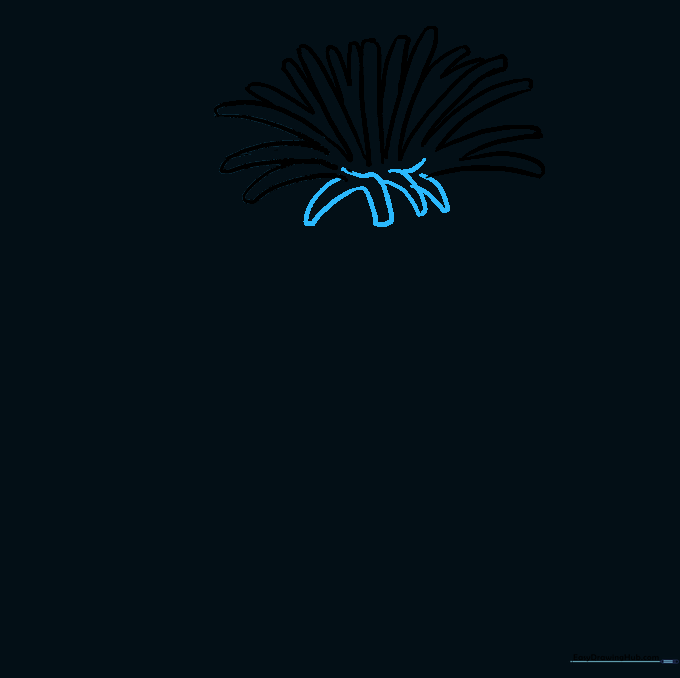
Add more petals to the front of the flower. Draw short, horizontal curved lines to define the base edge, then layer in more petal shapes. Tip: Imagine the flower is blooming outward toward you.
Step 6: Finalizing the Flower Head

Fill in any remaining gaps with smaller petals. Use a combination of curved lines and V-shapes to ensure the flower looks dense and full. Tip: Don't overthink it; nature is rarely perfectly symmetrical!
Step 7: Drawing the Stem

Extend two long, parallel curved lines downward from the flower to create the stem. Add a small diagonal leaf shape branching off the side. Tip: Make the stem slightly thicker at the bottom for a more grounded look.
Step 8: Shaping the Leaf
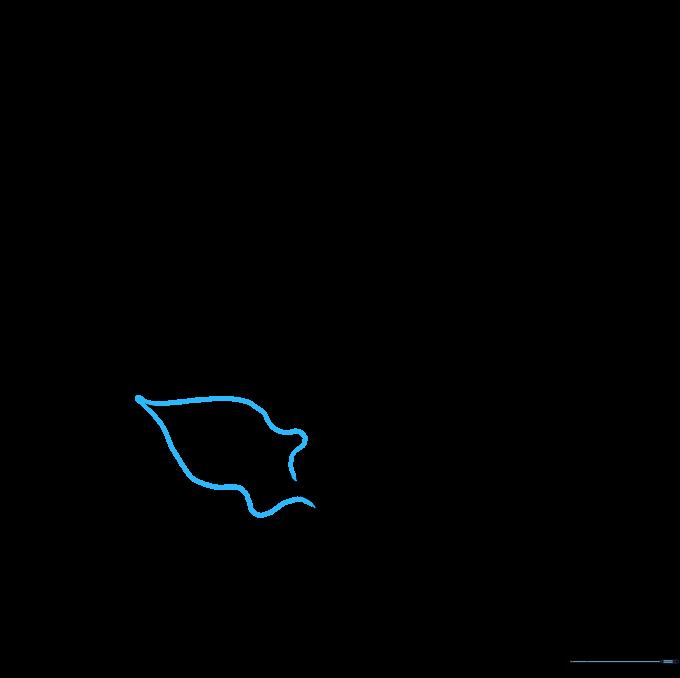
Use squiggly, curved lines to outline the large dandelion leaf. Connect these lines to a central vein. Tip: Dandelion leaves are famous for their 'lion's tooth' jagged edges, so make your lines nice and wavy!
Step 9: Adding Leaf Detail
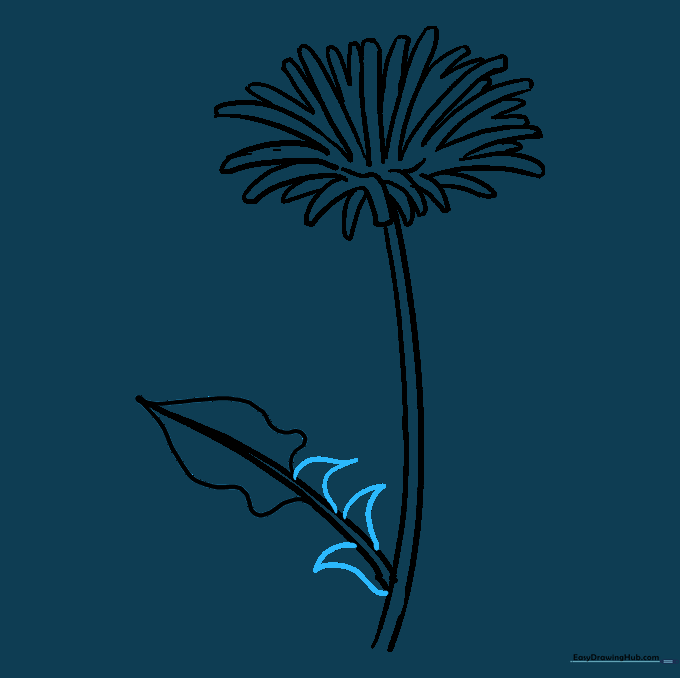
Refine the leaf by adding small, triangular spikes along the edges. Use the central vein as your guide. Tip: Keep your triangles small and irregular to make the leaf look organic.
Step 10: Bringing It to Life with Color

Time to color! Use a bright, sunny yellow for the flower petals and a deep, vibrant green for the stem and leaves. Tip: Try using two shades of green—a light one for the center and a darker one for the edges—to give your leaf extra dimension.
More Tutorials


