How to Draw a Cute Spider: Easy 10-Step Guide for Kids
Ready to draw a friendly eight-legged friend? This tutorial is perfect for ages 5+ and requires only a pencil, eraser, and paper. Follow along to build confidence in your sketching skills while creating a charming, fuzzy character.
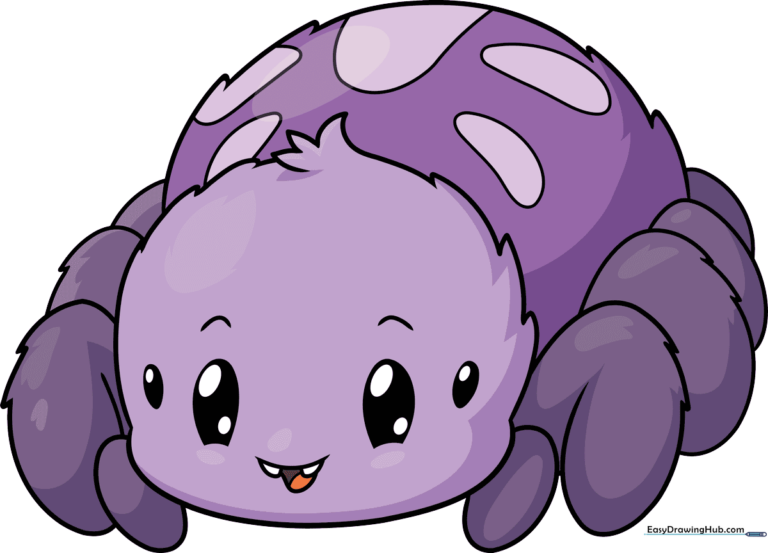
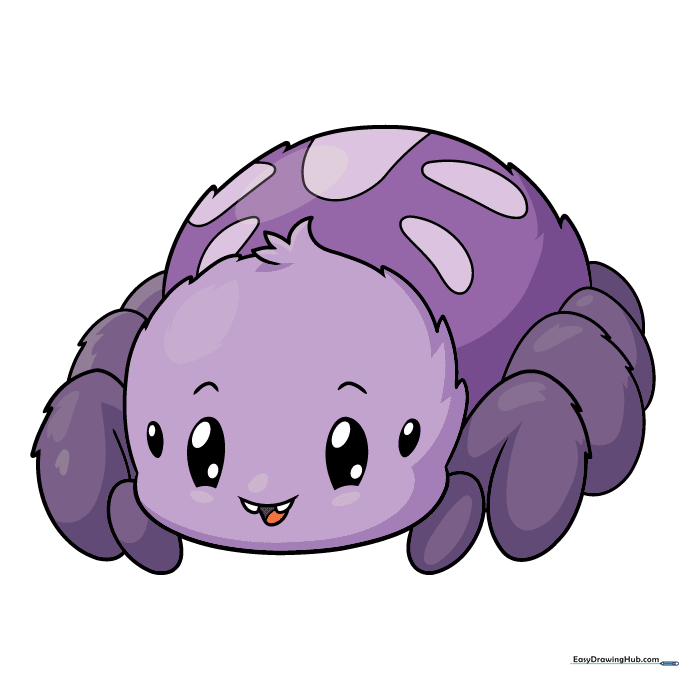
🎯 Final Result
Step-by-Step Instructions
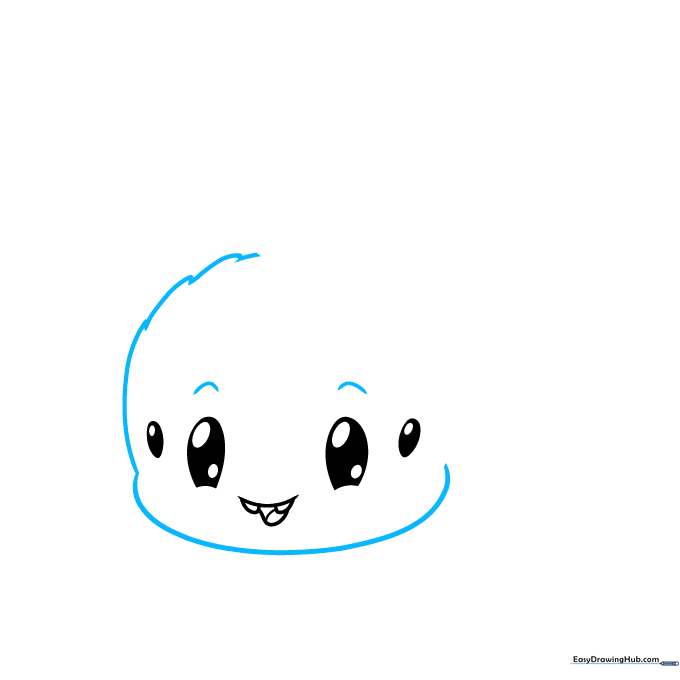
Step 1: Sketching the Large Eyes
Start by drawing two large, rounded shapes for the eyes. Add a smaller third eye near the center. Teacher's Tip: Draw these lightly; they are the anchor for your spider's personality!
Step 2: Adding Pupils and a Friendly Mouth

Add smaller ovals inside the eyes and shade them in. Below the eyes, draw a wide, curved mouth with tiny fangs. Tip: Keep the mouth shape wide to make the spider look happy rather than scary.
Step 3: Defining the Face and Fur
Draw curved lines above the eyes for eyebrows, then outline the cheeks. Use short, zig-zag lines at the top of the head to create a fuzzy texture. Tip: Use quick, flicking motions with your pencil to make the fur look realistic.
Step 4: Finishing the Head Shape
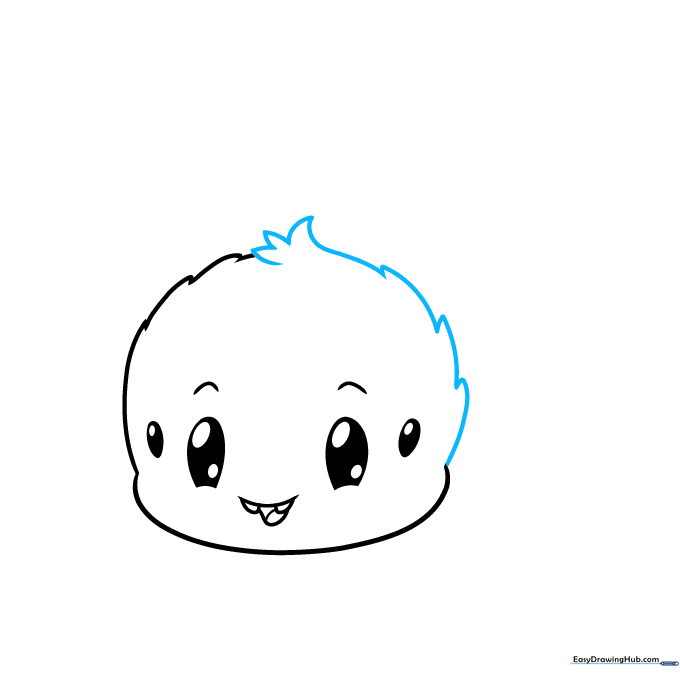
Connect your lines to complete the head shape, ensuring the tuft of fur on top looks soft and rounded. Tip: Check that your head is symmetrical before moving on to the legs.
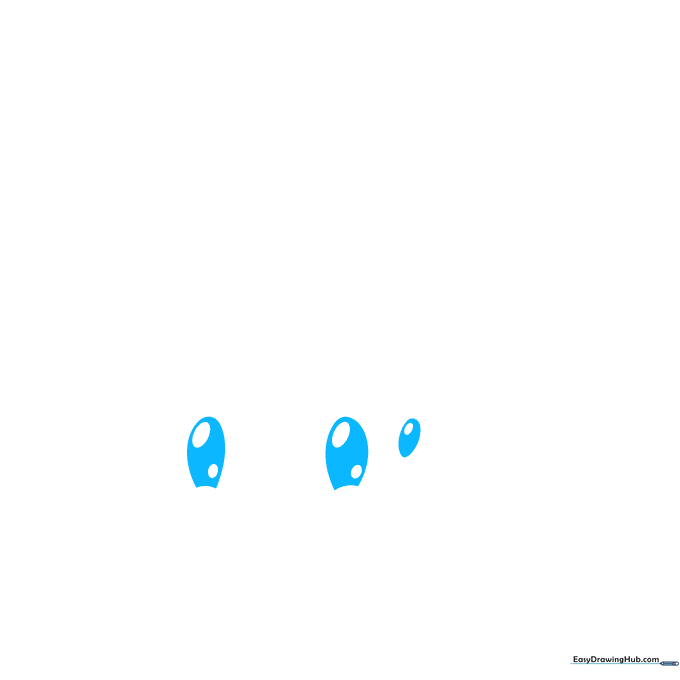
Step 5: Sketching the First Two Legs
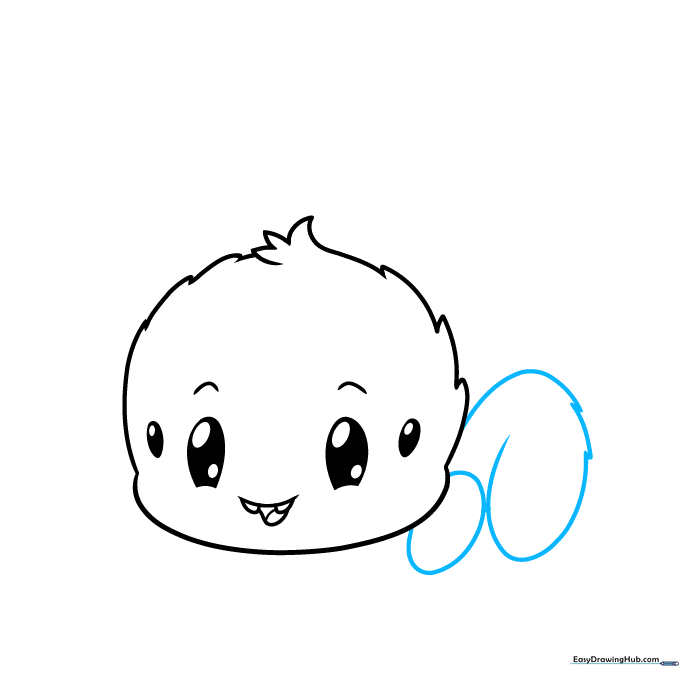
Draw an oval near the cheek for the first foot, then sketch the second leg using jagged, furry lines. Tip: Notice how the line doubles back—this creates the joint of the leg.
Step 6: Adding More Legs
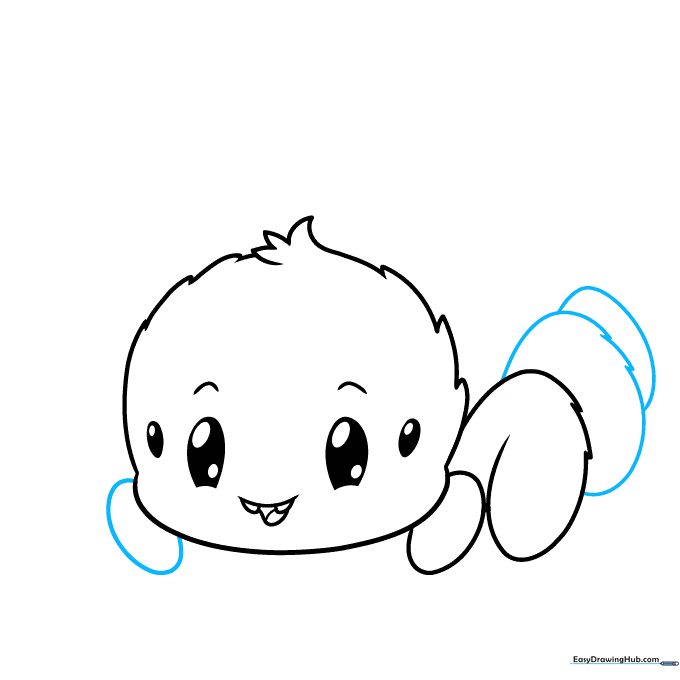
Add two more legs on the right side and one on the left. Keep the shapes oval-like and consistent with the first set. Tip: Vary the angles of the legs to make the spider look like it's crawling.
Step 7: Balancing the Legs
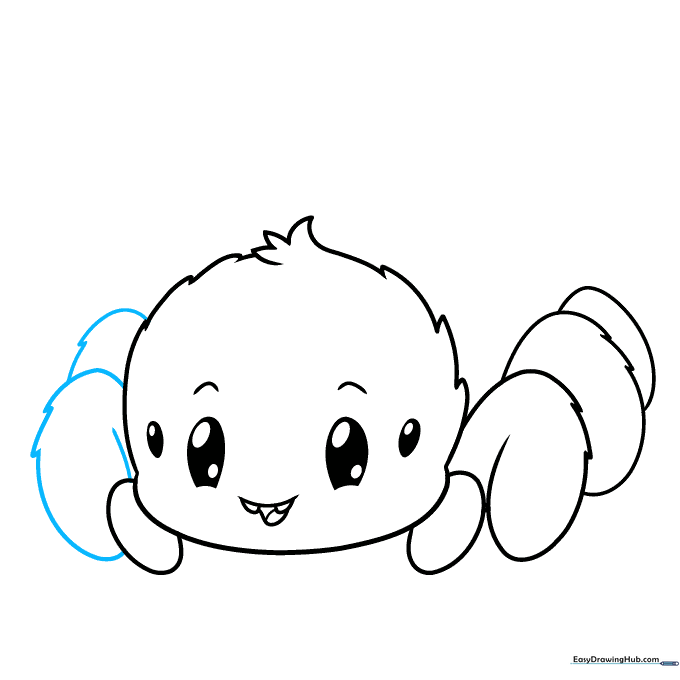
Draw two more legs on the left side, using jagged points to maintain the furry aesthetic. Tip: Ensure the legs are spaced evenly so the spider doesn't look lopsided.
Step 8: Drawing the Abdomen
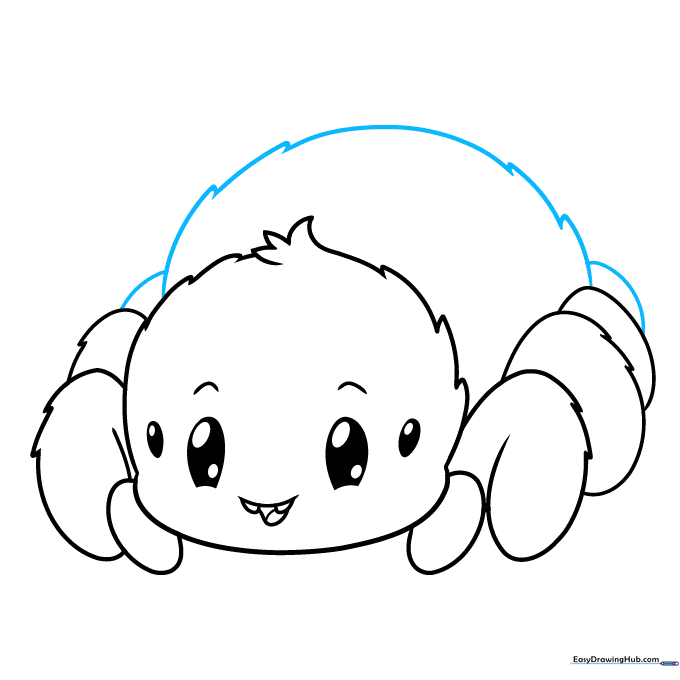
Sketch the large, fuzzy abdomen behind the head. Add the final remaining legs on each side. Tip: The abdomen should be the largest part of the body—make it nice and round!
Step 9: Adding Final Details

Add small spots or patterns on the abdomen using curved lines. Tip: These spots are a great place to add a pop of color later.
Step 10: Bringing Your Spider to Life with Color
Time to color! Use browns or greys for a realistic look, or go wild with bright reds, greens, or blues. Tip: Use a darker shade around the edges of the legs to give them a 3D, rounded appearance.
More Tutorials


