How to Draw a Cute Robot: Easy 10-Step Guide for Kids
Bring a friendly robot to life with this fun, screen-free drawing activity! Designed for young artists ages 5 and up, this tutorial uses simple geometric shapes to build confidence. All you need is a pencil, an eraser, and a piece of paper to get started.
🎯 Final Result

Step-by-Step Instructions
Step 1: Sketching the Expressive Eyes
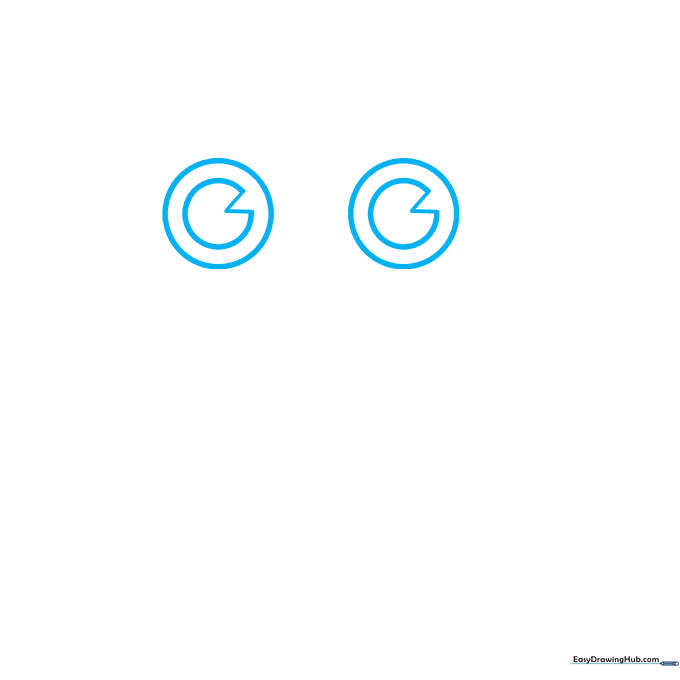
Start by drawing two circles for the eyes. Inside each, add a 'C' shape and a small 'V' to create a friendly, pie-slice look. Teacher's Tip: Keep your pencil lines light so you can easily erase any stray marks later.
Step 2: Adding Personality
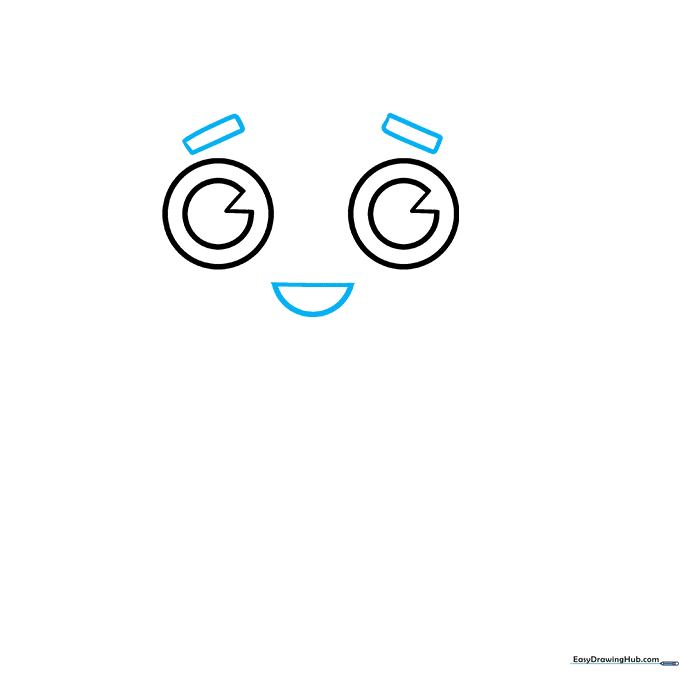
Draw a diagonal rectangle above each eye for eyebrows, then a half-circle below for a happy mouth. Teacher's Tip: Changing the angle of the eyebrows can make your robot look surprised or curious!
Step 3: Defining the Head and Antennae

Draw a rectangle with rounded corners around the face. Add an upside-down triangle on top, connected by a vertical line to form the antenna. Teacher's Tip: Rounded corners make the robot look friendly rather than sharp and intimidating.
Step 4: Ears and Neck Details
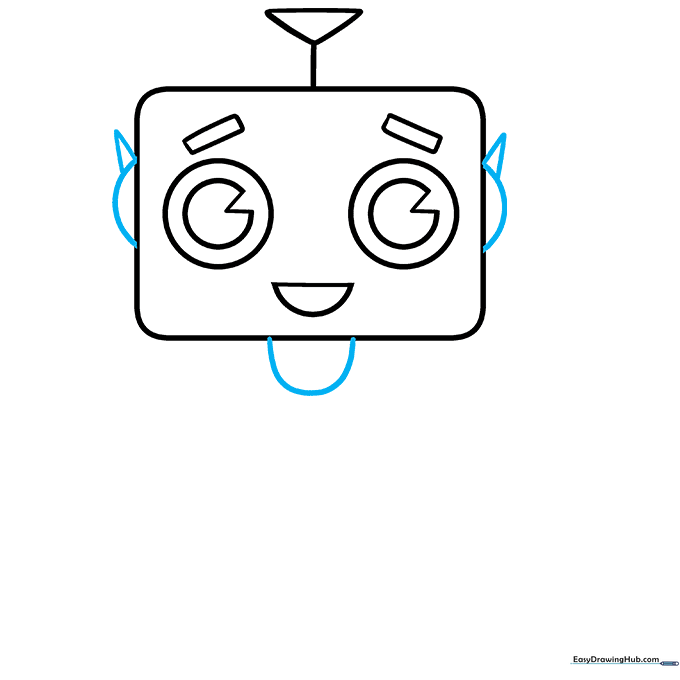
Add partial circles on the sides of the head for ears and a small neck at the bottom. Place a tiny triangle above each ear. Teacher's Tip: These small details add a 'mechanical' feel to your character.
Step 5: The Torso and Heart

Draw a rounded rectangle below the neck for the body. Add a heart in the center and a small circle on either side. Teacher's Tip: The heart gives your robot a 'kind' personality—a great storytelling element!
Step 6: Shoulders and Midsection

Add curved triangles to the shoulders and horizontal lines to the neck for texture. Enclose a half-circle at the base of the torso. Teacher's Tip: Use short, consistent strokes to make the neck look like a flexible metal spring.
Step 7: First Arm and Claw

Draw two parallel curved lines for the arm, ending in a claw shape made of a 'C' and a 'V'. Add bands across the arm. Teacher's Tip: Keep the arm lines parallel to ensure the limb looks sturdy.
Step 8: The Second Arm

Repeat the process for the second arm, using the same parallel lines and claw shape. Teacher's Tip: Symmetry can be tricky, so take your time matching the length of this arm to the first one.
Step 9: Legs and Feet

Draw two sets of parallel lines for the legs, ending in half-circle feet. Add bands to the legs for detail. Teacher's Tip: Make the feet slightly wider than the legs to give your robot a stable base.
Step 10: Bring Your Robot to Life with Color

Your outline is finished! Now, add color. We used metallic grays, light greens, and pinks, but feel free to experiment with your favorite colors. Teacher's Tip: Use a darker shade on the edges of the limbs to create a 3D metallic effect.
More Tutorials


