How to Draw a Cute Rainbow and Clouds: Easy 10-Step Guide
Bring a splash of color to your sketchbook with this cheerful rainbow and cloud duo! This project is perfect for artists ages 5 and up, requiring only a pencil, eraser, and your favorite markers or crayons. Follow along to practice drawing expressive faces and symmetrical shapes while building confidence in your line work.
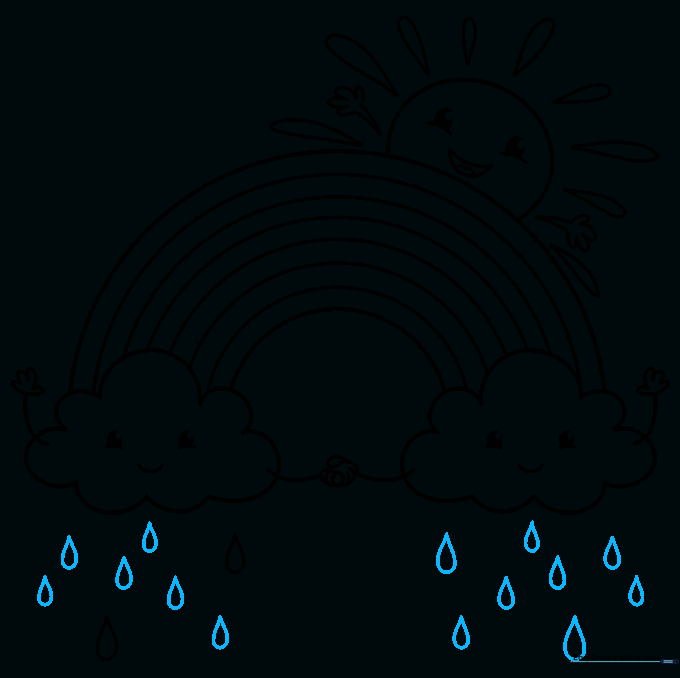
🎯 Final Result

Step-by-Step Instructions
Step 1: Sketching the Fluffy Clouds

Start by drawing the base of your clouds using a series of connected, rounded bumps. Teacher's Tip: Keep your pencil pressure light so you can easily adjust the shape if the 'fluffiness' looks a bit uneven.
Step 2: Adding Cheerful Faces

Finish the cloud outlines and add their happy expressions. Use a small 'U' for the mouth and two ovals for the eyes. Teacher's Tip: Leave a tiny white dot inside the pupils to give the eyes a 'sparkle' effect that makes them look extra friendly.
Step 3: Clouds Holding Hands

Draw small arms extending from the sides of the clouds, ending in simple 'U' shaped hands. Teacher's Tip: Make sure the hands touch in the middle to show the clouds are friends!
Step 4: Drawing the Rainbow Arch

Connect the clouds with a series of parallel 'U' shaped lines. Teacher's Tip: Aim for 7 or 8 lines to leave enough space for all the colors of the rainbow later.
Step 5: Adding the Smiling Sun

Draw a partial circle at the top of the rainbow for the sun. Give it a face similar to the clouds. Teacher's Tip: Adding a small curved line inside the mouth for a tongue makes the sun look extra happy.
Step 6: Sun Rays and Arms

Draw small arms for the sun and add teardrop shapes around it for rays. Teacher's Tip: Vary the size of the teardrops slightly to make the sun look more dynamic.
Step 7: Adding Raindrops

Draw teardrop shapes falling from the bottom of the clouds. Teacher's Tip: Keep them spaced out so the drawing doesn't look too crowded.
Step 8: Filling the Scene
Add more raindrops to create a light shower effect. Teacher's Tip: Don't worry about making them perfect; raindrops look natural when they are slightly different sizes.
Step 9: Background Clouds

Add a few more clouds in the background to give your drawing depth. Teacher's Tip: Draw these slightly smaller than the main clouds to make them look further away.
Step 10: Bringing it to Life with Color

Time to color! Use the classic rainbow order: red, orange, yellow, green, blue, indigo, and violet. Teacher's Tip: Use light pressure with your colored pencils to blend the colors smoothly at the edges.
More Tutorials


