How to Draw a Cute Heart: Easy 10-Step Guide
This step-by-step tutorial is perfect for young artists ages 5 and up. All you need is a pencil, an eraser, and your favorite markers or crayons to bring this cheerful character to life. Follow along to build confidence in your drawing skills while creating a fun, expressive heart.
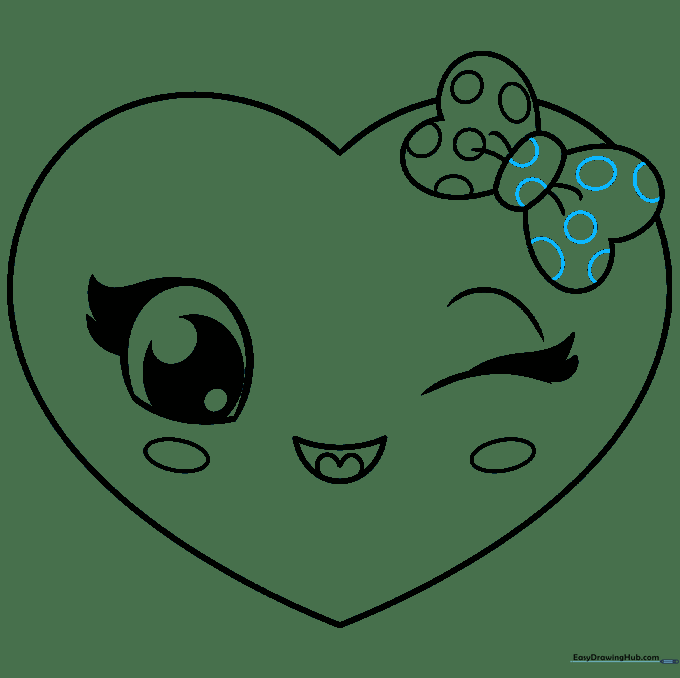
🎯 Final Result

Step-by-Step Instructions
Step 1: Sketching the Heart Outline

Draw a large, symmetrical heart shape. Inside the left side, add an upside-down “U” shape. Teacher’s Tip: Keep your pencil lines very light so you can easily erase any mistakes later.
Step 2: Adding the Eyes

Close the “U” shape with a curved line to finish the open eye, then add two ovals inside for the pupil. On the right side, draw a simple curved line for a winking eye. Teacher’s Tip: Make the pupils dark to give the heart a bright, lively expression.
Step 3: Drawing Eyelashes
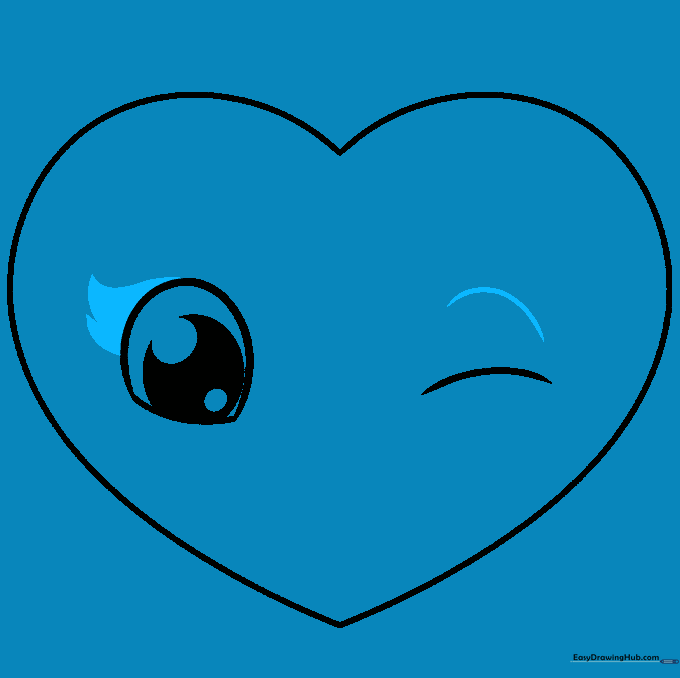
Add two small, overlapping curved triangles to the top of the open eye for lashes. Add a small curved line above the winking eye to represent the eyelid. Teacher’s Tip: Keep the lashes short and thick to make them stand out.
Step 4: Creating the Smile

Add lashes to the winking eye using the same triangular technique. Below the eyes, draw a crescent-shaped line for a happy, smiling mouth. Teacher’s Tip: A wider crescent makes the heart look extra joyful!
Step 5: Adding Cheeks and Tongue

Draw a small oval under each eye for rosy cheeks. Inside the mouth, draw a rounded “M” shape to show the tongue. Teacher’s Tip: Keep the cheeks light so you can color them pink later.
Step 6: Drawing the Bow Knot
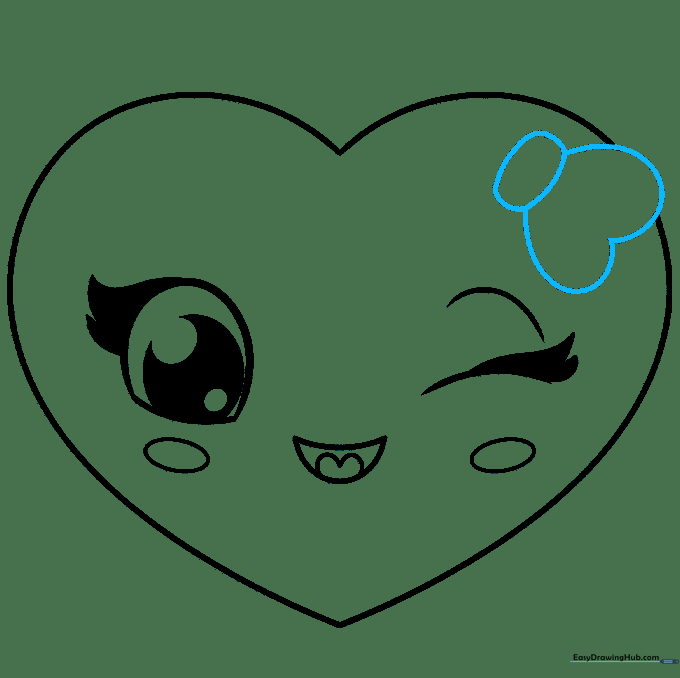
Draw a bow on top of the heart. Start with a rounded rectangle for the center knot. Teacher’s Tip: Erase the heart outline behind the bow so it looks like it’s sitting on top.
Step 7: Shaping the Bow
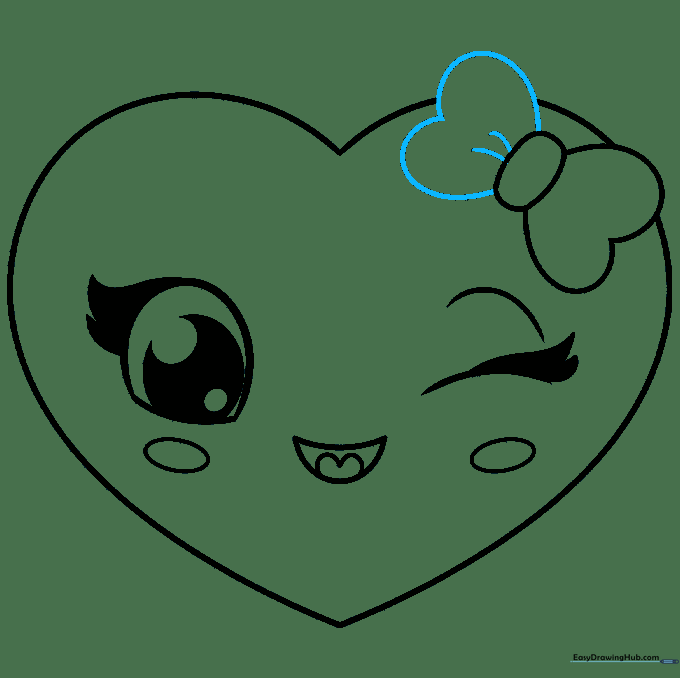
Add the loops of the bow using partial heart shapes on either side of the knot. Add short, curved lines to show the fabric folding. Teacher’s Tip: Use smooth, flowing lines to make the bow look soft.
Step 8: Adding Pattern Details
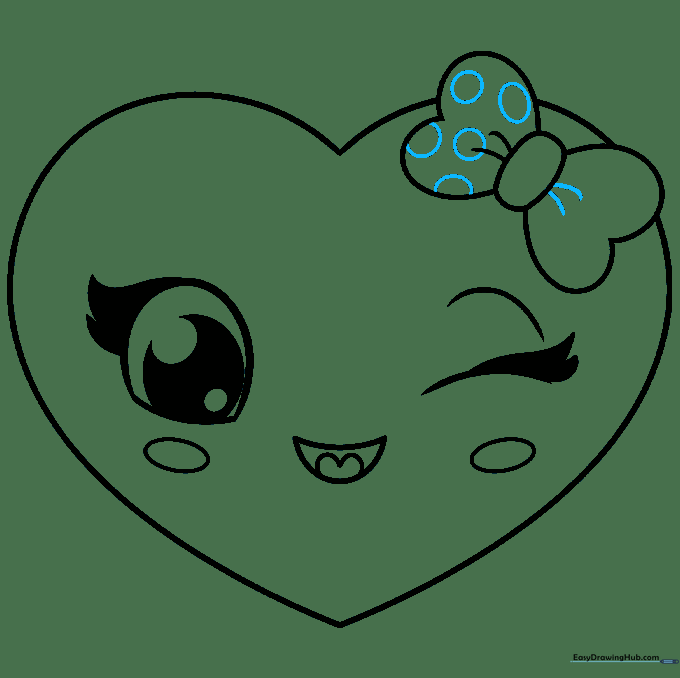
Decorate your bow with small circles to create a polka-dot pattern. Teacher’s Tip: Vary the placement of the dots so they look natural across the fabric.
Step 9: Finalizing the Outline
Review your drawing and darken your final lines. Fill in any remaining space on the bow with more polka dots. Teacher’s Tip: Use a fine-liner or dark marker to make your final lines pop before coloring.
Step 10: Adding Color

Bring your heart to life with color! We used red for the heart, but feel free to experiment. Teacher’s Tip: Remember that colors have meanings—red is for love, while yellow or orange can represent friendship!
More Tutorials


