How to Draw a Cute Girl Face: Easy Step-by-Step Guide
Looking for a fun, creative project? This guide is perfect for artists ages 5 and up to practice character design. All you need is a pencil, an eraser, and some paper to bring this expressive, stylized face to life.
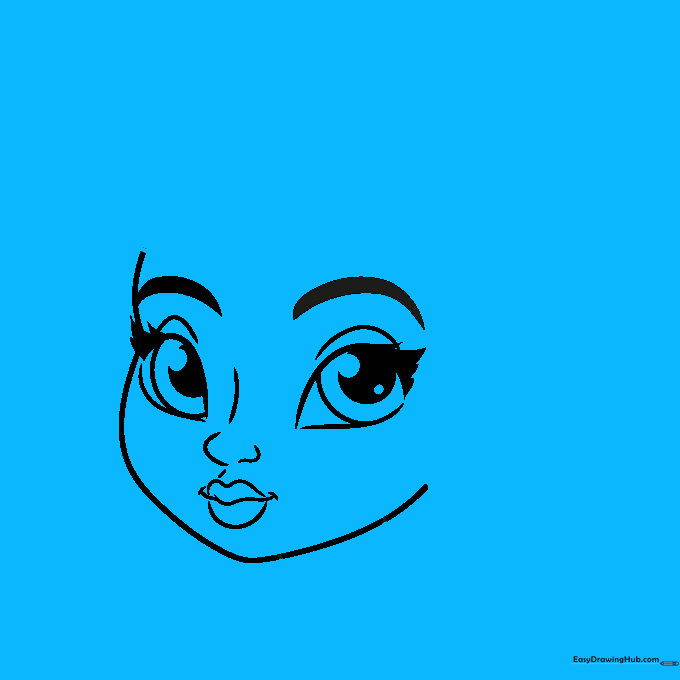
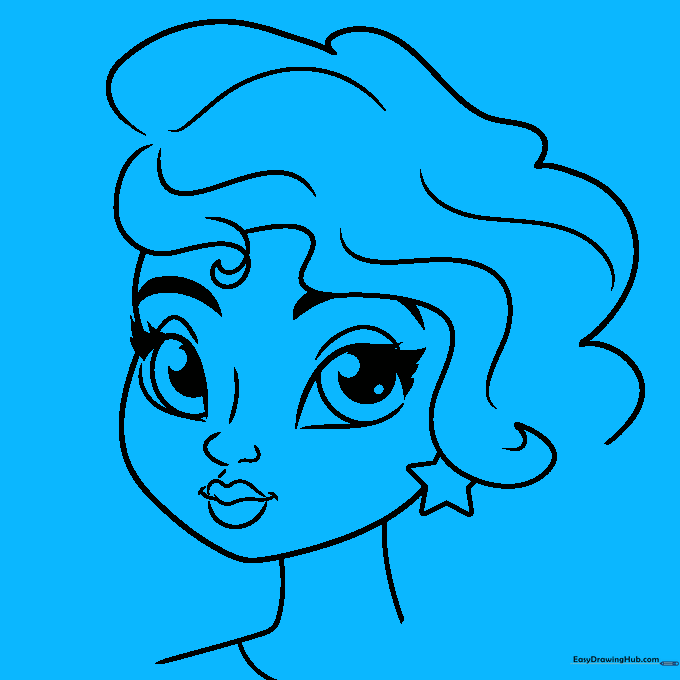
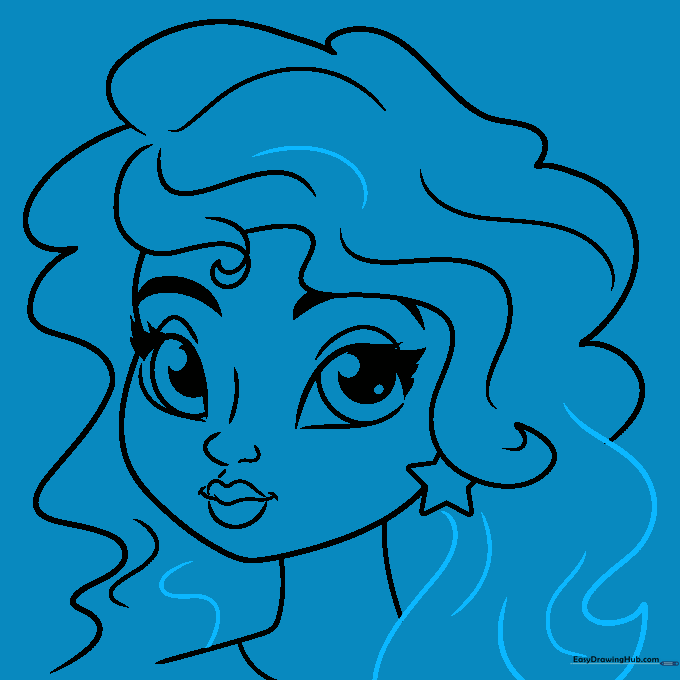
🎯 Final Result

Step-by-Step Instructions
Step 1: Sketching the Expressive Eyes

Draw two teardrop shapes to serve as the eye sockets. The right one should be slightly longer to account for the face's angle. Inside, sketch a circle with a smaller pupil, leaving two tiny white circles for the light reflection. Teacher's Tip: Keep your pencil pressure light so you can easily adjust the shape if needed.
Step 2: Defining the Eyelashes

Mirror the eye shape on the left side. Add a small dash above each eye for the eyelid crease, then draw small triangles along the top edge for eyelashes. Teacher's Tip: Think of these as little feathers; keep them spaced out for a clean, cartoon look.
Step 3: Adding Brows, Nose, and Mouth

Draw two thick, pointed strokes for the eyebrows. For the nose, sketch a small loop with a vertical line, then add a smaller loop to the right. Finish with a gentle wavy line for the mouth. Teacher's Tip: Keep the nose small to maintain the 'cute' aesthetic.
Step 4: Shaping the Face
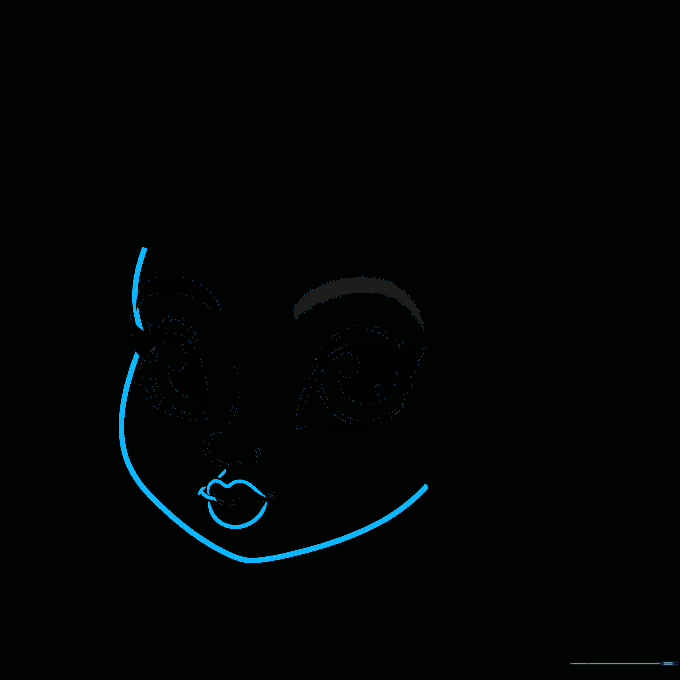
Outline the face using a soft, incomplete heart shape. Add a curve above the left eye to suggest the hairline. For the mouth, add small dashes and two 'hill' shapes for the lips. Teacher's Tip: Use a light touch for the face outline so it doesn't overpower the facial features.
Step 5: Drawing the Neck and Hairline
Draw two vertical lines for the neck, connecting them with a diagonal line and a curve. Add swirls on top of the head to create the first lock of hair. Teacher's Tip: Swirls add movement—don't worry about making them perfectly symmetrical!
Step 6: Adding Hair Volume and Accessories
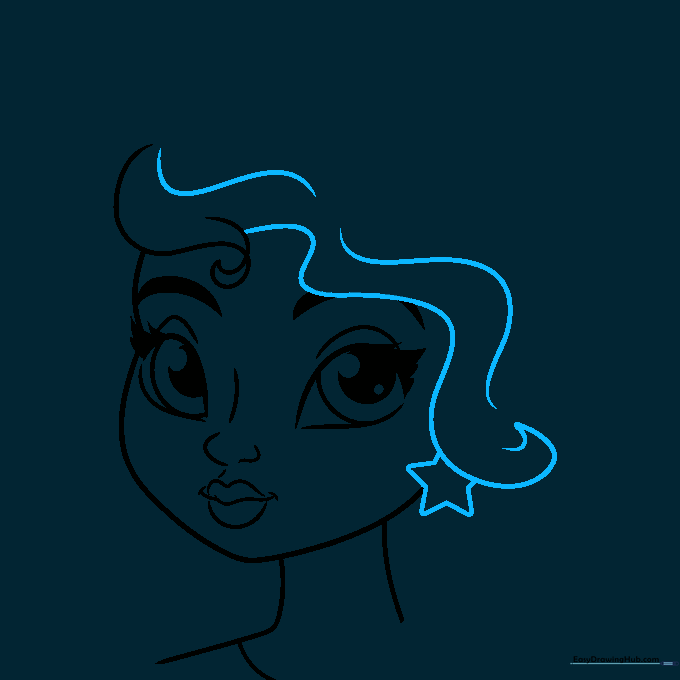
Sketch loose, wavy lines across the top of the head to build volume. Add a small star shape on the side for an earring. Teacher's Tip: Use long, flowing strokes to make the hair look natural and soft.
Step 7: Layering the Hair
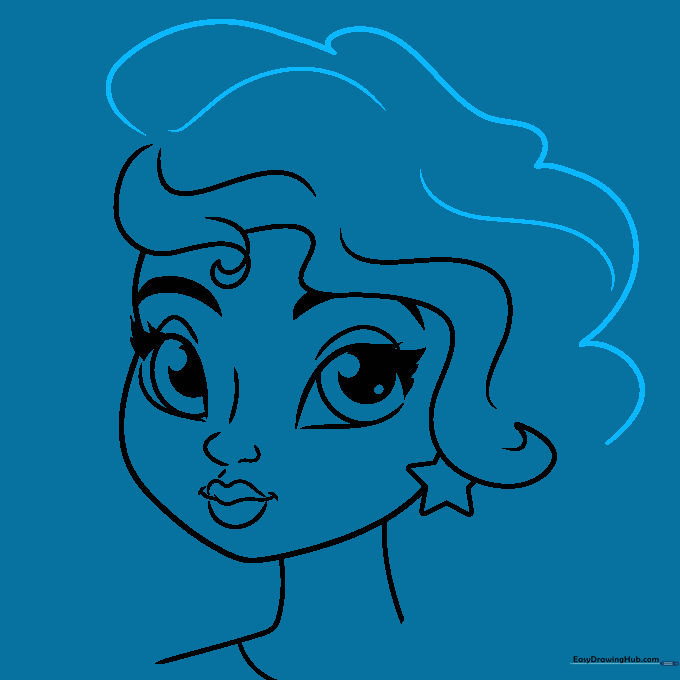
Continue adding loose, wavy lines to build up the hair. Think of these as layers that frame the face. Teacher's Tip: Vary the length of your lines to give the hair a more realistic, flowing appearance.
Step 8: Adding Texture to the Hair
Add vertical, squiggly lines to the left side of the hair to create texture and depth. Teacher's Tip: These small details help define the hair's shape and make the drawing look more professional.
Step 9: Finalizing the Hair Outline
Complete the hair with more expressive, sketchy lines to finalize the silhouette. Teacher's Tip: Don't worry about perfect lines—the 'sketchy' look adds character and charm.
Step 10: Inking and Coloring

Go over your lines with a black pen or marker, then erase the pencil marks. Color the face using your favorite palette—try orange, tan, pink, and blue for a magical, mermaid-inspired look! Teacher's Tip: Use light, circular motions when coloring to keep the pigment smooth and even.
More Tutorials


