How to Draw a Cute Doll: Easy 10-Step Guide for Kids
Ready to bring a charming character to life? This tutorial is perfect for young artists ages 6+ who want to practice character design. All you need is a pencil, an eraser, and a piece of paper to start building your own adorable doll from scratch.
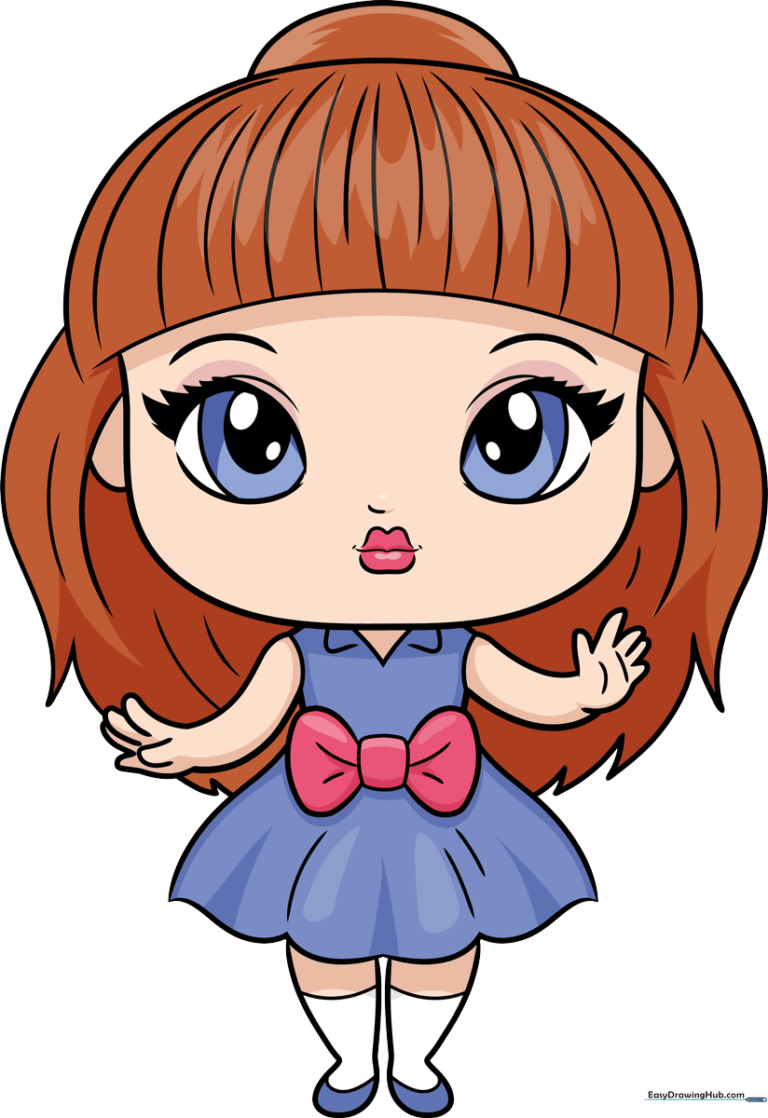
🎯 Final Result
Step-by-Step Instructions
Step 1: Sketching the Expressive Eyes

Start by drawing two large, curved shapes for the eyes. Inside each, add two small ovals for the pupils and shade them in. Tip: Keep the eyes symmetrical to give your doll a friendly, open expression.
Step 2: Adding the Mouth and Eyelashes
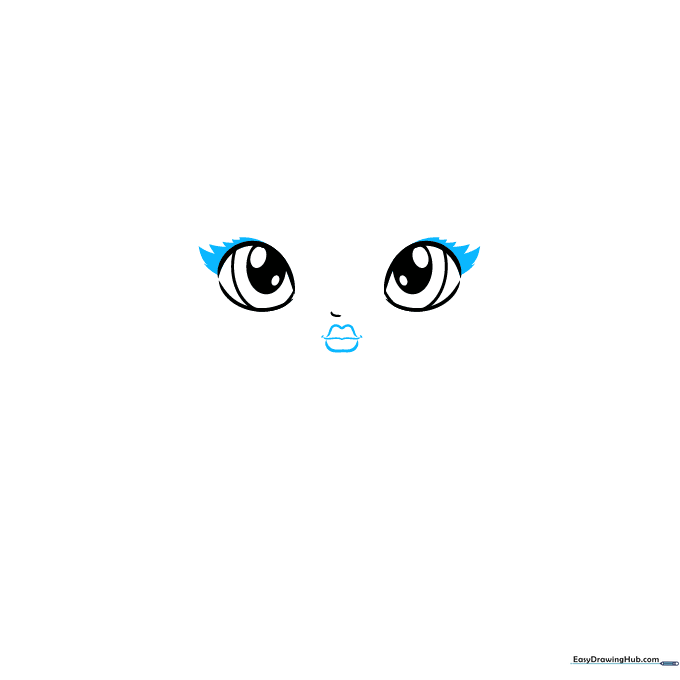
Draw a small, gentle mouth below the nose using two curved lines. Then, add delicate, triangular eyelashes around the top of each eye. Tip: Make the lashes longer at the outer corners to give the doll a sweet, wide-eyed look.
Step 3: Defining the Face and Hair
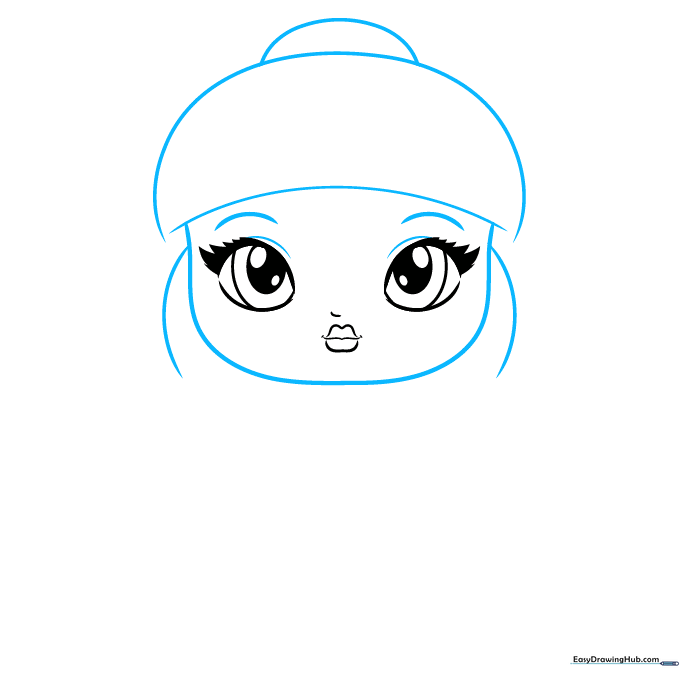
Use long, sweeping curved lines to outline the shape of the face. Extend these lines upward to create the hair and a cute bun on top. Tip: Don't press too hard; keep the head shape rounded and soft.
Step 4: Adding Hair Details and Shoulders
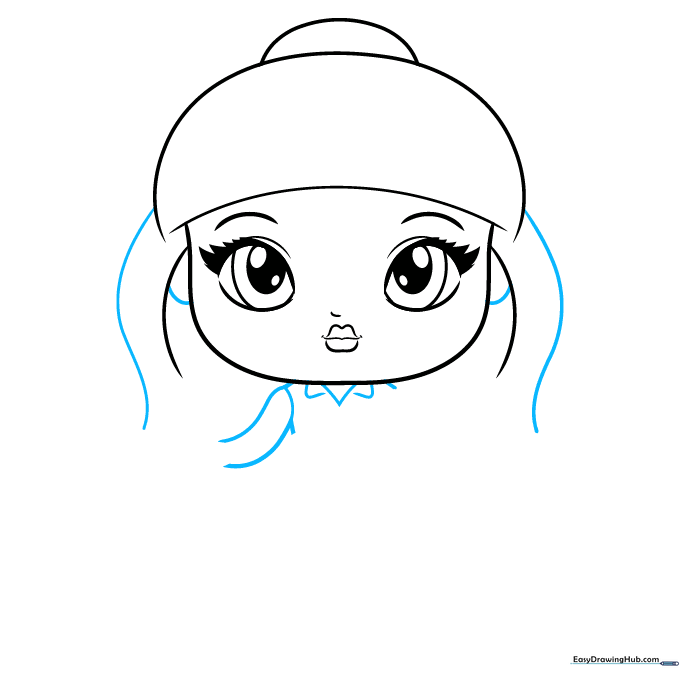
Draw parallel lines along the sides of the face to create locks of hair. Add small lines for ears, then sketch the neck, collar, and shoulders. Tip: Keep the collar lines simple to make the doll look like she is wearing a classic shirt.
Step 5: Drawing the Arms and Hands
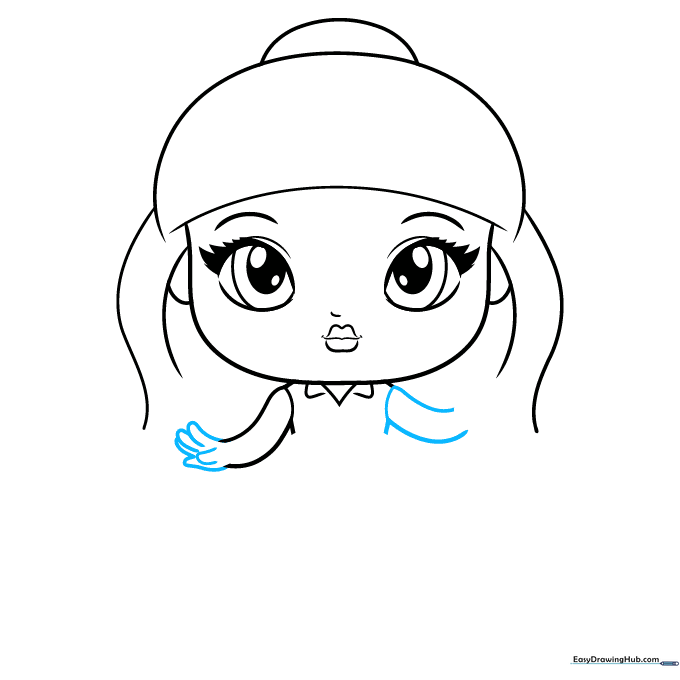
Continue the shirt sleeves with long curved lines. Use small 'U' shapes to form the fingers and thumb. Tip: If hands are tricky, remember that they are just small, rounded shapes attached to the sleeves.
Step 6: Adding Hand Detail and Bow Knot
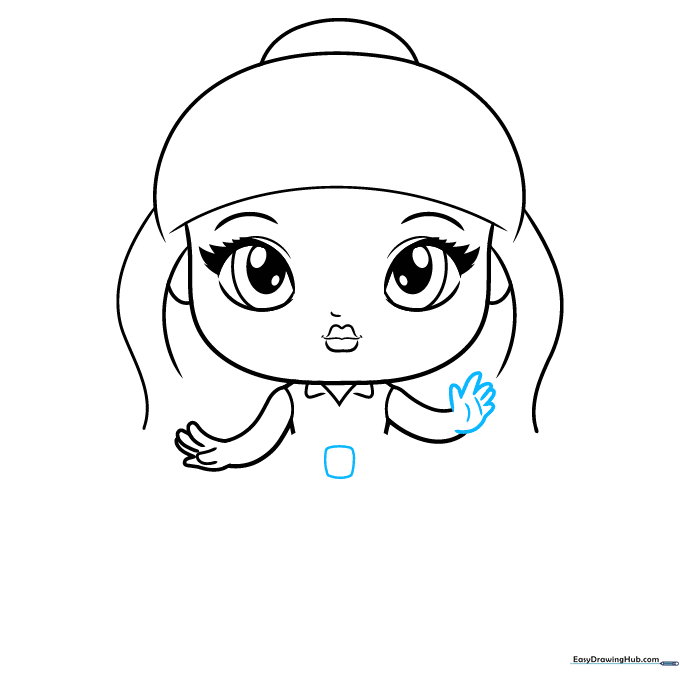
Add more 'U' shapes for the fingers and detail the palm with a small curved line. Draw a rounded square on the shirt to serve as the center knot for a bow. Tip: This knot acts as a guide for the bow wings we will add next.
Step 7: Creating the Bow and Dress
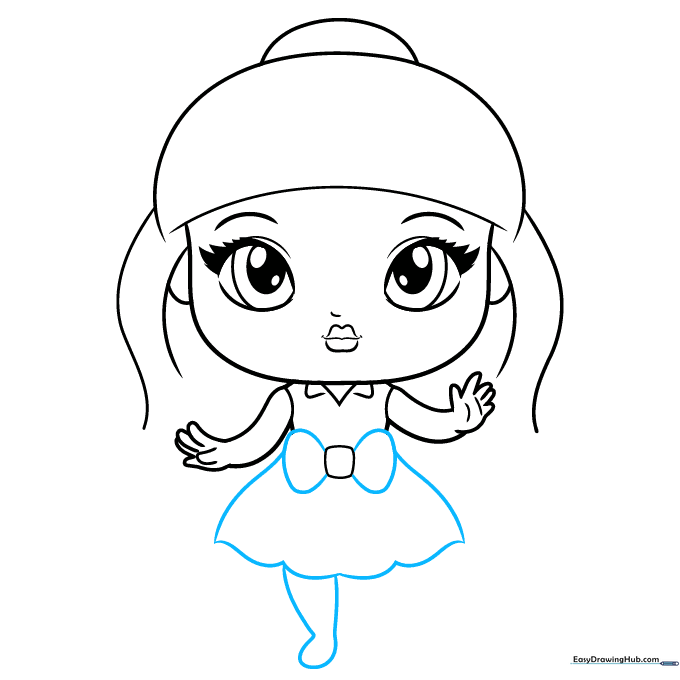
Draw the sides of the bow, then extend long lines to form the skirt of the dress. Connect the bottom with a scalloped edge. Add one leg and foot below. Tip: Use a wavy line for the skirt hem to make it look like fabric.
Step 8: Finishing the Hair and Legs
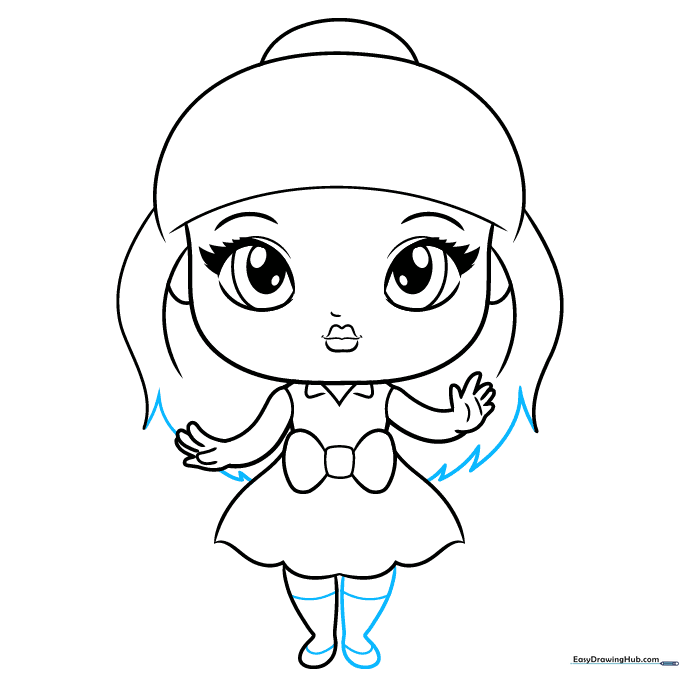
Connect the hair sections with sharp points. Draw the second leg and add horizontal lines on the legs to represent socks and shoes. Tip: Keep the shoe lines parallel for a neat, tidy look.
Step 9: Adding Final Textures
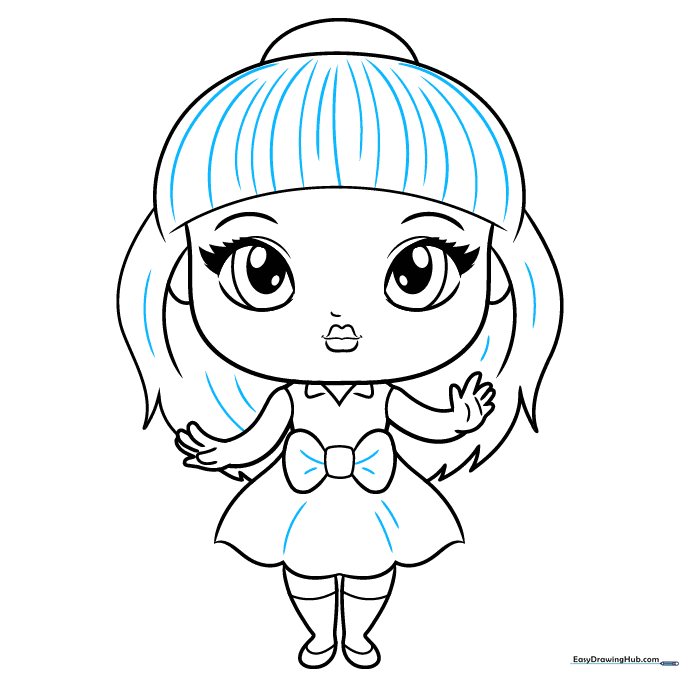
Add small, curved lines to the hair, bow, and skirt to give them texture and movement. Tip: These small lines make your drawing look more professional and less flat.
Step 10: Coloring Your Creation
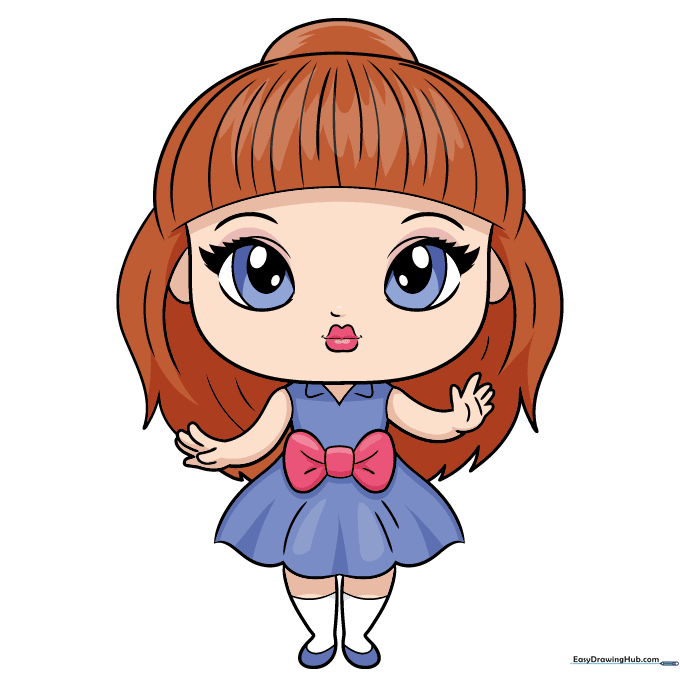
Your outline is complete! Now, choose your favorite colors for the hair, eyes, and outfit. Tip: Try using lighter colors for the skin and brighter colors for the clothes to make your doll pop.
More Tutorials


