How to Draw a Cute Bunny: Easy 10-Step Guide for Kids
This step-by-step guide is perfect for budding artists ages 5 and up. All you need is a pencil, an eraser, and your favorite coloring supplies. Follow along to build confidence and develop hand-eye coordination while creating your very own adorable bunny character.
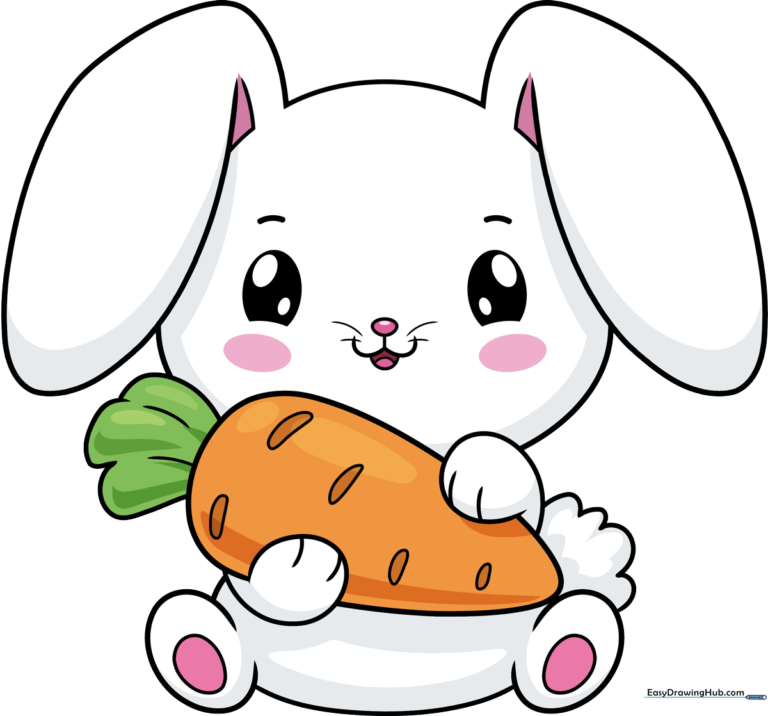
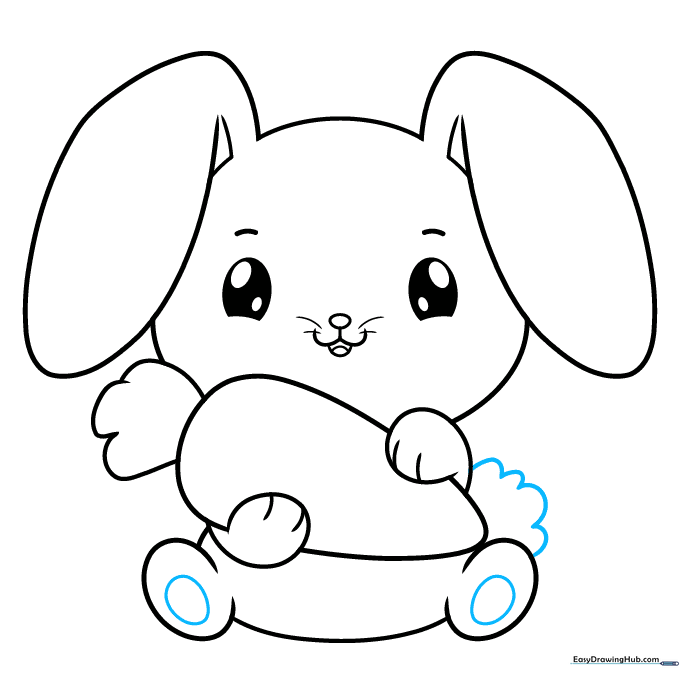
🎯 Final Result
Step-by-Step Instructions
Step 1: Sketching the Expressive Eyes
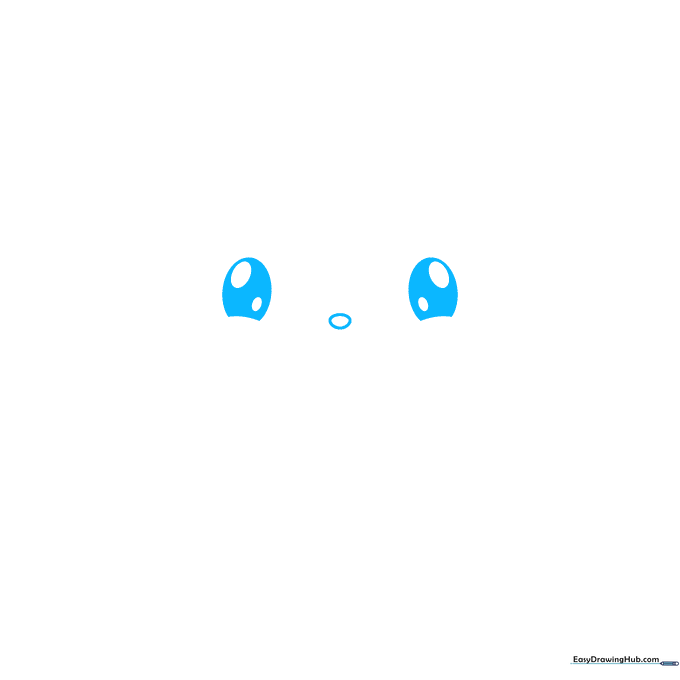
Start by drawing two large ovals for the eyes. Add two smaller ovals inside each for the pupils and shade them in, leaving a tiny white spot for a 'sparkle' effect. Teacher's Tip: Keep the eyes close together to make the bunny look extra friendly and cute!
Step 2: Adding the Nose and Mouth
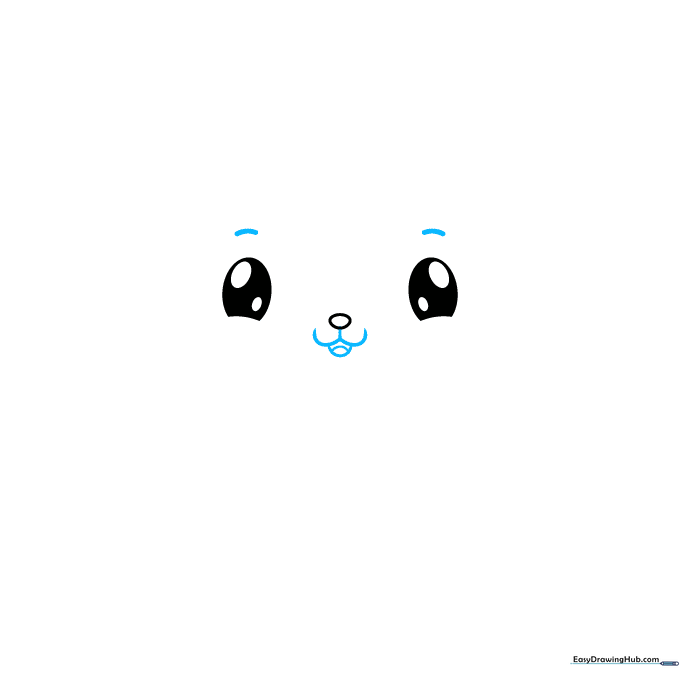
Draw a small oval for the nose between the eyes. Below it, create a 'W' shape for the mouth and a 'U' shape for the open chin. Tip: Use a light touch for the mouth to keep the expression soft and gentle.
Step 3: Creating Floppy Ears
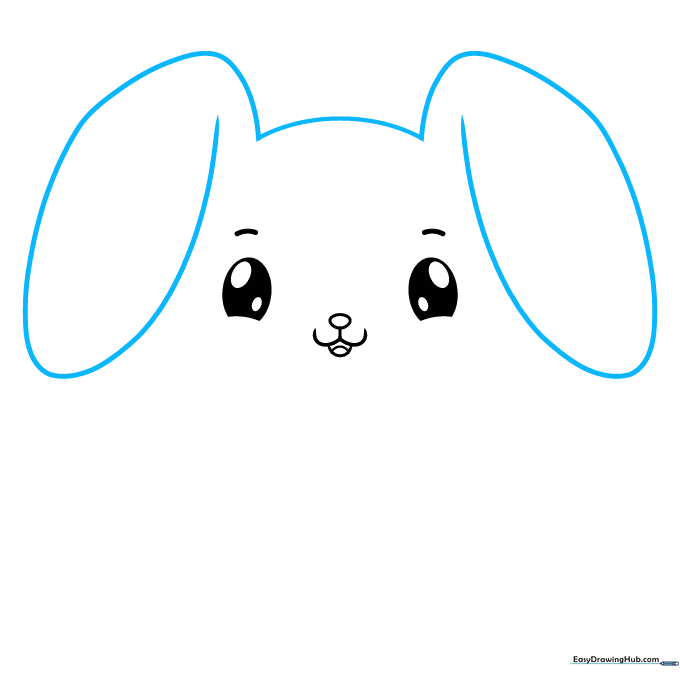
Sketch two long, curved shapes extending from the top of the head. Connect them with a soft arch to form the crown of the head. Tip: Make the ears slightly asymmetrical to give your bunny more personality.
Step 4: Whiskers and Carrot Base
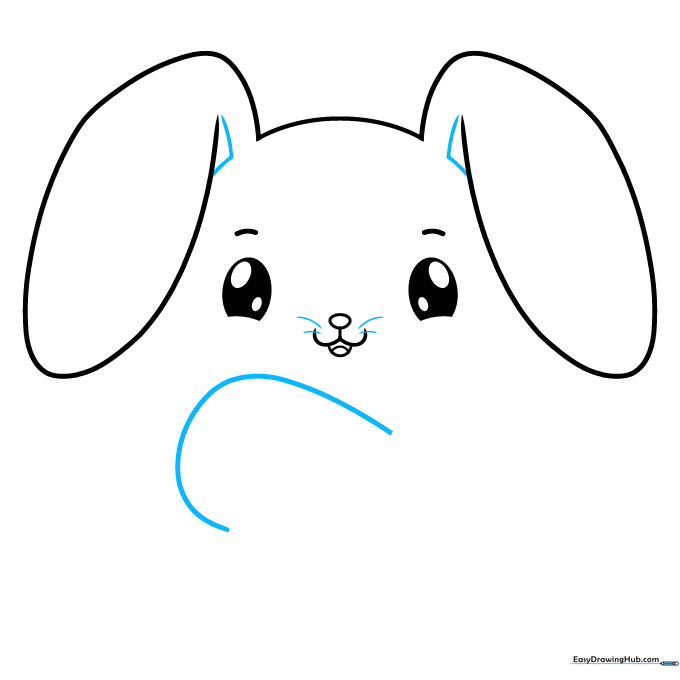
Add 'L' shaped details inside the ears and short lines for whiskers. Start the carrot by drawing a long, curved 'J' shape under the chin. Tip: Keep your whisker lines quick and flick your pencil at the end for a natural, tapered look.
Step 5: Drawing the Paws
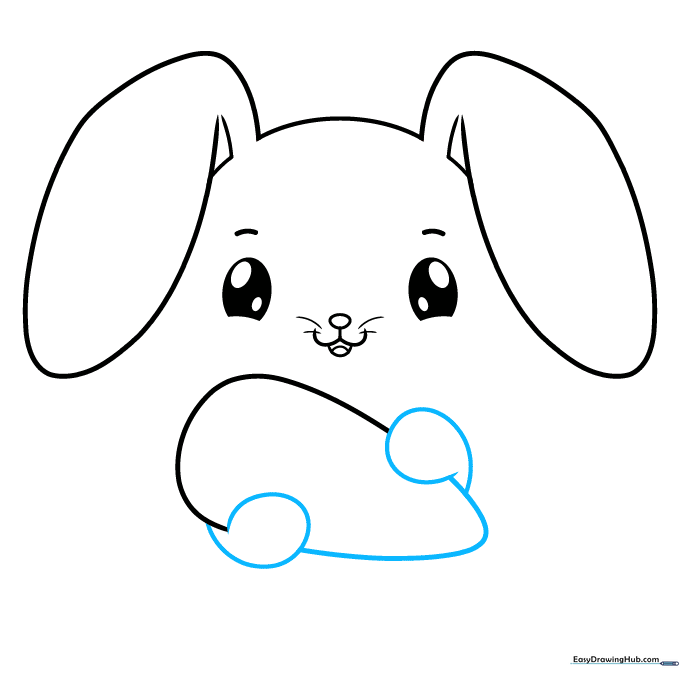
Draw two small, curved shapes at the ends of the carrot to represent the bunny's paws. They should look like little quotation marks. Tip: Ensure the paws overlap the carrot slightly to show the bunny is holding it.
Step 6: Adding Carrot Greens
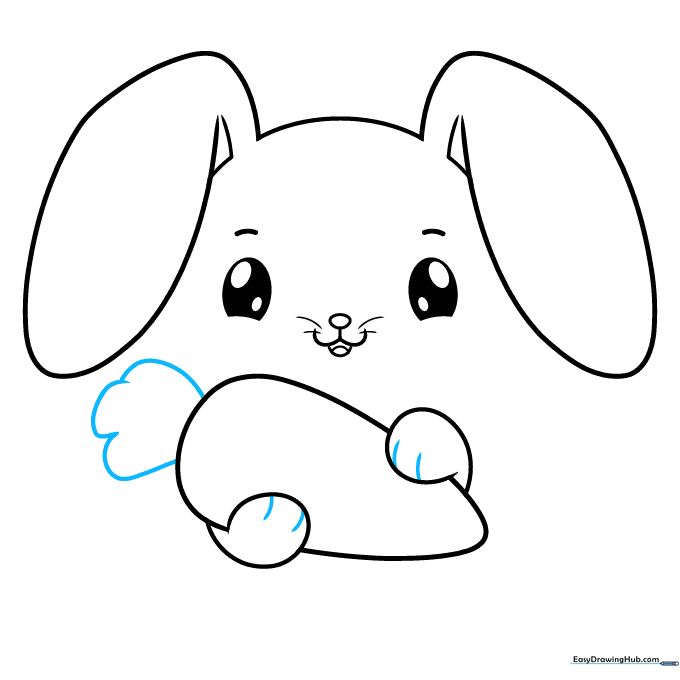
Add small lines to the paws for toes, then draw a series of wavy, curved lines at the top of the carrot for the leafy greens. Tip: Vary the size of your leaf curves to make the greenery look fluffy and realistic.
Step 7: Connecting the Body
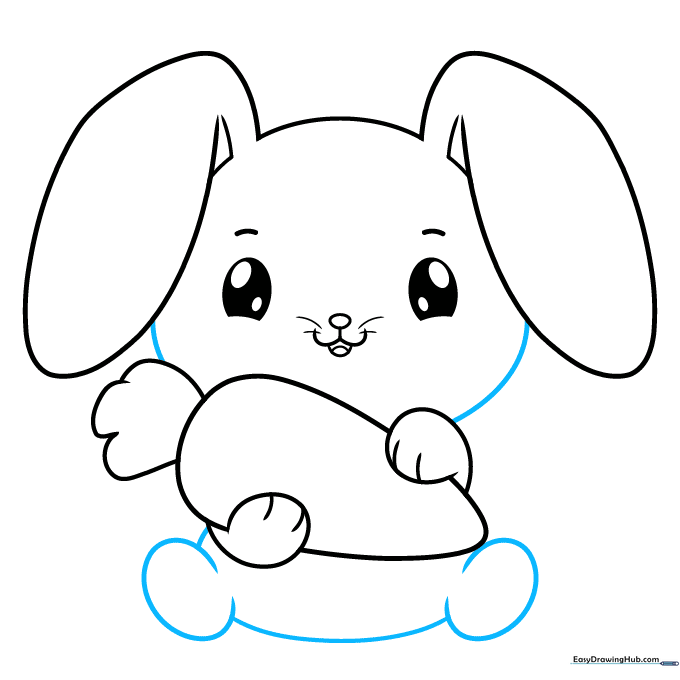
Draw smooth lines connecting the ears to the carrot, and add 'C' shapes for the feet. Tip: Use long, continuous strokes to connect the head to the body for a smoother silhouette.
Step 8: Feet and Tail
Add ovals to the bottom of the feet for pads, and draw a fluffy, cloud-like shape for the tail. Tip: Use short, quick 'zig-zag' strokes for the tail to make it look soft and furry.
Step 9: Final Carrot Details
Add small horizontal lines to the carrot root to give it texture. Tip: Don't make these lines too uniform; irregular spacing looks more natural.
Step 10: Bring Your Bunny to Life with Color
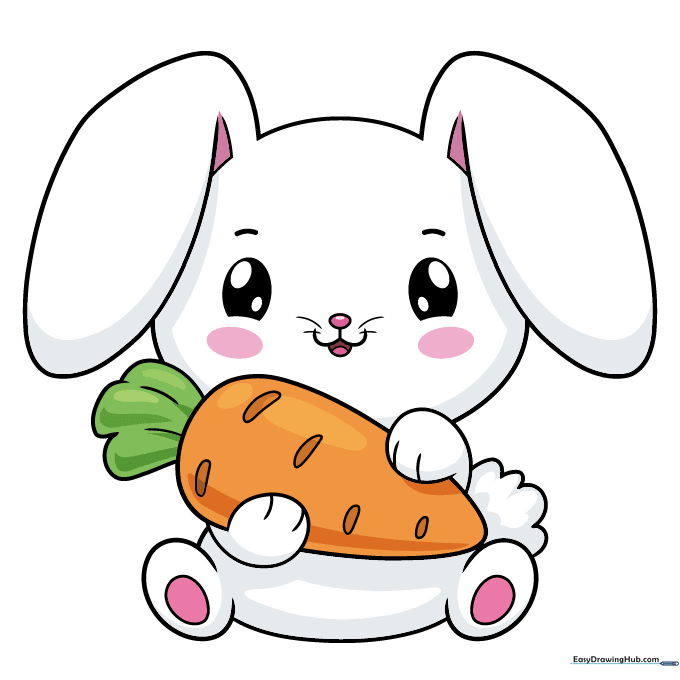
Your outline is finished! Now, use your favorite colors to fill in your bunny. You can go for traditional white or brown, or get creative with pastel colors. Tip: Use a darker shade of your main color to add a little shadow under the chin for depth.
More Tutorials


