How to Draw a Cube in 3 Perspectives: Easy Step-by-Step Guide
Ready to bring your drawings to life? This guide is perfect for students ages 8+ looking to understand how objects change shape in space. All you need is a pencil, an eraser, and a ruler to practice these fundamental 3D techniques.
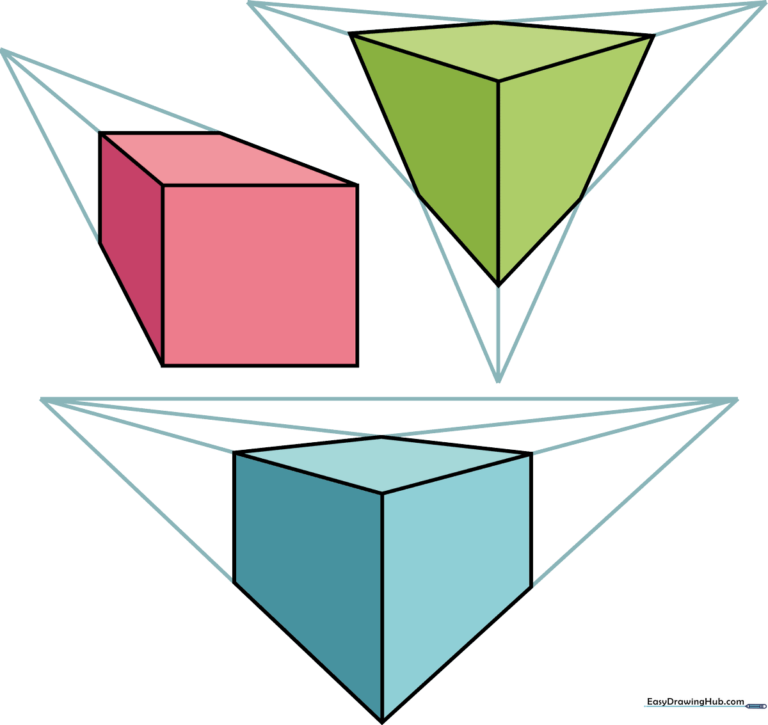
🎯 Final Result
Step-by-Step Instructions
Step 1: The One-Point Perspective Square
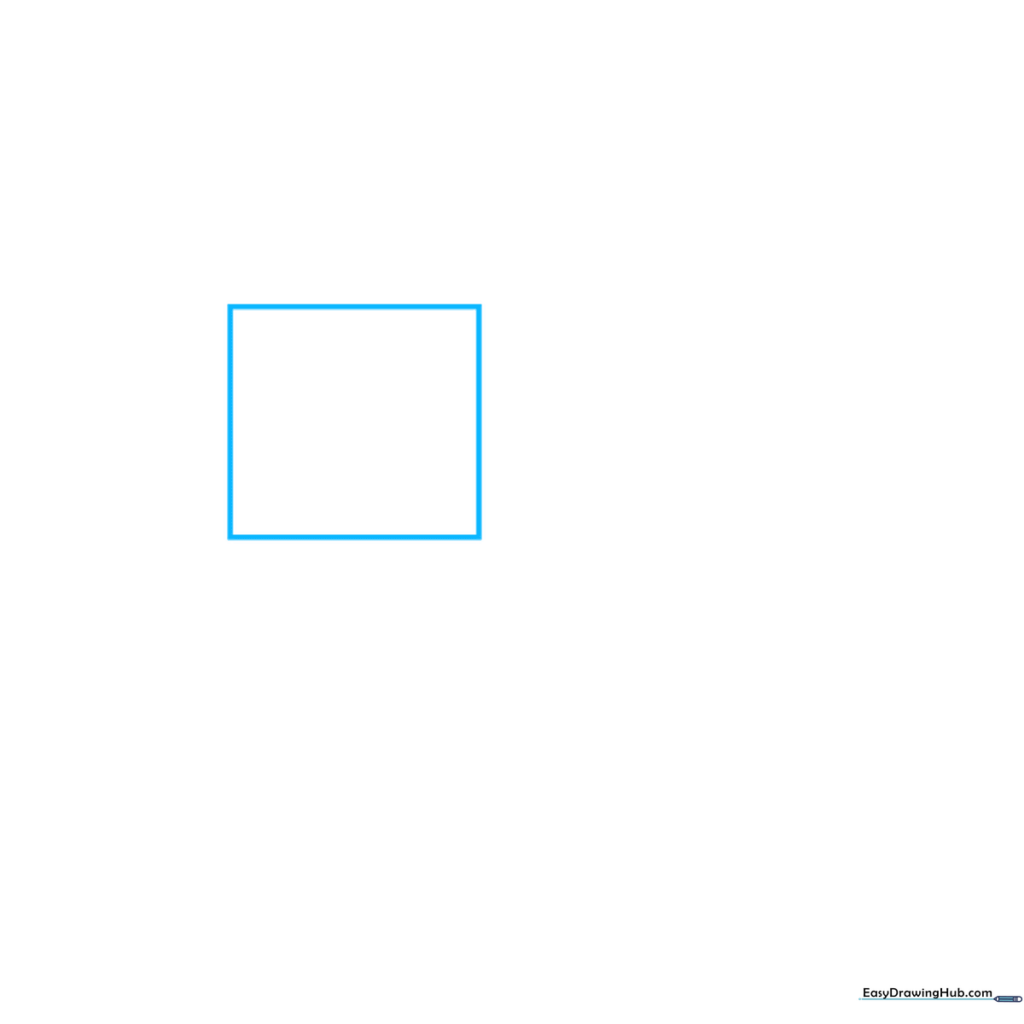
Start by drawing a simple square. This will be the front face of your cube. Tip: Use a ruler to ensure your lines are perfectly straight; precision here makes the perspective work much better later!
Step 2: Establishing the Vanishing Point
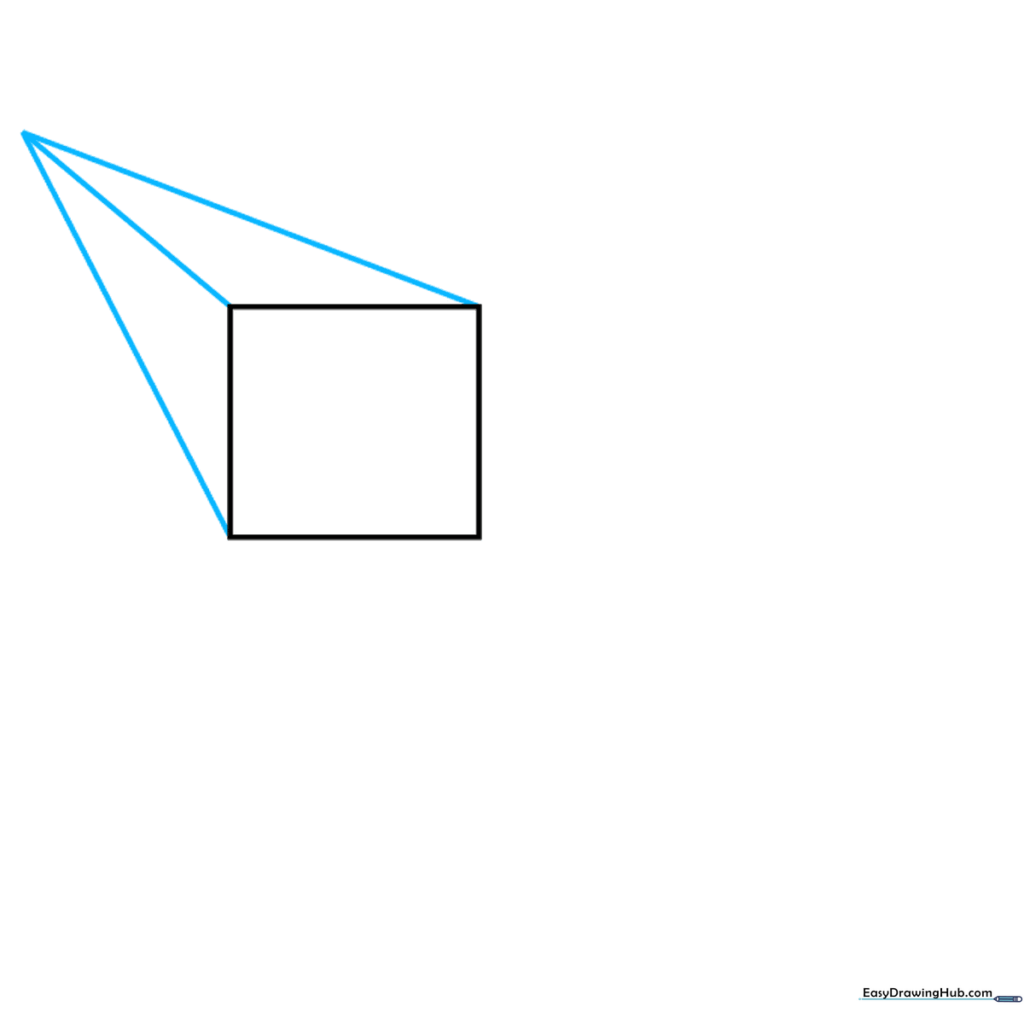
Place a small dot (the vanishing point) above and to the right of your square. Use your ruler to draw light 'guide lines' from three of the square's corners to this dot. Tip: Keep these lines very faint so you can erase them easily once the cube is finished.
Step 3: Defining the Depth
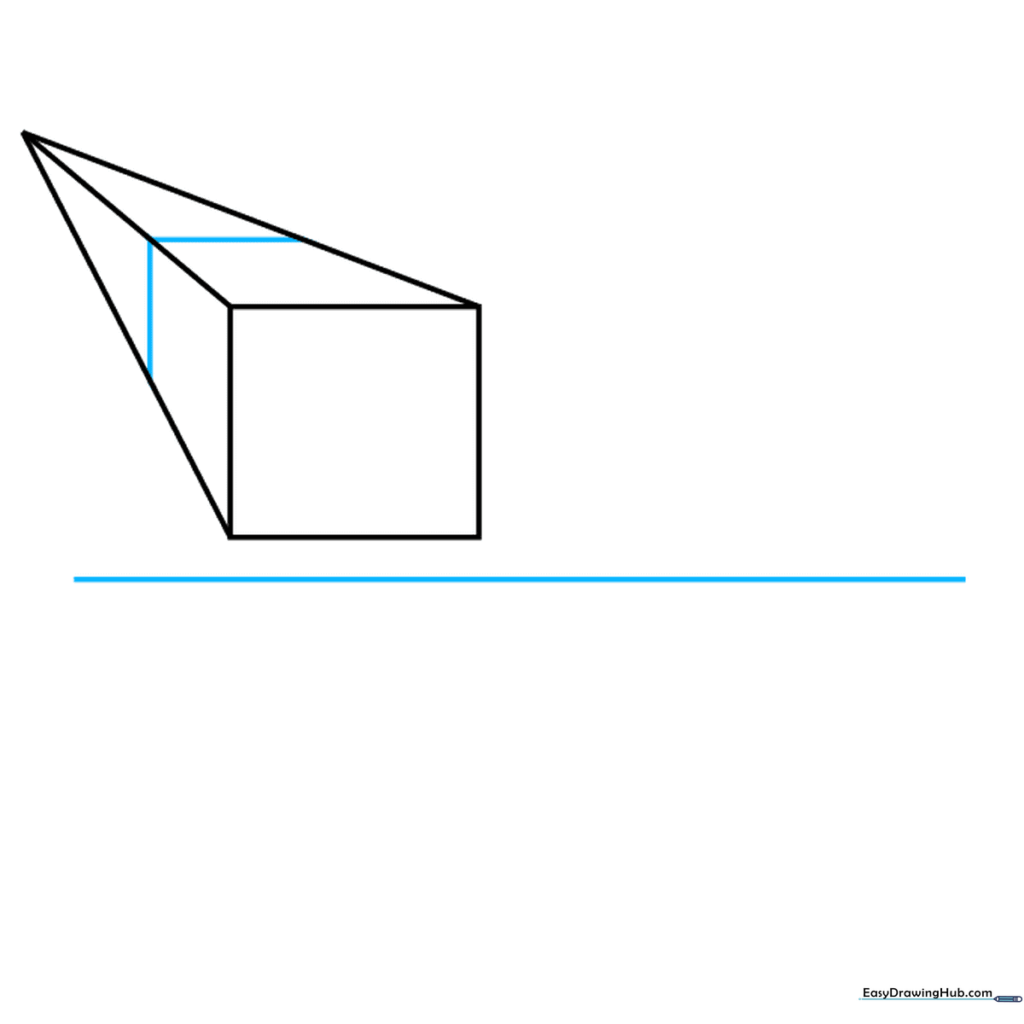
Connect the diagonal guide lines with straight horizontal and vertical lines to form the side and top of the cube. Draw a long horizontal line across the middle of your page to prepare for the next perspective. Tip: Ensure your new lines are parallel to the original square's sides.
Step 4: Starting Two-Point Perspective
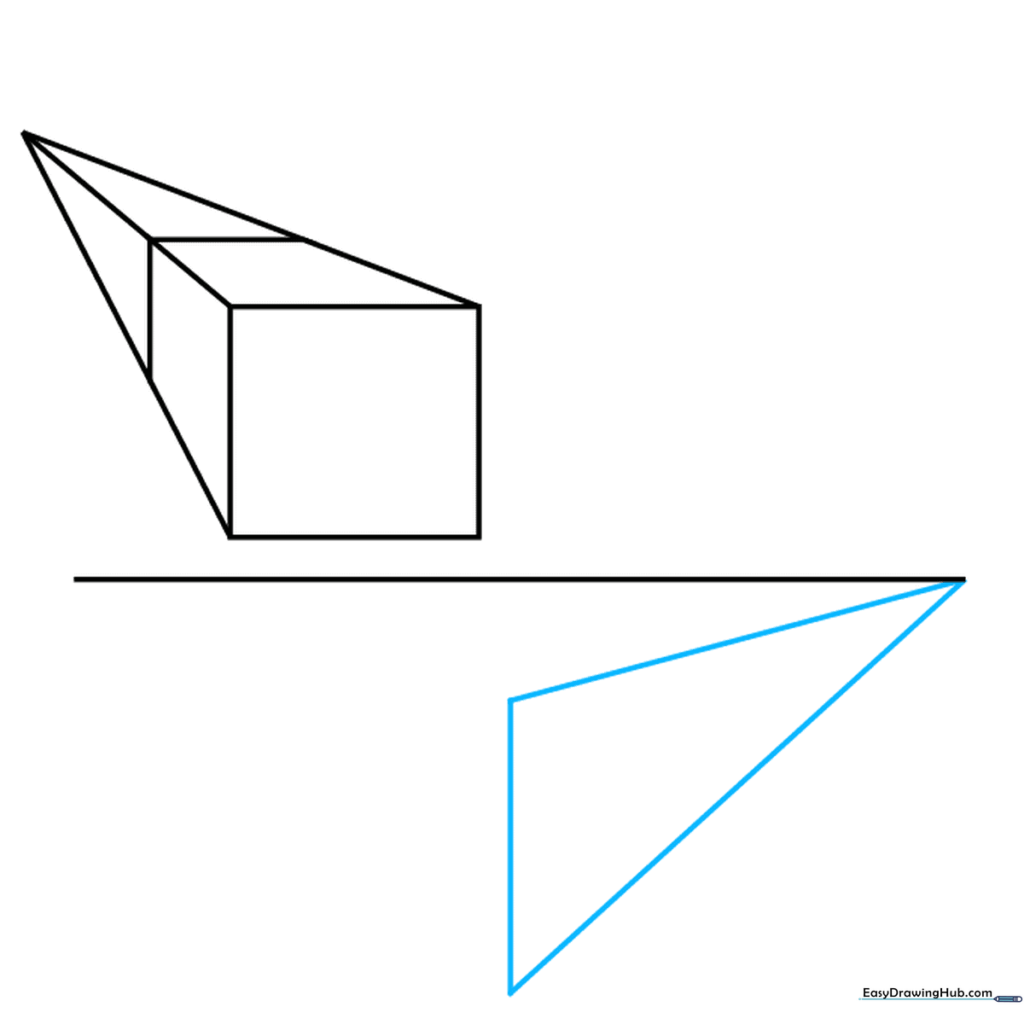
Below your horizon line, draw an obtuse triangle. This represents the corner edge of a cube viewed from an angle. Tip: Think of this as the 'spine' of your cube; everything else will grow outward from this line.
Step 5: Mirroring the Shape
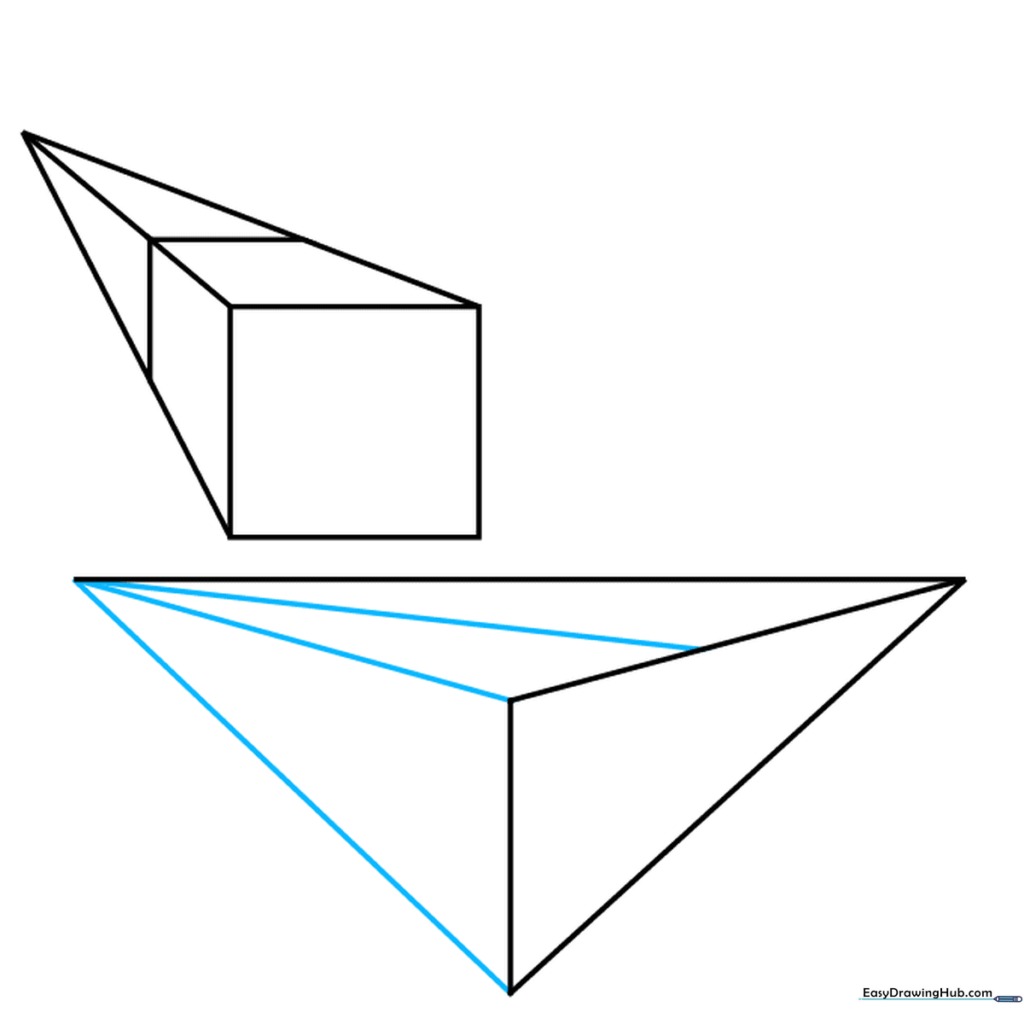
Draw a second triangle, mirroring the first one. Connect the center point to the sides to begin defining the two visible faces. Tip: Symmetry is key here—try to keep both sides balanced so the cube doesn't look lopsided.
Step 6: Closing the Two-Point Cube
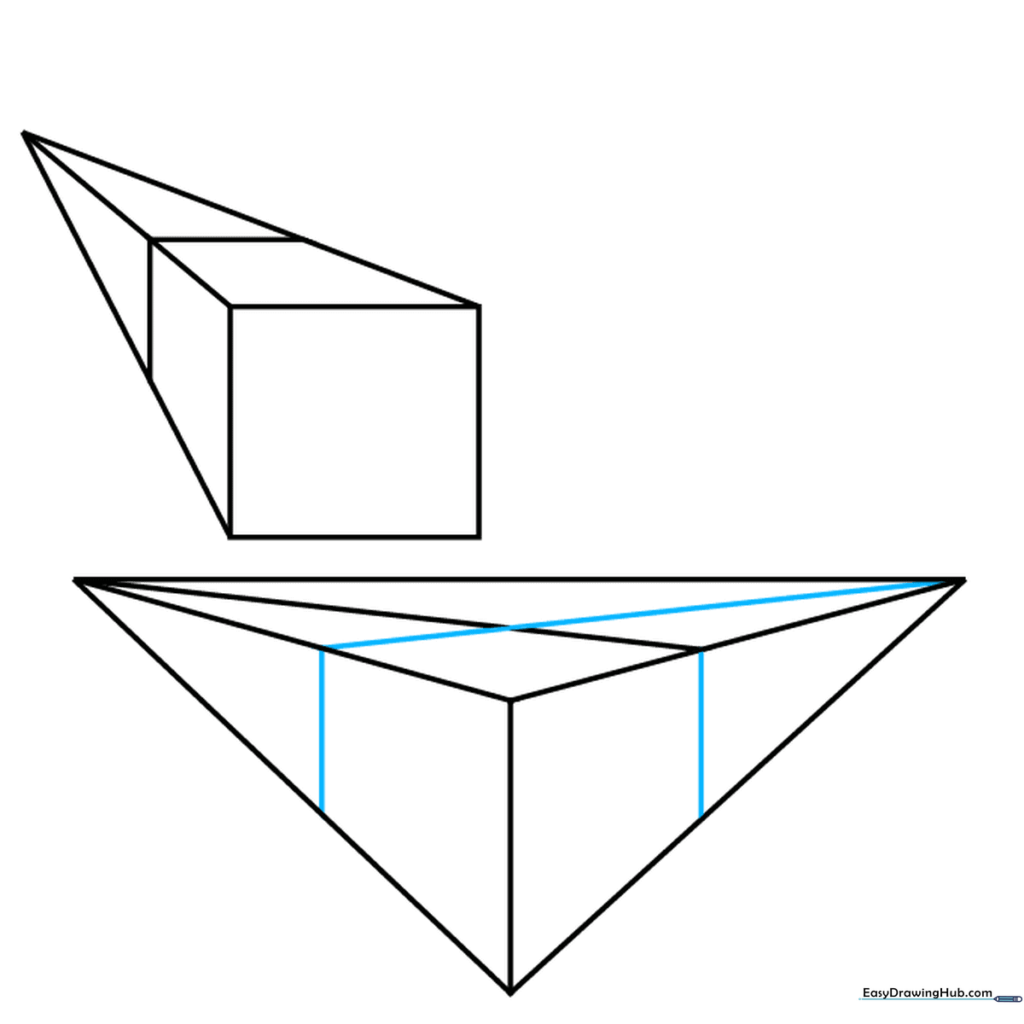
Extend vertical lines from the outer points to complete the sides of the cube. This creates the illusion of depth on both sides. Tip: If your lines aren't perfectly vertical, the cube will look like it's leaning, so use your ruler's edge against the paper's side.
Step 7: Beginning Three-Point Perspective
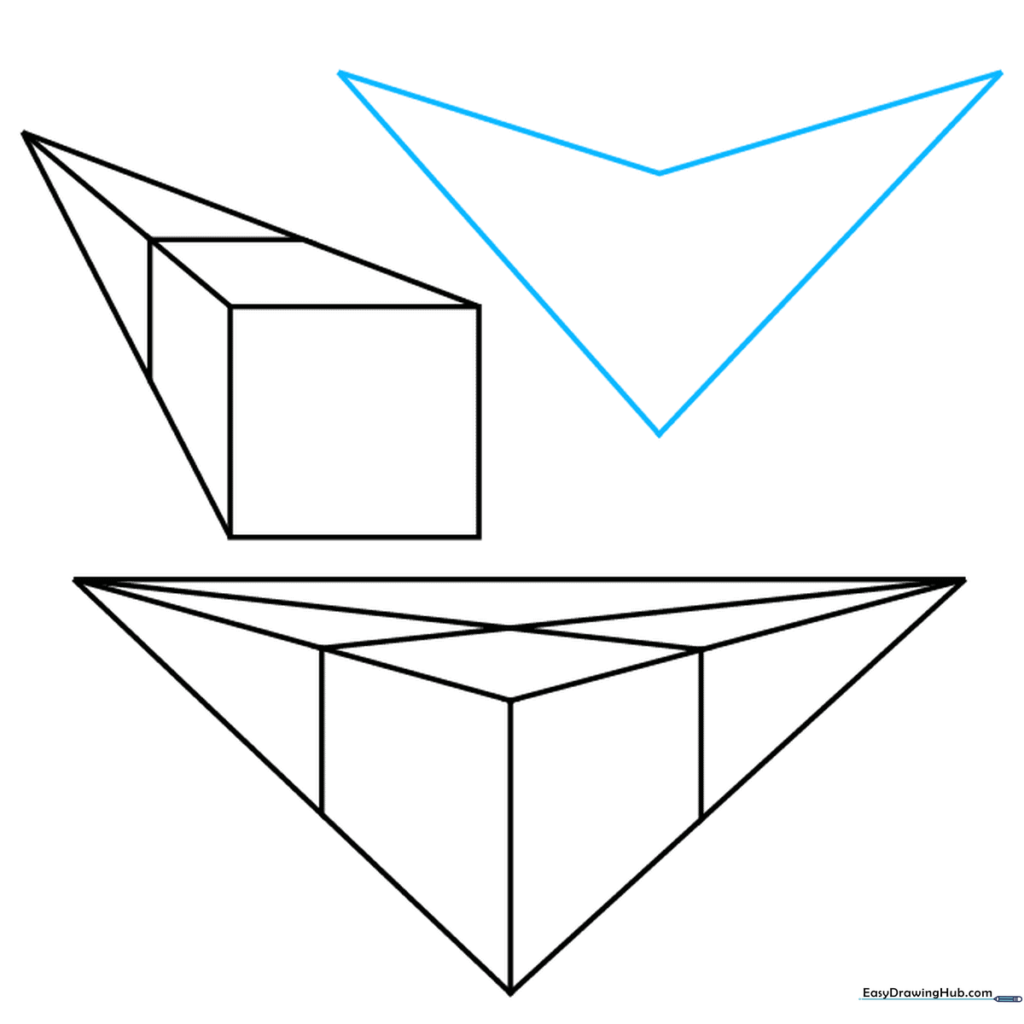
Now for the advanced one! Draw a 'boomerang' shape using four lines. This will be the top corner of your cube. Tip: Keep your lines sharp and clean; three-point perspective relies on very specific angles.
Step 8: Adding Vertical Depth
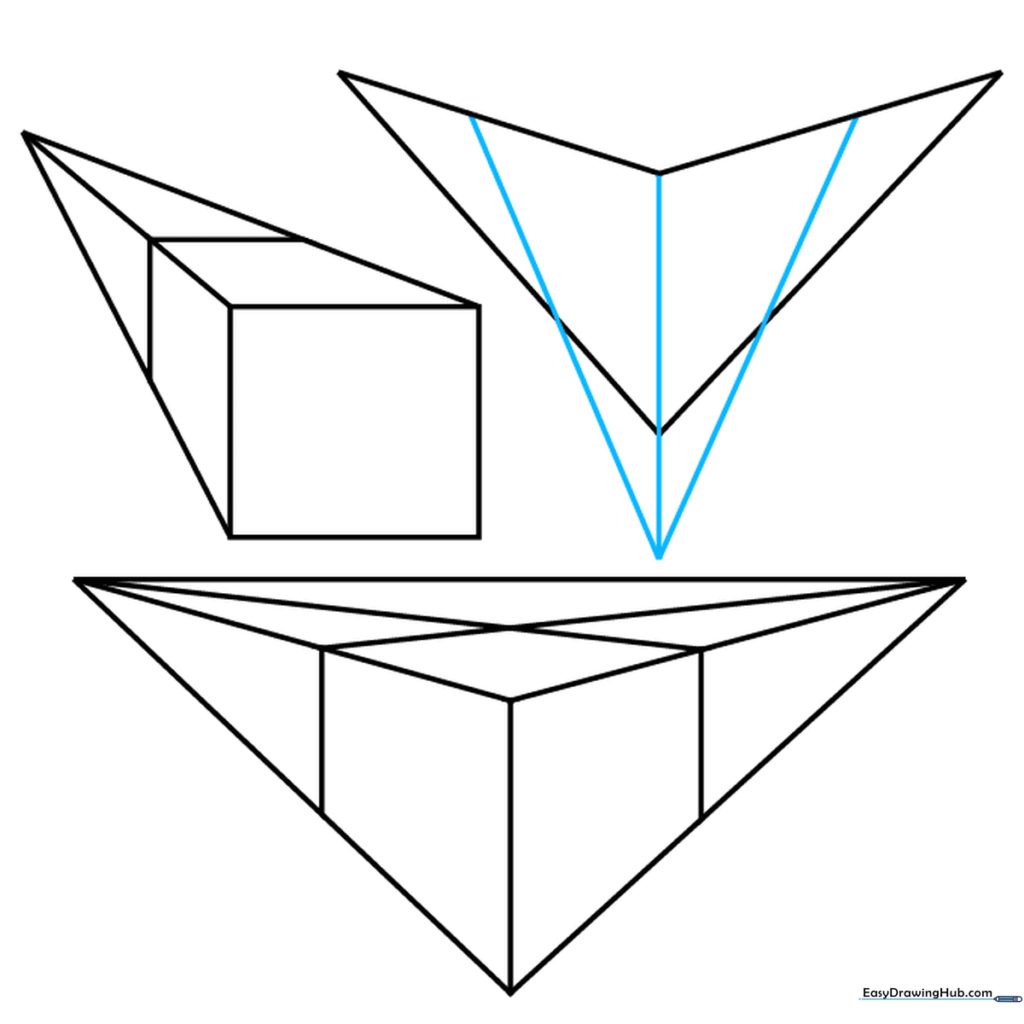
Draw a vertical line down from the center corner to a point below. Connect the other corners to this same point. Tip: This creates the 'bird's eye' or 'worm's eye' view effect, making the cube look like it's floating in space.
Step 9: Finalizing the Outline
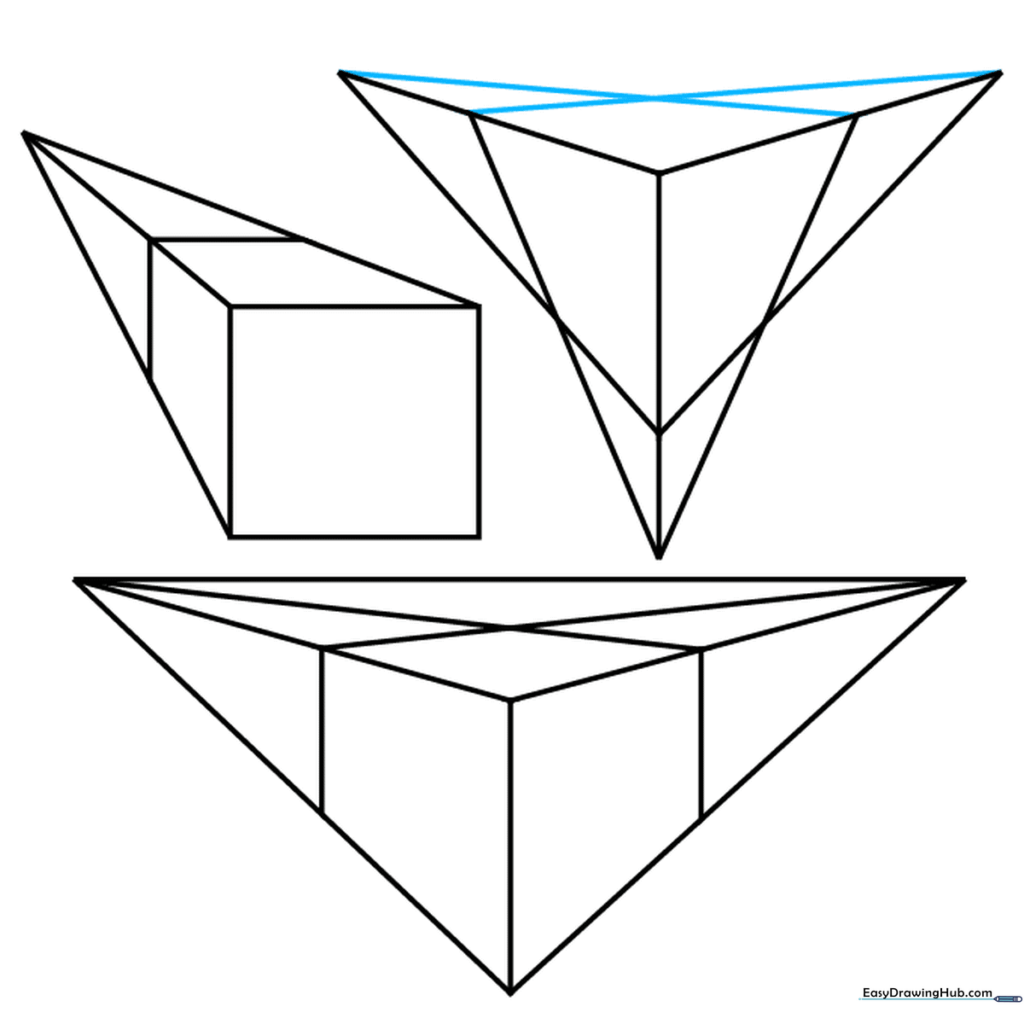
Connect the remaining points to close off the sides of the cube. You should now see three distinct faces. Tip: Double-check that all your lines converge toward the three invisible vanishing points.
Step 10: Shading for Realism
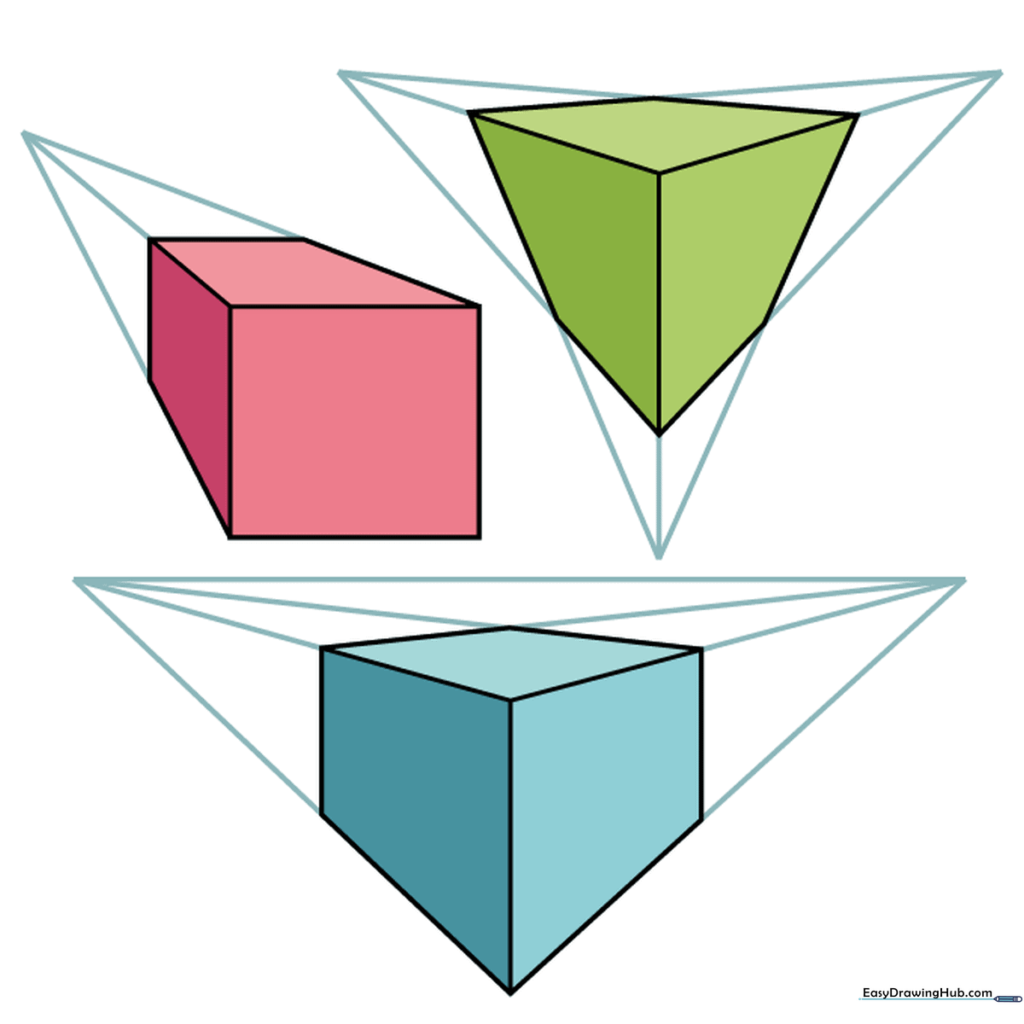
Erase your extra guide lines and add shading to the sides of each cube to make them pop. Tip: Pick one side to be the darkest and one to be the lightest—this creates a realistic light source effect!
More Tutorials


