How to Draw a Croissant: Easy 9-Step Guide for Kids
Ready to draw a flaky, golden pastry? This tutorial is perfect for young artists ages 5 and up. All you need is a pencil, an eraser, and your favorite coloring markers to bring this buttery treat to life.
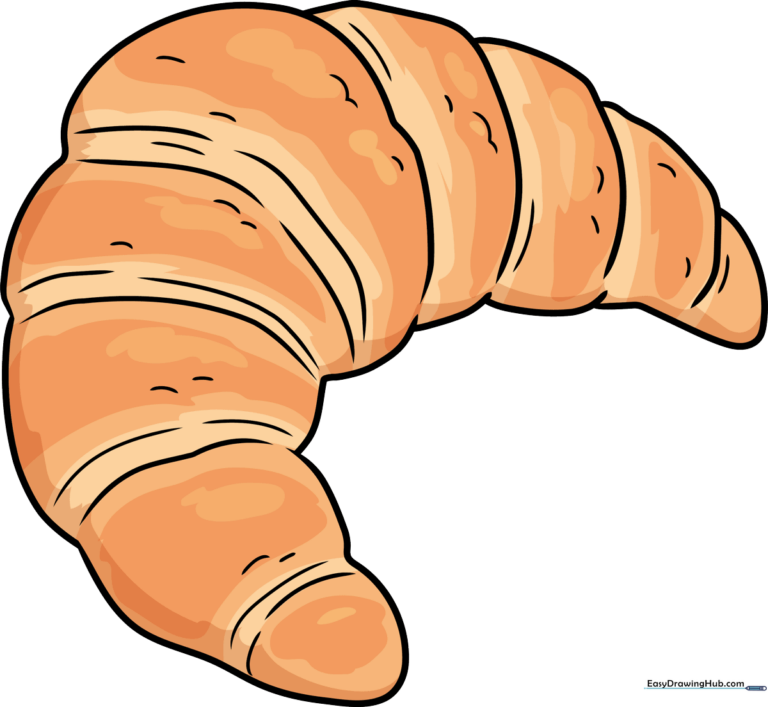
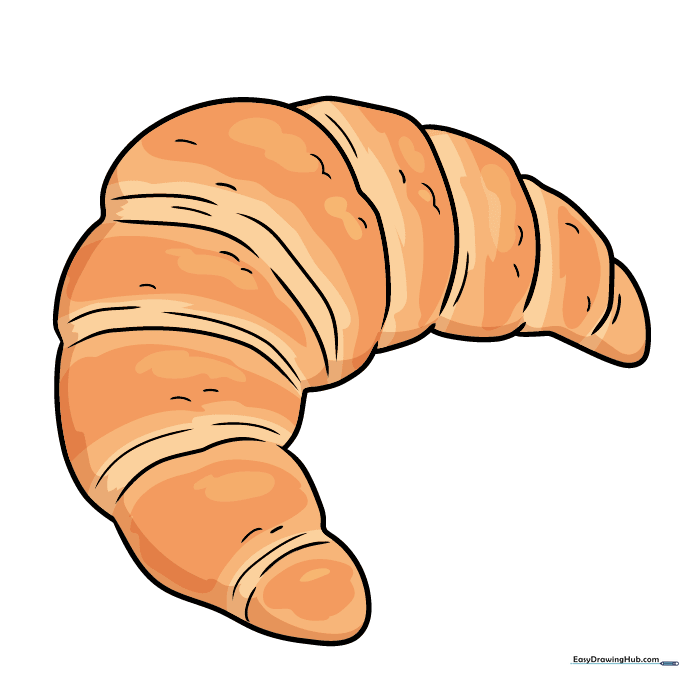
🎯 Final Result
Step-by-Step Instructions
Step 1: Sketching the First Curve
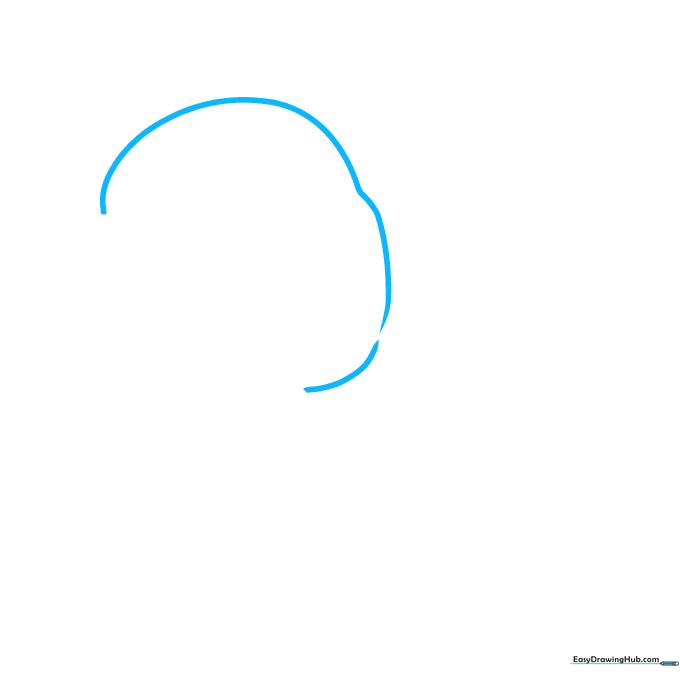
Start by drawing a soft, curved line to form the base of your croissant. Teacher's Tip: Keep your pencil pressure light so you can easily adjust the shape if needed.
Step 2: Adding Pastry Layers
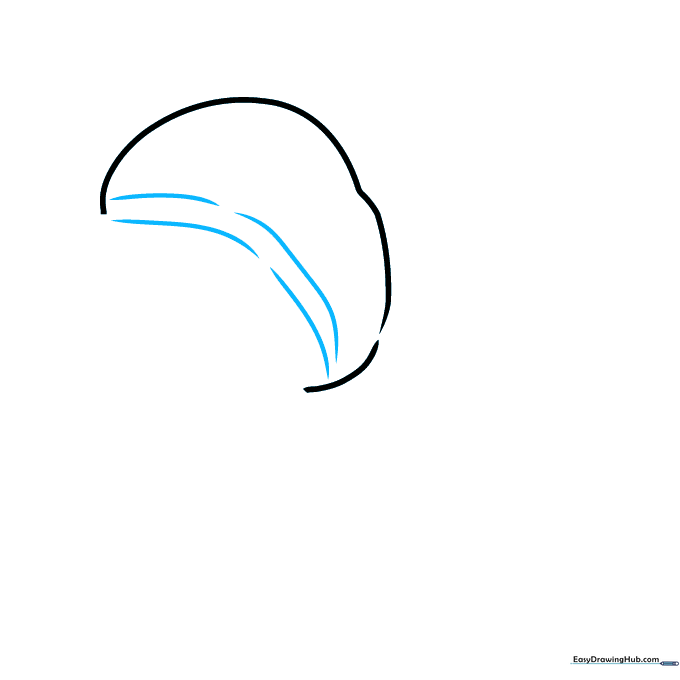
Draw two small, parallel lines across the opening of your shape. Tip: Make sure they don't touch the edges; this creates the illusion of folded dough layers.
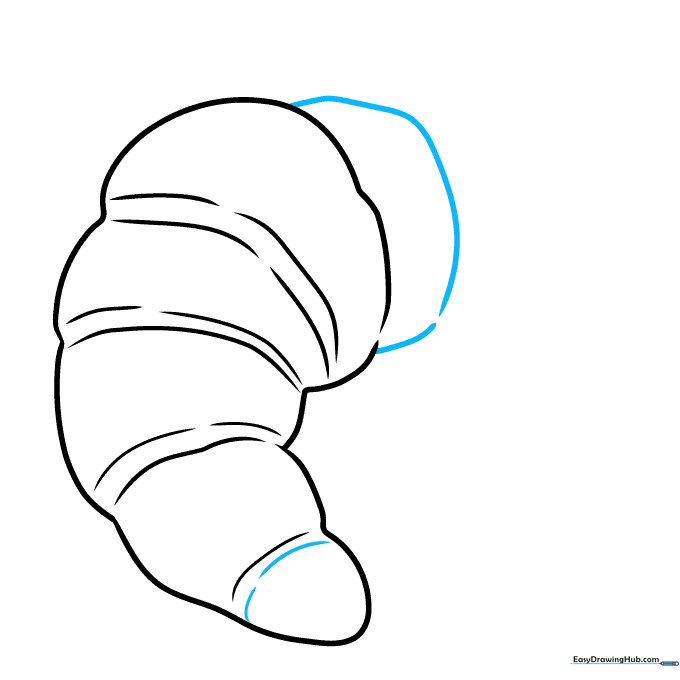
Step 3: Building the Second Section

Add another curved section next to the first one. Use a curved line for the side, then repeat the two-line detail. Tip: Try to keep the sections roughly the same size for a balanced look.
Step 4: Creating the Third Segment

Draw a third section using a long curved line for one side and a shorter one for the other. Add the two-line detail in the middle. Tip: Varying the line lengths helps the croissant look more natural and organic.
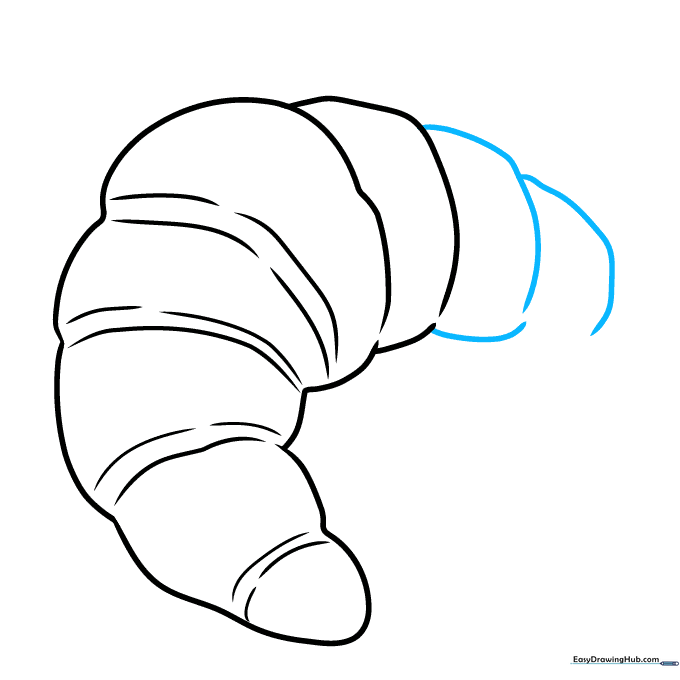
Step 5: Rounding the Edge
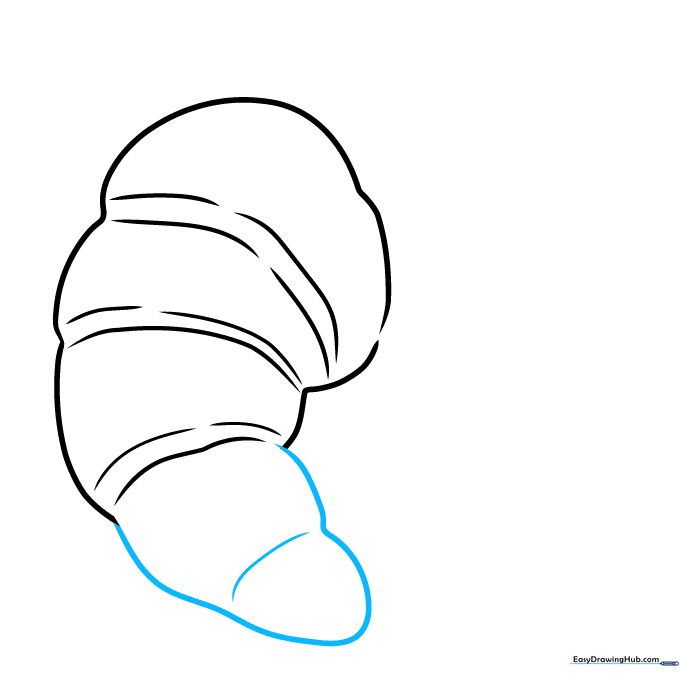
Use a long curved line that doubles back on itself to complete the side. Add a small cross-line to show the fold. Tip: Think of this as the 'end' of the pastry roll.
Step 6: Balancing the Other Side
Add a curved line across the center, then build a new section on the opposite side using two curved lines. Tip: Don't worry if it's not perfectly symmetrical; real pastries are never perfect!
Step 7: Adding Smaller Details
Continue adding smaller sections as you move toward the tip. Use curved lines that don't quite meet. Tip: Smaller, tighter lines make the pastry look more delicate.
Step 8: Finalizing the Shape
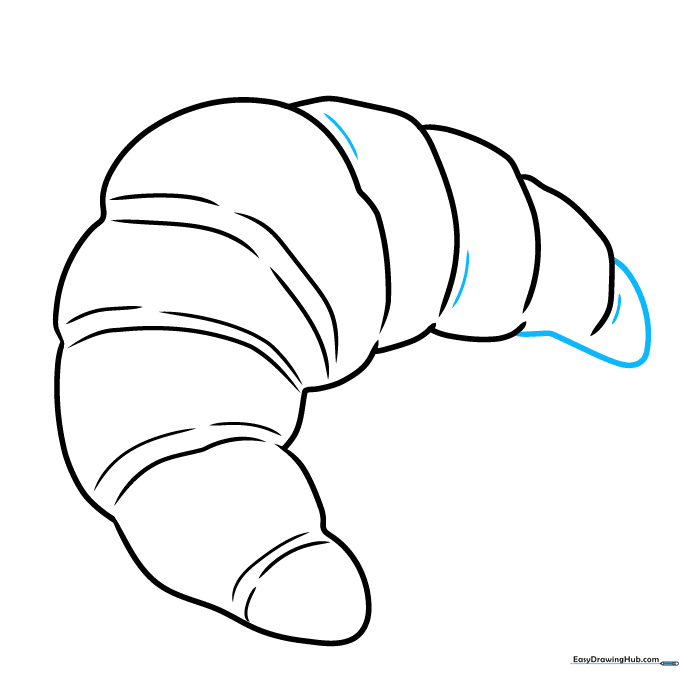
Complete the final two sections with curved lines. Add short, dash-like lines where the sections overlap to show texture. Tip: These little dashes act as 'shadows' to give your drawing depth.
Step 9: Adding Final Textures
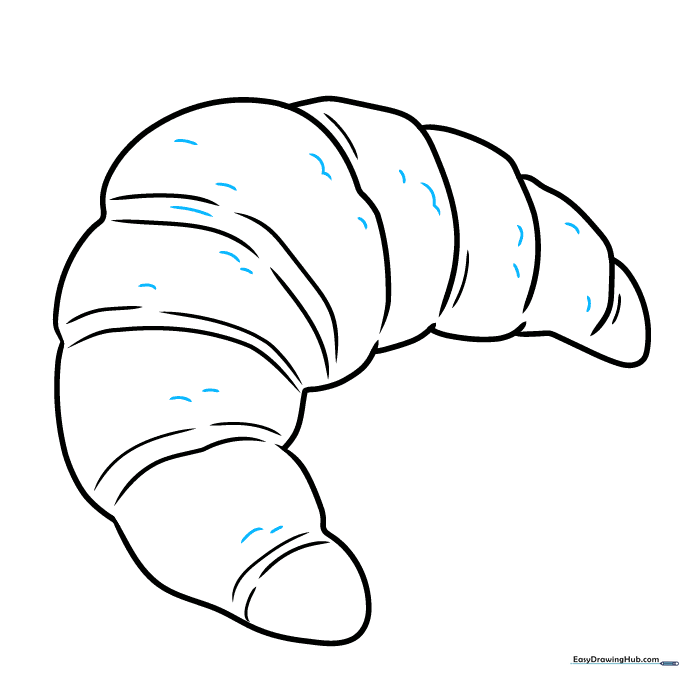
Add a few more short curved lines along the sides to emphasize the flaky texture of the crust. Tip: Use a slightly darker pencil stroke here to make the texture pop.
Step 10: Coloring Your Masterpiece
Time to color! Use warm golden-browns for the crust. You can even add a darker brown drizzle to make it look like a chocolate-filled pastry. Tip: Use light pressure with your yellow pencil first, then layer brown on top for a realistic 'baked' look.
More Tutorials


