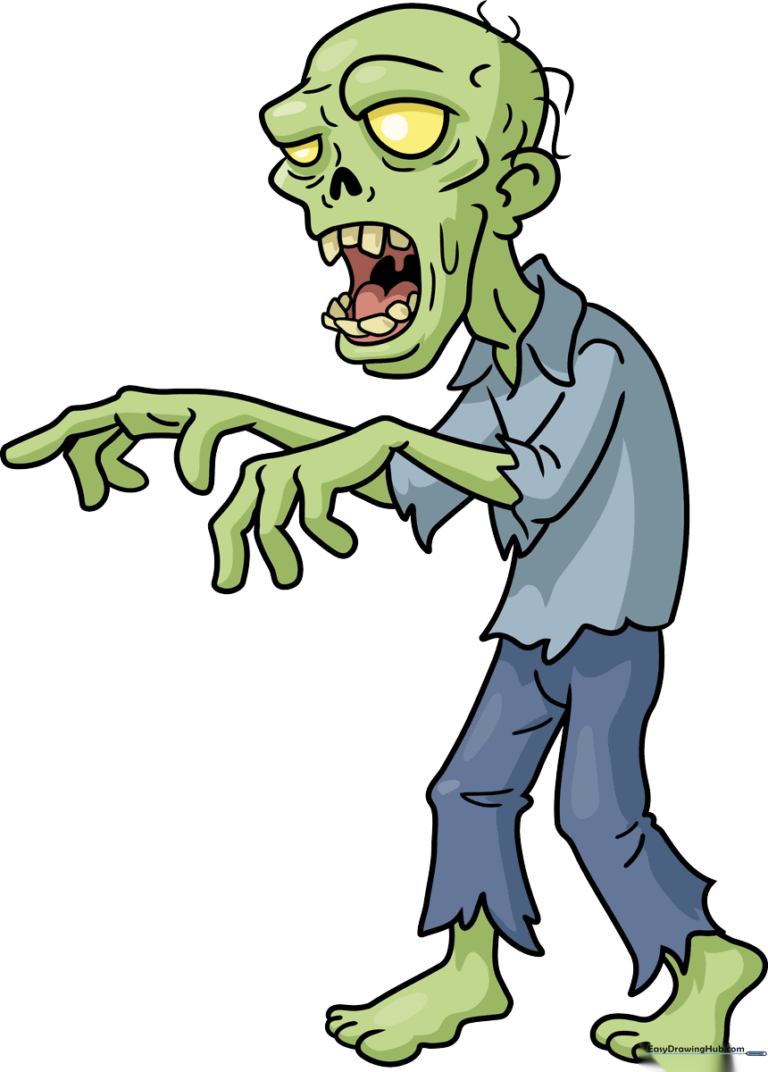
How to Draw a Creepy Zombie: Easy 10-Step Guide
Ready to create your own spooky character? This tutorial is perfect for artists ages 7+ looking to master cartoon-style proportions. You’ll only need a pencil, an eraser, and some paper to bring this undead friend to life.
🎯 Final Result
Step-by-Step Instructions
Step 1: Sketching the Mouth and Face

Draw an oblong shape for the mouth. Above it, sketch an upside-down heart and fill it in. Add two dashed semi-circles for the eyes. Teacher's Tip: Use light, feathery strokes here; it helps you adjust the expression without leaving dark marks.
Step 2: Adding Teeth and Tongue

Draw uneven, overlapping shapes for the teeth—avoid perfect rectangles to keep it looking 'creepy.' Add a heart shape inside for the tongue. Teacher's Tip: Varying the size of the teeth makes the character look more expressive and cartoonish.
Step 3: Shaping the Head and Jaw
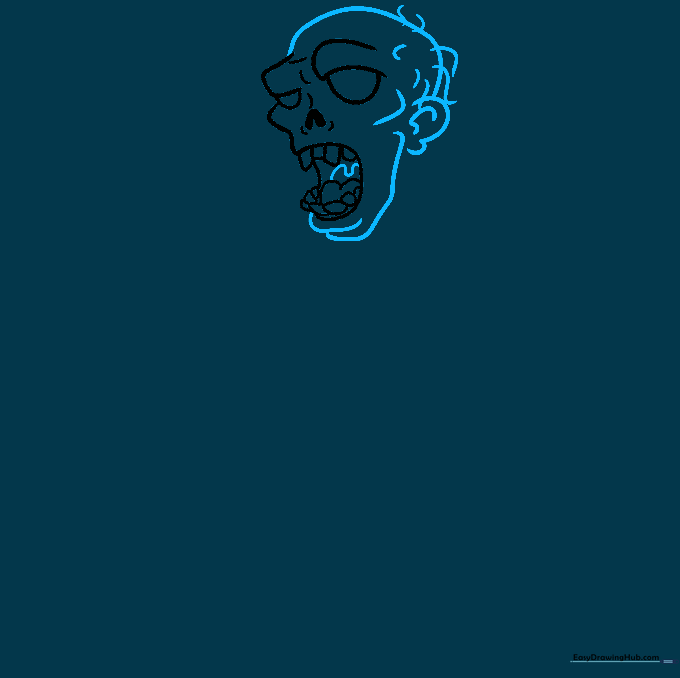
Outline the head with a downward-curving shape. Add butterfly-wing loops for the ear and a jagged line for the jaw. Teacher's Tip: Use a 'broken' line style for the hair to make it look messy and unkempt.
Step 4: Constructing the Neck and Shoulders
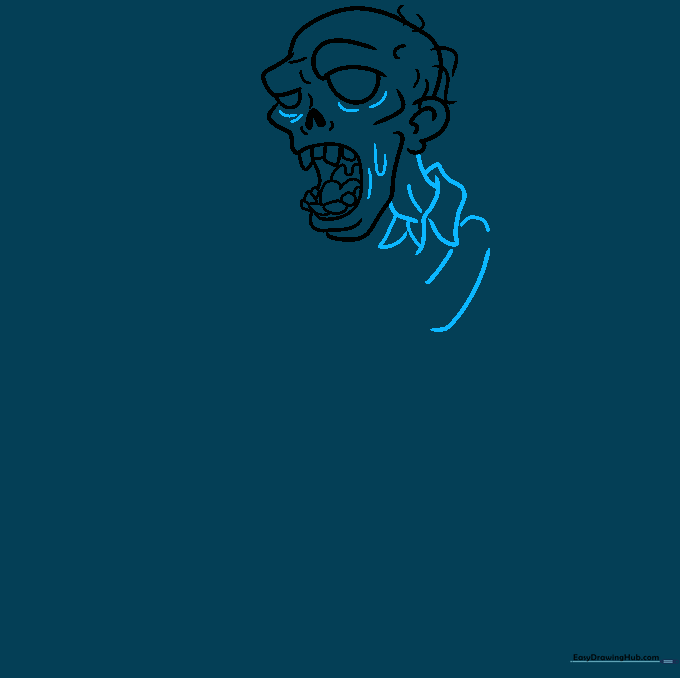
Draw a broad arrow shape for the neck and connect it to the shoulders using wavy, triangular lines. Teacher's Tip: Think of these as 'tattered' fabric edges to enhance the zombie theme.
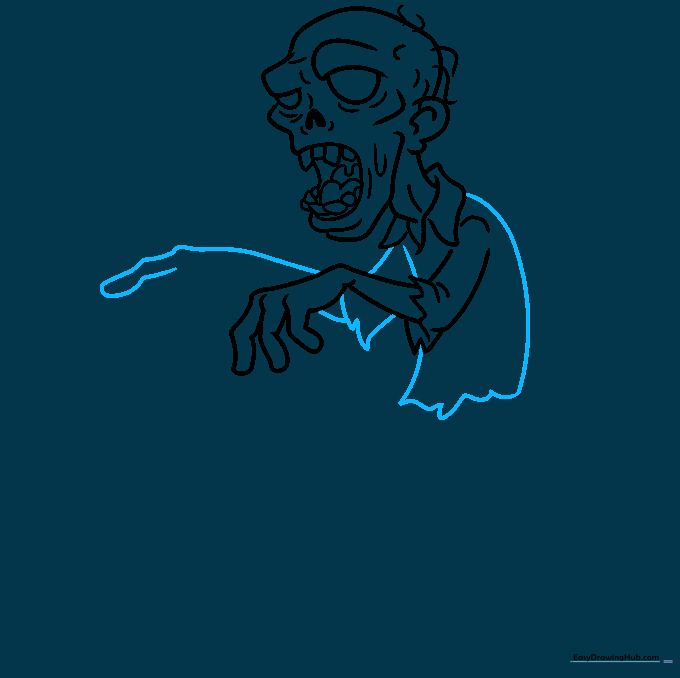
Step 5: Drawing the First Hand
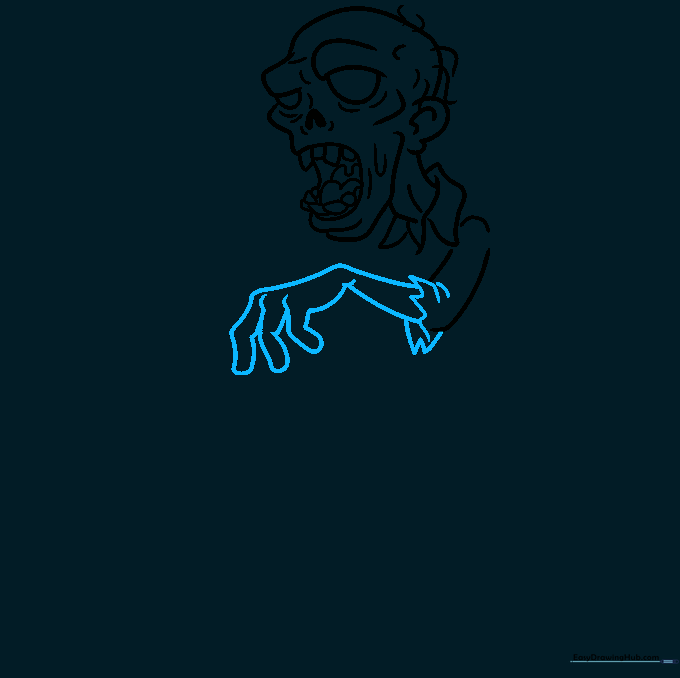
Create the arm using a wide triangle, then add 'sausage' shapes for the fingers. Teacher's Tip: Point the fingers in slightly different directions to give the hand a more natural, 'undead' movement.
Step 6: Outlining the Body
Draw a long, curved line for the body, adding sketchy shapes to suggest tattered clothing. Teacher's Tip: Keep the lines loose; zombies aren't known for their neat, tailored outfits!
Step 7: Adding the Legs
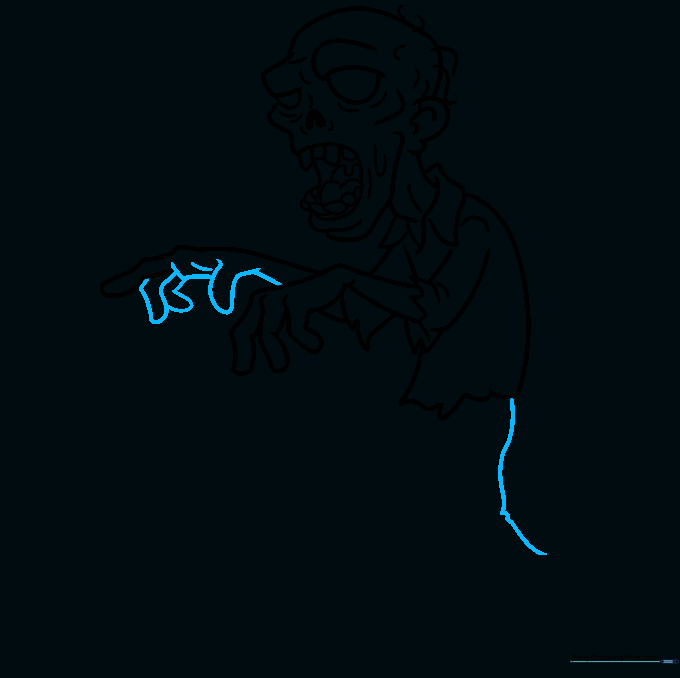
Sketch the legs with curved, slightly jagged lines. Add more sausage shapes for the second hand. Teacher's Tip: Use a ruler if you struggle with straight lines, but try freehand for a more organic, spooky look.
Step 8: Detailing the Fabric
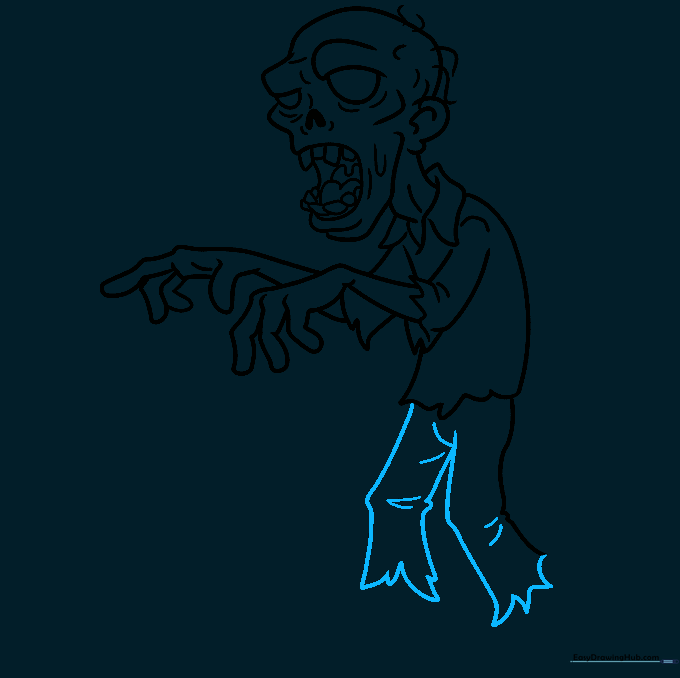
Add parallel lines to the legs and connect them with jagged 'grass-like' strokes to represent torn fabric. Teacher's Tip: Adding these small folds creates a sense of texture and depth.
Step 9: Drawing the Feet
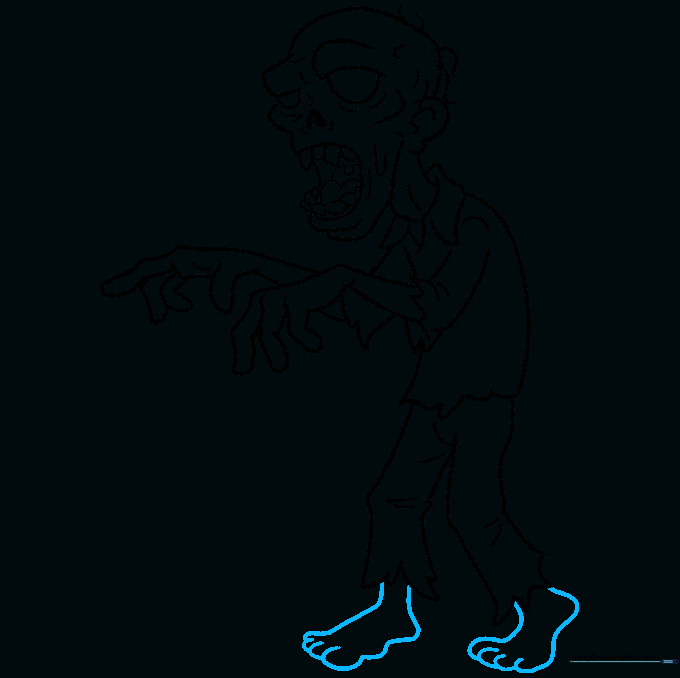
Draw curved, wavy lines for the feet and toes. Teacher's Tip: Don't worry about making the feet look perfect; the 'zombie' aesthetic thrives on slightly wonky proportions.
Step 10: Final Outline and Color

Trace your lines with a pen and erase the pencil marks. Color using muted greens for the skin, grey-blue for the shirt, and dark red for the mouth. Teacher's Tip: Use a light touch with your markers to blend the colors for a more 'decayed' look.
More Tutorials


