How to Draw a Coral Reef: Easy 10-Step Guide for Kids
Bring the wonders of the ocean to your sketchbook with this fun, screen-free activity. Designed for young artists ages 5+, this guide uses basic shapes to build a complex underwater scene. All you need is a pencil, an eraser, and your favorite markers to create a thriving reef ecosystem.
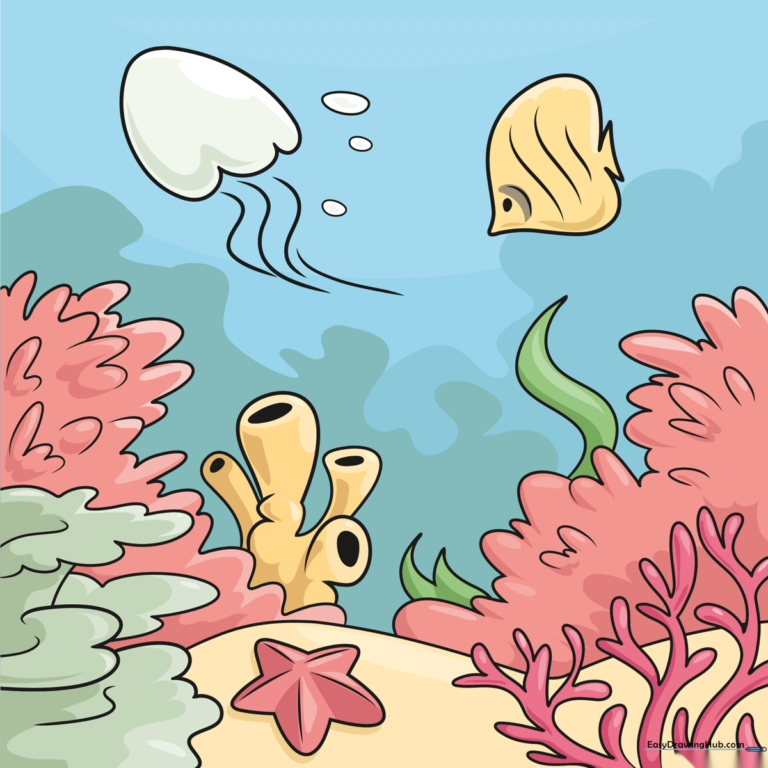
🎯 Final Result
Step-by-Step Instructions
Step 1: Sketching the Base Rocks

Draw several overlapping curved lines to form the foundation of your reef. Teacher's Tip: Keep your pencil pressure light so you can easily erase any overlapping lines later to make the rocks look solid.
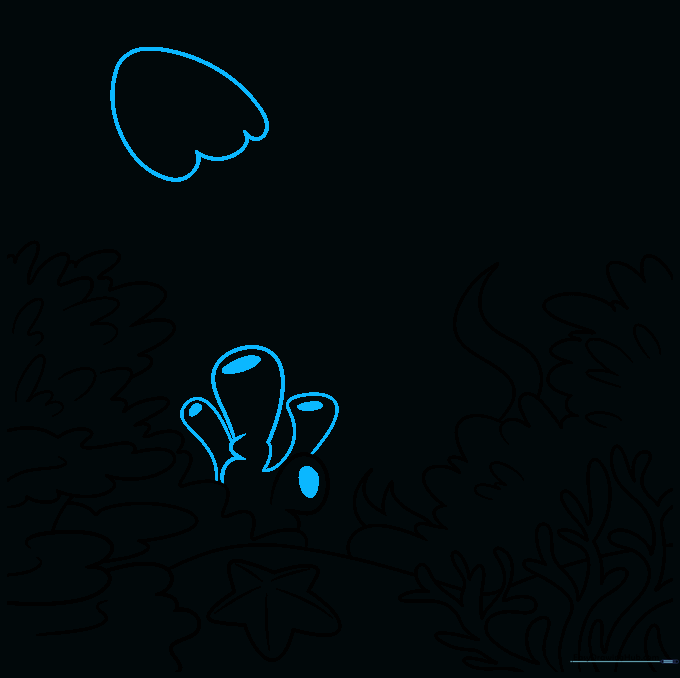
Step 2: Adding Shelf and Staghorn Coral

Add shelf coral using curved lines on top of your rocks. Next, draw staghorn coral by creating branching, antler-like shapes. Teacher's Tip: Think of these branches like the limbs of a tree—keep them rounded and organic.
Step 3: Expanding the Staghorn Coral

Add more staghorn coral branches to fill out your reef. Teacher's Tip: Vary the height of your branches to make the drawing look more natural and less like a perfect grid.
Step 4: Drawing a Starfish and Sponges
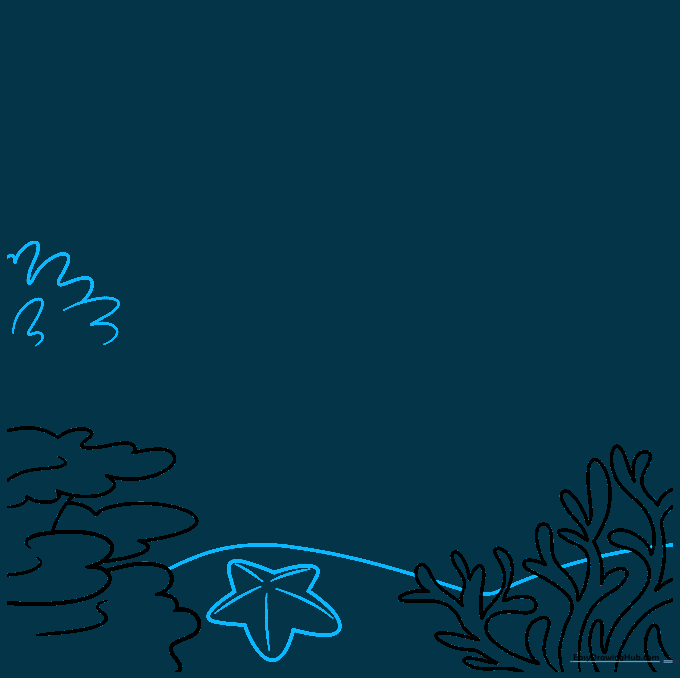
Draw a horizontal line for the sandy ocean floor. Add a five-pointed starfish and some wavy, layered lines to represent sponges. Teacher's Tip: Use a light touch for the sand line so it doesn't distract from the coral.
Step 5: Building the Sponge Clusters

Connect your sponge layers to the seafloor with more wavy lines. Teacher's Tip: Don't worry about making the lines perfectly smooth—sponges in nature are bumpy and irregular!
Step 6: Adding Texture to Sponges

Use 'U' shaped lines to add texture to the sponges. Add more sponge clusters on the other side of the page to balance your composition. Teacher's Tip: Vary the size of your 'U' shapes to create depth.
Step 7: Adding Seagrass
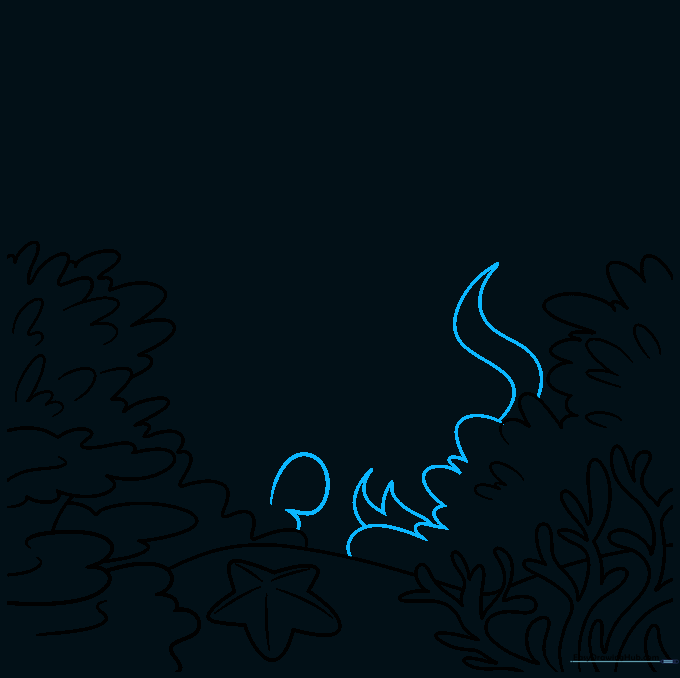
Continue adding texture to sponges and draw seagrass using pairs of wavy lines that taper to a point. Teacher's Tip: Make the seagrass blades different heights to show movement in the water.
Step 8: Large Sponge and Jellyfish
Draw a large, branching sponge with oval openings. Above it, sketch a jellyfish using a large 'U' shape for the bell. Teacher's Tip: The oval openings on the sponge act as 'pores'—shading them slightly makes them look deep.
Step 9: Tentacles and Tropical Fish
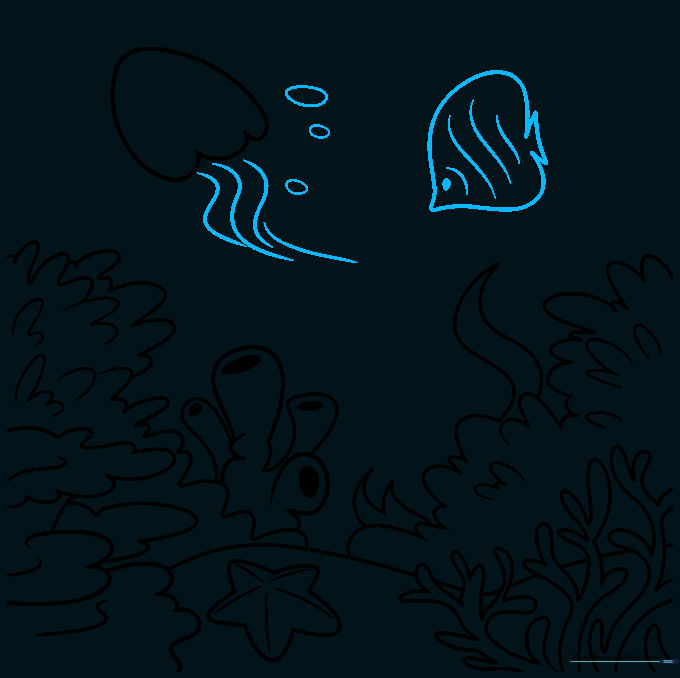
Add tentacles to your jellyfish and draw a heart-shaped tropical fish nearby. Teacher's Tip: Give the fish stripes with vertical lines and a small circle for an eye to bring it to life.
Step 10: Bringing Your Reef to Life with Color
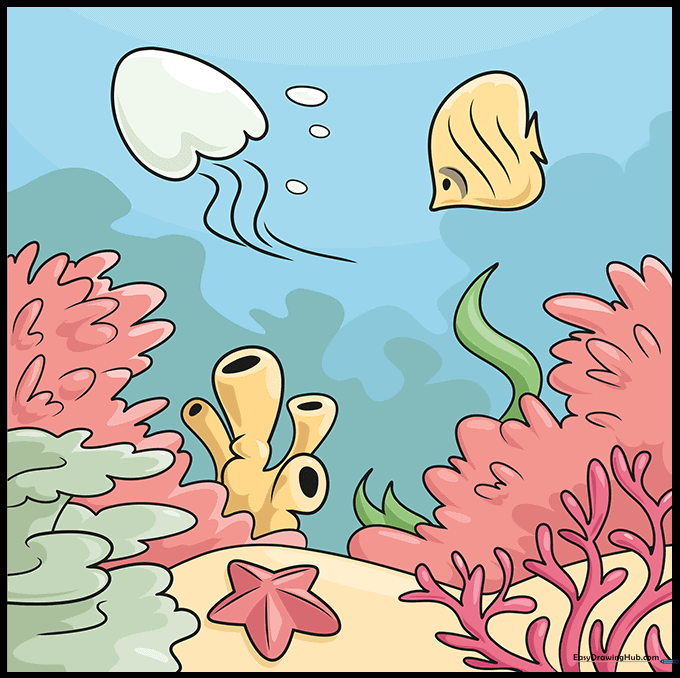
Use bright, bold colors to fill in your reef. Teacher's Tip: Healthy reefs are vibrant! Use oranges, pinks, and yellows for the coral, and deep blues for the water to make your colors pop.
More Tutorials


