How to Draw a Compass Rose: Easy Step-by-Step Guide
Ready to map out your next adventure? This compass rose tutorial is perfect for students and artists ages 7+ looking to add professional detail to their maps. You only need a pencil, an eraser, and a ruler to get started. Follow along to build your spatial awareness and steady your hand with these geometric shapes.
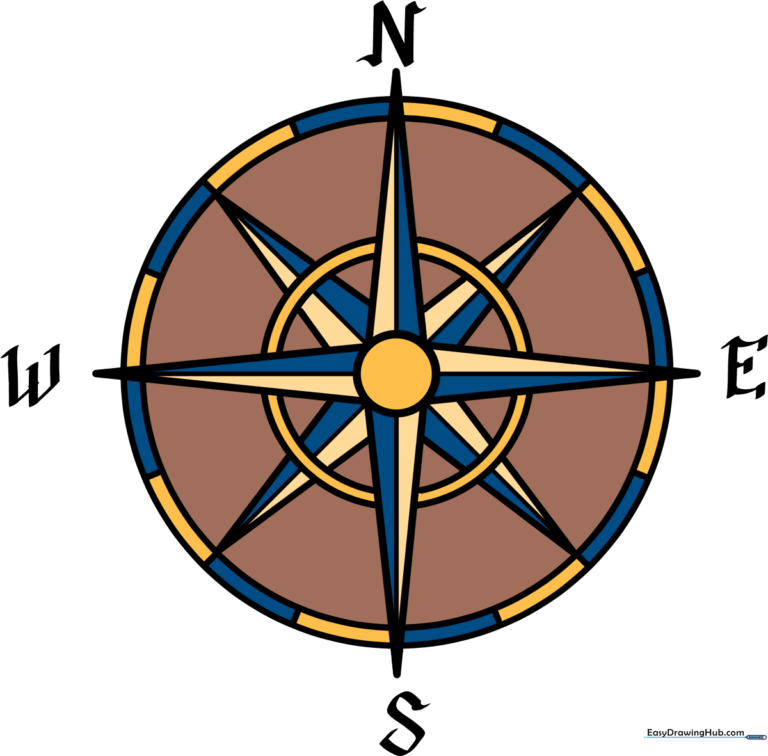
🎯 Final Result
Step-by-Step Instructions
Step 1: Establishing the Center

Draw a small, neat circle in the center of your page. Teacher's Tip: Use a light touch with your pencil; this circle is just a guide for your rays and will be partially covered later.
Step 2: Sketching Cardinal Rays

Extend four sets of lines from the center to form sharp, triangular points. These represent North, South, East, and West. Teacher's Tip: Use a ruler to ensure your rays are perfectly straight and symmetrical.
Step 3: Adding Definition
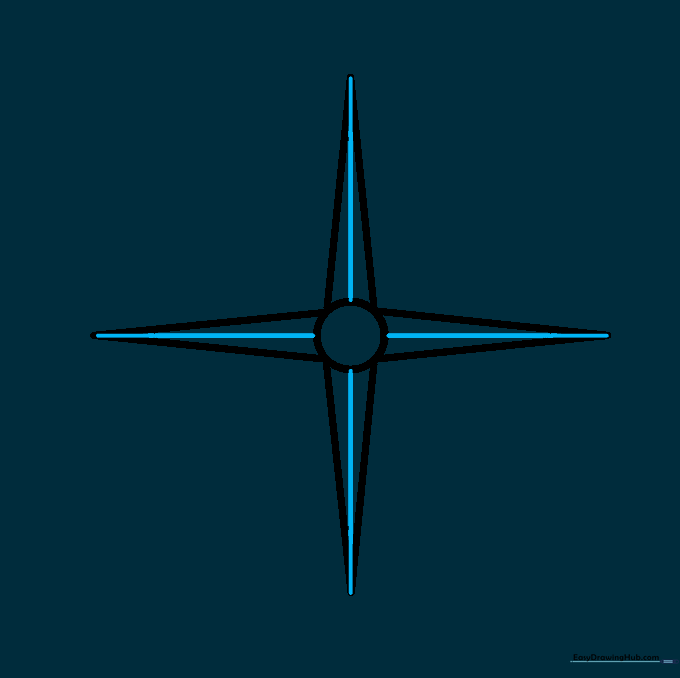
Draw a straight line down the center of each ray. This adds a 3D effect to your compass. Teacher's Tip: Keep your lines parallel to the outer edges of the triangles for a clean, professional look.
Step 4: Drawing Inner Circles
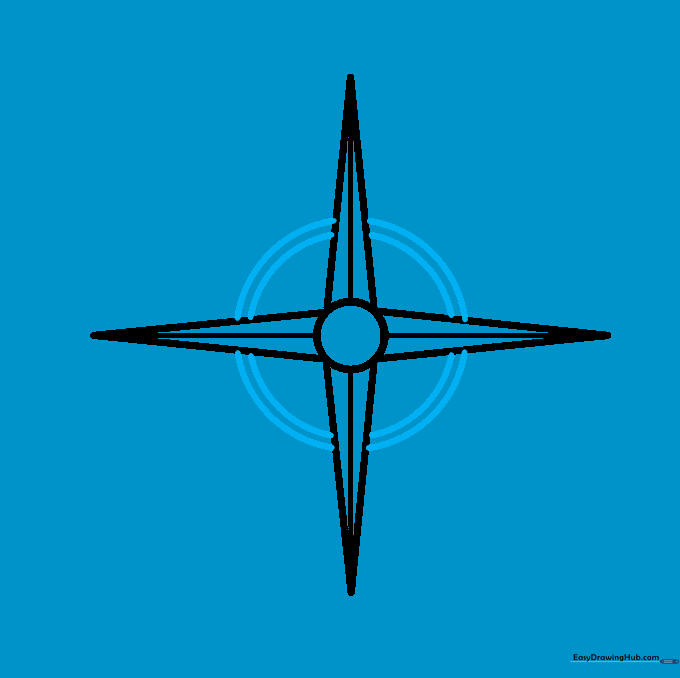
Sketch two circles around the center. They should look like they are passing behind the rays. Teacher's Tip: Don't worry if the lines overlap; you can erase the segments inside the rays later for a polished finish.
Step 5: Adding Intercardinal Rays
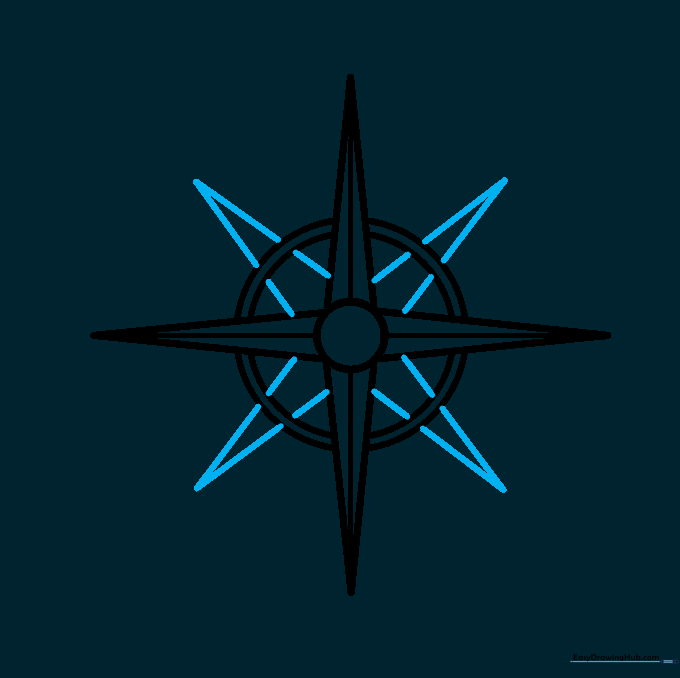
Add four shorter rays between the cardinal ones to represent directions like Northeast and Southwest. Teacher's Tip: Make these rays slightly shorter than the main ones to keep the design balanced.
Step 6: Detailing the New Rays

Draw a center line down each of your new, shorter rays. Teacher's Tip: Consistency is key! Ensure these lines match the style of the lines you drew in Step 3.
Step 7: Framing the Compass
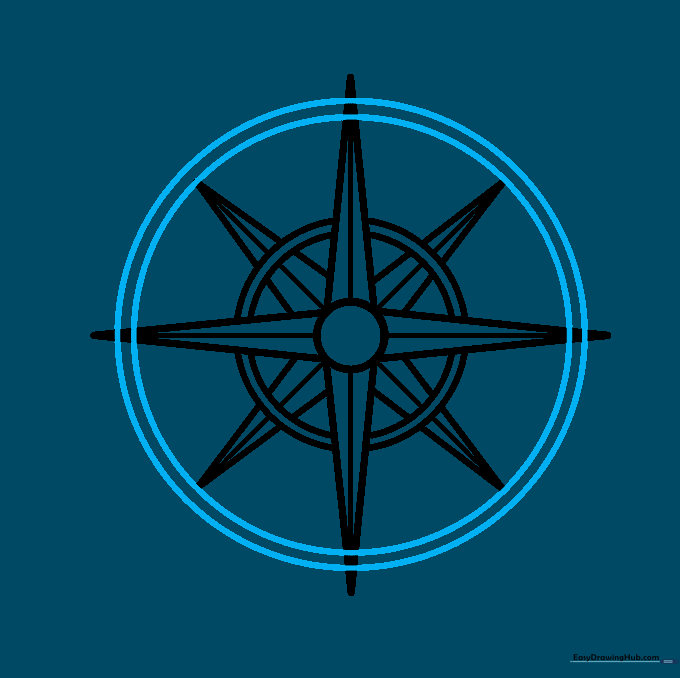
Draw a circle that touches the tips of the shorter rays, then add a second, slightly larger circle just outside it. Teacher's Tip: Use a compass tool or a circular object to get these perfect.
Step 8: Adding Decorative Lines

Draw small lines across the outer circle to create segments. This gives your compass a vintage, nautical look. Teacher's Tip: Space these out evenly to maintain symmetry.
Step 9: Labeling Directions
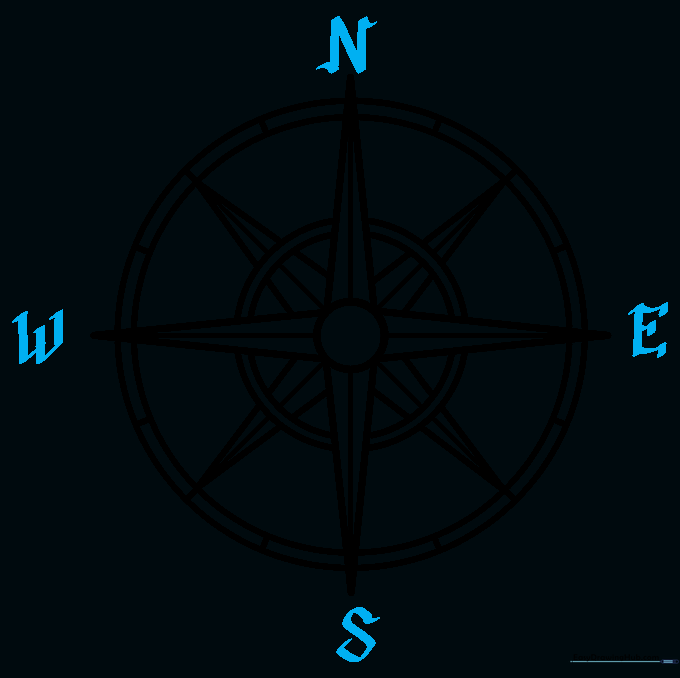
Add the letters 'N', 'S', 'E', and 'W' at the tips of the cardinal rays. Use a fancy script with serifs for a classic map aesthetic. Teacher's Tip: Practice your lettering on a scrap piece of paper first!
Step 10: Adding Color
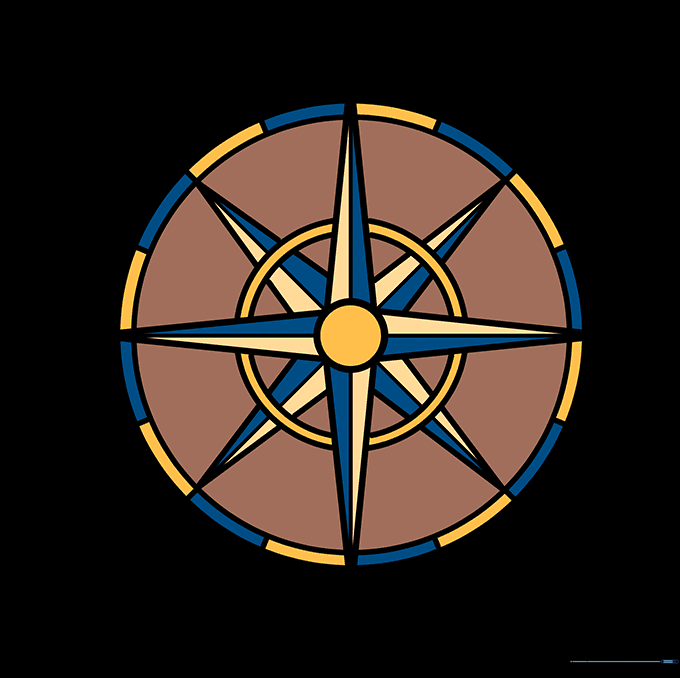
Bring your compass to life with color! Traditional maps often use deep blues, reds, and gold. Teacher's Tip: Use colored pencils and apply light pressure to layer your colors for a rich, professional finish.
More Tutorials


