How to Draw a Church: Easy 10-Step Guide for Kids
This guided drawing lesson is perfect for young artists ages 5 and up. You will need a pencil, an eraser, and a piece of paper to build this charming structure. Follow along to master basic geometric shapes and architectural symmetry in your own artwork.
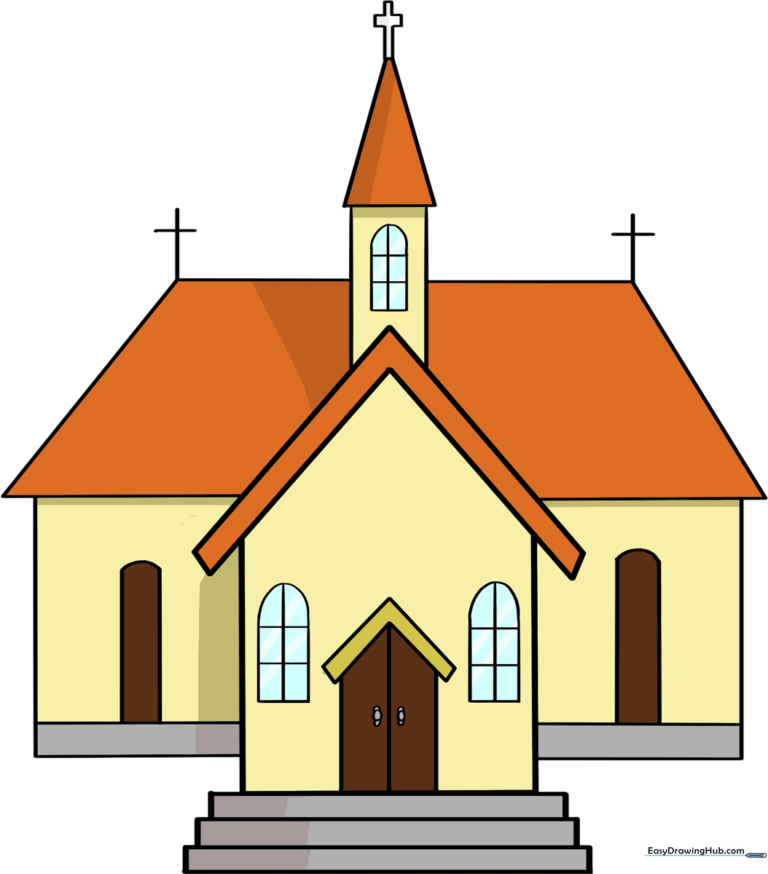
🎯 Final Result
Step-by-Step Instructions
Step 1: Sketching the Main Hall

Start by drawing three straight lines to form an open-ended square for the front wall. Add an inverted 'V' shape on top for the roof, then mirror it with a second 'V' to create depth. Teacher's Tip: Keep your pencil pressure light so you can easily adjust the roof angle if it looks a bit crooked.
Step 2: Adding the Foundation Steps
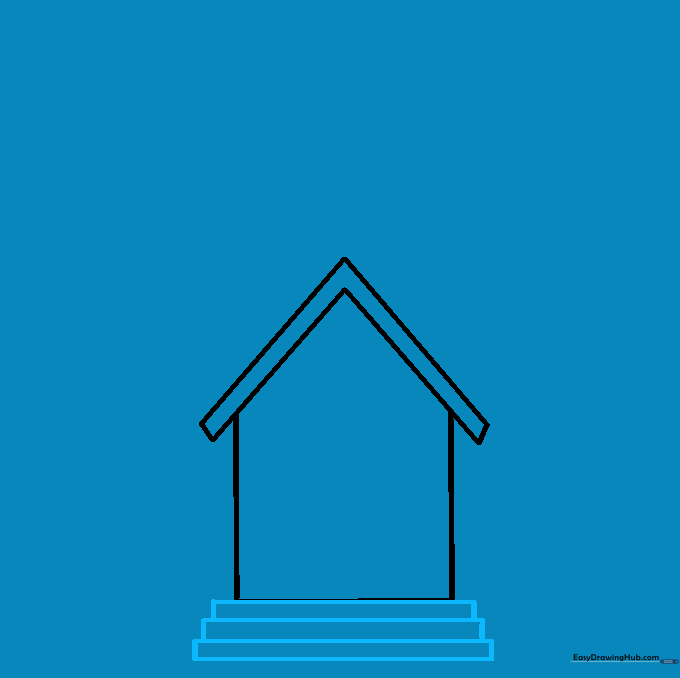
Draw three narrow, stacked rectangles at the base of the building. Make each one slightly wider than the one above it to create a sturdy-looking staircase. Teacher's Tip: Use a ruler if you want perfectly straight edges, or practice freehand to build steady hand control.
Step 3: Constructing the Entrance

Draw three vertical lines for the door frame, making the center line the tallest. Cap them with an inverted 'V' and add two small ovals for handles. Teacher's Tip: Adding the door handles helps give your drawing a sense of scale and realism.
Step 4: Drawing the Windows
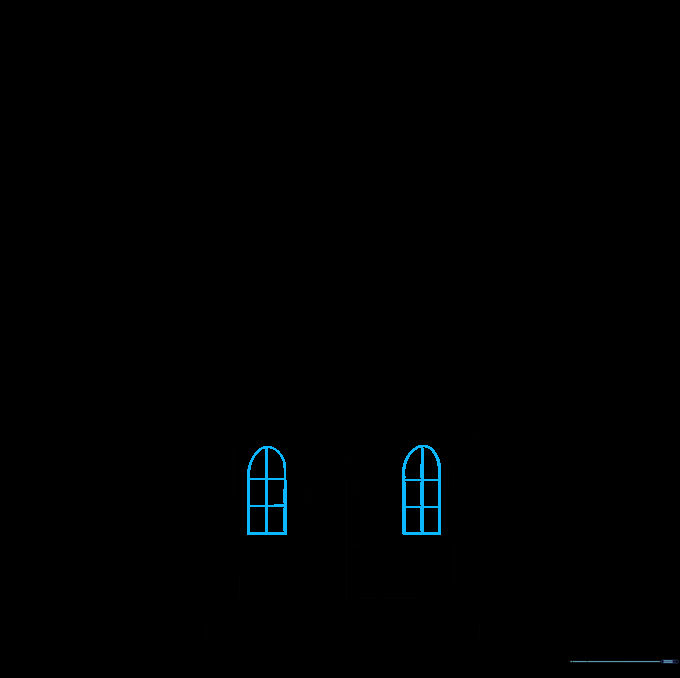
Sketch two narrow, arched windows on either side of the door. Add a vertical line down the center and horizontal cross-bars to create the pane effect. Teacher's Tip: Try to keep your window shapes identical to maintain balance in your building.
Step 5: Building the Steeple

Draw a rectangle on the roof, topped with a triangle to form the steeple. Teacher's Tip: Ensure the steeple is centered on the roof peak to keep your church looking structurally sound.
Step 6: Adding the Cross and Detail
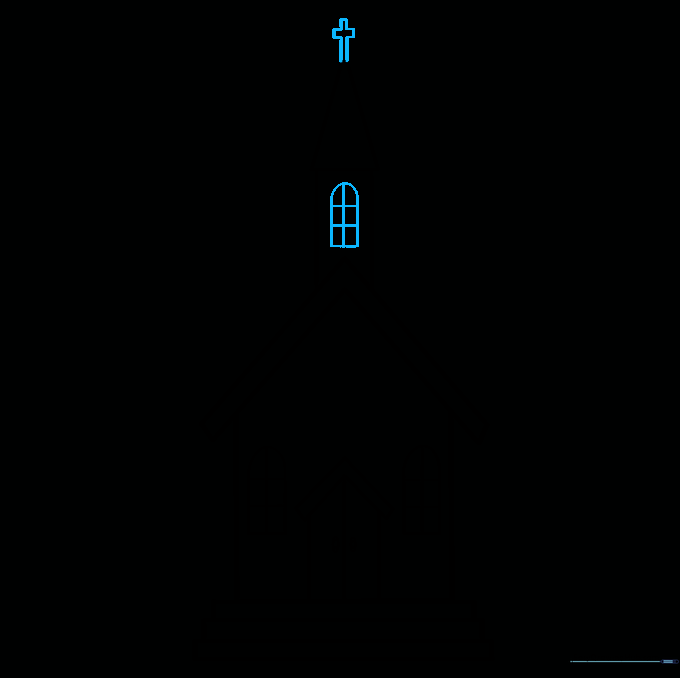
Add a small window to the steeple and draw a 't' shaped cross at the very top. Teacher's Tip: Draw the cross slowly—it’s a small detail, so take your time to make the lines meet cleanly.
Step 7: Extending the Building
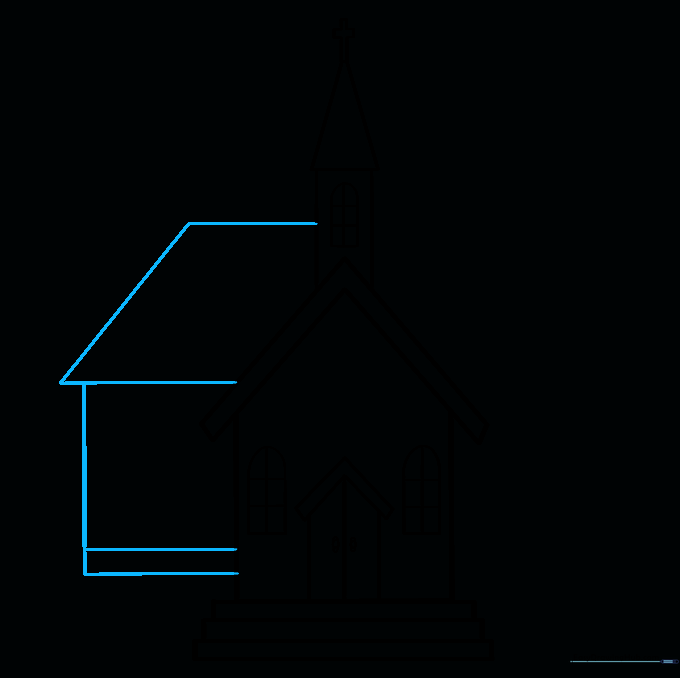
Add a rectangular extension to one side of the main hall with a sloped roof. Teacher's Tip: This adds perspective to your drawing, making it look like a larger, more complex building.
Step 8: Balancing the Structure
Repeat the process on the opposite side to create a symmetrical wing. Teacher's Tip: Symmetry is key in architectural drawing; try to make this side match the first extension in height.
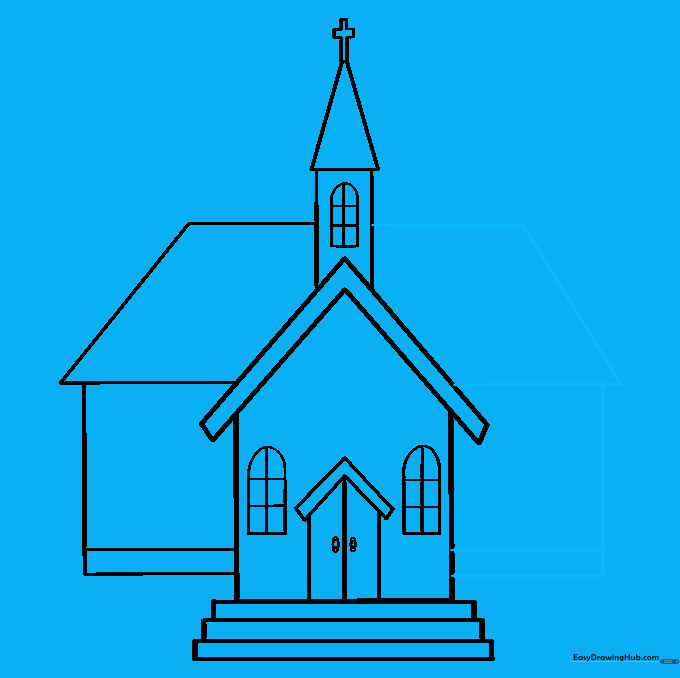
Step 9: Final Touches
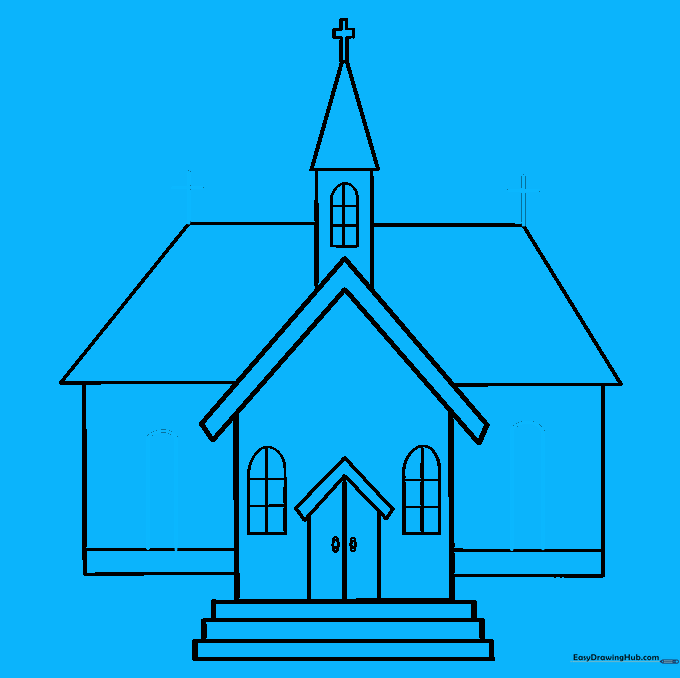
Add small windows to the side wings and crosses to the roof corners. Teacher's Tip: Use a fine-liner or dark pencil to go over your final lines, then erase any stray construction marks for a clean look.
Step 10: Bring It to Life with Color
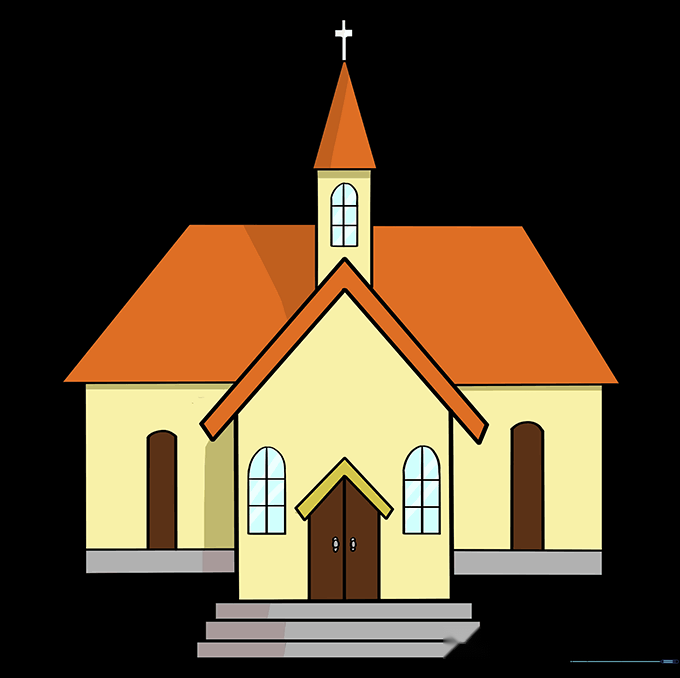
Color your church using warm tones for the walls and cool blues for the windows. Teacher's Tip: Use light shading to create a 3D effect on the roof tiles!
More Tutorials


