How to Draw a Chinese Dragon Face: Easy 9-Step Guide
Bring mythical legends to life with this step-by-step guide to drawing a majestic Chinese dragon face. Designed for young artists ages 7+, this activity requires only a pencil, eraser, and paper to build confidence in character design. Follow along to master the fluid lines and intricate details that make these creatures so iconic.
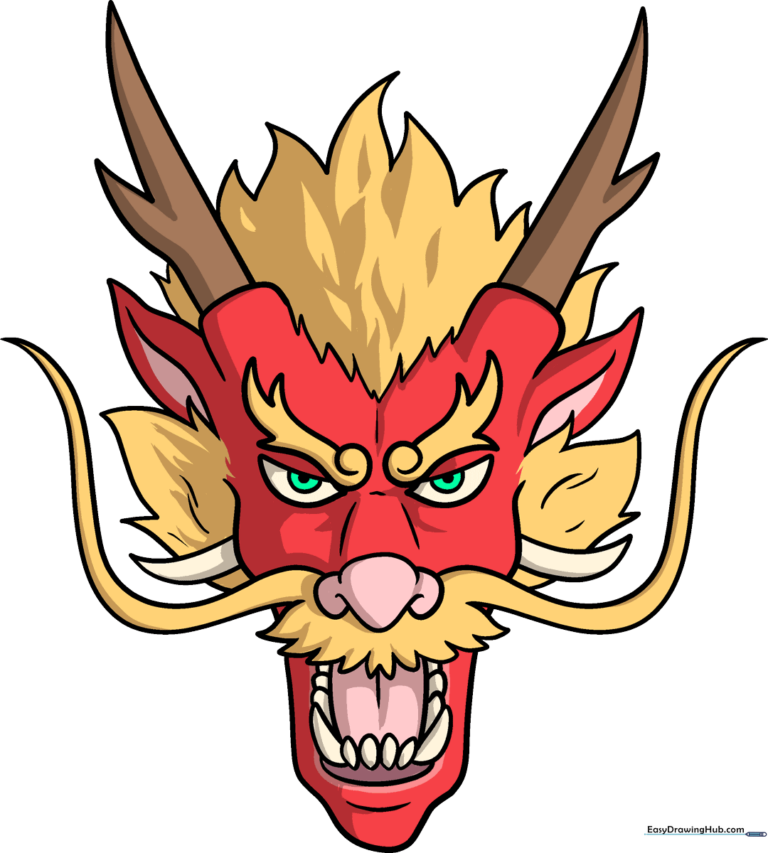
🎯 Final Result
Step-by-Step Instructions
Step 1: Sketching the Expressive Eyes

Start by drawing two semicircular shapes for the eyes. Inside each, add two smaller half-circles to create depth. Above the eyes, sketch bushy eyebrows using jagged, pointed lines. Teacher's Tip: Keep your pencil pressure light here so you can easily refine the shapes later.
Step 2: Defining the Dragon's Snout

Draw the nose using overlapping curved lines to form the bridge and the tip. Think of this as a rounded, organic shape that sits right between the eyes. Tip: Use smooth, flowing motions to give the dragon a friendly, cartoon-like appearance.
Step 3: Adding Whiskers and Mustache

Extend long, elegant curved lines from the sides of the nose to create the whiskers, meeting them at sharp points. Use short, quick strokes to add the mustache beneath the nose. Tip: Vary the length of your lines to make the whiskers look like they are flowing in the wind.
Step 4: Crafting the Jaw and Teeth
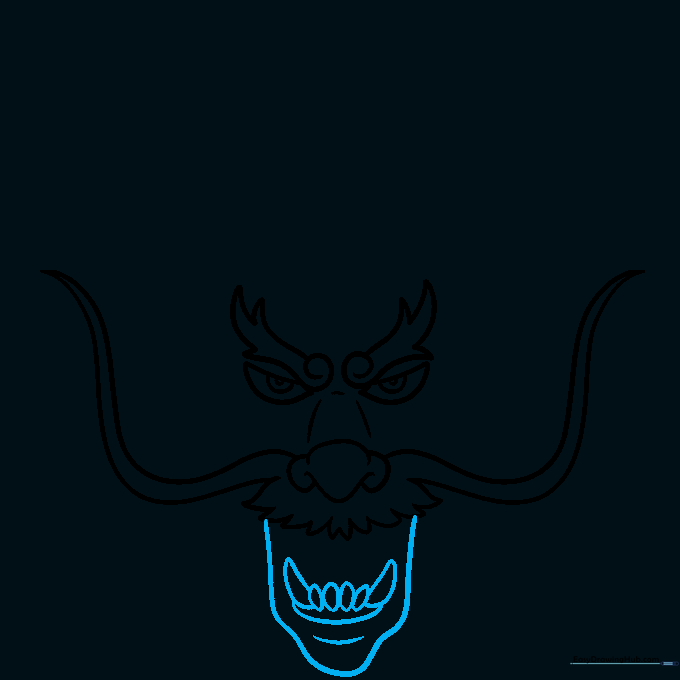
Use a wide, sweeping curved line to outline the lower jaw. Add the teeth by drawing pairs of curved lines—two large fangs and four smaller teeth. Tip: Ensure the teeth are spaced evenly to give your dragon a balanced, characterful smile.
Step 5: Defining the Mouth and Head Shape
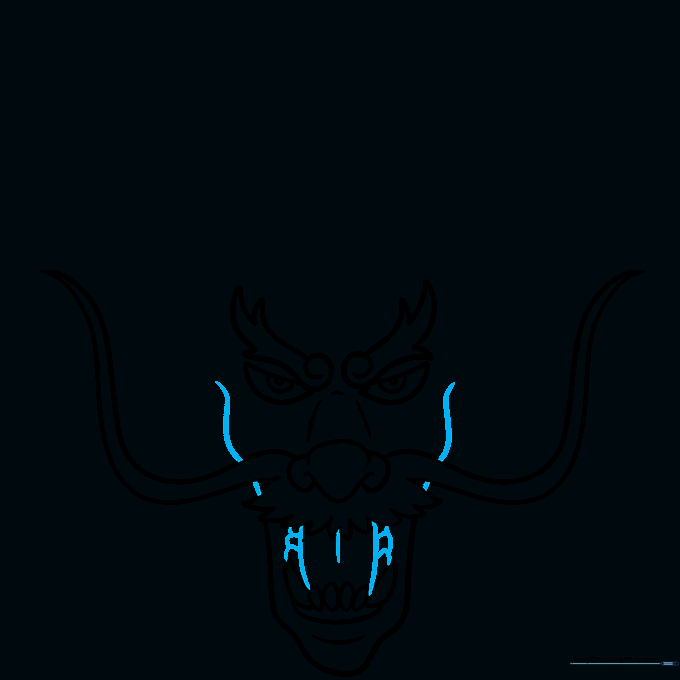
Draw the tongue inside the mouth and connect the jaw to the sides of the head using smooth, curved lines. Tip: Keep the tongue shape rounded to contrast with the sharp, pointed teeth.
Step 6: Adding Horns and Fur
Draw two curved horns on the sides of the head. Add fur using jagged, pointed lines of varying lengths. Tip: Add small, curved lines inside the fur sections to give them a textured, realistic look.
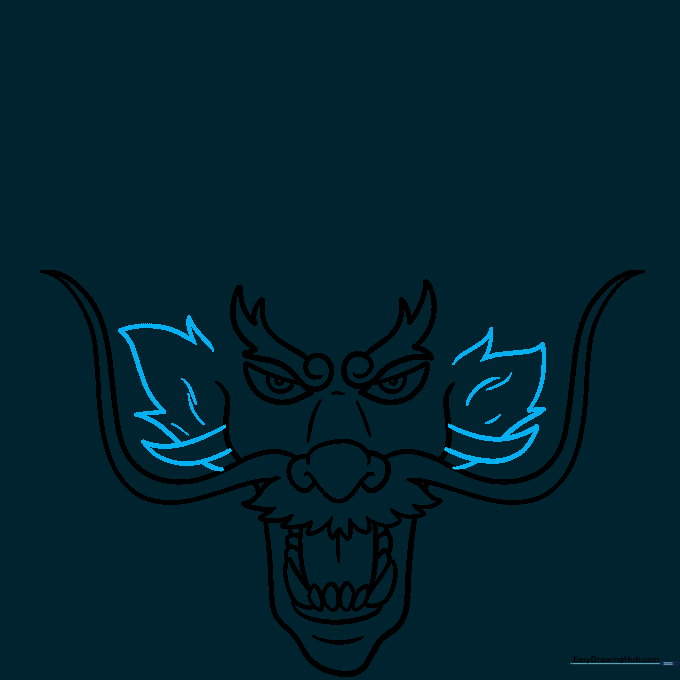
Step 7: Drawing the Ears and Antler Bases
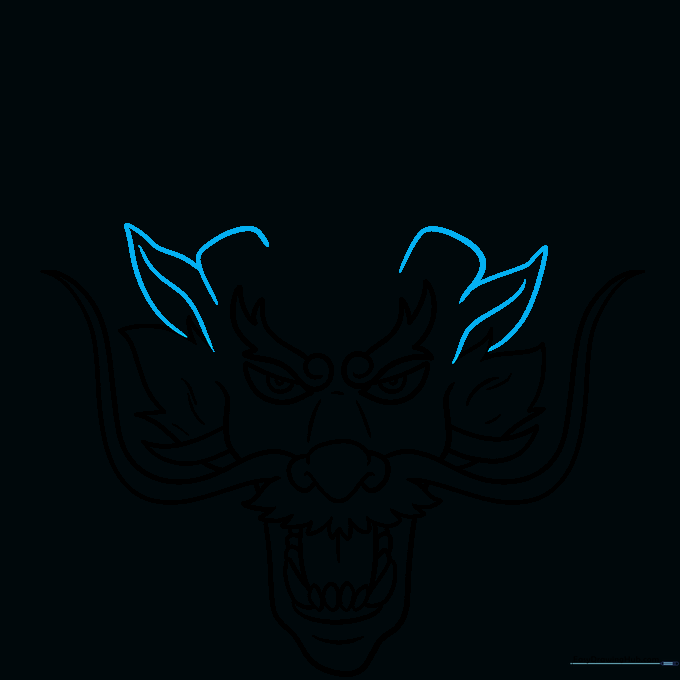
Sketch the ears using two curved lines each, adding a third line for inner-ear detail. Next to the ears, draw small rounded rectangles—these are the bases for the antlers. Tip: Keep these shapes symmetrical to maintain the dragon's balanced look.
Step 8: Constructing the Antlers
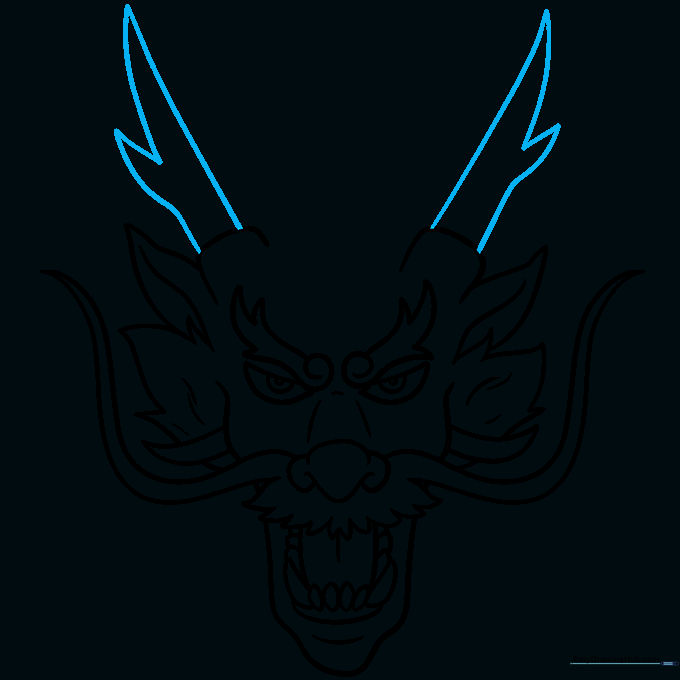
Draw the branching antlers using pairs of curved lines that meet at points. Tip: Imagine the antlers as tree branches—let them grow outward and upward for a majestic effect.
Step 9: Final Touches and Fur Details
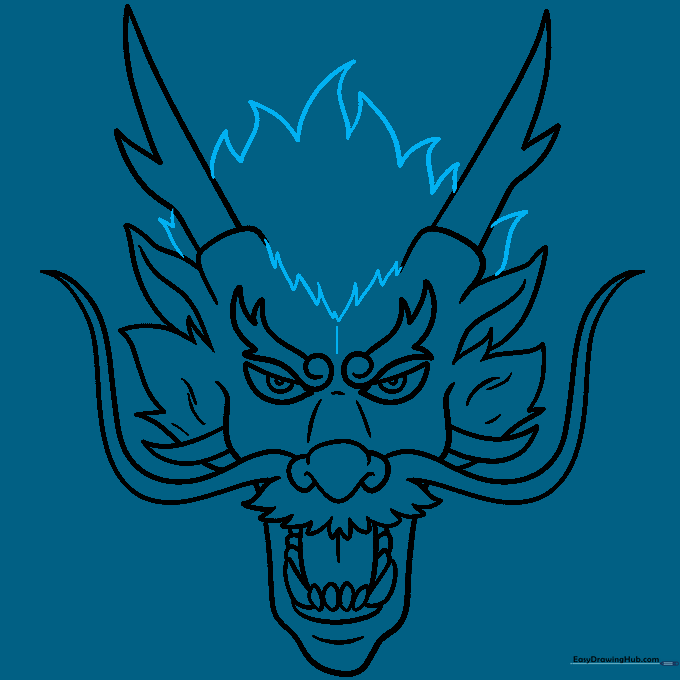
Complete the head by adding more hair along the top using jagged, pointed lines. Add a second layer of fur between the antlers to create volume. Tip: Use a darker pencil for your final outline to make the drawing pop before coloring.
Step 10: Bring Your Dragon to Life with Color
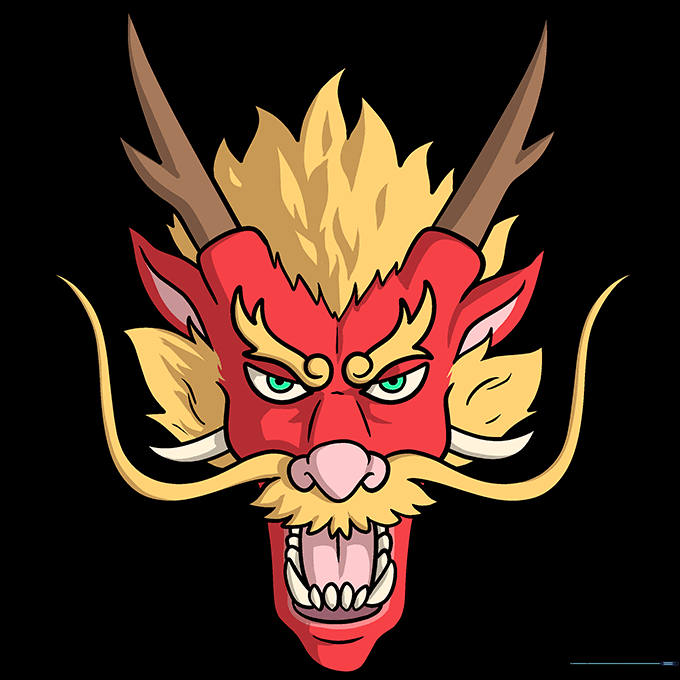
Time to color! Use traditional red and gold for a vibrant, opulent look, and choose a striking green for the eyes to create a beautiful contrast. Tip: Use light, circular strokes when coloring to keep the texture smooth and professional.
More Tutorials


