How to Draw a Chibi Batman: Easy 9-Step Guide for Kids
Bring the Dark Knight to life with this adorable Chibi Batman drawing guide, perfect for young artists ages 6 and up. You will only need a pencil, an eraser, and a piece of paper to master this stylized superhero. Follow these steps to build confidence in your character design and learn how to balance proportions for that classic 'chibi' look.
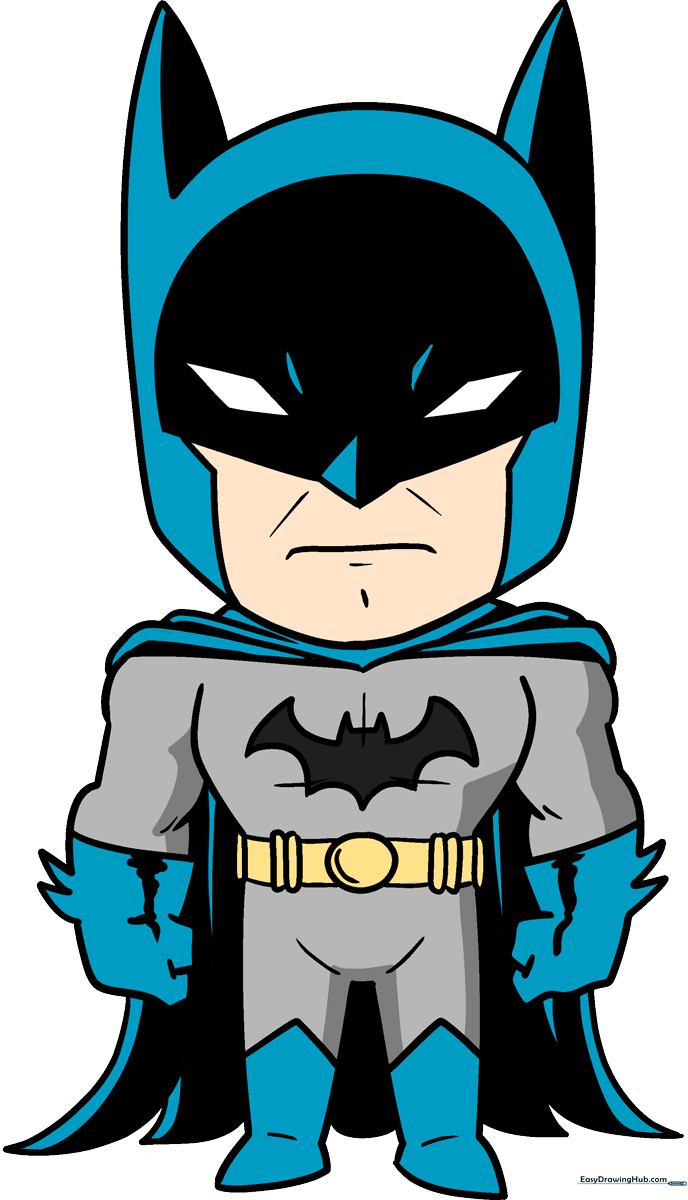
🎯 Final Result
Step-by-Step Instructions
Step 1: Sketching the Eyes and Mask
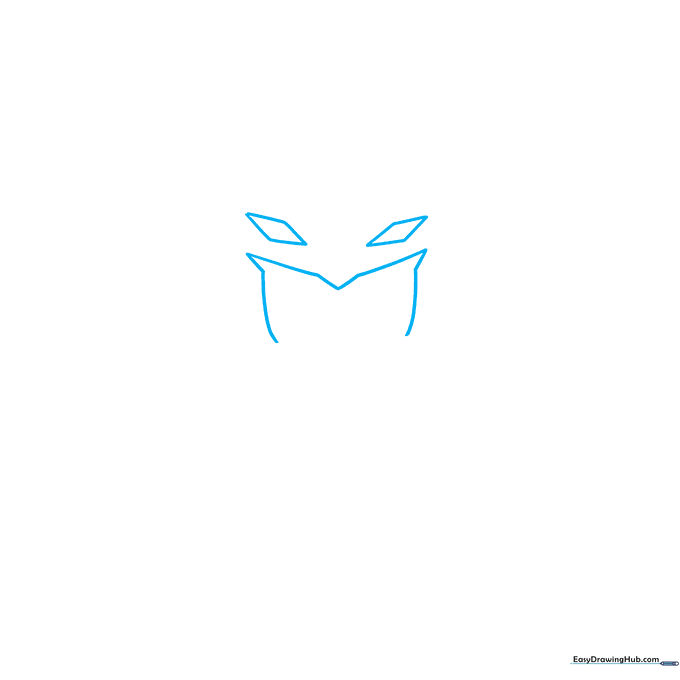
Draw two diagonal diamond shapes for the eyes. Then, sketch a stylized 'M' shape between them to form the mask opening. Teacher's Tip: Keep the diamonds symmetrical to give your Batman a balanced, heroic expression.
Step 2: Defining the Face

Outline the head with a long, rounded curve connecting the mask edges. Add a small, slightly downturned mouth line below the mask. Teacher's Tip: A slight curve in the mouth gives him that serious, determined Batman look.
Step 3: Adding the Bat Ears
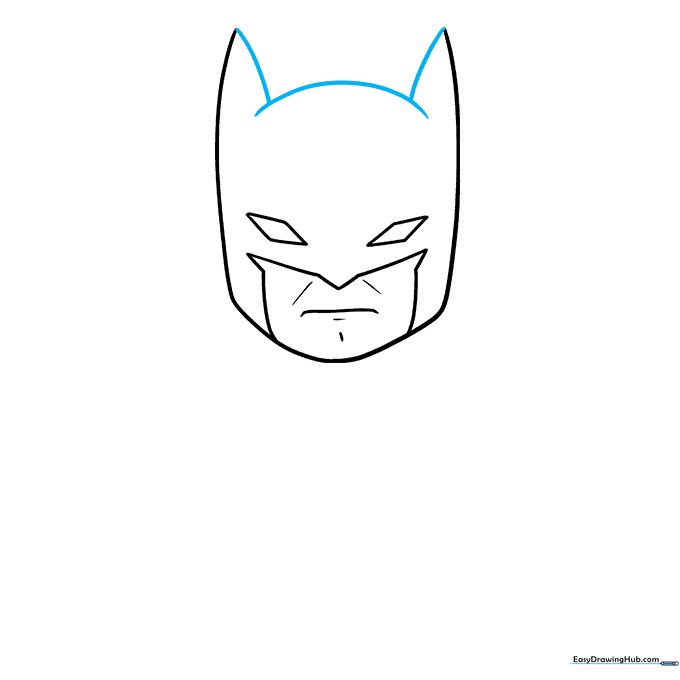
Use overlapping curved lines to draw the top of the head, finishing with two sharp, triangular ears. Teacher's Tip: Make the ears slightly taller than you think; it helps emphasize the 'bat' silhouette.
Step 4: Starting the Cape
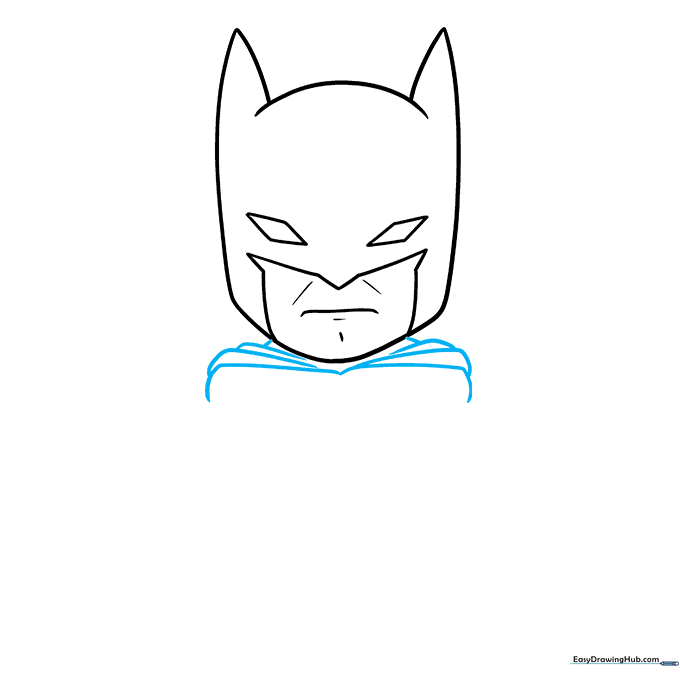
Extend two short lines down from the head, then add three overlapping triangles on each side to represent the cape's folds. Teacher's Tip: Keep these triangles jagged to give the cape a sense of movement.
Step 5: Drawing the First Arm
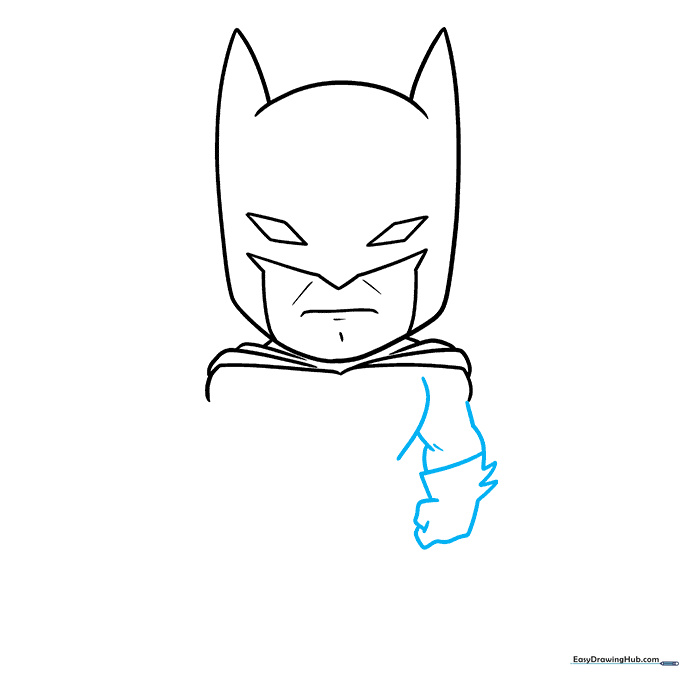
Draw the arm using curved lines for the bicep and a gloved hand. Add two small 'V' shapes on the side of the glove for the spikes. Teacher's Tip: Use smooth, rounded lines to maintain the cute chibi aesthetic.
Step 6: Drawing the Second Arm

Repeat the process for the second arm, mirroring the bicep and gloved hand. Teacher's Tip: Try to match the size of the first arm so your Batman looks balanced.
Step 7: Chest Logo and Utility Belt
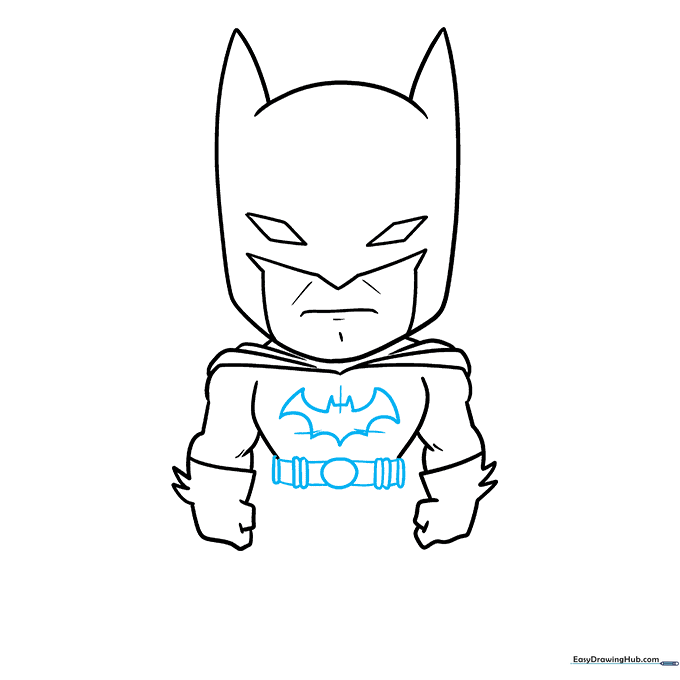
Draw the bat emblem on the chest using jagged points. Add the utility belt by drawing a central oval with small rectangles on either side. Teacher's Tip: Keep the belt shapes simple to ensure they don't look too cluttered.
Step 8: Legs and Boots
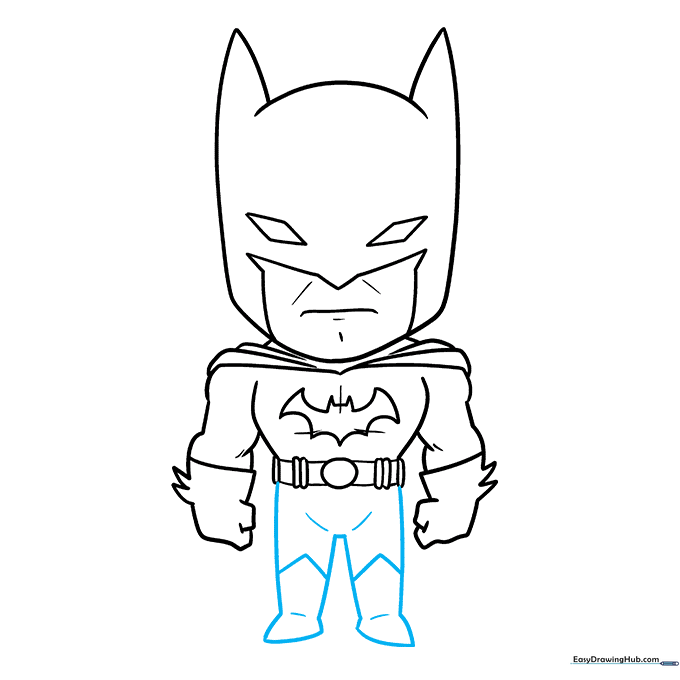
Outline the legs with curved lines and add a 'V' shape across each to define the tops of his boots. Teacher's Tip: Make the legs short to maintain the chibi proportions.
Step 9: Finalizing the Cape
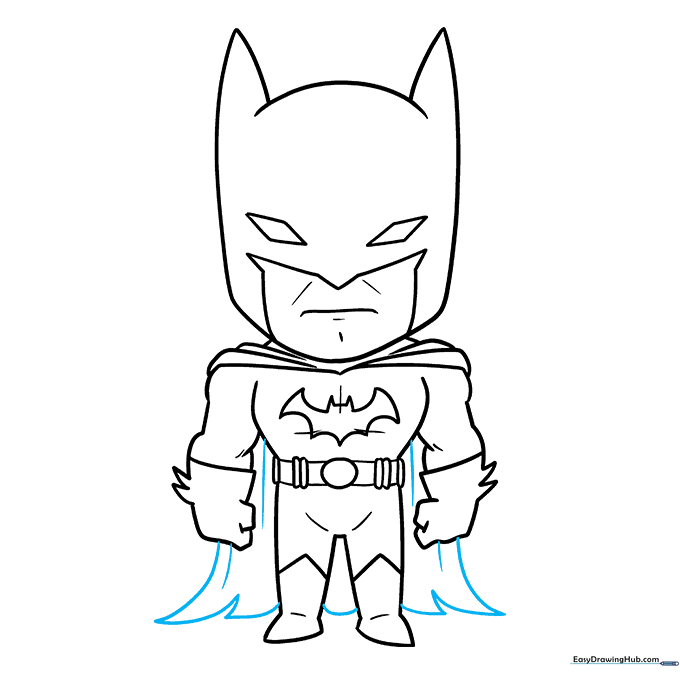
Finish the cape with long, jagged curved lines that flow behind him. Add a few extra lines for texture. Teacher's Tip: Use long, sweeping strokes to make the cape look like it's flowing in the wind.
More Tutorials


