How to Draw a Cauliflower: Easy 9-Step Guide for Kids
Ready to bring a garden-fresh vegetable to life on paper? This tutorial is perfect for young artists ages 5+ looking to practice organic shapes and texture. All you need is a pencil, an eraser, and your favorite coloring supplies to create your own masterpiece.
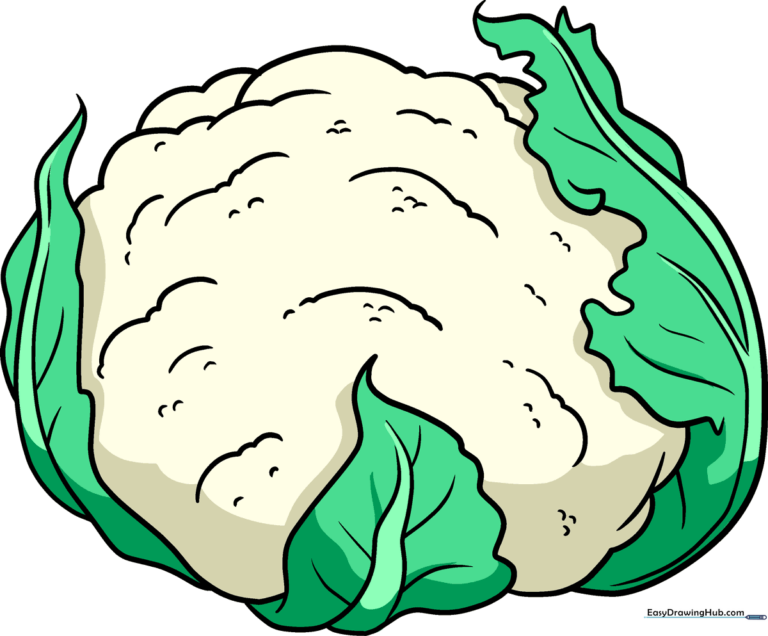
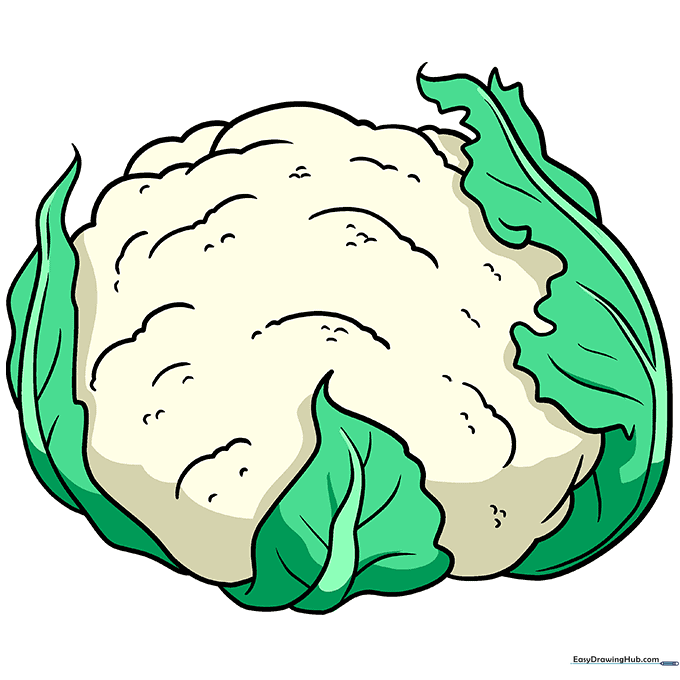
🎯 Final Result
Step-by-Step Instructions
Step 1: Sketching the First Leaf

Start by drawing a wavy, triangular leaf. Use two gentle, wavy lines that meet at a sharp point. Add a thick central vein to give it structure. Tip: Keep your pencil pressure light here so the leaf looks soft, not rigid.
Step 2: Adding the Second Leaf
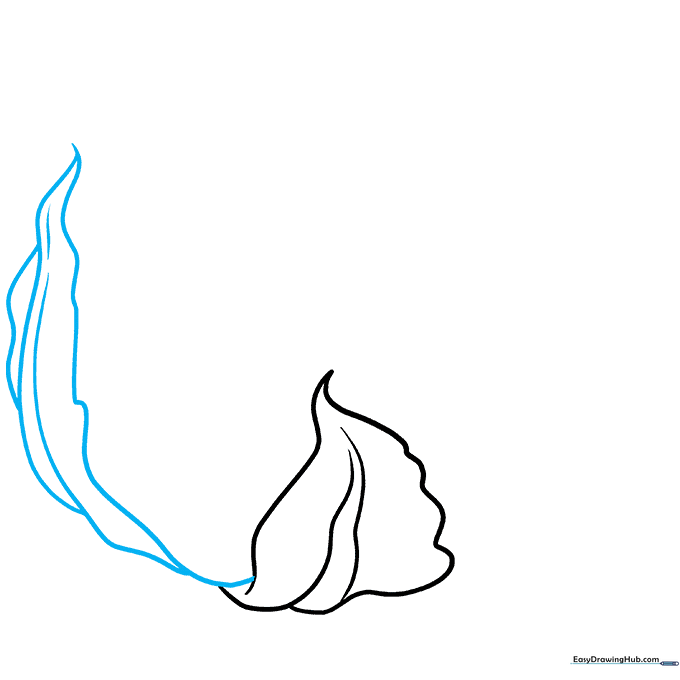
Draw a second, slightly longer leaf overlapping the first. Use wavy lines to form the back and front, letting them meet at a sharp point. Tip: Overlapping lines create depth, making your drawing look 3D rather than flat.
Step 3: Forming the Curled Leaf
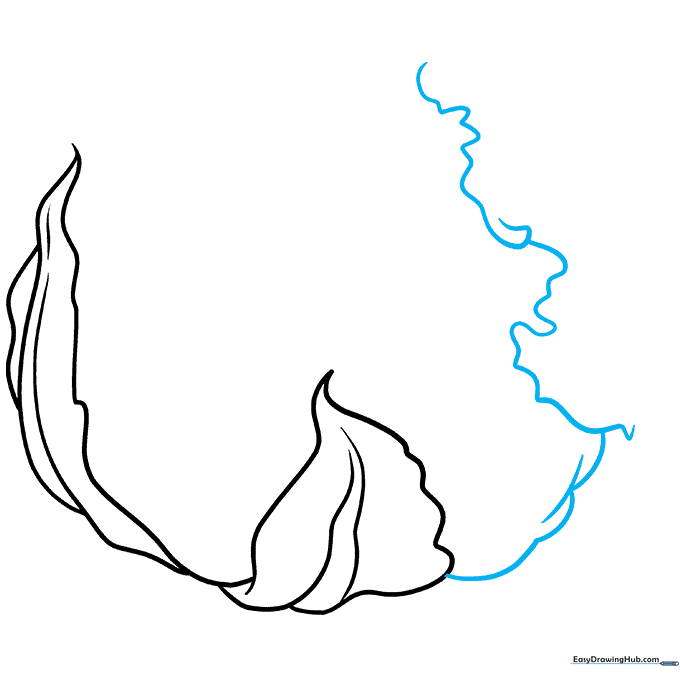
Draw a segment of the cauliflower head using overlapping curves. Then, add a third leaf that twists back on itself. Tip: Use a 'scribble' motion with your wrist to get those natural, curly edges.
Step 4: Detailing the Veins
Add branching veins to your large leaves using pairs of curved lines and 'V' shapes. Outline the top of the leaf with a wavy line. Tip: Veins are rarely perfectly straight; let your hand wobble slightly for a natural look.
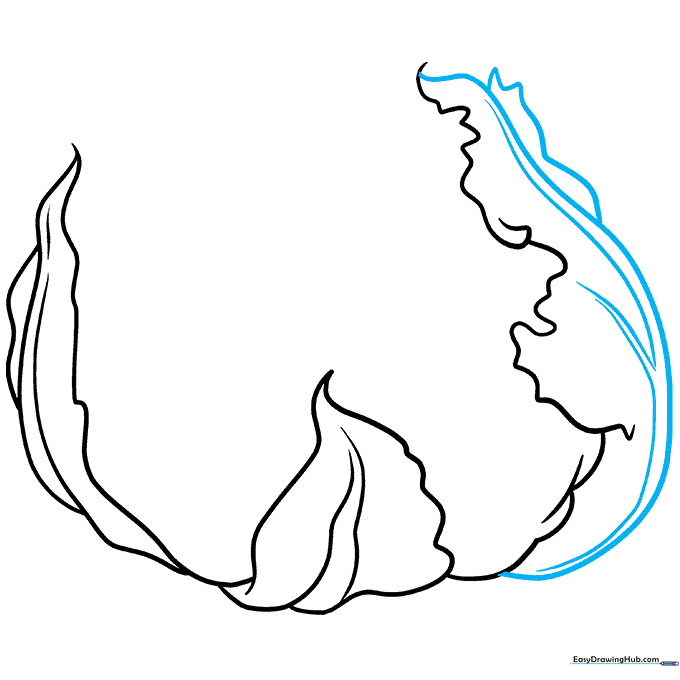
Step 5: Outlining the Head
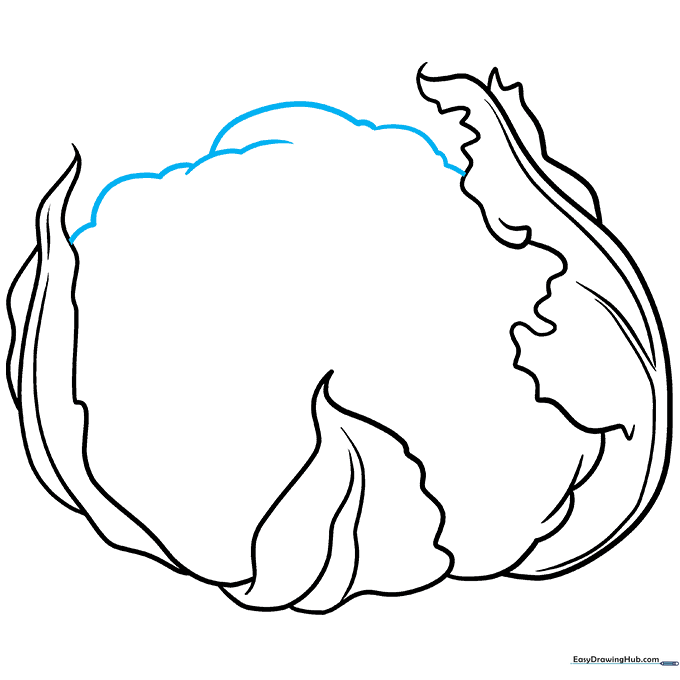
Enclose the top of the cauliflower using two series of curved lines. Connect them in the center with a third set of overlapping lines. Tip: Think of these as little clouds sitting on top of the leaves.
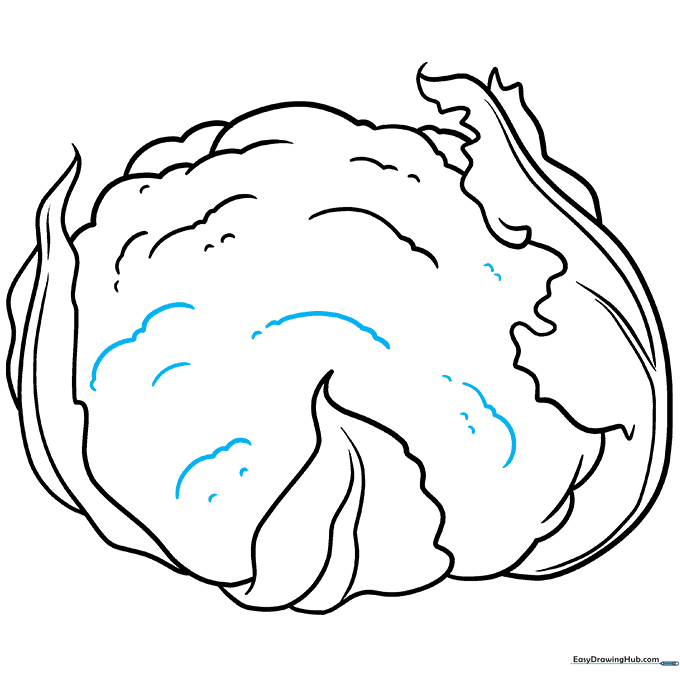
Step 6: Adding Texture

Start texturing the bulbous vegetable. Use connected curved lines and small 'U' shapes along the edges and inside the outline. Tip: Vary the size of your 'U' shapes to make the cauliflower look realistic.
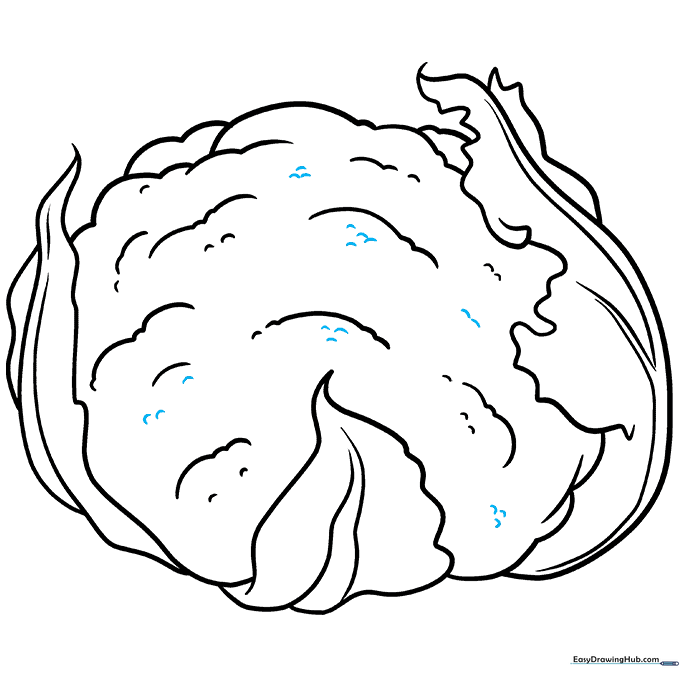
Step 7: Refining the Surface
Continue adding texture across the surface. Use a mix of individual curved lines and short, connected series of lines. Tip: Don't overthink it—cauliflower is naturally bumpy and irregular!
Step 8: Finalizing Texture
Add final groupings of small 'U' shaped lines to fill in any empty spaces on the florets. Tip: Focus on the shadows—add more 'U' shapes where the florets meet to create depth.
Step 9: Leaf Details
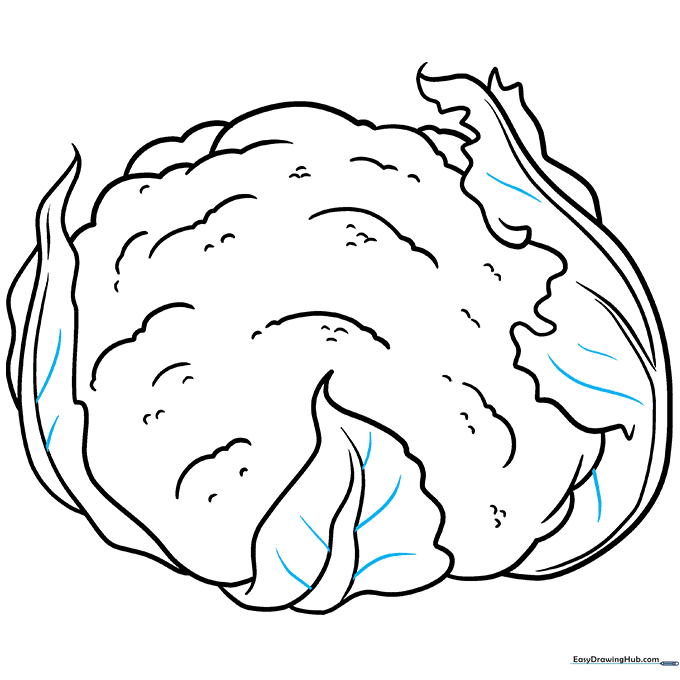
Finish by adding small lines from the central veins of the leaves to indicate auxiliary veins. Your outline is now complete! Tip: Use a sharp pencil for these fine lines to make them stand out.
Coloring Your Cauliflower
Bring your drawing to life! Use creamy white for the florets and vibrant greens for the leaves. Tip: Try using a light green pencil to shade the edges of the white florets for a realistic touch.
More Tutorials


