How to Draw a Cat in Clothes: Easy 10-Step Guide
Looking for a fun, screen-free activity? This tutorial is perfect for young artists ages 5 and up to practice character design. All you need is a pencil, an eraser, and a piece of paper to bring this cozy, winter-ready kitten to life.
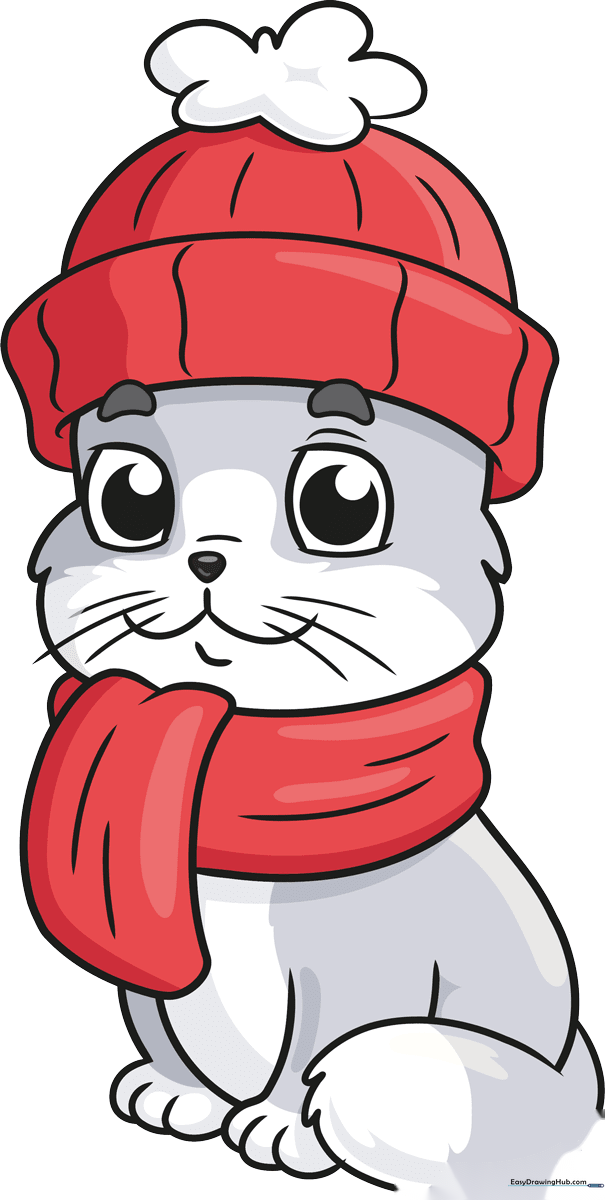
🎯 Final Result
Step-by-Step Instructions
Step 1: Sketching the Expressive Eyes

Start by sketching the cat's face. Use light, curved lines to form the large, rounded eyes and a small triangle for the nose. Tip: Keep your pencil pressure light so you can easily erase any stray marks later.
Step 2: Adding Personality
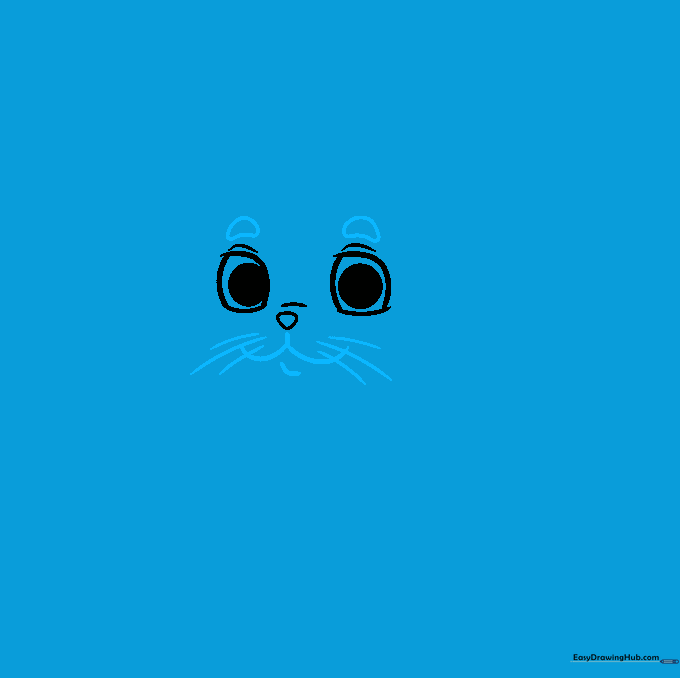
Draw the bean-shaped eyebrows and a 'W' shaped mouth. Add a few quick flicks for whiskers. Tip: A tiny curved line under the chin adds a cute, dimpled effect that makes the cat look friendly.
Step 3: Defining the Furry Face
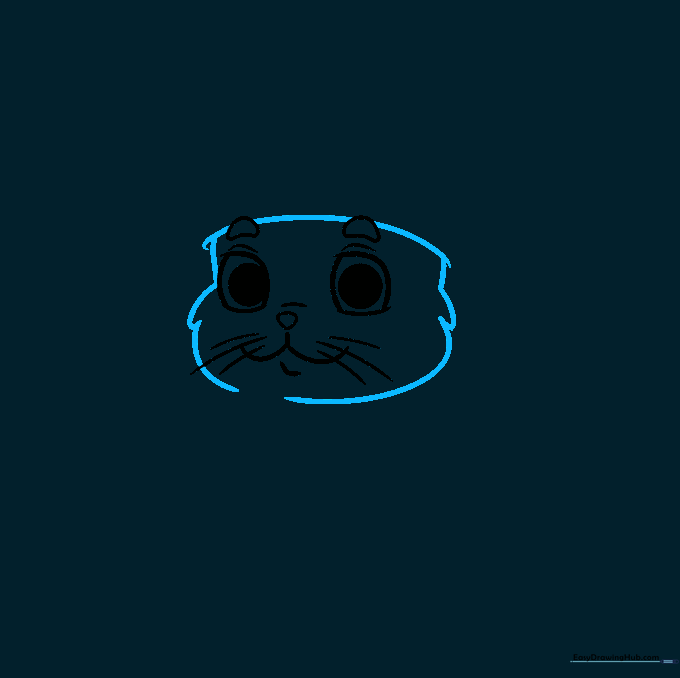
Outline the head with a long, smooth curve across the top. Use short, overlapping strokes on the sides to suggest fluffy fur. Tip: Don't worry about making the fur perfectly symmetrical; real fur is messy!
Step 4: Sketching the Beanie
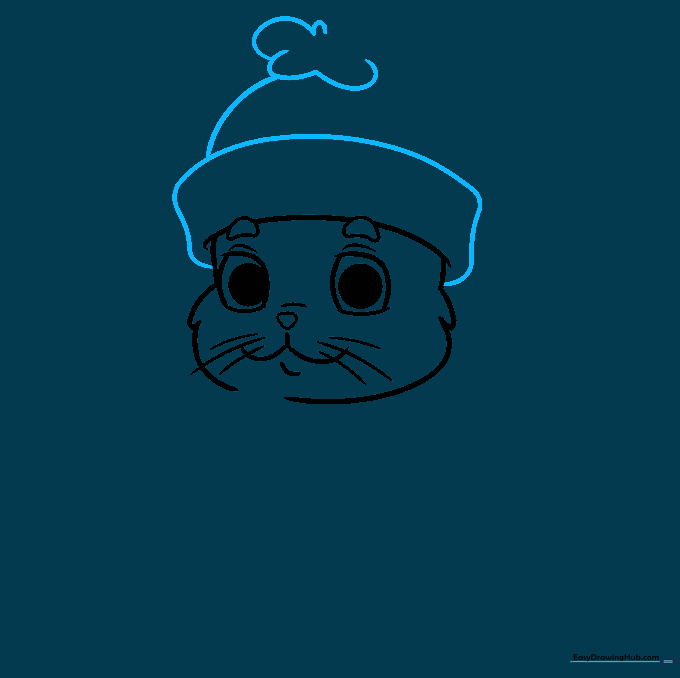
Draw a curved band across the forehead for the beanie. Add the crown and a circle on top for the pom-pom. Tip: Imagine the hat is sitting snugly on the cat's head, so let the lines follow the curve of the skull.
Step 5: Adding Texture to the Hat
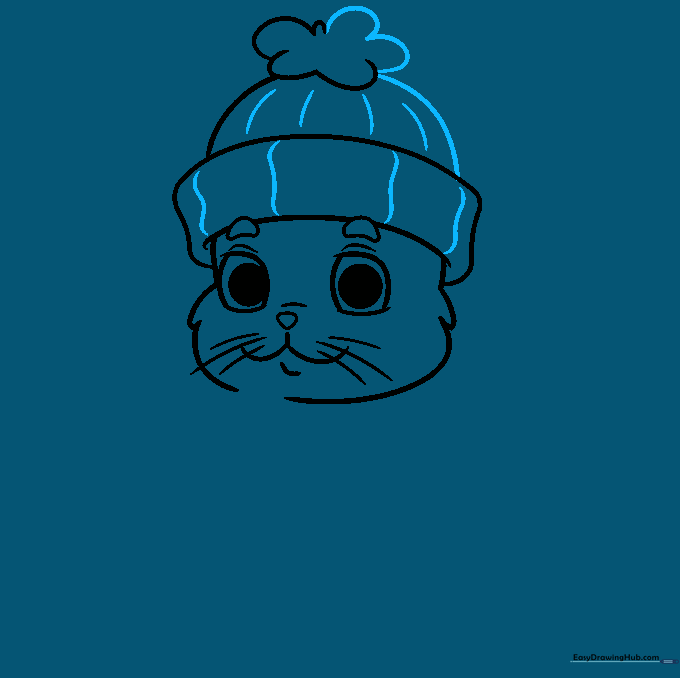
Refine the pom-pom and add vertical curved lines to the beanie to show the knit fabric texture. Tip: Varying the length of your lines makes the hat look soft and cozy.
Step 6: Drawing the Scarf
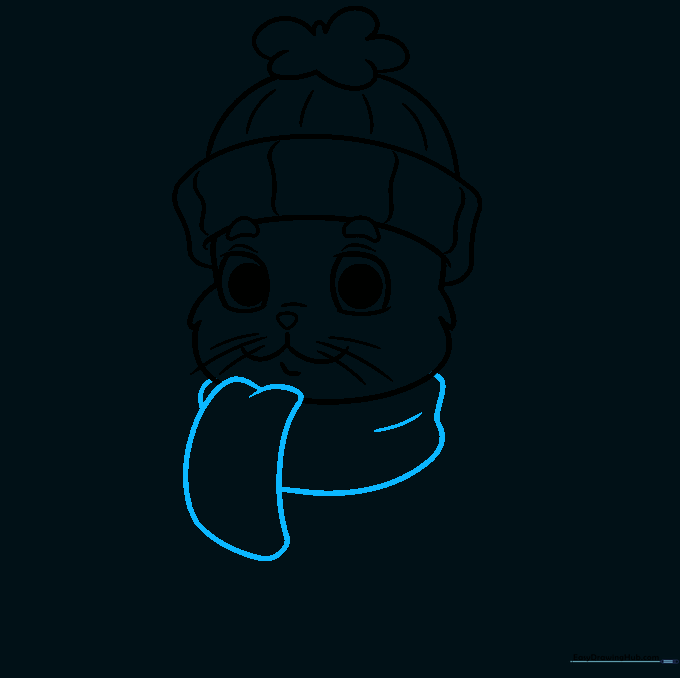
Draw the scarf wrapped around the neck. Use overlapping lines to show where the fabric folds over itself. Tip: Add a small curved line to represent a wrinkle; it makes the scarf look real and warm.
Step 7: Starting the Paws

Add more folds to the scarf, then begin sketching the front leg and paw. Tip: Keep the paw rounded to give it that soft, kitten-like appearance.
Step 8: Adding the Second Leg
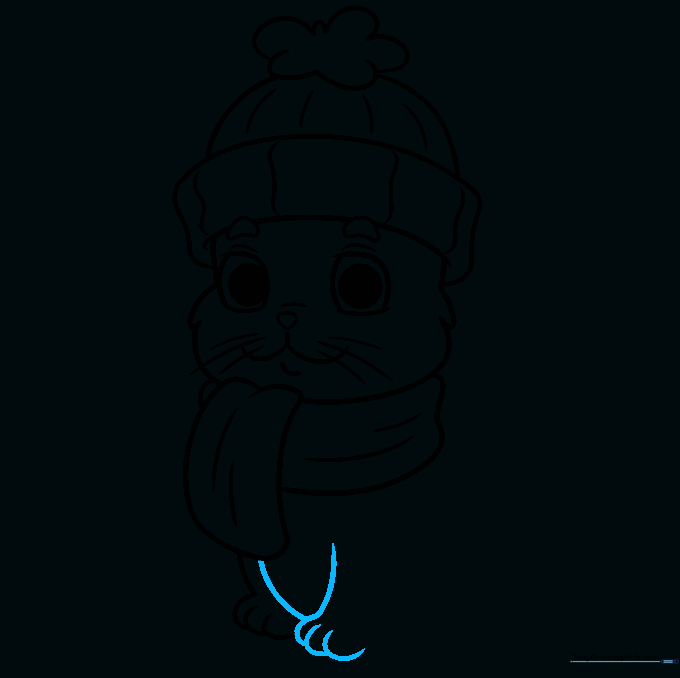
Draw the second leg and paw next to the first one. Connect them with a curved line for the chest. Tip: Ensure the paws are roughly the same size to keep the drawing balanced.
Step 9: Completing the Body and Tail

Sketch the back, the foreleg, and a long, fluffy tail. Use jagged, overlapping lines at the tip of the tail to show texture. Tip: A big, bushy tail is a classic sign of a happy, healthy cat!
Step 10: Bringing it to Life with Color

Time to color! Use your favorite shades for the hat and scarf. Tip: Try using two shades of the same color on the scarf to create a sense of depth and shadow.
More Tutorials


